
This year I'm participating in monthly DIY Challenges with a wonderful group of DIY bloggers. This month's them is DIY Home Improvement, and today I have one of my favorite projects from my latest boy bedroom makeover - a faux shiplap wall. Don't forget to check out all the other great projects linked at the bottom of this post!
When I started renovating Weston's room, I was really excited to try my hand at some sort of accent wall. I've seen a lot of modern wood pattern accent walls lately, but his room is so small and I was worried something like that might overwhelm the space. So I settled for a more traditional shiplap wall inspired by Table and Hearth. There are a hundred different ways to do shiplap, and all the tutorials online can get a little overwhelming. So I'll just tell you ahead of time - I used this method because it was the absolute cheapest way to get that shiplap look.

This post may contain affiliate links. If you make a purchase from one of the links, I may make a small commission at NO EXTRA COST to you. This helps keep the tutorials and plans free here at Bitterroot DIY. Thank you for your support! See my full disclosure here.
In case you missed it, I also shared the plans for each piece of furniture in his room - the Twin Bed, Dresser, and Toy Organizer.
- 4' x 8' sheets of Eucaboard
- Lattice Trim
- Miter Saw
- Jigsaw
- Circular Saw (or table saw)
- Finish Nailer
- 1 ¼" Finish Nails
- Stud Finder
- Level
- Tape Measure
- Pencil
- Safety Glasses
- Respirator
- Respirator Filters
- Ear Protection
I've seen quite a few people use ¼" plywood for a shiplap wall, which works great. I decided to use sheets of Eucaboard from Home Depot to save a little extra money. At $6.50 per board, they're about half the price of ¼" plywood and give the same result.
We live in Minnesota, so the humidity wreaks havoc on the house, especially with the big temperature swings. The house is constantly expanding and contracting, as well as all the trim and wall treatments. Since eucaboard expands and contracts more than plywood, I left about ½" gap between the perpendicular walls and the start of each board to allow for expansion. The lattice trim covered it up. If you don't leave a gap for expansion, the boards may bubble off the wall.
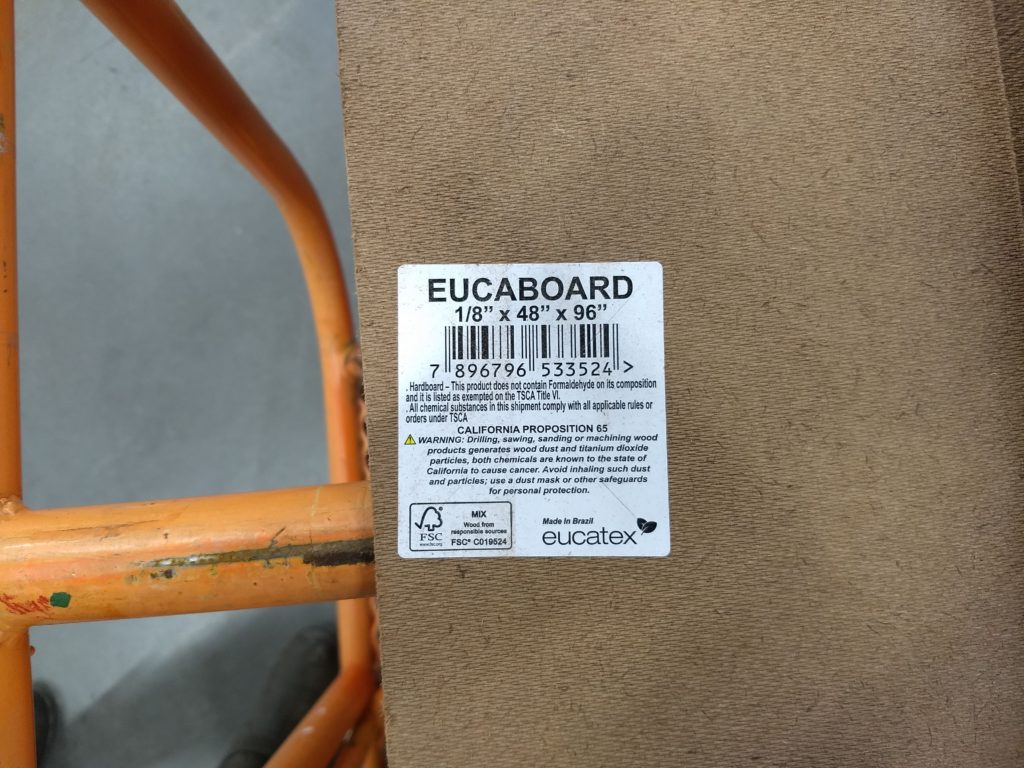

Measure your wall to determine the number of sheets of Eucaboard and lattice trim that you'll need. For my 8' x 12' wall, I used three sheets of 4' x 8' Eucaboard and four 8' pieces of lattice.
To calculate the number of sheets for 6" strips:
- Calculate the square feet of wall and multiply it by 12.
- Divide the result from #1 by the width of boards you want to use to find the total linear feet.
- Divide the total linear feet by 8 (the length of one sheet).
- Divide the result from #3 by 8 (total number of 6" strips from one 4' x 8' sheet).
*** this calculation is different for widths other than 6" ***
Step 1.
Rip the eucaboard into 6" strips with a circular saw or table saw. You can do a different thickness, but 6" divides a 4' x 8' sheet equally into 8 strips. The last strip will be slightly less than 6" due to the width of the saw blade, but I just saved those pieces for the bottom row and covered them with the baseboard trim. If you want to use a different thickness, you may have to grab a few extra sheets of eucaboard.
Step 2.
Once you've marked the studs along your wall, begin installing the shiplap planks from top to bottom. Since ceilings are not always perfectly level, position the first plank as close to the ceiling as possible and then use a level to make sure it is level. If you have to adjust the plank down from the ceiling in a few parts, that's fine - the lattice trim will cover it up later. The goal is to get that first row perfectly level so the rest of the planks are level! Don't forget to leave a gap between the board and perpendicular wall to allow for expansion (I did ½"). Once you've positioned the plank, attach it to the studs with 1 ¼" finish nails.
Start on one side of the wall and work your way across. I worked right to left since I like to read backwards ...

JK. JK. I have no idea why I went right to left, but here we are haha. The important part is to stay consistent for the whole wall.
To ensure evenly spaced vertical joints, start with a full length board. Once you can no longer fit a full length board, cut a board to length to finish that row. Start the next row with the rest of the piece that you cut the last board from. Again, make sure to work from right to left (or left to right) for the whole project. Working the same direction and using the last piece you cut staggers the vertical joints perfectly.
I used paint sticks to space the rows ⅛" apart. You can use tile spacers, playing cards, a speed square, etc.

Step 3.
To work around outlets and/or switches, measure the opening horizontally and vertically.


Transfer your measurements onto the shiplap plank.


Cut the opening out with a jigsaw and install the plank.


Work your way along the wall until it's all covered.

Step 4.
Once you've installed all the shiplap, prime it. I used my favorite Bullseye 123 primer.

Start by cutting in all the seams and edges with a brush. I just used a 1 ½" angle brush and it worked great to get in all the nooks and crannies.

Then finish it up with a paint roller and let it dry.

Primer is some pretty potent stuff, so I always make sure to wear a respirator ... especially when I'm working in a closed room in the house. I have this respirator and filters from 3M and have been really happy with it. I use it for painting, staining, sanding, etc.
Step 5.
Time to paint! Repeat the same process as you did with the primer. Start by cutting in all the seams with a brush, and then use a roller for the rest of the wall. The color is Benjamin Moore "Steel Wool".
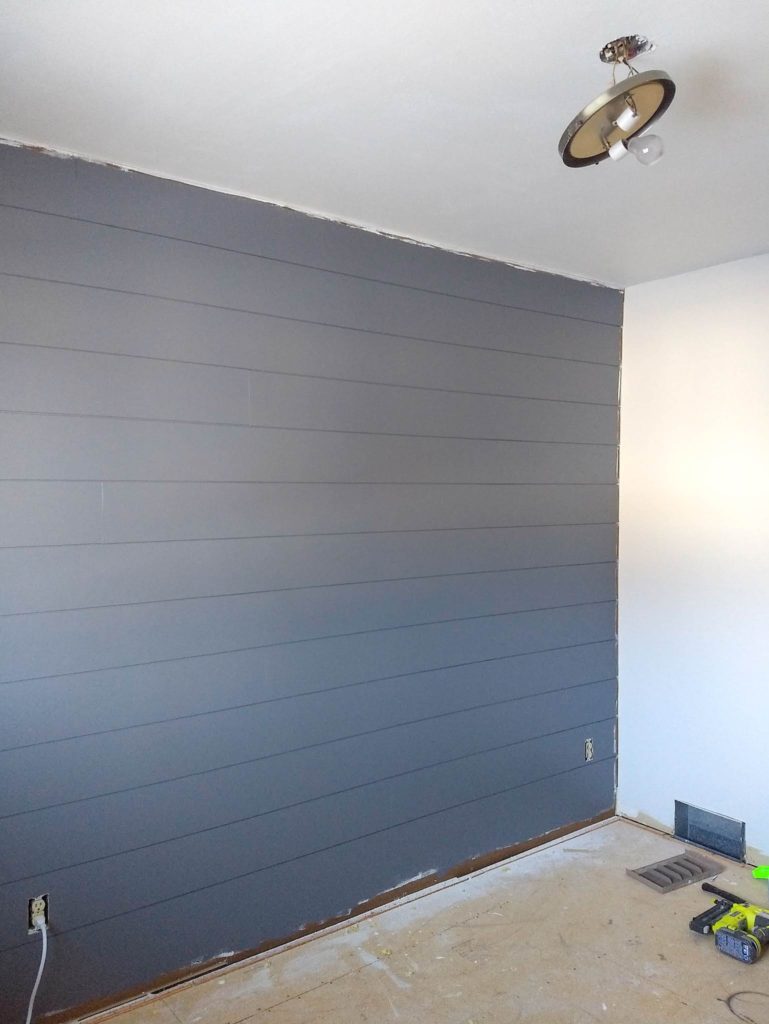
If you own a paint sprayer, by all means use the paint sprayer!
Step 6.
Last but not least - trim the sides, top, and bottom of the wall.

Simply measure your wall, cut the lattice trim to length, and attach with 1 ¼" finish nails.

I used ¾" pre-primed MDF for the baseboard trim around the whole room.

To finish things up, re-install any switch and/or outlet covers. And there you have it!
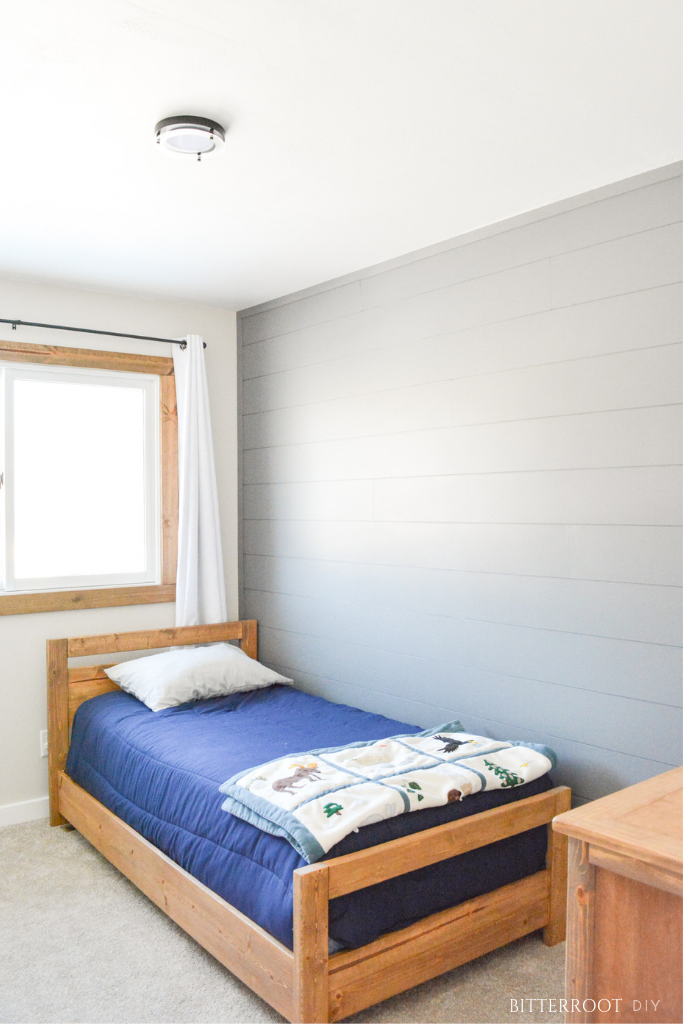
Please let me know if you have any questions and I’ll get back to you as soon as possible!
| Tylynn |
Thanks for stopping by!
For more project ideas, you can find me on Pinterest. And to stay up to date with the latest shenanigans, follow me on Instagram.


Tylynn..
I noticed you did not use any type of adhesive on the back of your planks...did they lay flat to the wall without any bulges? I am not seeing any...but just making sure..As far as I could see..you only had two nails per board per stud..correct?
Great job..BTW...thanks for sharing your work..
Shirley
Hi Shirley,
Thank you for the question! I did not use adhesive just in case I want to take it down some day - just 2 or 3 nails per board per stud. Everything lays flat and looks nice. I would recommend leaving some room along the sides of the walls to let the boards expand and contract - about a 1/2" or so. I put those trim pieces up to cover those gaps on the sides. You can definitely use adhesive if you want a more secure joint. This is just a kid's room, so I wasn't as worried about it. If you're putting it up in a main room or a bathroom (lots of humidity), I'd recommend using an adhesive.
Hi, do you think this eucaboard material would chip/dent/damage easily? Has it held up good for your son? I would love to put this on the walls of the play room we are making for the kids, but am worried it would easily damage every time a toy gets thrown? 🙂
I've actually been really impressed with it! It's a really hard board, so it doesn't dent easily at all. My son hits it with toys and kicks at it when lying in bed and there are no dents or marks. Make sure to leave at least a 1/2" gap on the edges of the walls (under the vertical trim) to allow the eucaboard to expand and contract. I had to take the trim off and cut the boards a little shorter so they wouldn't bubble off the wall when they expand. It all looks great now that it has more room to expand and contract on the ends.
Hi, I can't find this board on the Home Depot website, are in the U.S.? What is it normally used for? tia
Hi there, yes I'm in the US. It's in the plywood aisle usually. Here's the link from Home Depot: https://www.homedepot.com/p/Hardboard-Tempered-Panel-Common-1-8-in-4-ft-x-8-ft-Actual-0-115-in-x-47-7-in-x-95-7-in-832777/202189720
What color is this? It’s so pretty!
Thank you! It's Benjamin Moore "steel wool"
It looks like you had to stagger your boards because the length of the wall is longer than what the sheets came in.
However, in the finished photo you cant even tell it was staggered. How did you achieve that look ad one long piece?
Yes I had to use multiple boards for each pass. I just butted the ends up together and it hid the seams really well ... Nothing tricky. You can see the seams up close but all shiplap has seams, so it looks normal
After seeing this on pinterest, I asked my husband to use the same concept to cover up a poorly placed window in our master. It had its challenges for sure but I'm SO glad we did it and it's DONE! Our wall was a little wider than yours and the prices at our home depot were a little more but it was still insanely cheap compared to real shiplap. Thanks so much for the idea!
That's so great to hear! I'm glad it worked out for you!
Hi there! Would you be able to hang artwork on this wall? Nothing too heavy - thinking a framed picture with a matte. Thanks!
Yes, I think so! I didn't hang any on this one, but I don't see why it would be an issue. The boards are very secure to the wall.
What is the paint finish used?
It's steel wool by benjamin moore in eggshell for walls
What did you use to cover the boards that you put side to side so there weren’t any spaces showing? And any tips to make it mine look like yours
I'm not exactly sure what you mean, but I'll try to help out. You can see the joints between boards where one board ends and another starts. They're just butted up together and not as noticeable in the photo. It looks natural on the wall.
I put pieces of lattice trim over the ends of the shiplap boards where they meet the adjacent walls. I also put a piece of lattice trim along the top where the top shiplap meets the ceiling.
Hope that helps!
The nails didn't shoot right through with a finishing nailer? I've read they go right through it...
No mine didn't. Make sure to shoot into the studs so they hit something solid. If you just shoot them into drywall, they're more likely to go through since it's not very solid. You want them to sink a little into the eucaboard so they're not sticking out, but you shouldn't have trouble with them shooting all the way through.
Hello!
Love this tutorial and all ready to do it Monday. Did you start from the top?? Did you have help holding the boards. I’m solo doing this. Just wondering.
Thanks!
Marcy
I did it by myself and started from the top. The eucaboard is light.
Hi, was wondering why you had to use a primer before you painted the Eucaboard? Is it because how smooth the material is? I’ve done the plywood method for shiplap and used just a paint with primer in it. Would like to try this idea. I’m just wondering if you had to prime or could you skip that step and use a paint that has a primer in it?
Thanks
You could probably get away with a paint/primer combo. I just did it to make sure the paint really adhered well
This is Awesome!!! I am A Beginner Diy Blogger. Go Check out my blog at http://the-grace-filled-life.com/
I’ve had some sleepless nights over a really unsightly ceiling and was wondering if you think this could work based on your experience. I’m not set on the shiplap look or the coffered ceiling one, but those two solutions seem to be the most doable. The ceiling does have plywood on it covered with some insulation and that’s what I need to pretty up. What do you think? Would it be doable?
Yes, shiplap ceilings look great. However, I'd recommend going with actual tongue and groove for a ceiling cus it will look more finished. Just ask for tongue and groove at the hardware store (Home Depot or wherever) and they'll direct you to it. It's a little more expensive, but worth it for a ceiling where it'll be more permanent.
Great diy I can’t wait to try myself! And this weekend is my target date. I live in the hot, humid south... Georgia... and your comments about the board swelling scare me a little. I am curious if the boards have noticeably expanded on your walls. After corners are caulked in have you seen any major issues with expansion and contraction. Thank you for your detailed instructions. Your project is a great inspiration!
Thanks Judy!
Yes, the boards expand and contract significantly with the humidity changes in Minnesota. I left gaps between the ends of the boards and the wall so they can move as necessary (about 1/2" gaps, so pretty substantial). I covered the ends with a piece of trim so you can't see the gap. I did not use any caulk.
It seems to be doing pretty well so far!
I’m in the middle of this project and just wondering is it really necessary to prime? I’m painting a dark colour
Yes I'd recommend priming so the paint adheres really well.