
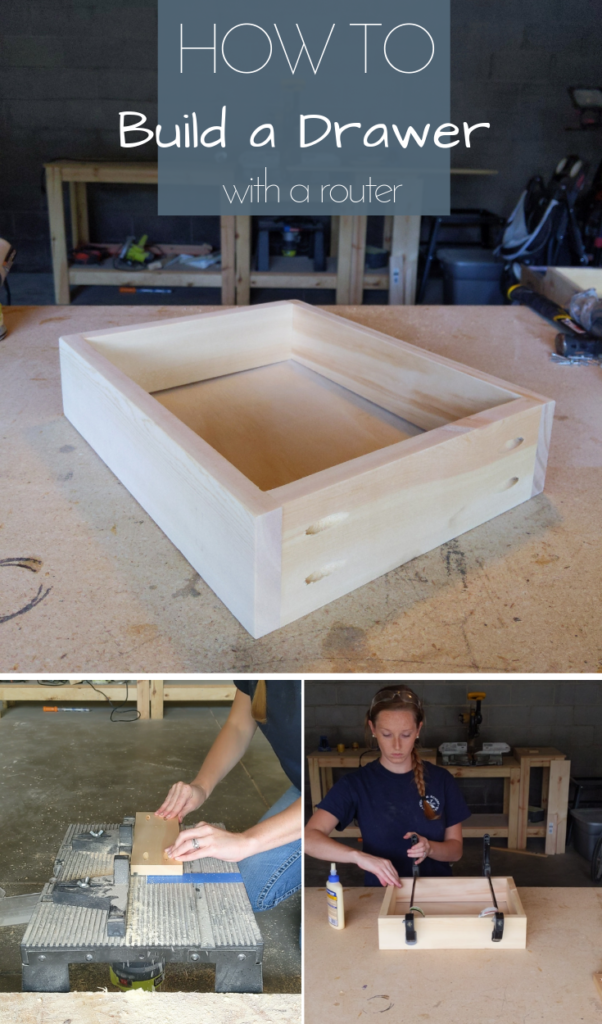
Learn how to build a drawer using a router for the bottom panel and pocket holes, or countersunk screws, for the frame.
Head to my new YouTube channel for the full video tutorial. I’ll walk you step-by-step through a few different ways to build drawers without any fancy tools. And don’t forget to SUBSCRIBE while you’re there to see lots more how-to videos.


This post may contain affiliate links. If you make a purchase from one of the links, I may make a small commission at NO EXTRA COST to you. This helps keep the tutorials and plans free here at Bitterroot DIY. Thank you for your support! See my full disclosure here.
The dimensions for this drawer apply to the 3 Drawer Nightstand I recently built. Adjust as necessary for your project.
TOOLS & MATERIALS:
- Miter Saw
- Drill
- Router and Table
- 1/4″ Straight Router Bit
- Kreg Pocket Hole Jig
- 1 1/4″ Pocket Hole Screws
- Tape Measure
- Clamps
- Wood Glue
- Speed Square
- Pencil
- Safety Glasses
- Ear Protection
LUMBER:
- 1/4″ Plywood
- 1 | 1 x 4 @ 6′
- 1 | Drawer Face (I usually use a 1×6 with this size drawer)
CUTS:
- 2 | 1 x 4 @ 15″ (sides)
- 1 | 1 x 4 @ 10 1/2″ (front & back)
- 1 | Plywood @ 11″ x 14″ (bottom)
Step 1.
Set the router to 1/4″ and cut grooves in the bottom of each drawer side. I typically start the groove 1/4″ from the bottom of each board.
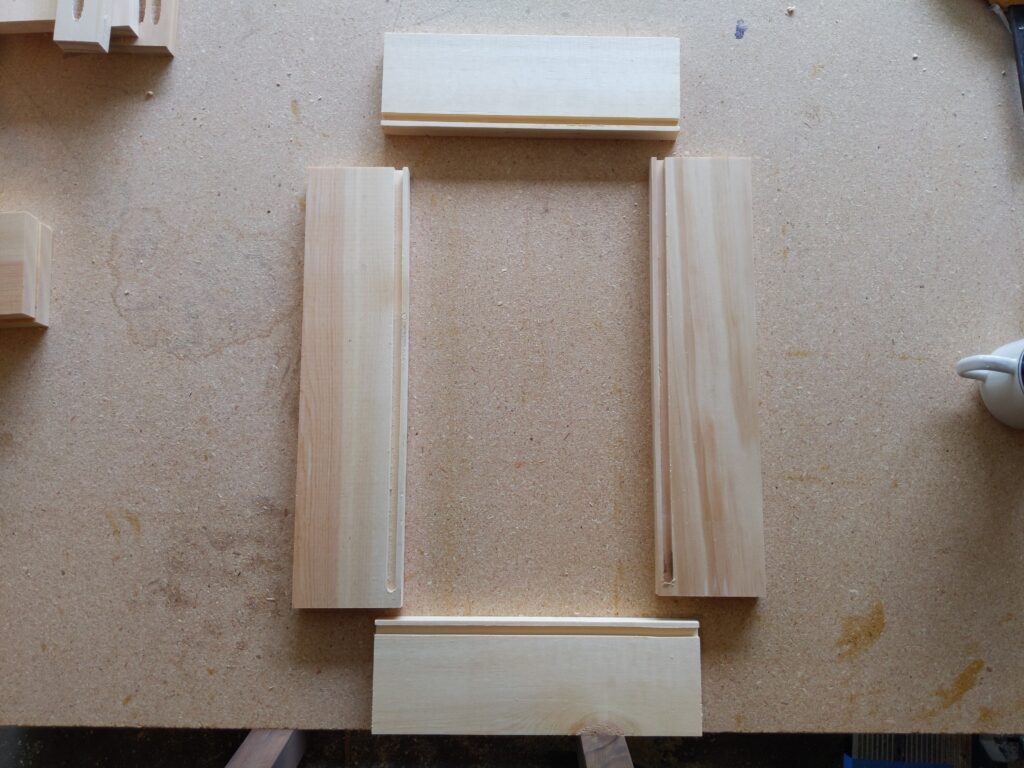
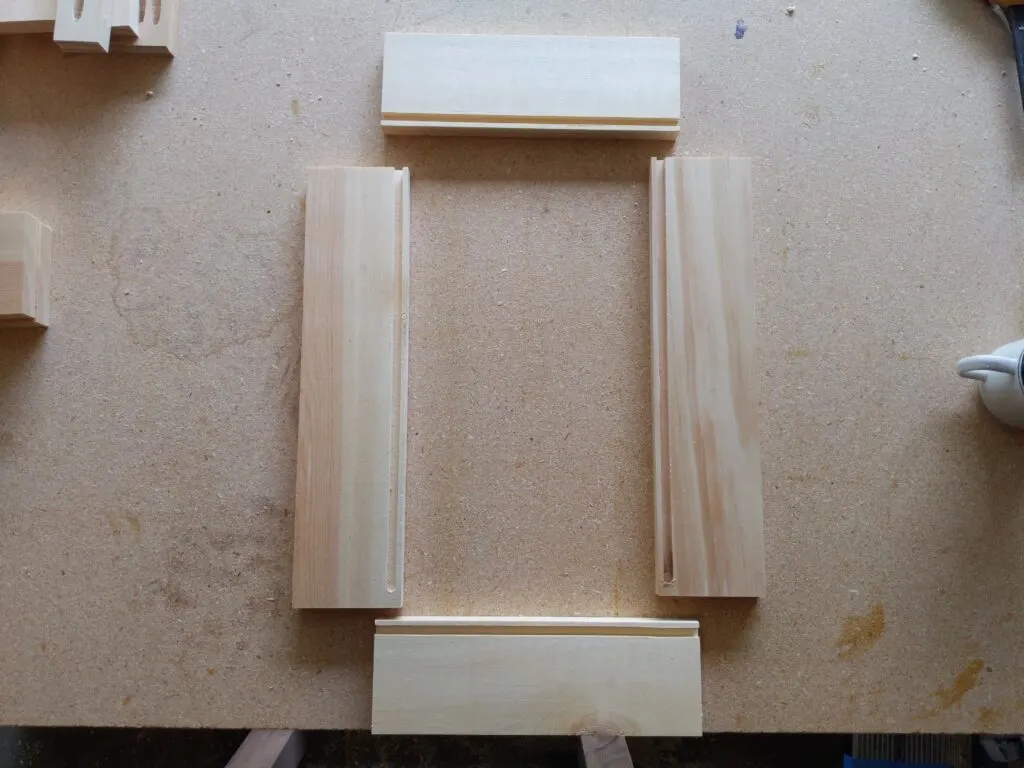
Cut a groove along the entire edge of the front and back boards (top & bottom in the photo). For the side boards – start the groove 1/2″ from the end so there’s not a gap in the back of the drawer once you assemble it. I cut all the way through the front of the board since the drawer face will cover it (see photo below).

If you prefer, stop the groove 1/2″ from the front (just like the back) to prevent those holes in the front. However, as I said above, the drawer face will cover it so it’s not a huge deal.
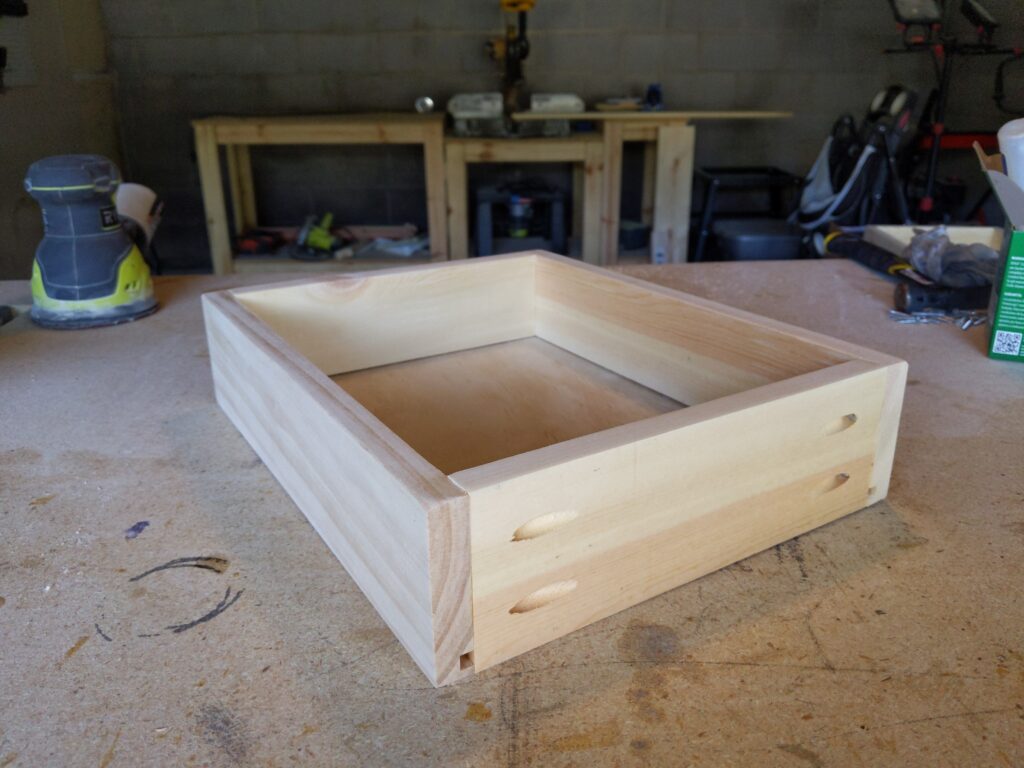
Step 2.
Add a bead of wood glue to the grooves as well as the ends of the front & back boards. Insert the bottom panel into the grooves in the front and back boards.

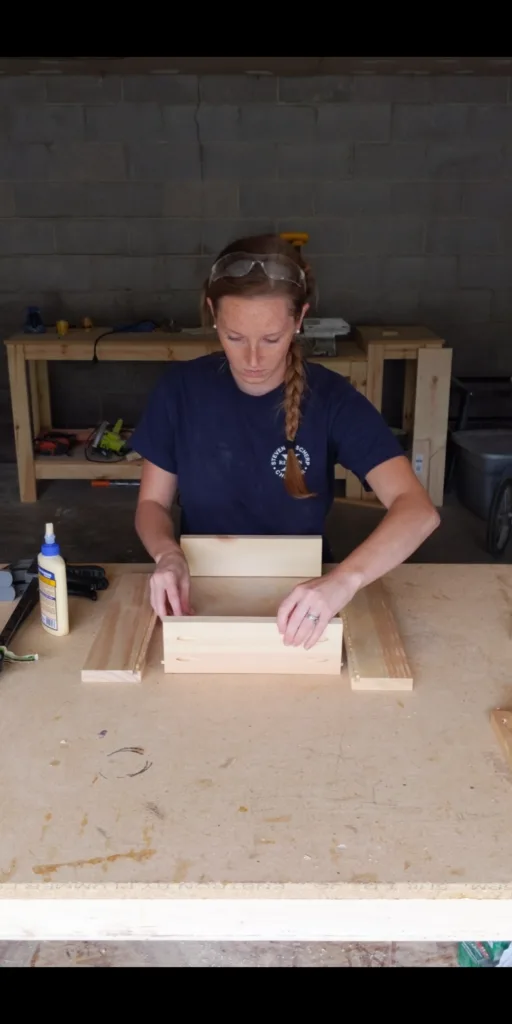
Insert the panel into the groves in the drawer sides and clamp in place.
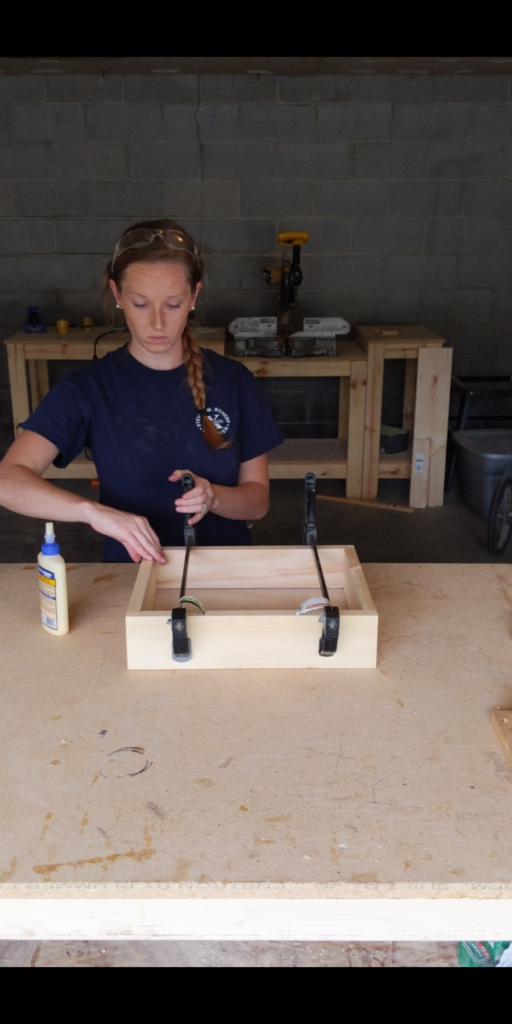
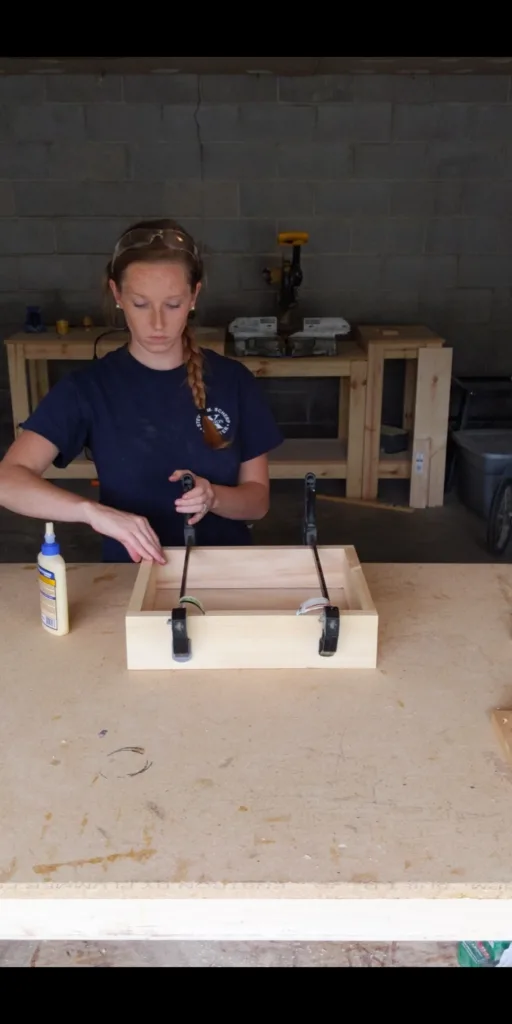
Step 3.
Attach the front & back to the sides with 1 1/4″ pocket hole screws.
If you don’t own a kreg pocket hole jig, simply countersink screws through the sides of the drawer into the front & back boards.
Let all the wood glue dry and you have a drawer!

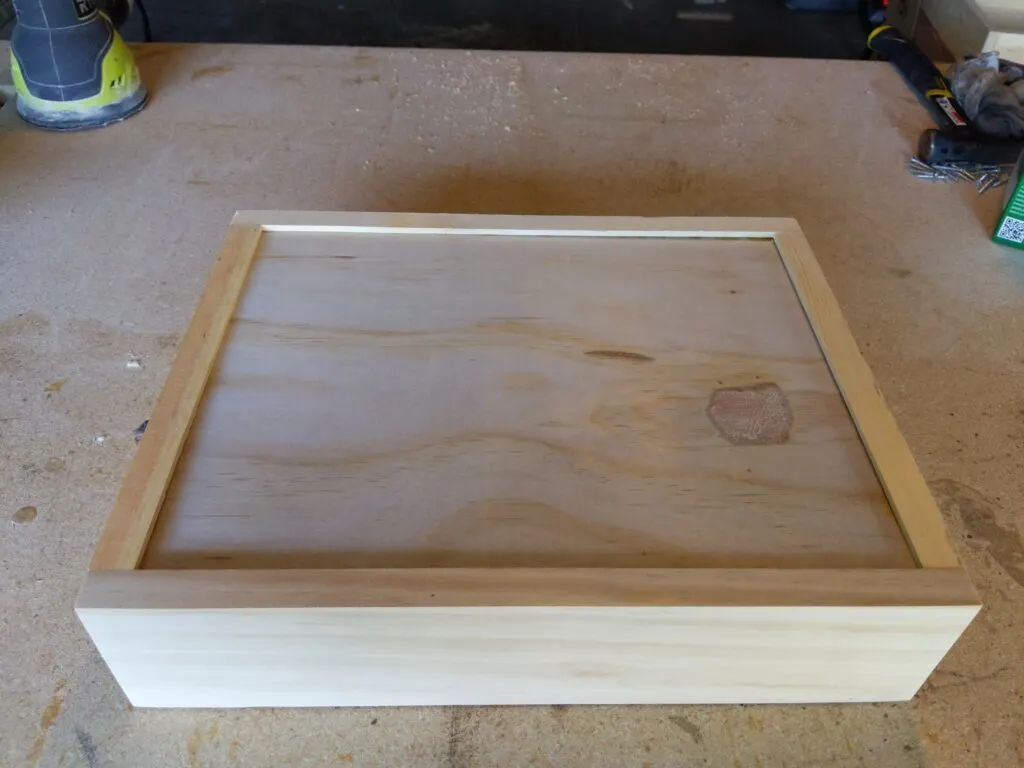
There are a ton of ways to build drawers, but this is a great option to build them quickly and simply.
If you don’t own a router, you can always build a drawer with all 3/4″ material. See my other post on how to build a drawer without fancy tools.
Once you have your drawer, the next step is to install the slides, install the face, and put it in place!
Let me know if you have any questions and I’ll get back to you as soon as possible.


Thanks for stopping by!
For more project ideas, you can find me on Pinterest. And to stay up to date with the latest shenanigans, follow me on Instagram.

Cari
Wednesday 4th of November 2020
Two questions about using a router to make a drawer please. -Do you use a template for the router? I’m just starting to use a router and can never seem to keep the line straight!
-If using the router method, do you insert the drawer bottom into the router grooves before assembling all sides? If not, how do you get the drawer bottom in?
Thanks a bunch!
tylynn_sattler
Thursday 5th of November 2020
Hi Cari,
1 - My router is mounted on a little table, so I set the fence to keep the cuts straight. 2 - Yes, put the bottom in as you're assembling otherwise you won't be able to get it in. I usually put 3 sides together, insert the bottom, and then attach the fourth side.
Hope that helps and good luck!