
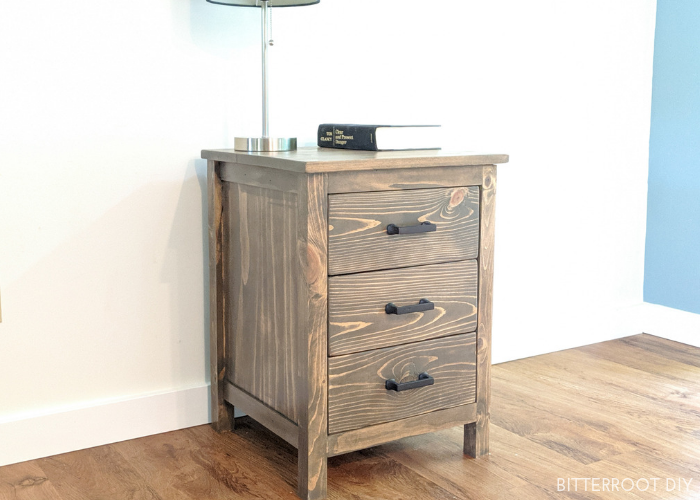
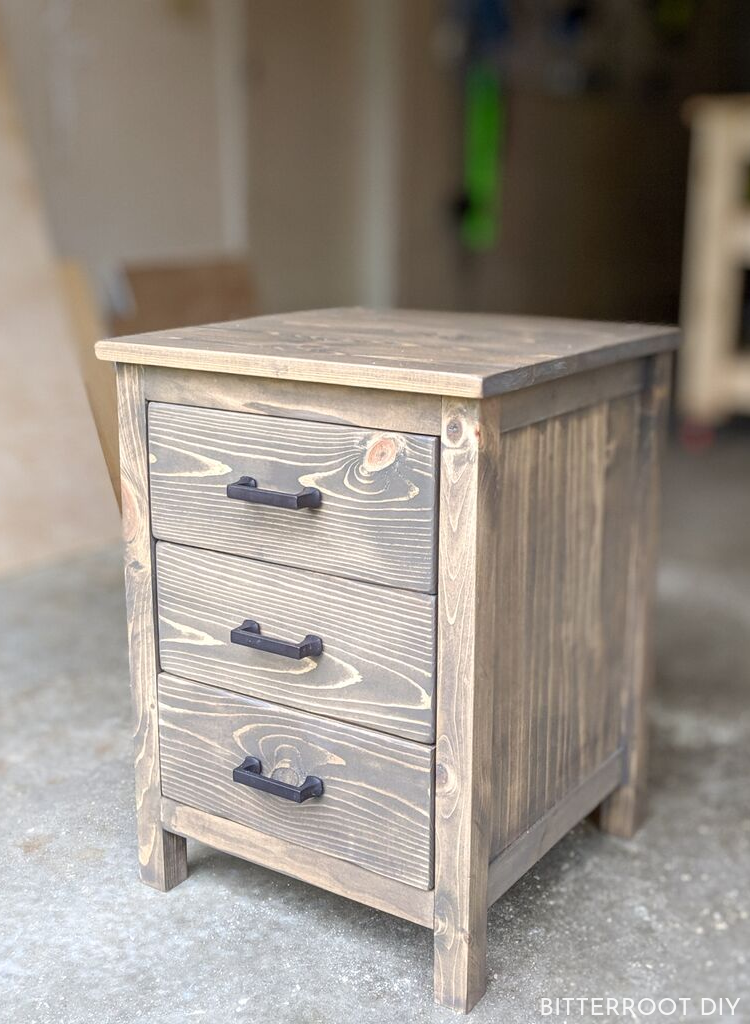
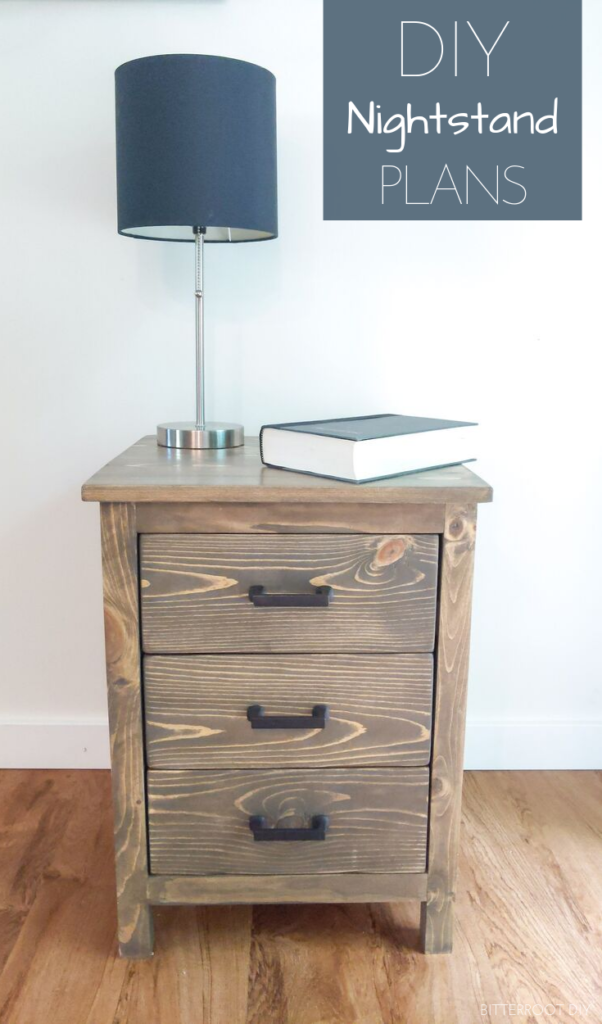
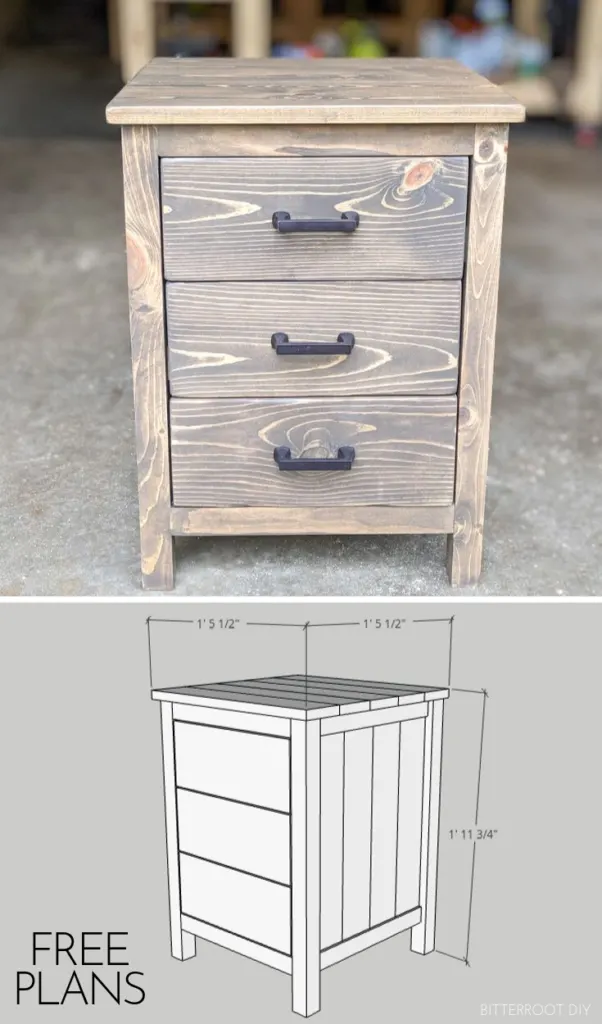
Add a lot of storage space to your room with these plans to build a DIY nightstand with 3 drawers.

This post may contain affiliate links. If you make a purchase from one of the links, I may make a small commission at NO EXTRA COST to you. This helps keep the tutorials and plans free here at Bitterroot DIY. Thank you for your support! See my full disclosure here.
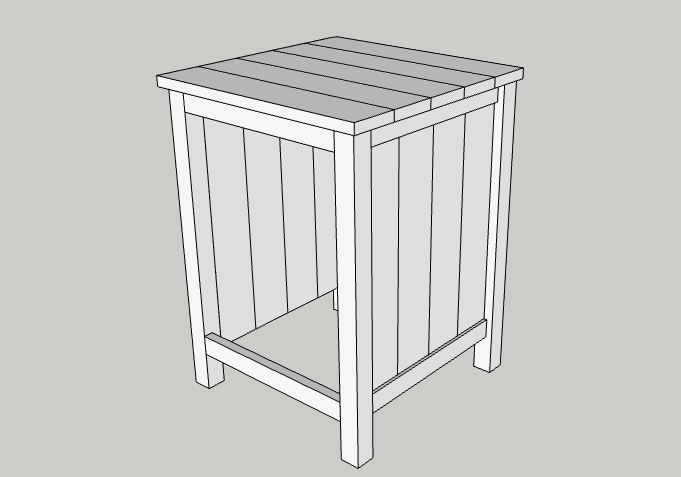
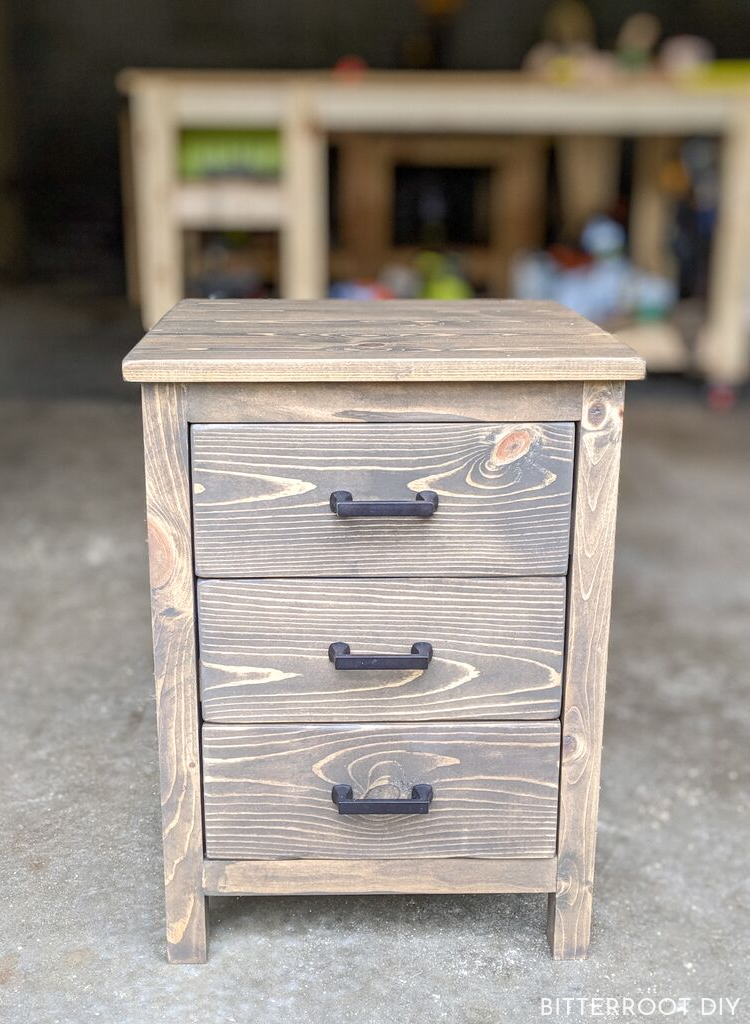
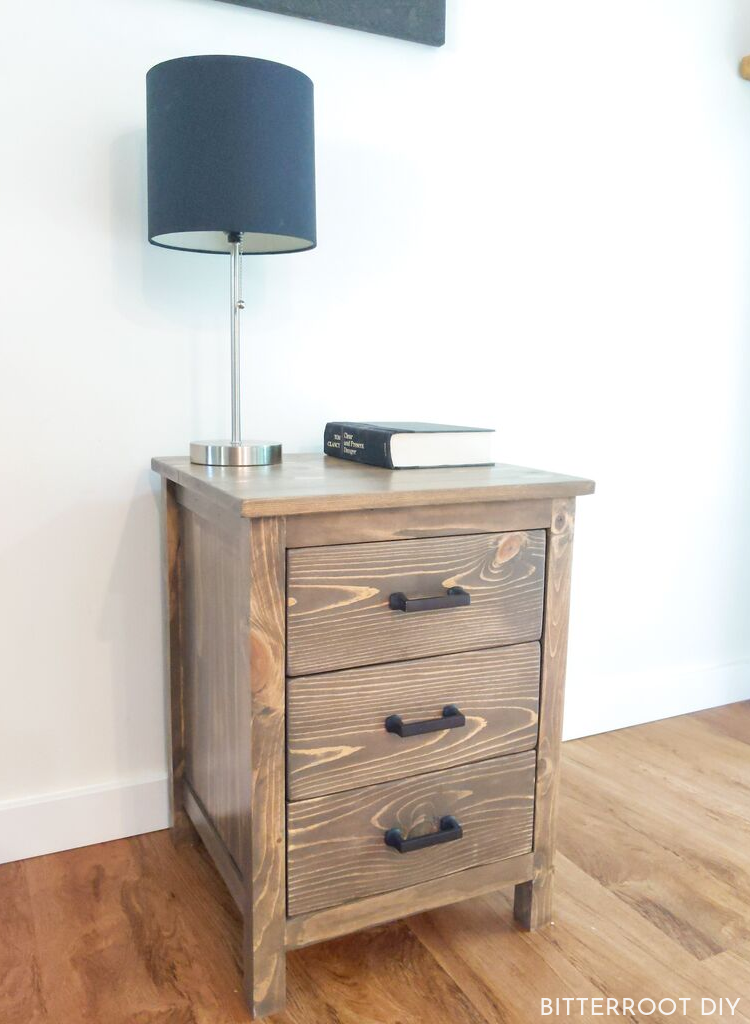
If you’re wondering where all the drawers from the last few posts came from, here’s the culprit! This may be one of my favorite woodworking projects to date. I say that every time I finish something, but I really mean it this time! There’s so much storage space in this little guy, and I just can’t get over the clean lines.
If you’re looking to build this, I have a few posts with more details about the drawers that you may be interested in:
- How to Build a Basic Drawer
- How to Build a Drawer with a Router
- How to Build a Drawer with a Finish Nailer
- The Easiest Way to Install Drawer Fronts
- How to Install Drawer Slides
For the purposes of the lumber and cut lists, I used dimensions for the drawers based on building the drawers with a finish nailer. If you choose to build the drawers with a different method, adjust your cuts as necessary.
Enjoy the Plans!

Tools & Supplies
- 3 Pairs of 14″ Drawer Slides (I used bottom mount slides but these side ball-bearing ones are also great)
- 3 Handles
- Kreg Pocket Hole Jig
- Miter Saw
- Circular Saw
- Drill
- Orbital Sander
- Tape Measure
- Clamps
- Wood Glue
- Level
- Speed Square
- Pencil
- Safety Glasses
- Ear Protection
- 1 ¼” Pocket Hole Screws
Lumber:
- 5 | 1 x 4 @ 8′
- 1 | 2 x 2 @ 8′
- 1 | 1 x 2 @ 8′
- 1 | 1 x 6 @ 8′
- 1 | 1/4″ x 1 1/5″ Lattice Trim @ 8′ (available in the trim aisle)
- 1 | Half Sheet of 1/4″ Plywood
Cuts:
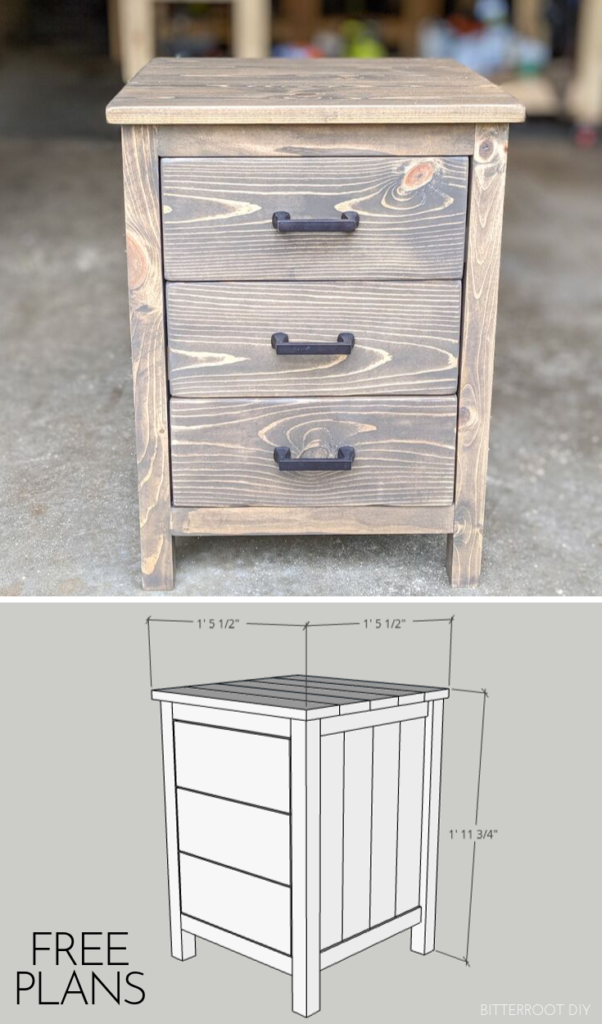
- 4 | 2 x 2 @ 23″ (legs)
- 6 | 1 x 2 @ 13 1/2″ (frame)
- 8 | 1 x 4 @ 20″ (sides)
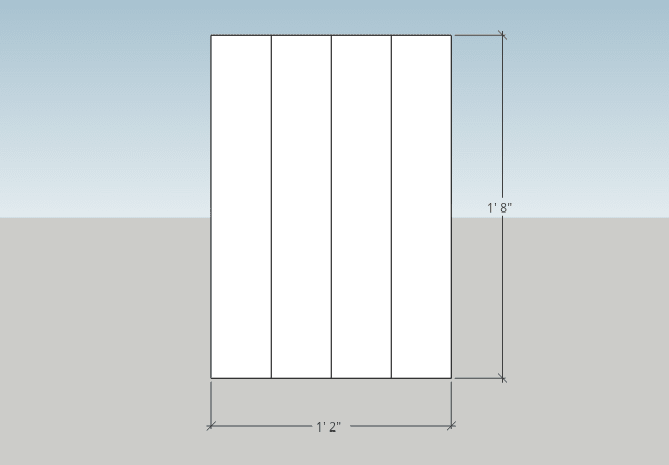
- 5 | 1 x 4 @ 17 1/2″ (tabletop)
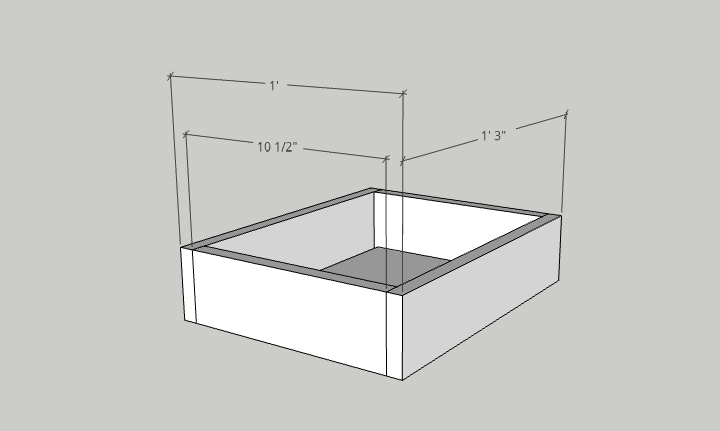
- 6 | 1 x 4 @ 15″ (drawer sides)
- 6 | 1 x 4 @ 10 1/2″ (drawer front & back)
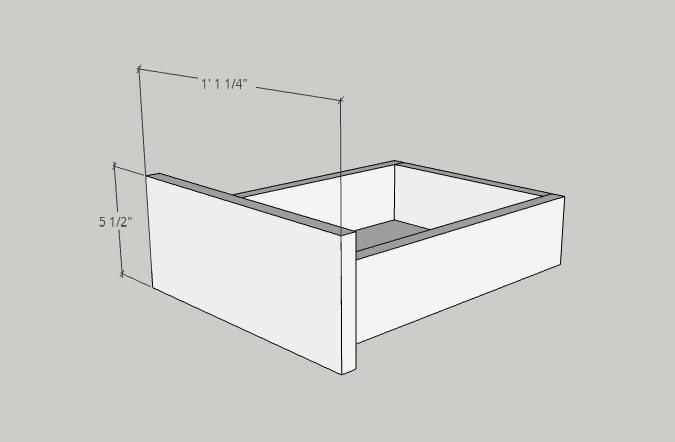
- 3 | 1 x 6 @ 13 1/4″ (drawer fronts)
- 4 | 1/4″ Lattice @ 14″ (trim)
- 1 | 1/4″ Plywood @ 13 1/2″ x 20″ (nightstand back)
- 3 | 1/4″ Plywood @15″ x 12″ (drawer bottoms)
Step 1.
Build the sides of the nightstand out of 1x4s. You could use plywood, but I went with 1x4s this time – up to you!

Use wood glue and 1 1/4″ pocket hole screws to attach the boards to each other as you would a tabletop. Stagger the pocket holes to ensure a solid joint.
You’ll also need pocket holes along the outside edges of the panel to attach the side to the legs in step 2.
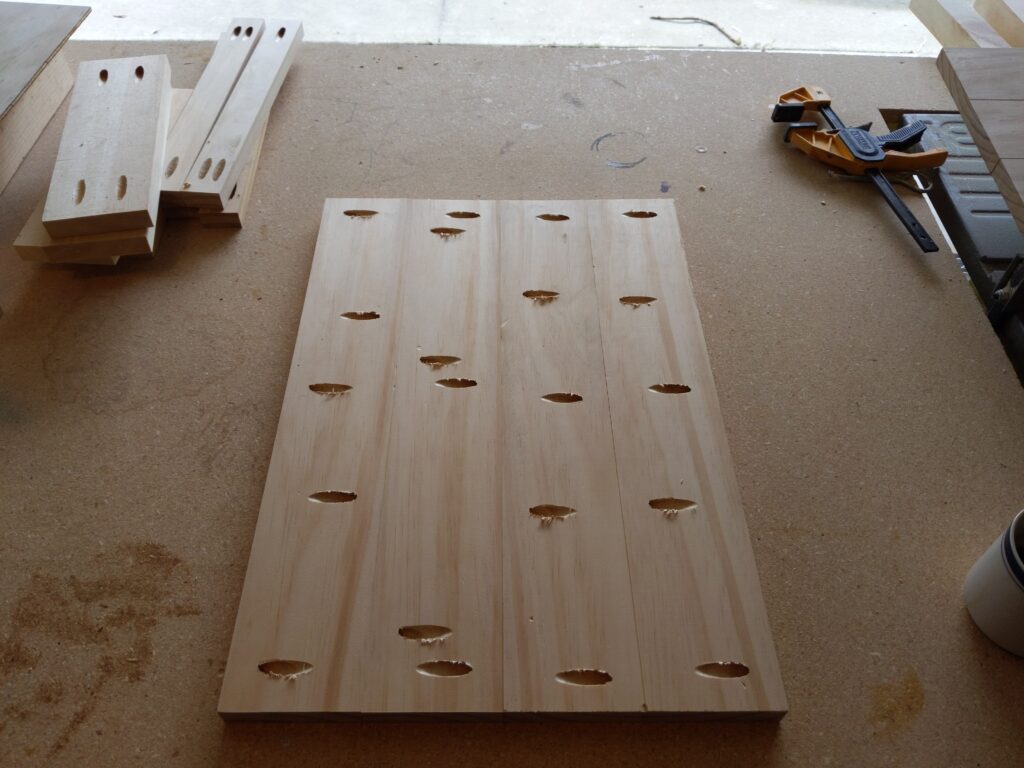
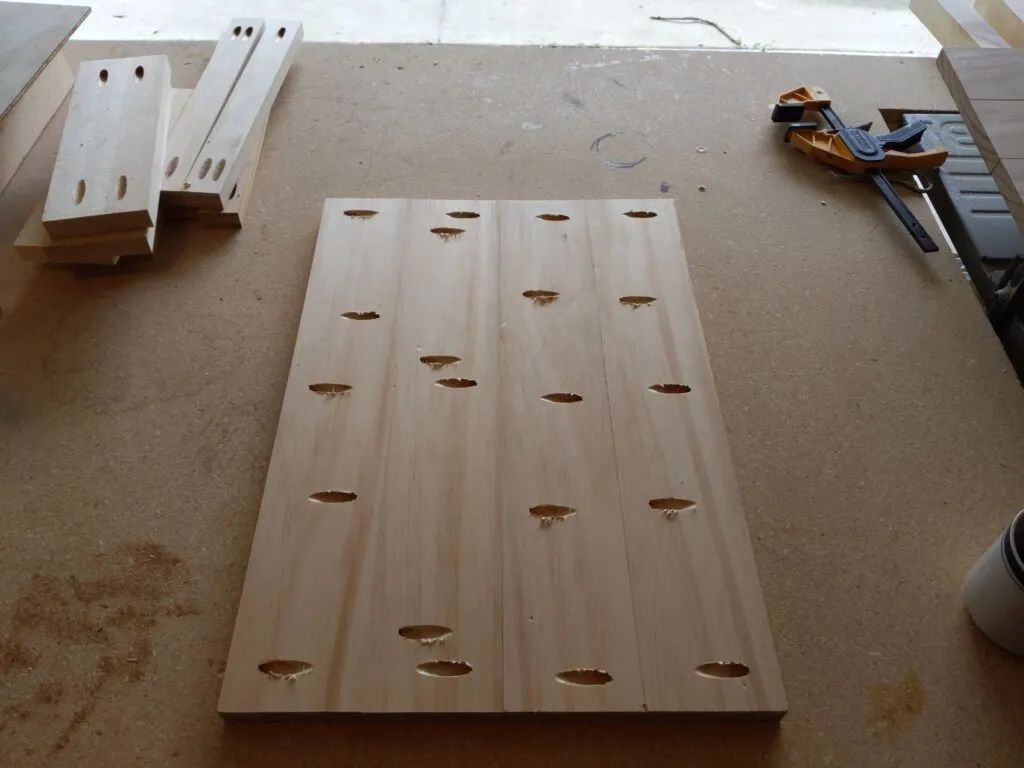
Build two sides.
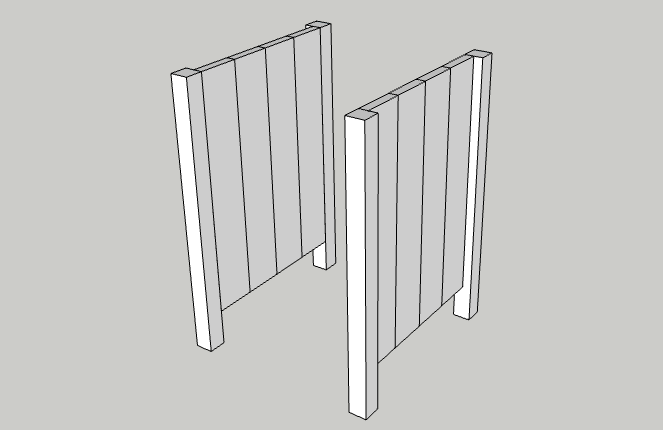
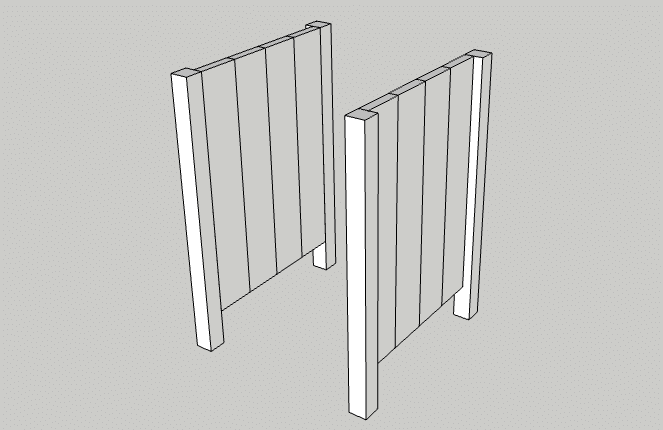
Step 2.
Attach the side panel to the 2×2 legs with wood glue and 1 1/4″ pocket hole screws.

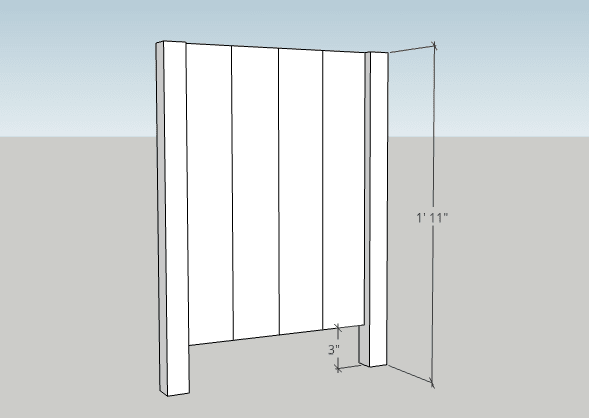
Repeat for the other side.
Step 3.
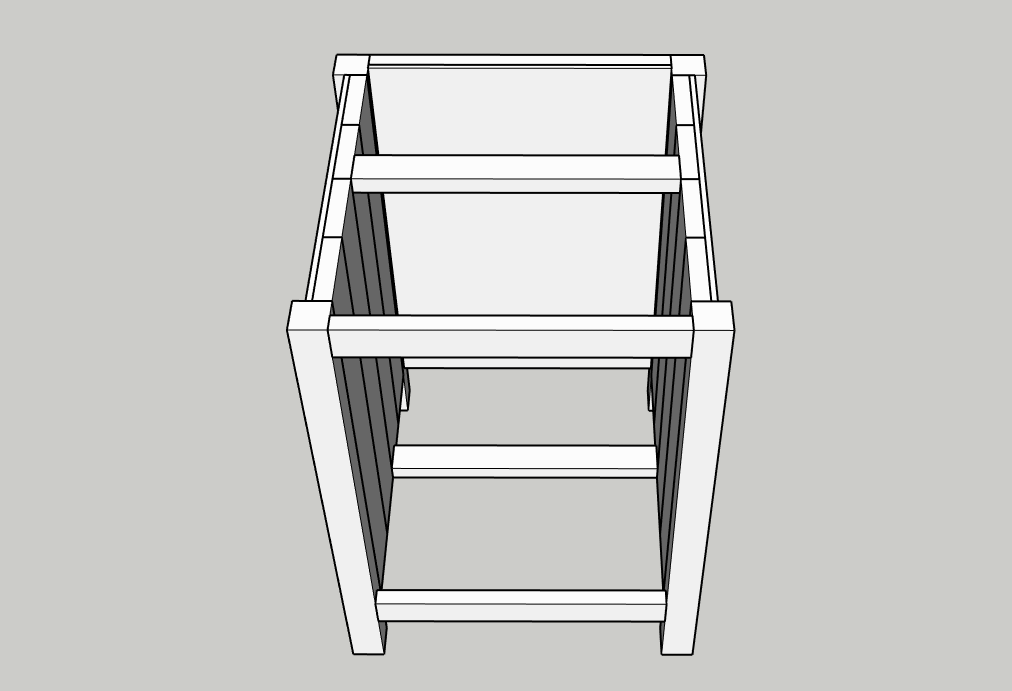
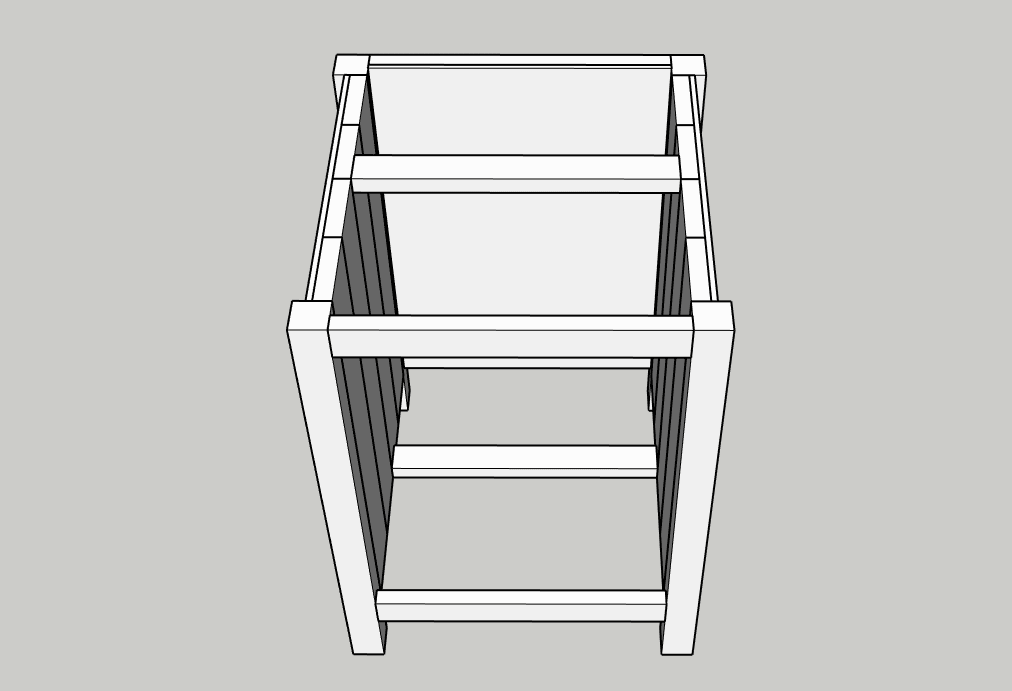
Join the side panels together with the top & bottom 1×2 supports in the front and back.
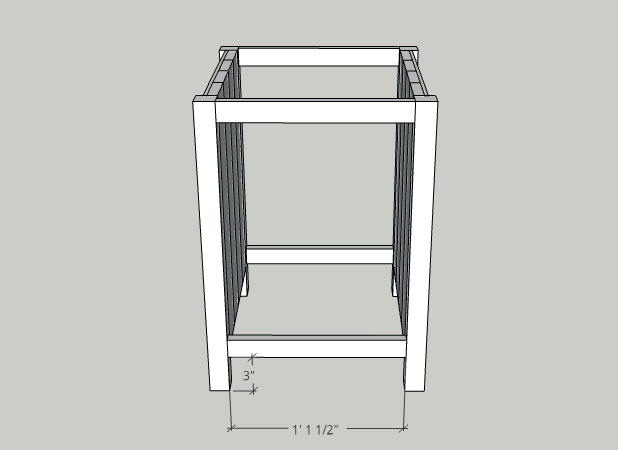
Use wood glue and 1 1/4″ pocket hole screws to attach the 1x2s to the legs.

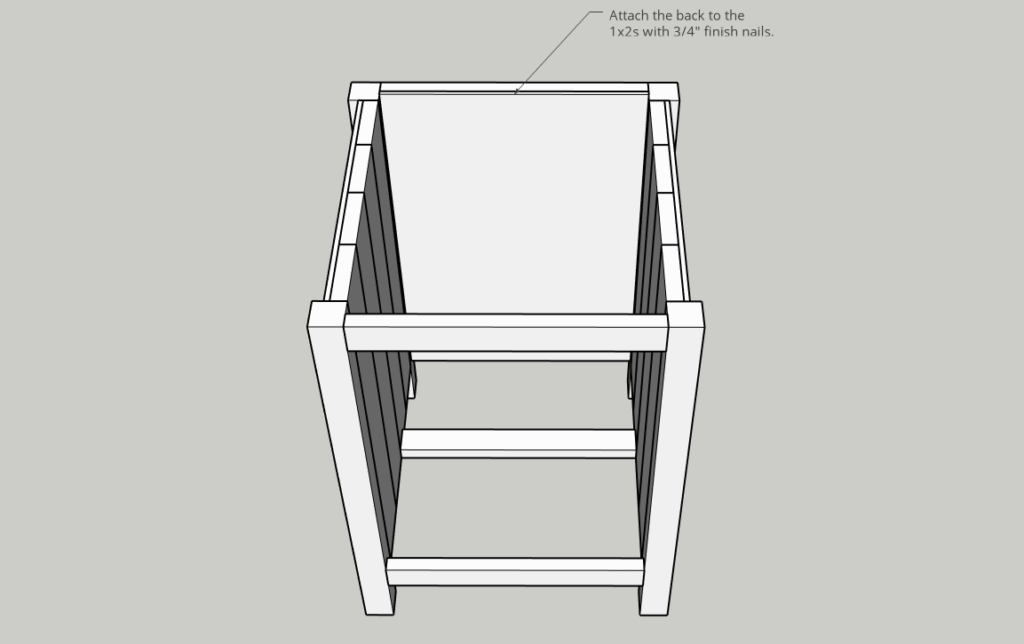
Step 4.
Insert the back panel into place and attach it to the 1x2s with wood glue and finish nails.

Step 5.
Once the back panel is in place, add a support in the middle along the top and bottom to make sure the side panels don’t bend inward at all.
Position the center 1x2s just behind the middle joint in the side panels to avoid putting a screws through the seam (if you built it out of 1x4s rather than plywood).
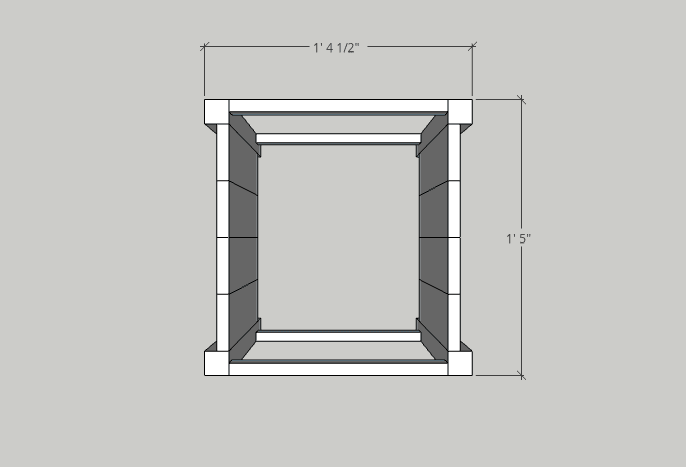
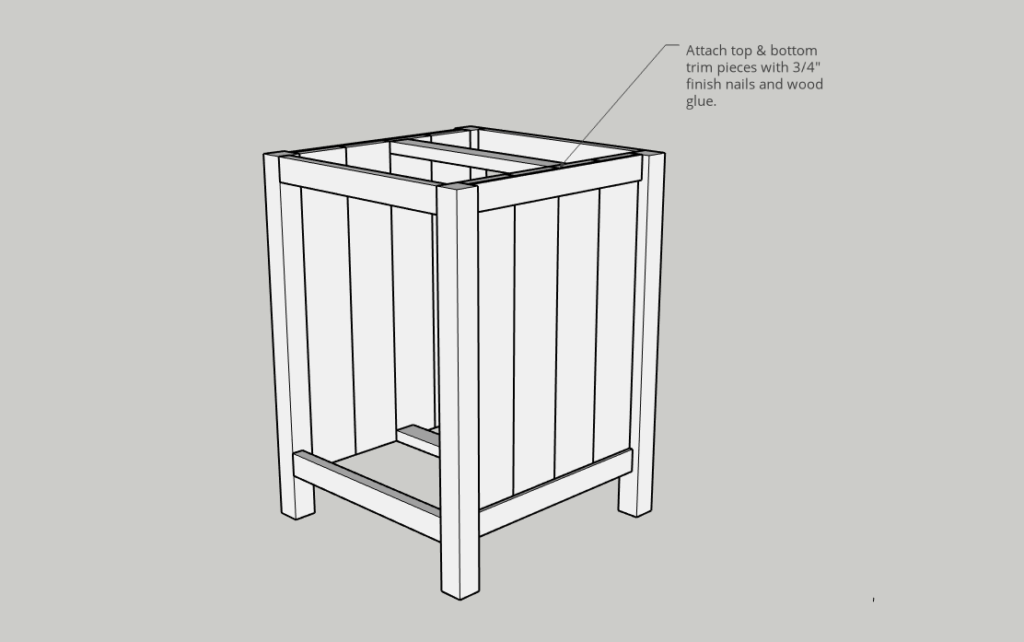
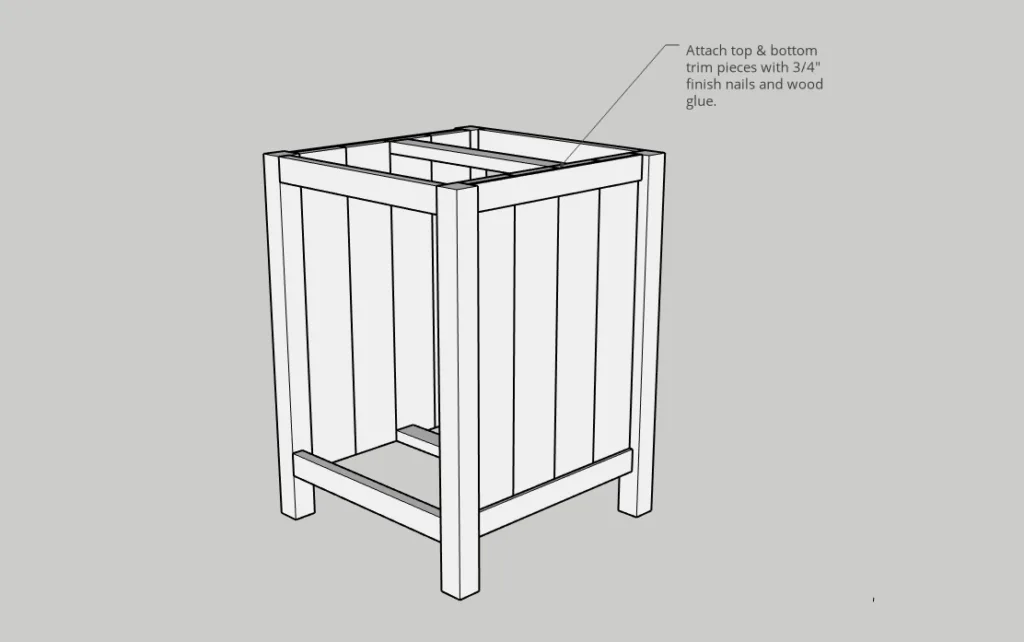
Step 6.
Add the trim pieces on the top and bottom of each side panel.
Step 7.
Build the top of the nightstand the same way that you did the side panels. Join the 1x4s to each other with wood glue and 1 1/4″ finish nails. Stagger the pocket holes on each side to ensure a strong joint (as shown in the photo above).
Wait to attach the top until you’ve installed all the drawers.
Step 8.
Build three drawers with dimensions as shown. See the posts listed at the top of this tutorial for details to build the drawers.

Install the drawers in the nightstand as shown in my tutorial – How to Install Drawer Slides. I used bottom-mount slides since I attached the bottom of the drawer with finish nails and glue. The bottom-mount slides reinforce the bottom a little.
Once you’ve installed the slides, attach the drawer fronts. See my post on how to install drawer fronts if you need more information.

Step 9.
Last but not least, attach the tabletop! I positioned the tabletop so it’s flush with the back of the nightstand and overhangs the front 1/2″. Adjust to fit your style.
I like to attach tabletops with small corner braces. The braces let the top move when the wood expands and contracts without pulling on the frame.

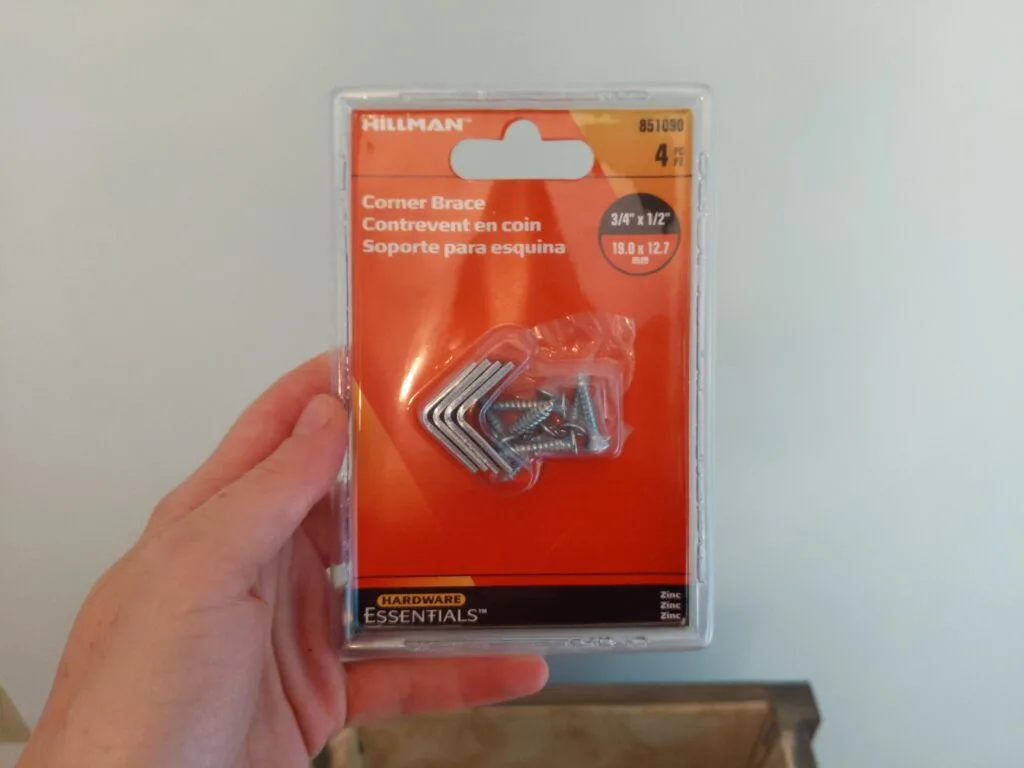
I used four on this tabletop – one in each corner of the frame (on the inside side of the nightstand).

And that’s that – sand and finish as desired!

I stained it with Varathane weathered wood accelerator in “brown” and sealed it with glossy water-based polyurethane.
I used some old handles I had lying around for the drawers, but here are some similar ones.

Please let me know if you have any questions and I’ll get back to you as soon as possible.


Thanks for stopping by!
For more project ideas, you can find me on Pinterest. And to stay up to date with the latest shenanigans, follow me on Instagram.

Ethan
Friday 31st of July 2020
Great stuff. I was wondering what the lattice trim is for? You only mentioned it in the cuts and shopping list.
tylynn_sattler
Saturday 1st of August 2020
I used it on the top and bottom of the sides just to make it look a little more finished. See Step 6.
Ethan
Friday 31st of July 2020
Hey, this is such a cool project, I was confused on where the lattice trim came in? It was only mentioned in the shopping list and cuts but I don't know where it's applied.
tylynn_sattler
Saturday 1st of August 2020
I responded to your other comment, but in case you miss it - I used it to trim the top and bottom of the sides. See Step 6.
Andy
Saturday 20th of June 2020
Figured it out, the 2x2s are ripped down to one and a half inch square. Told you I was new to this😁
tylynn_sattler
Sunday 21st of June 2020
2x2s are actually 1.5"x1.5" when you buy them. 2x2 is just the nominal dimension. All part of learning!
Andy
Sunday 7th of June 2020
Hi great looking project, am new to this and looking at the plans I get two different sizes for the sides 13" and 14" . What am I doing wrong?
tylynn_sattler
Monday 8th of June 2020
Hi there, I'm not sure I understand the question - the sides are 14" wide made from four 1x4s glued and pocket holed together (3.5" x 4 = 14"). Where did you get the 13"?
Stefanie
Wednesday 6th of May 2020
I don’t see how the back plywood is attached.
tylynn_sattler
Tuesday 12th of May 2020
I just sent you an email as well, but I've updated the plans to include the instructions for the back. Sorry about that.