
Plans and tutorial to build a DIY mobile miter saw stand for your workshop.
Head to my new YouTube channel for the full video on how I put this DIY Mobile Miter Saw Stand together.
This post contains affiliate links. If you make a purchase from one of the links, I may make a small commission at NO EXTRA COST to you. This helps keep the tutorials and plans free here at Terrace Place. Thank you for your support! See my full disclosure here.
So the craziest thing happened a few weeks ago. One of my friends over on Instagram broke 100k followers and did the COOLEST giveaway ever. I still can't believe it, but he teamed up with Delta to give away one of their Delta Cruzer 10" sliding miter saws and I won ... like, WHATTT?! I don't even know.
It was a completely random drawing and I guess I remembered to do all the correct things to enter and BAM. Here we are.
So this new DIY miter saw stand goes out to the new saw - you the real MVP of the shop!
Last summer I built a stationary DIY miter saw bench for my very first saw - a well used DeWalt from the ol' Craigslist. And when I say well used, I mean I bought this thing off a contractor after like 10 years in the field. I was hoping to upgrade this summer, so this giveaway was really unbelievable. The big miter saw station is great, but my FAVORITE FAVORITE workbench is the mobile workbench I built for the table saw. I work out of the garage, so my goal is to be able to pull everything to the center to work and then push it back to the sides so we can pull the car in. The big workbench works great along the back wall, but I wanted to try out a mobile stand for the miter saw as well, just to see how it helps with work flow.
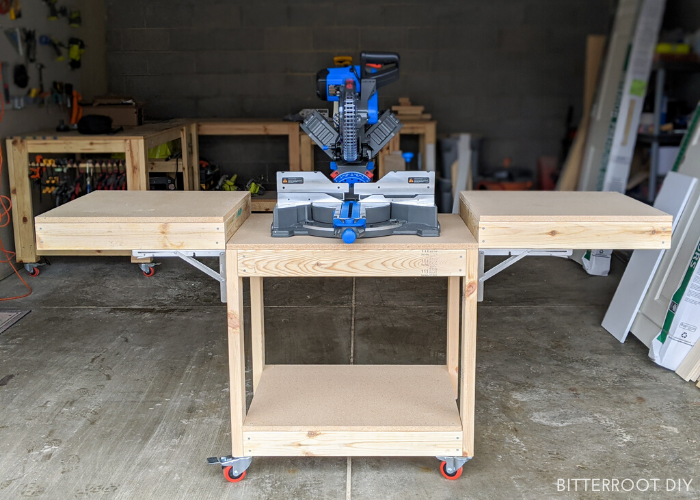
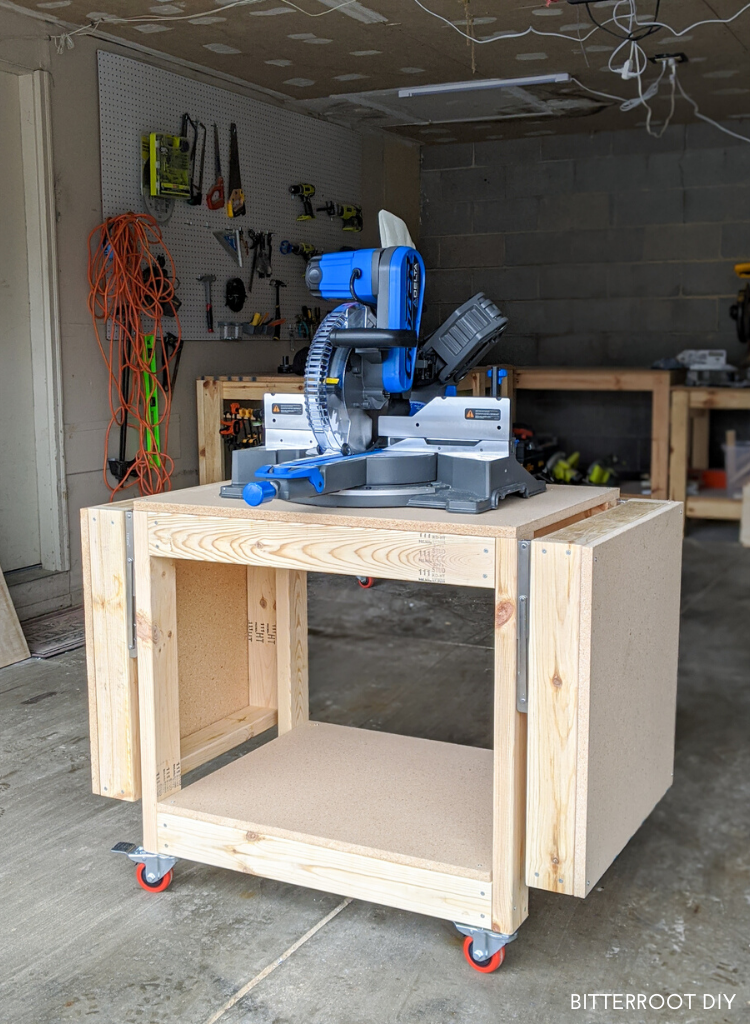
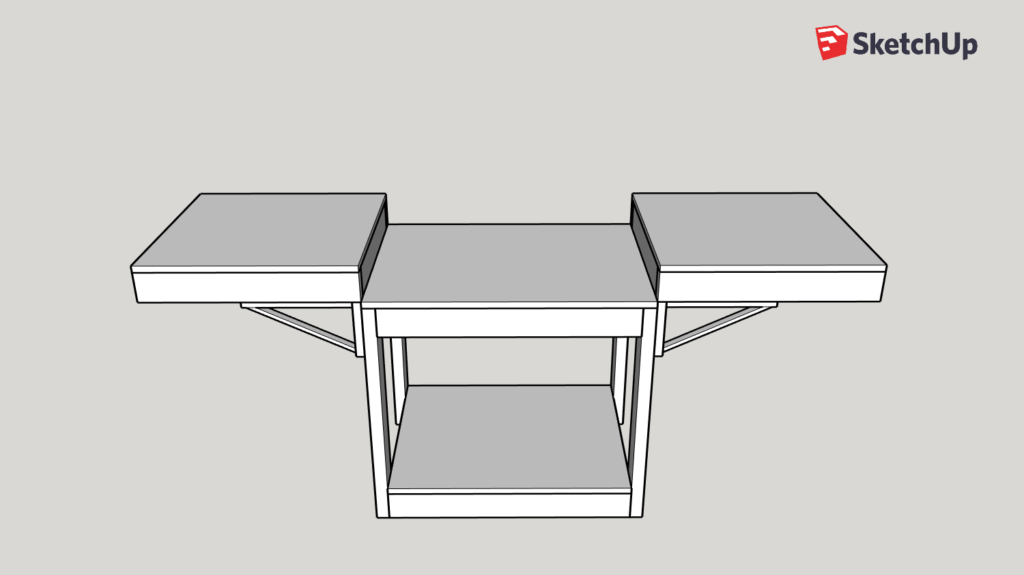
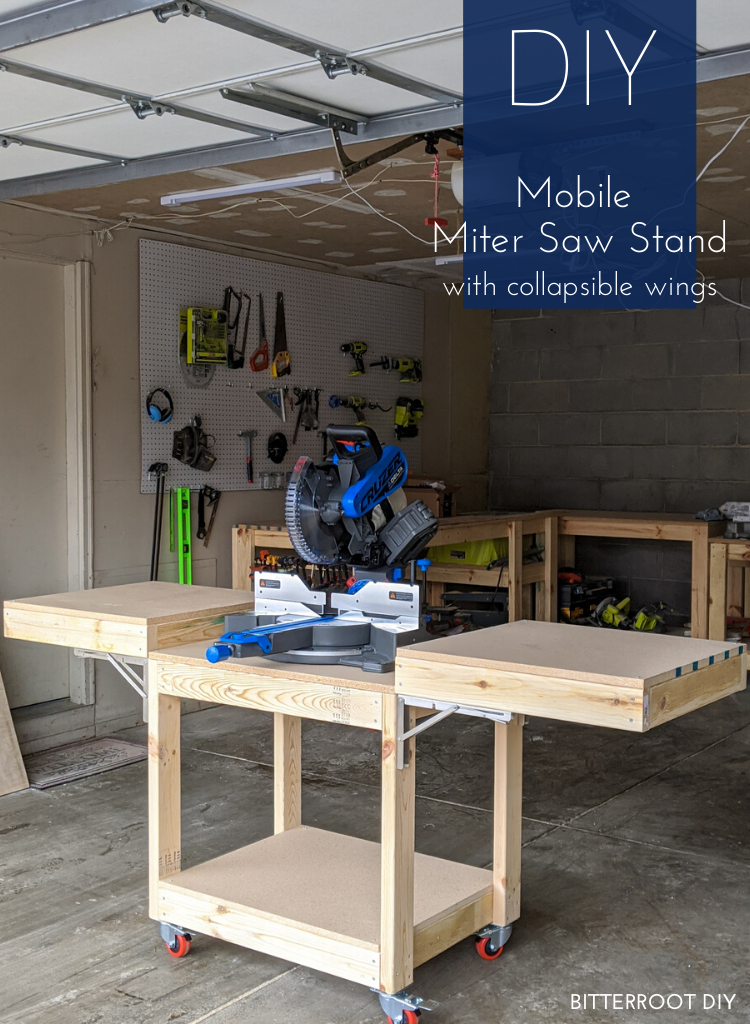
Alright, here you go - DIY mobile miter saw stand with collapsible wings.
Tools & Supplies
- 14" Folding Brackets (or bigger if you prefer)
- 3" Locking Casters
- Miter Saw
- Circular Saw
- Drill
- 6" Drill Bit
- Impact Driver (optional - just drives the screws a little easier)
- 2 ½” Screws
- 1 ¼” Screws
- Tape Measure
- Clamps
- Level
- Speed Square
- Pencil
- Safety Glasses
- Ear Protection
Lumber Lists
- 6 | 2x4 @ 8' (legs and frame)
- 1 | ¾" Particleboard @ 4'x8' (tabletops and shelves)
Cut Lists
- 4 | 2x4 @ 29" (center frames)
- 8 | 2x4 @ 21" (center & wing frames)
- 4 | 2x4 @ 24" (wing frames)
- 4 | 2x4 @ 28" (legs)
- 1 | ¾" Particleboard @ 24" x 32" (center tabletop)
- 1 | ¾" Particleboard @ 24" x 29" (center bottom shelf)
- 2 | ¾" Particleboard @ 24" x 24" (wing tabletops)
** NOTE: I built this workbench so the wings are at standard kitchen counter-top height (36"). If you're tall, you may want to adjust the legs to make it a little taller.
Step 1.
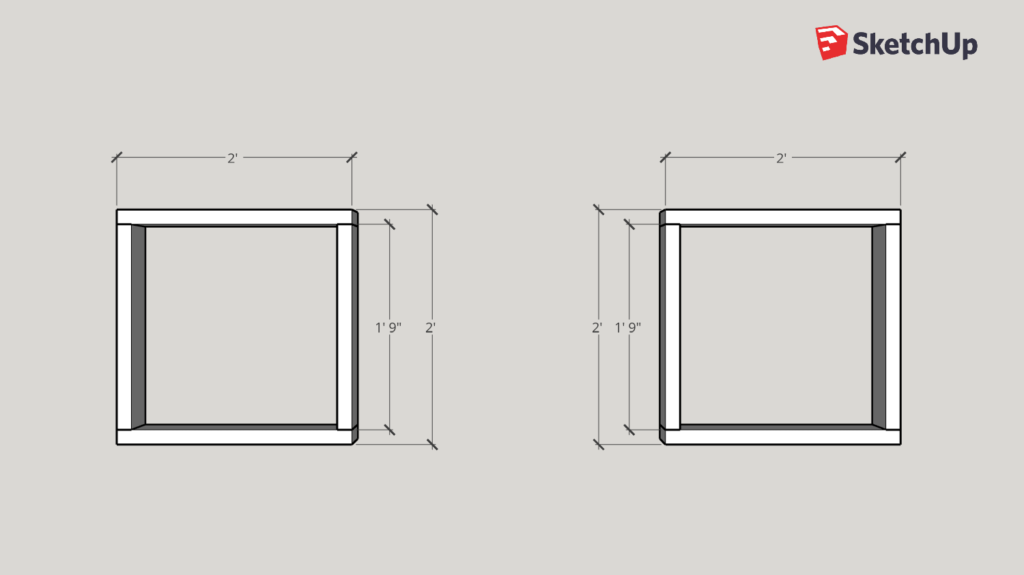
Build the frames for the center of the mobile miter saw stand. Make sure the frame is square and use two 2 ½" self tapping screws on each end of the 2x4s to attach them together.
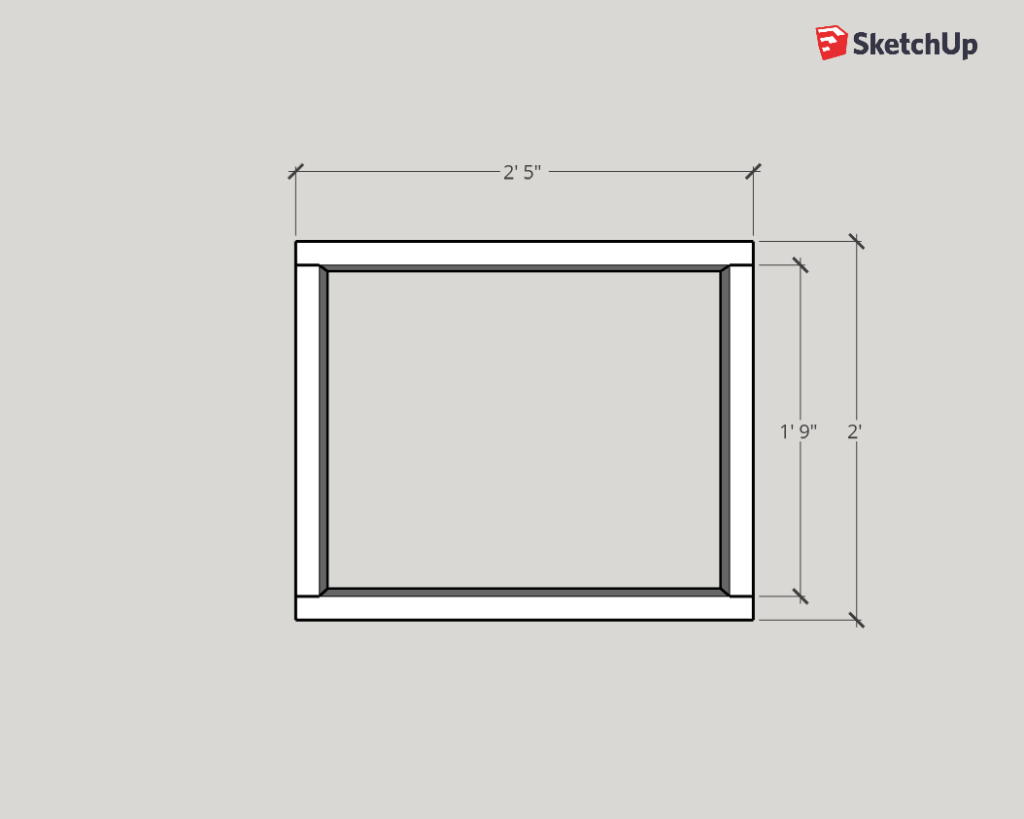
Assemble two frames - one for the miter saw shelf and one for the bottom shelf.
Step 2.
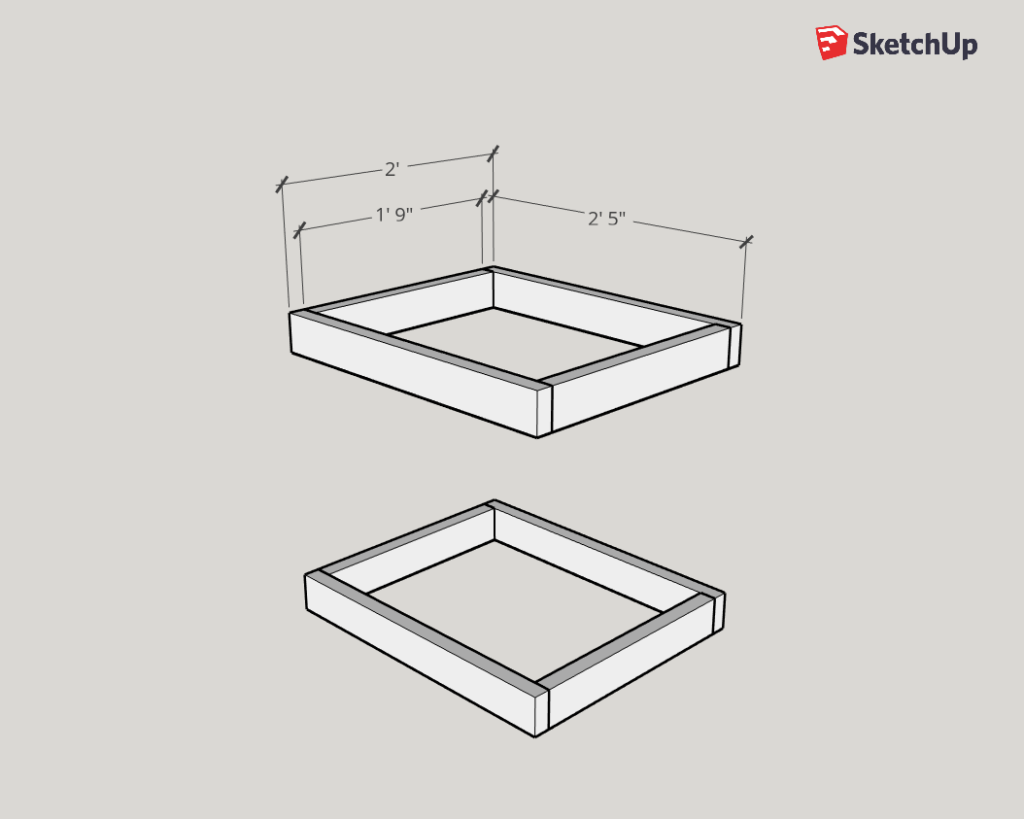
Repeat the same process to build two frames for the wings as shown below. Again use two 2 ½" self taping screws on each end of the 2x4s.
Step 3.
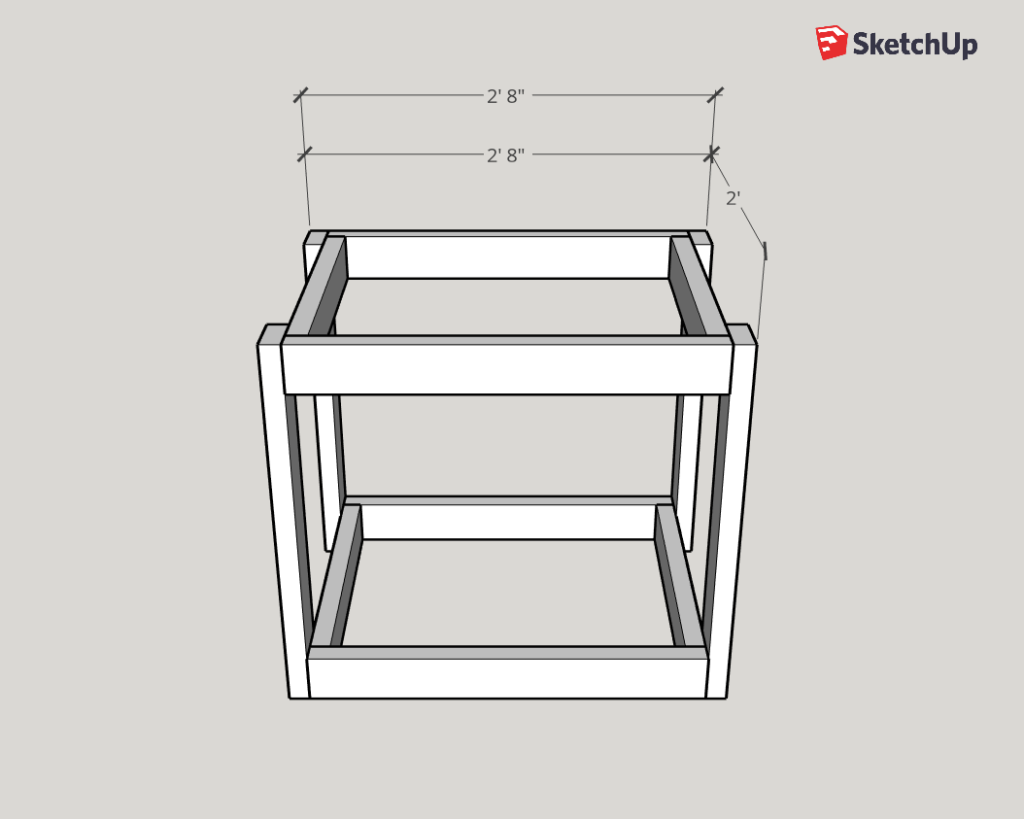
Next, attach the legs to the center frame. Line the legs up so they're flush with the edges and bottom of the first frame. Use 2 ½" self tapping screws to secure them.

I used three screws per leg - two through the side 2x4s and one through the center of the ends of the front and back 2x4s.
Repeat for the second center frame.
Step 4.
Now it's time to attach the folding brackets.
The brackets came with exactly ZERO instructions, but they're pretty straightforward. I didn't use the included screws since they were huge and looked like they'd split and destroy the 2x4s. Instead, I opted to use 1 ¼ self tapping screws and washers.
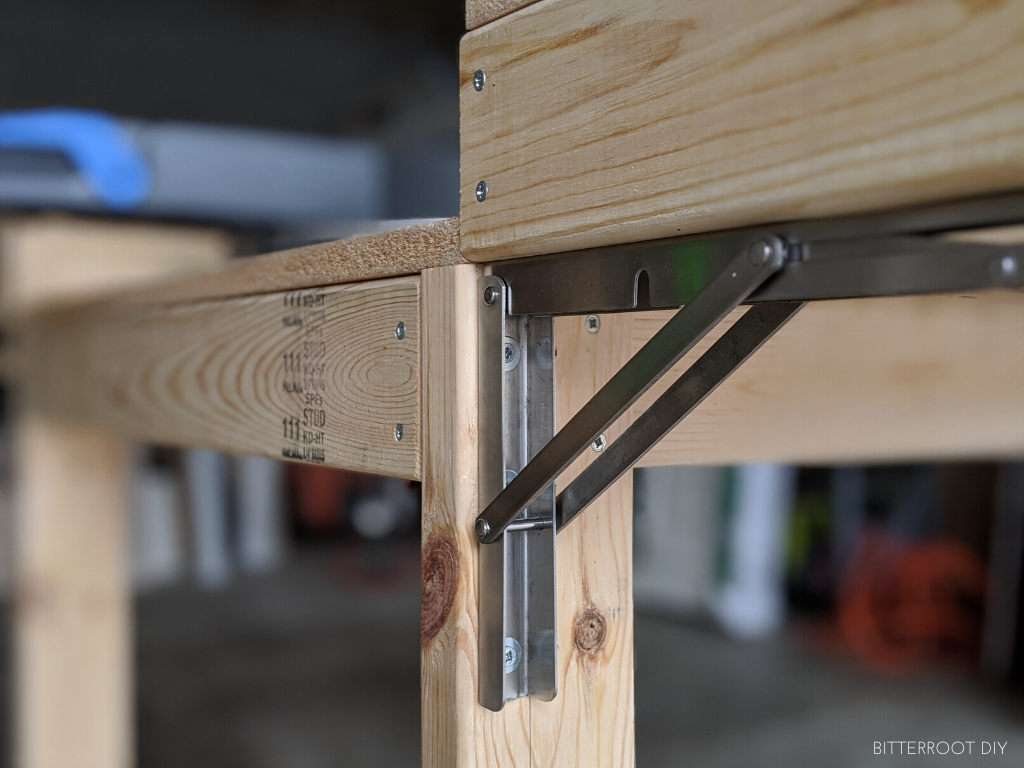
Line the bracket up with the outside of the leg, level it, and align it at the top to hold the wing level with the top of your miter saw table and fence. The tabletop of my miter saw sits at 3 ⅝", so I set the brackets so the wings fold up exactly level with that.
Use a long 6" bit to reach in the bracket and attach it to the legs.
I ended up removing the single 2 ½" screws I drove through the end of each of those center frame 2x4s so I could get the brackets in the correct place. I took the screw out, lined the bracket up where it needed to be, and then used a washer and that same 2 ½" screw to secure the very top of each bracket. So the screw and joint is still the same - it's just holding the bracket as well.
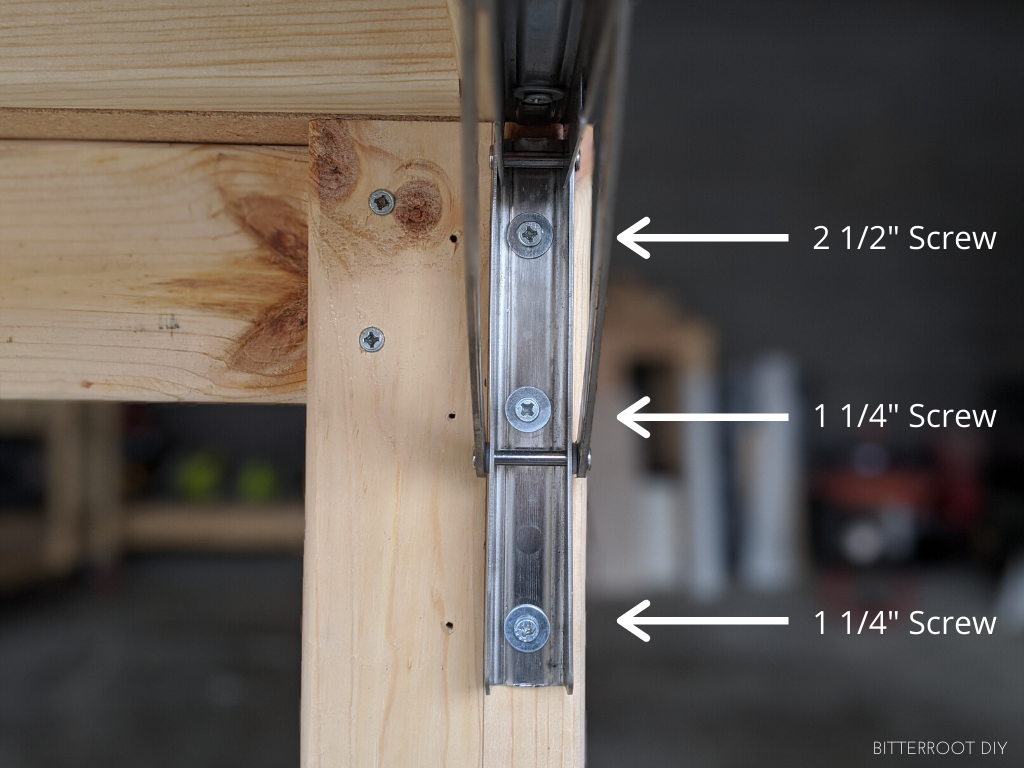
You can opt to leave those screws out until now when you attach the brackets, or just remove them one by one as you attach the brackets like I did.
I used 1 ¼" screws and washers to secure the rest of the bracket.
Step 5.
Once the brackets are secured to the legs, position the wings and attach the brackets to them.
The brackets should be centered in the bottom of the wing 2x4s.
Make sure everything is square - it may take a little shimming and finagling - so the brackets slide smoothly.
Step 6.
Flip the whole thing over and attach the locking casters to the bottom. I suppose you could do this before attaching the wings, but I did it after - totally up to you!
I used 1 ¼" screws and washers to secure the casters. The holes for attaching the casters are larger than the screw heads, thus the washers.
Step 7.
Lastly, add the tabletops.
I secured the tabletops to the frames with 1 ¼" self tapping screws in each corner.
Countersink the screws for a perfectly flat tabletop and shelves.
And there you have it - easiest DIY mobile miter saw stand EVER!
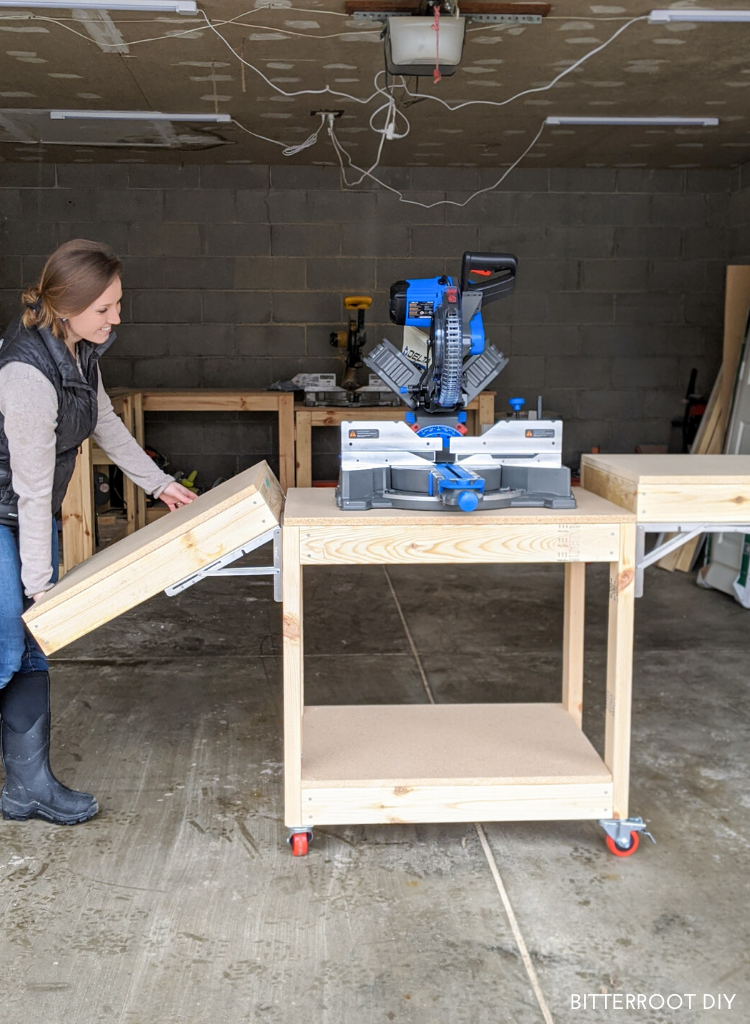
Let's just ignore all the random cords hanging from the ceiling and molding back corner of drywall ... focus on the beautiful workbench haha!
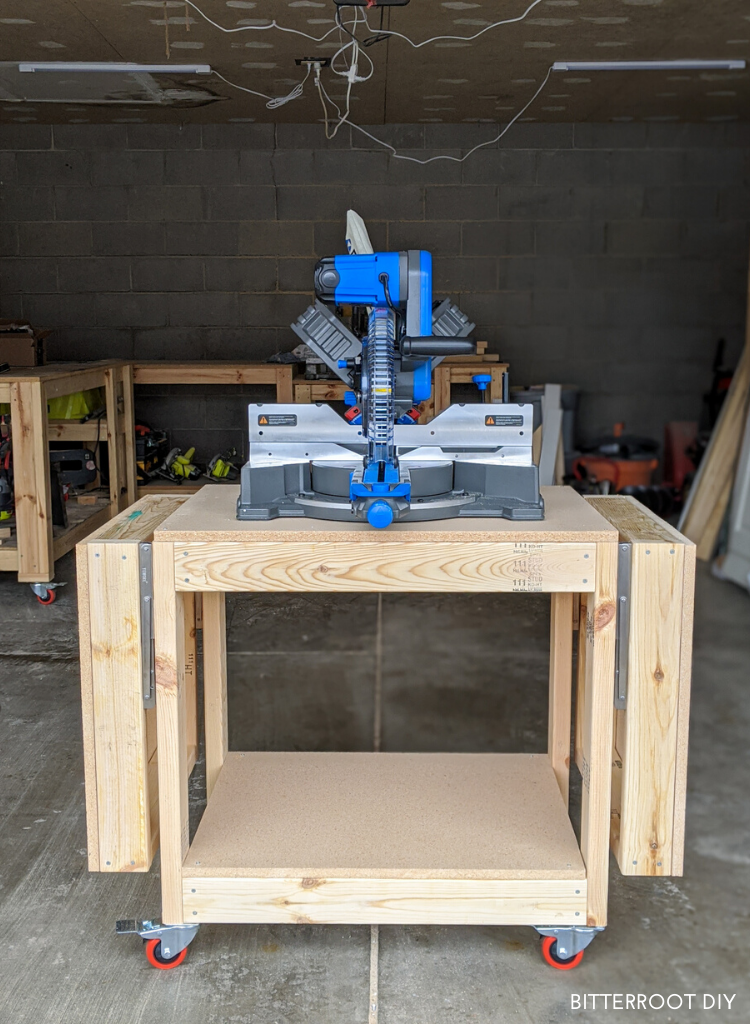
Please let me know if you have any questions and I'll get back to you as soon as possible.

Thanks for stopping by!
For more project ideas, you can find me on Pinterest. And to stay up to date with the latest shenanigans, follow me on Instagram.
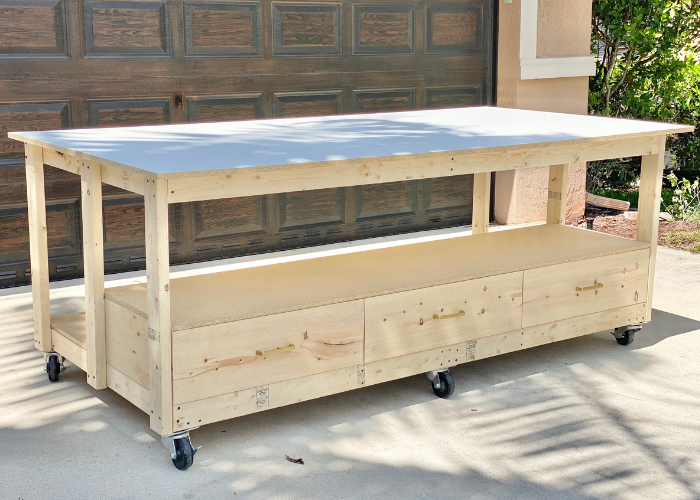

Had to add a small wood block under the cart since the wheels had 4 screws and there was no room for all of them using the original plan. Just have the wings to build now and want to add a stop block of some sort. Have you considered an option for a simple stop block for this cart? If so, love any suggestions. Thx
I don't have a stop block on it, but I know Kreg Tool makes stob block tracks that you can attach to the workbench - would work well to just attach a couple to the wings I think
While I haven't built this just yet, I feel that this will be a fantastic addition to my garage where space is a premium. I don't intend to use it for a miter saw stand I do plan to use it to set up my ammo reloading equipment. Your design is perfect for providing more than ample work space and not taking up too much floor space. I'll send photos when I'm up and running.
That's a great use for it! I'd love to see it when you're finished. Feel free to email me some photos at [email protected]
I completed this bench last night and its a workhorse. I followed your plans, except my wings are 41" high and I used 4" wheels. This replaces my card table on sawhorses. I have a 10" Ryobi saw, my deck is 3" high. When building, I placed the wings on the sawhorse to get them level with the deck, then I marked and installed the brackets. I then screwed the wings to the brackets and wha-la, level. It is definitely one of the most important items in my shop. I'll put a bbq cover on it and store it outside, perfect for southern Cal. Thank you very much, you rock!
Perfect! Thank you so much for using my plans!
This is perfect for my workshop!! May I ask if you prefer a regular workbench to be on casters or not? Are ones with casters sturdy enough to work on (ie. sanding, drilling without shaking)? THANK YOU so much for this plan! I'll be making this in a few days!
Yes, I have all my workbenches on casters so I can move them around. The 3" locking casters are very solid.
Thanks for the plans. It is very helpful and easy to do. I am almost done with my mitre saw table. I want to add a stop block. do you have any ideas for it?
I will post a picture once I have the table finished.
Is there a way to post pictures on here to share what I have done?
I don't have a way for you to post finished photos (working on adding that to the site), but feel free to email me at bitterroot.diy{at}gmail.com!
Sent! 🙂
Wow, what a fun and quick project that was needed so much. No more having to move the saw on the floor or pull out the work-mate. Thanks for posting. I did end up adding another pair of 2x4's on the bottom for the castors. I used lag bolts with the castors and the wood started to split. The 2x4's worked great but adds and additional 1.5" to the overall height. Thanks again
Bought 2 sets of the folding brackets from your link. Looking forward to putting this thing all together.
Awesome - I appreciate the support! Good luck with the build!
Thank you for the plans, this went together perfectly in a weekend! Very solid!
Thanks for this really cool project idea! Really well documented and although I ended up not doing it as described, I used portions and really happy with the results, thanks again! Here's the before and after of mine: https://imgur.com/gallery/PbiXHUf?fbclid=IwAR0hwTK1q4mE-2MXI35MOkYtZA3HQHNUZrkAnyBzcIel3XCRtGWc3DCDrhU
I am planning to build this with 1 major mod and 1 minor mod:
1. Major: I am going to build it to allow me to swap out my table saw or my Miter saw in the "business area" of the stand. This will require different dimensions and also the use of a filler block to bring the Miter Saw cut surface up the same height as the table saw.
2 Minor: If you flip the bottom frame over you can create a drawer-like space with the frame 2X4's becoming the sides of the drawer to store things.
Wish me luck!
That's a great idea! I can't wait to hear how it turns out!
That is such an easy tutorial. It is what I was looking for. Thank you Anika for such an interesting article.
Your new system that's supposed to charge me $2.95 for a copy of the plans might use a tweek. It has taken my Paypal charge, but I won't get the plans for two weeks, December 3.. Were you aware of this?
I hope you can fix this and then delete this message.
Hi Ed,
You should receive an email immediately with a link to download the plans.
Thank you so much for the plans, I have started to make this, I’ve got to the point of putting the tops on.
I will say putting the casters on before the wing brackets is a better idea 💡
So super easy to follow your plans!
Looking forward to creating more projects using this cart!
If you move the folding bracket up so the movable arm is level with the top of the table, could you make the shelves longer and butt them up to the mitre saw? When folded the shelves would stick up a few inches.
Not sure if I completely get your comment, but the height of the folding arms depends on your saw. Mine sit level with the table of the saw when they're up and fold down to level with the tabletop.
Made the cart yesterday. Added T-Track to both wing tops and a slot in the front for a speed square. I like it so much I may shellac the surfaces to keep it fresh looking. Thank you very much!