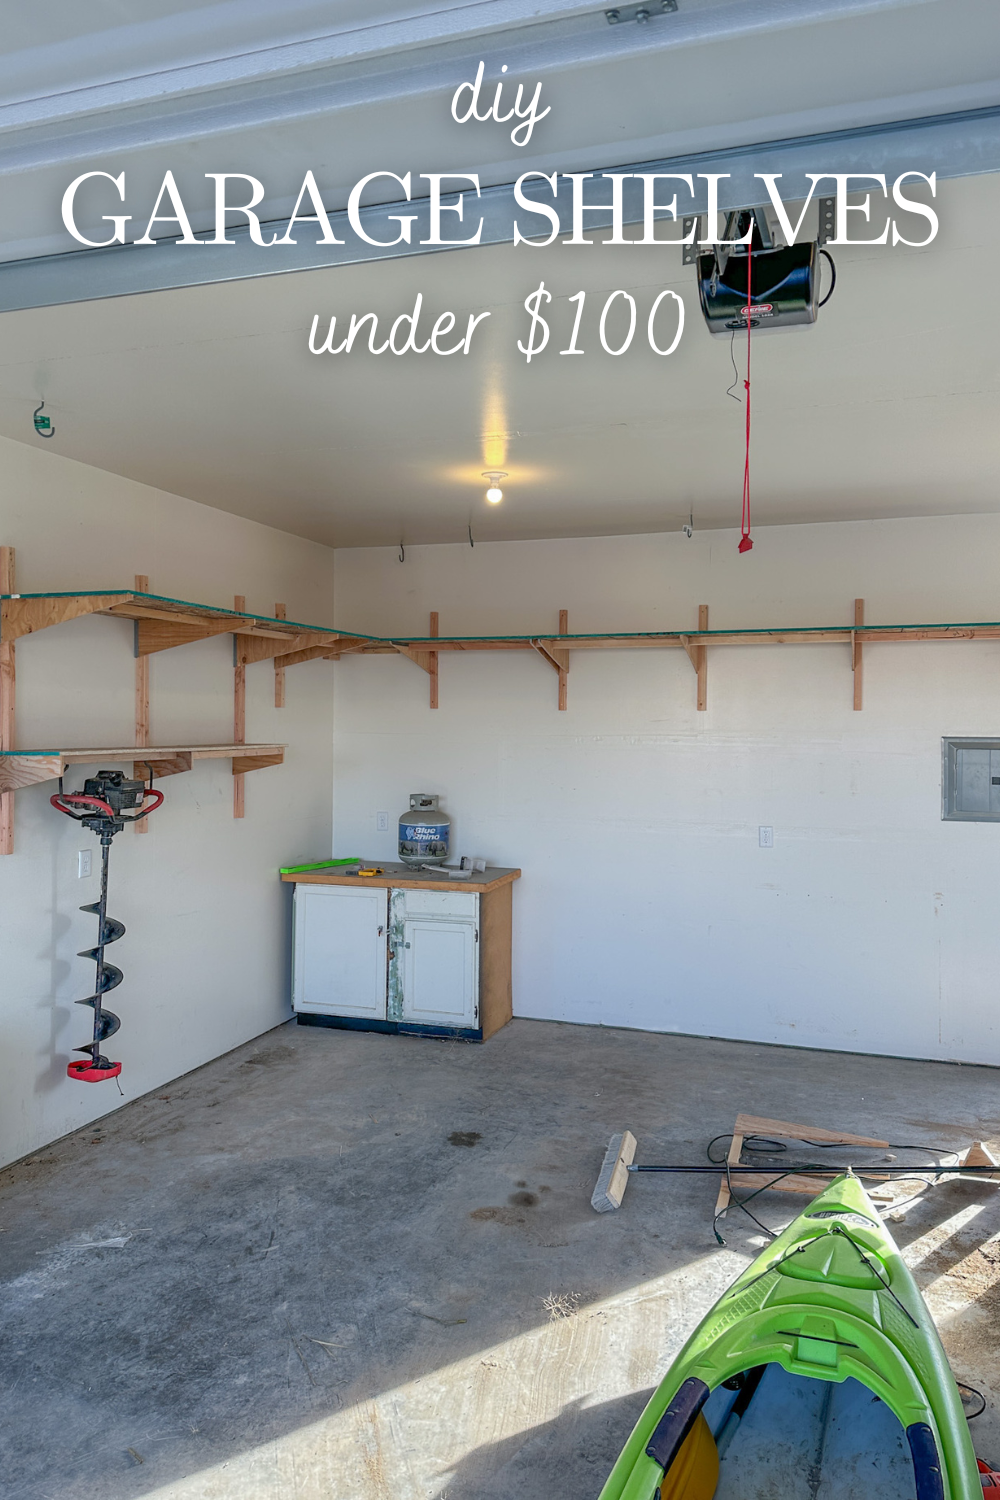
Build easy DIY garage shelves for under $100!

Our house has plenty of potential for storage areas. But, until recently, the garage was mostly unused space. Adding garage shelves has been on the list for a LONG time now – somewhere to store large items like yard equipment, camping gear, ice fishing gear, etc. Joseph tackled it over Christmas break and had the whole thing built and re-organized in about three days.
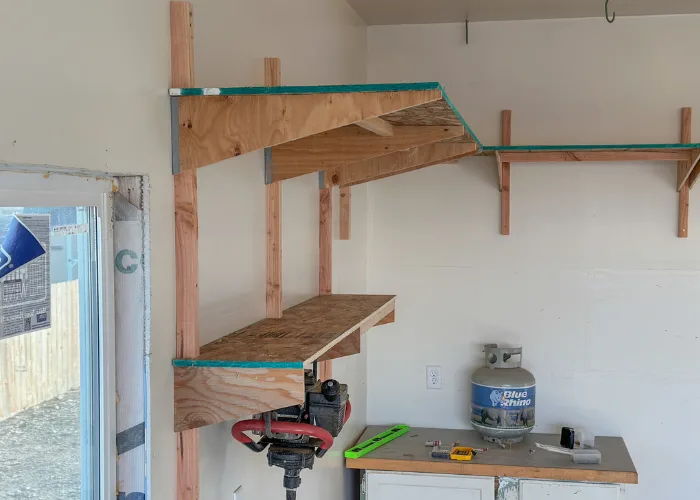
There are a lot of great designs out there for traditional garage shelves. However, our garage is pretty tight, and we can juuust fit two vehicles in as-is. Many of the traditional designs have shelves that sit on the ground, but we didn’t want to intrude on any of the floor space. We built these to mount right to the wall, above the vehicles. With the angled brackets, they hold a TON of weight and leave all that critical floor space open. Joseph also added a narrower shelf further down the wall for smaller items. It sits right next to the vehicle but is just above the hood and doesn’t stick out too far that it’s in the way when you walk by. You can mix, match, and customize these easily to fit your needs.
Here’s how we built these quick, simple, and very budget friendly DIY garage shelves!
- 1/2″ OSB or sheathing (you can use nicer plywood, but we used OSB to keep costs down)
- 2 x 2s (use furring strips or rip 2x4s in half)
- 1 1/2″ Screws (highly recommend PowerPro for not splitting the wood)
- 3″ Screws (again, highly recommend PowerPro)
- Circular Saw
- Table Saw (optional)
- Drill
- Laser Level
- Stud Finder
- Ladder


Step 1 – Cut Brackets
Using your circular saw, rip a 4’x8′ sheet of plywood in half to give you two long sheets that are 2′ x 8′. You could use a half sheet ripped in half as well, depending on how many shelves you want to build. But you want to start with a strip that’s 24″ wide to make the cuts easy. We used a full sheet to make enough brackets to go all the way around this corner of the garage.
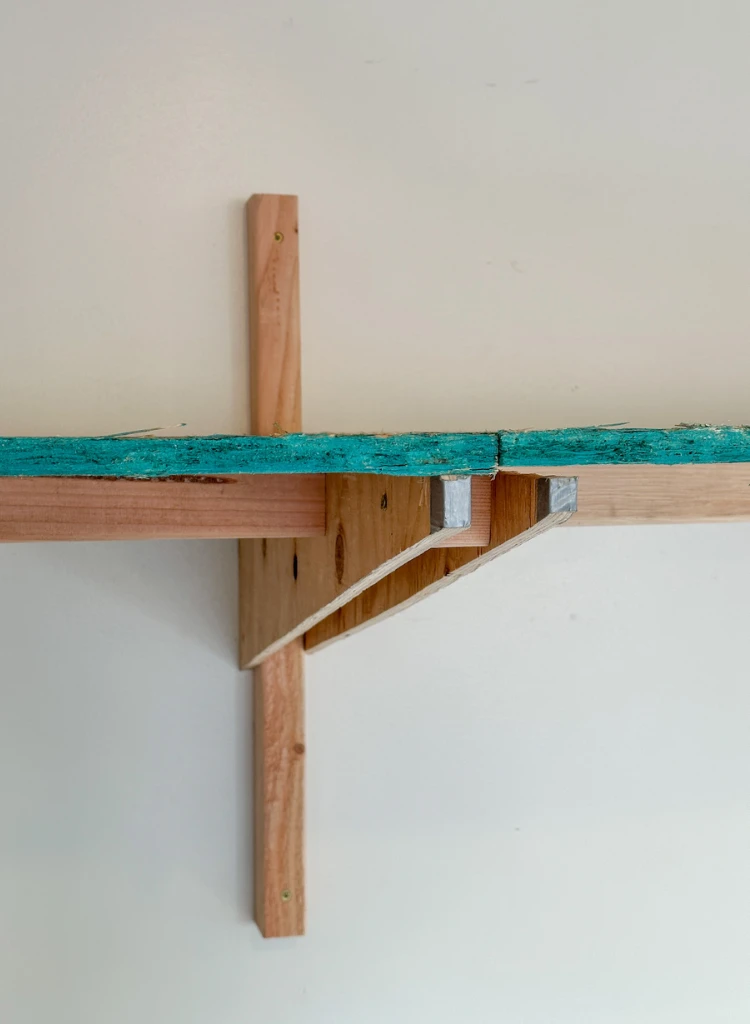
To cut the brackets, mark 1″ from the corner one side of the plywood and 7″ from the corner on the opposite side. The marks should be along the long edge of the plywood (8′ side) so the bracket is 24″ (2′) deep.
Use the circular saw to cut the diagonal line between them. You should end up with a triangle as shown:


You can use a guide if it’s more comfortable, but we just free-handed the cuts since they’re nice and straight (and it’s just garage shelves).
Once you’ve cut the first bracket, use it as a template to speed up your cuts for the rest of brackets. Flip flop the direction of the triangles to maximize the number of brackets you can fit on each strip of plywood.
If you want to add some shallower shelves similar to what we did on one side of the garage, just cut the end of the brackets off to the depth you want.
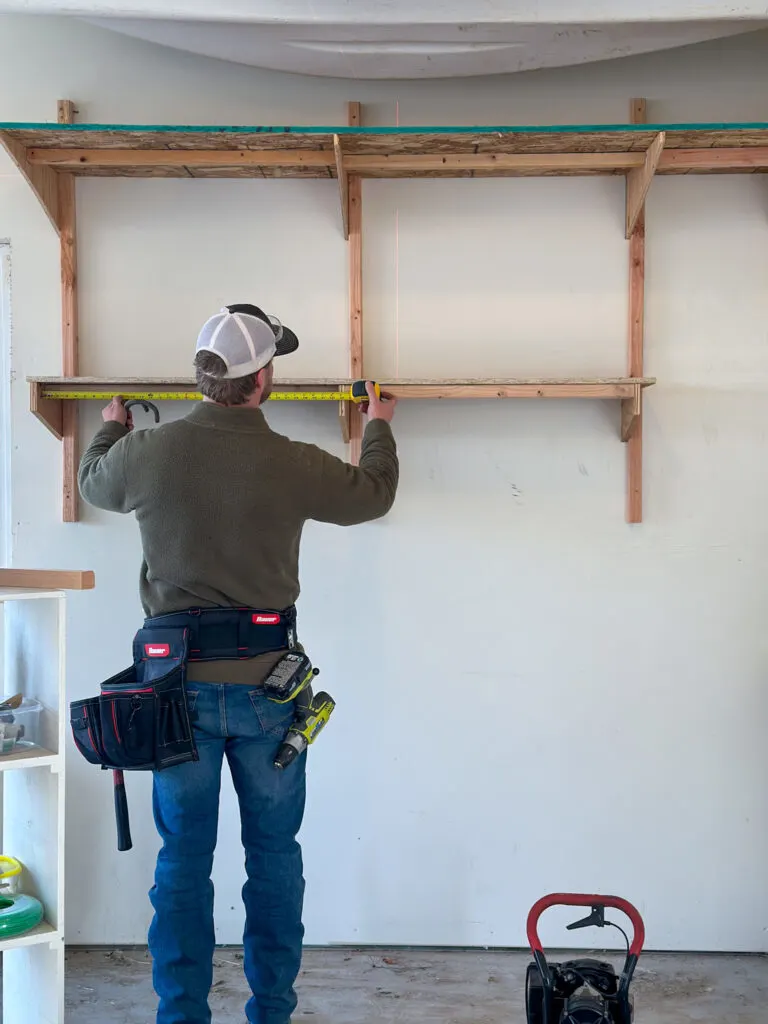
Repeat for however many brackets you need, depending on how long you’re building your garage shelves. Keep it simple and just space them along the studs on the walls.
Step 2 – Attach to 2x2s
Next, cut the 2x2s to length for the number of shelves you plan to put on each cleat. We cut the 2x2s for the single shelf to about 2′ and the ones for the double shelf to about 3 1/2″. If you couldn’t tell already, this project is really not an exact science 😅 and will be different depending on how many shelves you want to add in your garage.


Attach the brackets to the 2×2 furring strips with 1 1/2″ screws. Space the brackets for the amount of space you’d like between the shelves. Ours are about 2 1/2′ apart.
I highly recommend these PowerPro screws to avoid splitting the wood without having to pre-drill. They’re our go-to screws.
Step 3 – Additional Support
Secure the 2x2s with brackets to the studs with 3″ screws (again, PowerPro). Use a few screws per 2×2 into the studs (one on each end and in the middle).
We added additional 2×2 supports between the brackets so the shelves won’t sag over time. Stagger the 2x2s so you can drive screws through the plywood brackets into the end of each 2×2 support.
The extra supports on the bottom shelf are 2x4s so Joseph could hang the ice auger here. But it’s the same idea.


Step 4 – Add Shelves
Next, rip the plywood down to size for the shelves and place them on the brackets. Ours are 24″ deep by 8′ long along this wall. Once cut, set them in place on the brackets and mark the location of the 2×2 cleats. Use a jig saw to cut out notches to fit around each cleat so the shelves sit flush against the wall. Then, install the shelves and secure them to the supports with 1 1/2″ screws. We just did a scattering of screws so the shelves won’t flip up or move when we’re grabbing things.
The shelves along the adjacent wall are longer. We used two sections of plywood for the shelf and added an extra bracket in the middle where they butt together to support both ends.

We did just one shelf along that back wall so it’s out of the way of the front of the vehicles. But it’s really a choose-your-own-adventure type of project. Add as many shelves as you want!
I love that these don’t intrude on our floor space and we can store the less used, or seasonal, things easily.
I know this isn’t a typical, straightforward tutorial. The goal was easy DIY garage shelves that don’t take up any additional floor space and don’t cost an arm and a leg. And we didn’t get too caught up in specifics since they’re just garage shelves. So please let me know if you have any questions, and I’ll get back to you as soon as possible!
| Tylynn |
This post contains affiliate links. If you make a purchase from one of the links, I may make a small commission at NO EXTRA COST to you. See my full disclosure here.