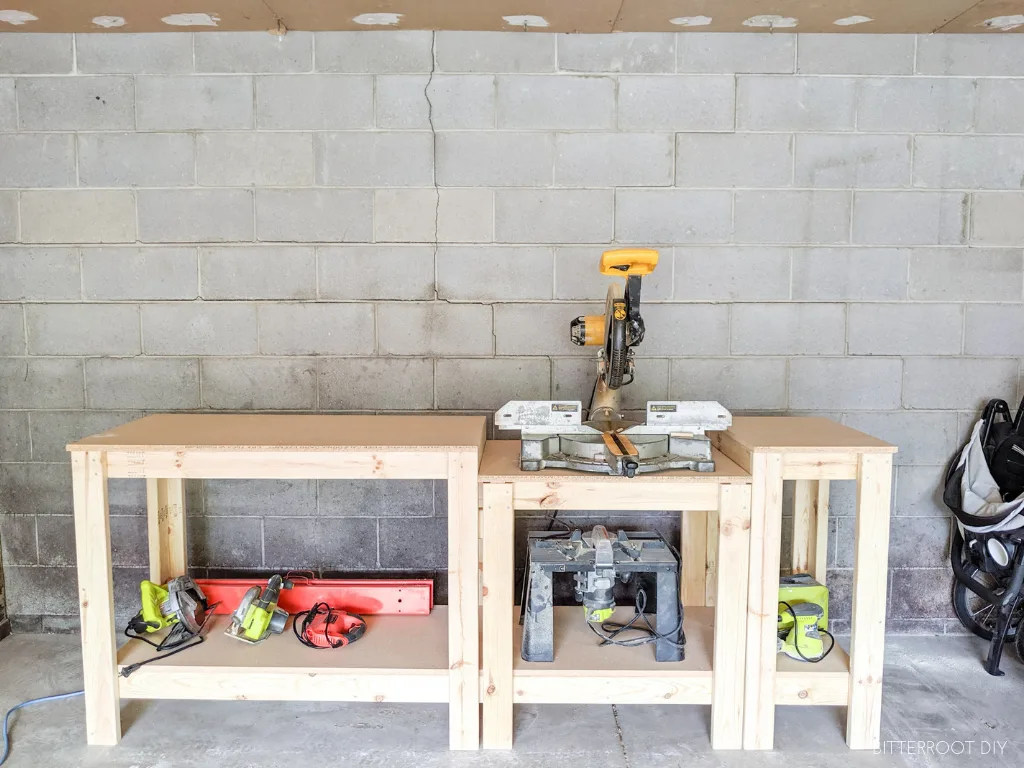
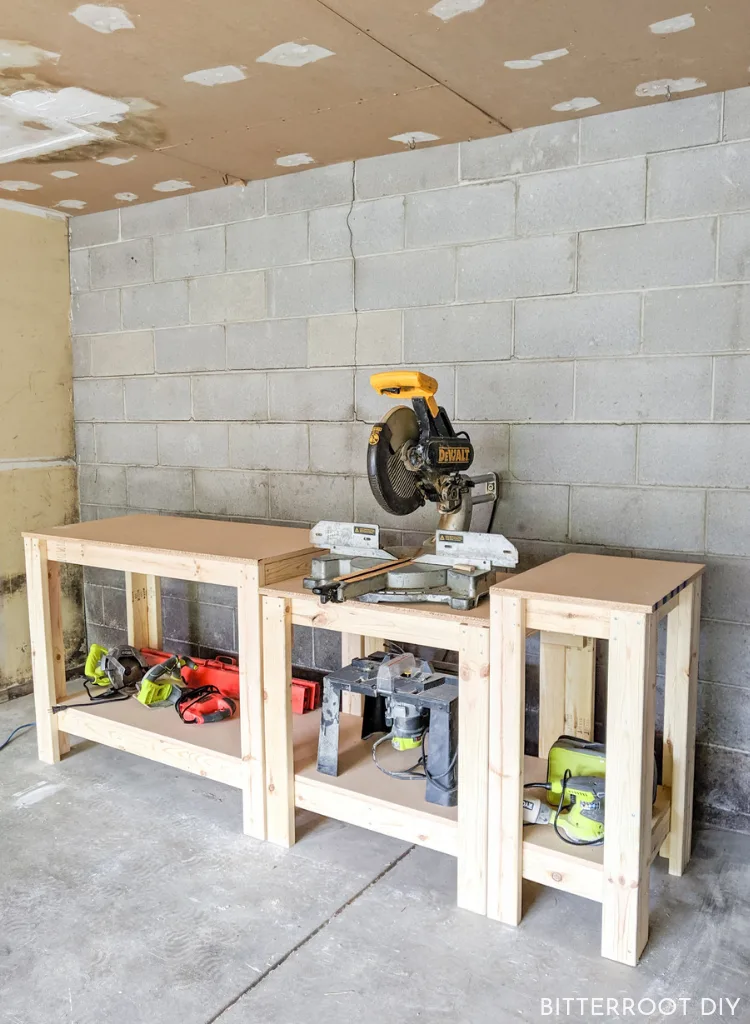
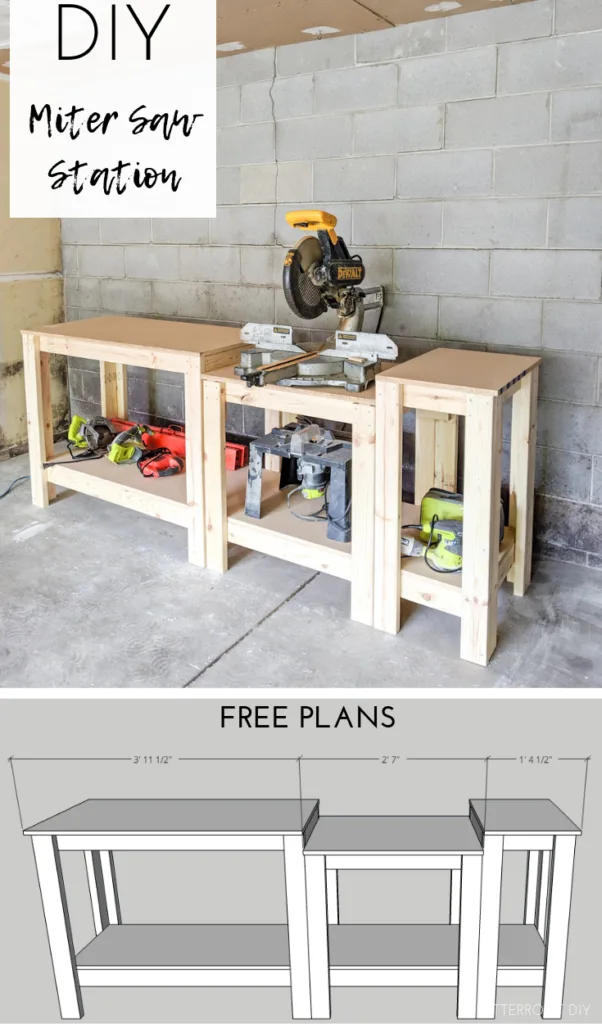
I probably should have done this project forever and a half ago (like before I started re-doing our entire house), but I FINALLY got around to building a few workbenches and setting up my shop. And by “shop” I mean the garage. My goal is to maximize shop space and storage, but still be able to park the car in there when necessary. First things first – a DIY miter saw stand.
This post may contain affiliate links. If you make a purchase from one of the links, I may make a small commission at NO EXTRA COST to you. This helps keep the tutorials and plans free here at Bitterroot DIY. Thank you for your support! See my full disclosure here.
I designed this miter saw stand to fit my saw and shop space, but there are a million and one ways to build one. Make sure to measure your saw, measure your space, and adjust the plans as necessary.
Enjoy!
Tools & Supplies:
- Miter Saw
- Circular Saw
- Drill
- Tape Measure
- Clamps
- Level
- Speed Square
- Pencil
- Safety Glasses
- Ear Protection
- 2 ½” Screws
- 1 ¼” Screws
Lumber:
- 14 | 2 x 4 @ 8′
- 1 | 3/4″ sheet of particle board (or plywood)
Cuts:
- 12 | 2 x 4 @ 36″ (full length legs)
- 4 | 2 x 4 @ 32 1/2″ (mid-workbench legs)
- 5 | 2 x 4 @ 18″ (top & bottom frame)
- 4 | 2 x 4 @ 21″ (top frame)
- 2 | 2 x 4 @ 44″ (top frame)
- 2 | 2 x 4 @ 28″ (top frame)
- 2 | 2 x 4 @ 13″ (top frame)
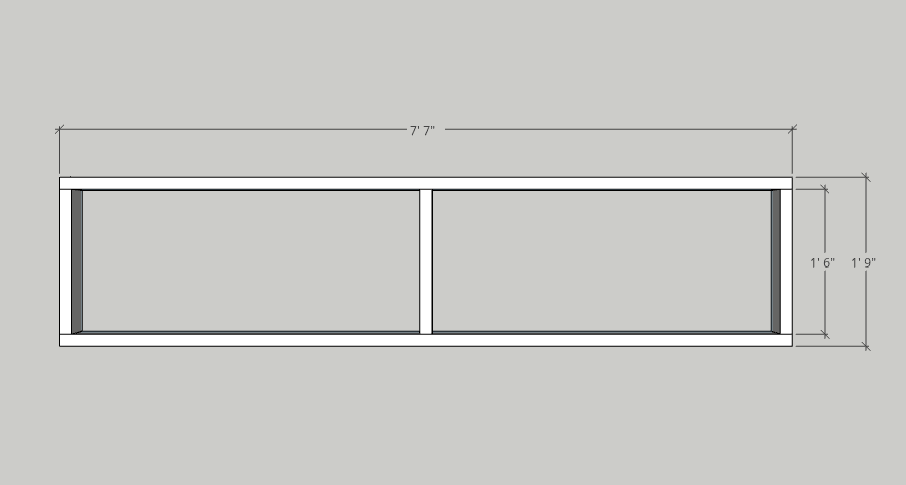
- 2 | 2 x 4 @ 91″ (bottom frame) **Tip: cut these pieces after you build the three bench sections. Measure all three sections together and cut to fit. The full width may be a little more than 91″ due to connections. See Step 4.
- 1 | 3/4″ Particle Board @ 47 1/2″ x 27″ (left tabletop)
- 1 | 3/4″ Particle Board @ 31″ x 27″ (center tabletop)
- 1 | 3/4″ Particle Board @ 16 1/2″ x 27″ (right tabletop)
- 1 | 3/4″ Particle Board @ 91″ x 21″ (bottom shelf)
Step 1.
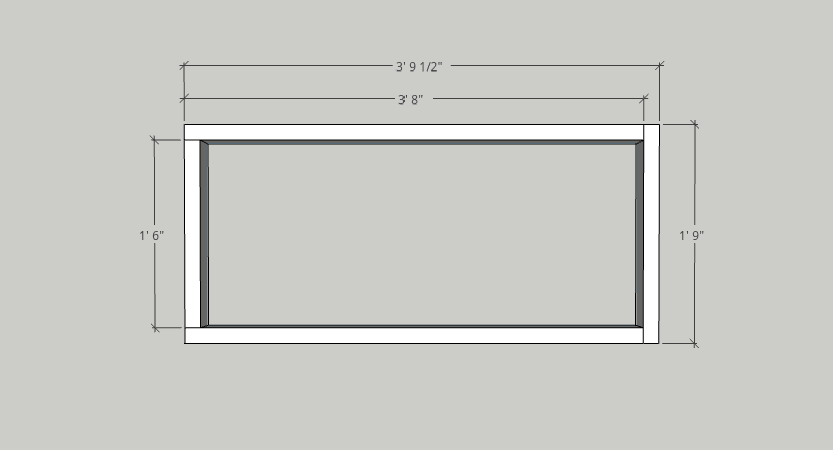
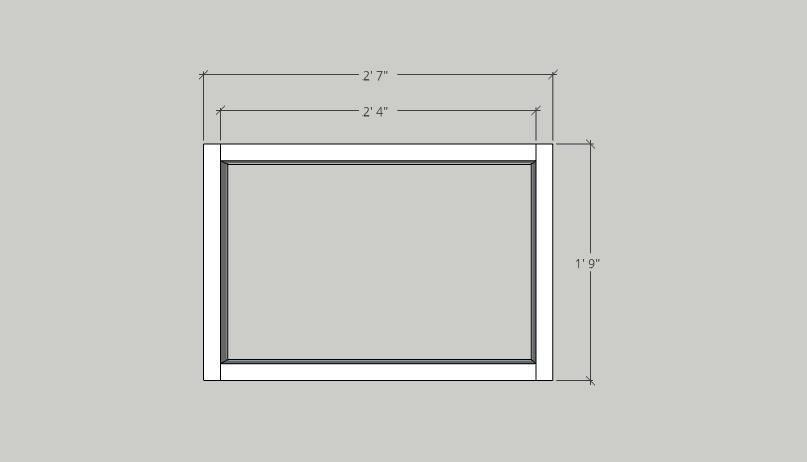
Build the three top frames according to the following diagrams.
I built three separate frames so that the miter saw section has its own frame, and the top of the saw table sits level with the bench on either side.
Left Frame:
Middle Frame:
Right Frame:
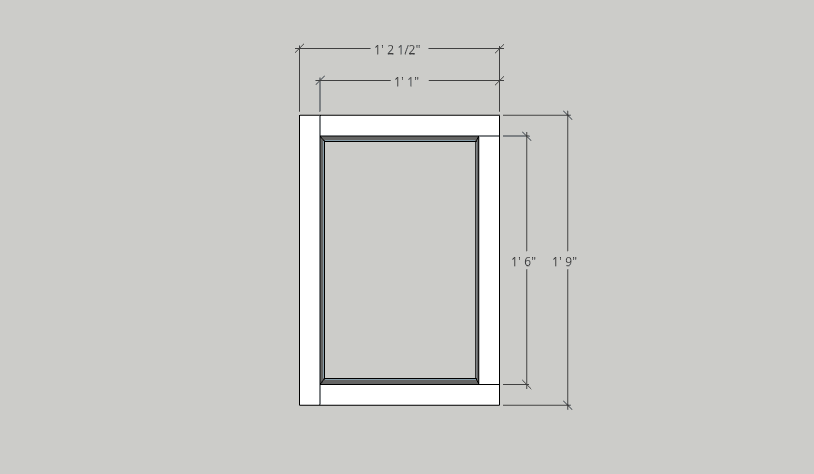
Use 2 1/2″ screws through the sides of the 2 x 4s to attach the frame pieces. You could use pocket holes if you want to hide all the screws, but I decided to screw things directly together since it’s just a workbench in the garage.
Step 2.
Lay the left frame on a level surface (I used the garage floor) and attach the legs with 2 1/2″ screws. It’s easiest to build the frame upside down to get the legs flush with the top of the frame and then flip it over.
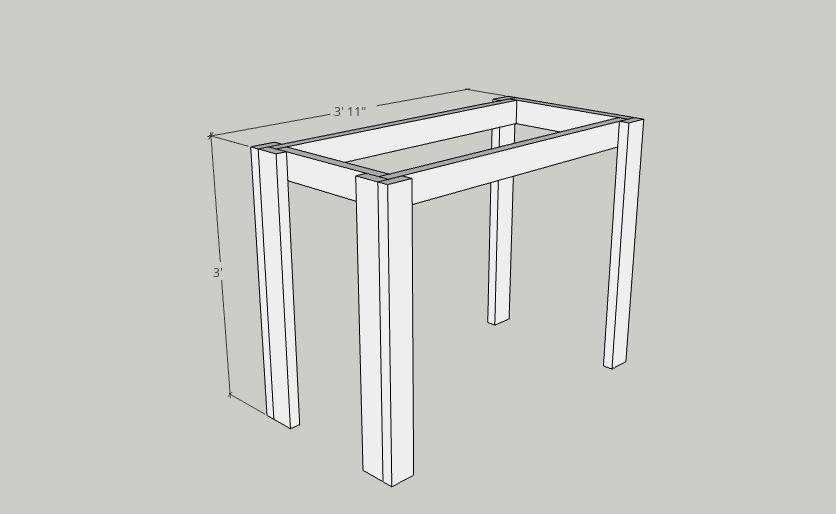
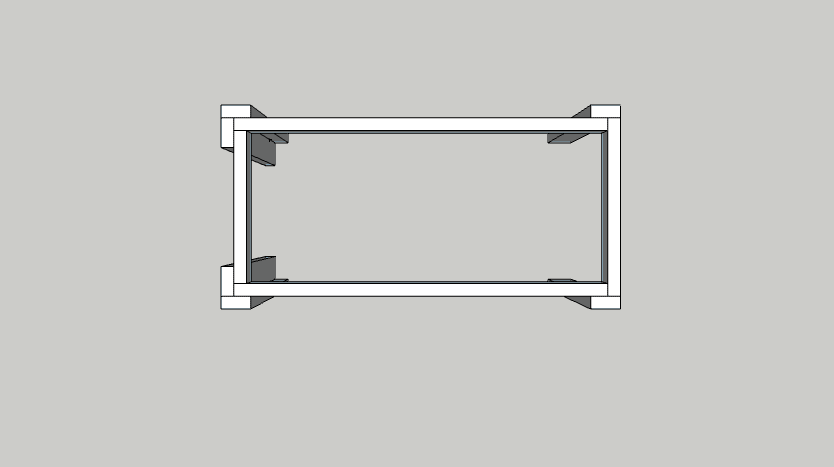
Repeat the same process for the middle frame.
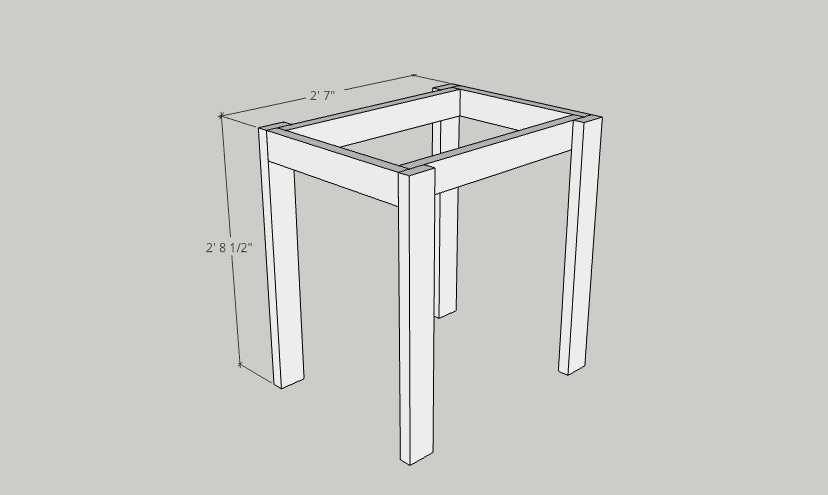
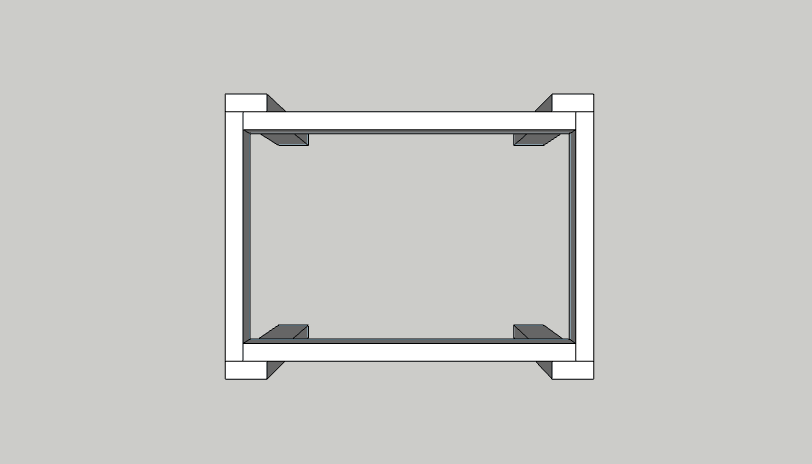
Repeat for the right frame.
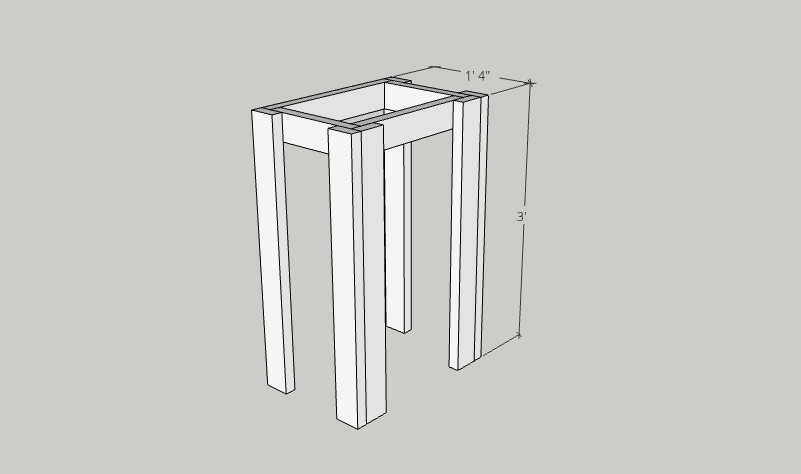
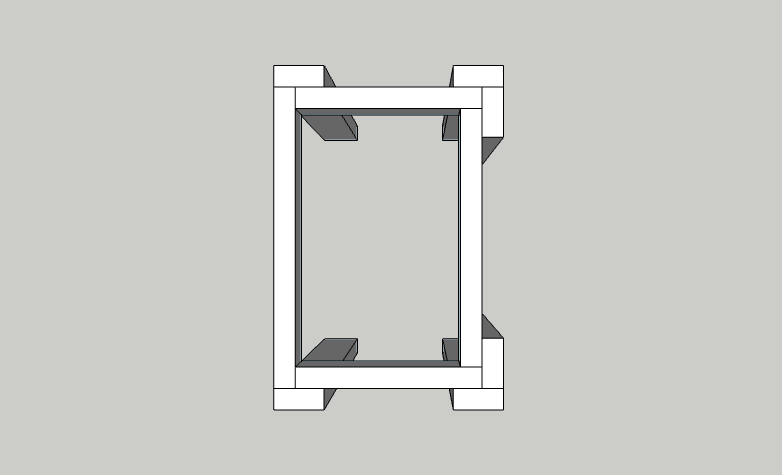
Step 3.
Build the bottom frame as shown below. Attach the boards with 2 1/2″ screws through the sides of the 2 x 4s.
** see my tip in the cut list above
Step 4.
Line the three benches up next to each other and work the bottom frame into place.
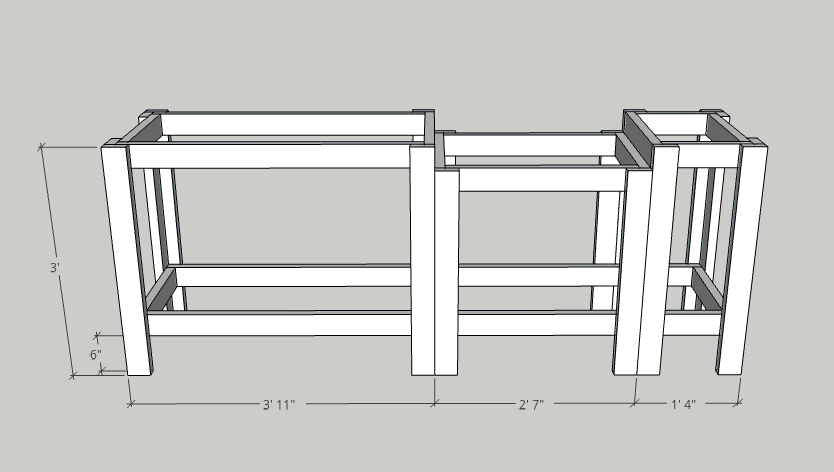
I laid the benches on their backs to get the bottom frame into place and then attached the frame with 2 1/2″ screws through each of the legs.
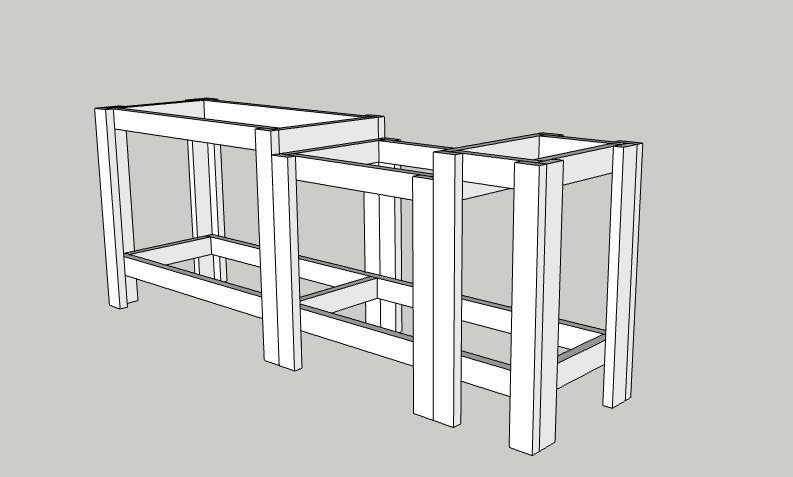
Step 5.
Lastly, attach the tabletops and bottom shelf. I had the guys at Home Depot rip the particle board sheet into two strips – one 27″ wide for the tabletop and one 21″ wide for the bottom shelf. Then I cut the three tabletop pieces down to size with my circular saw.
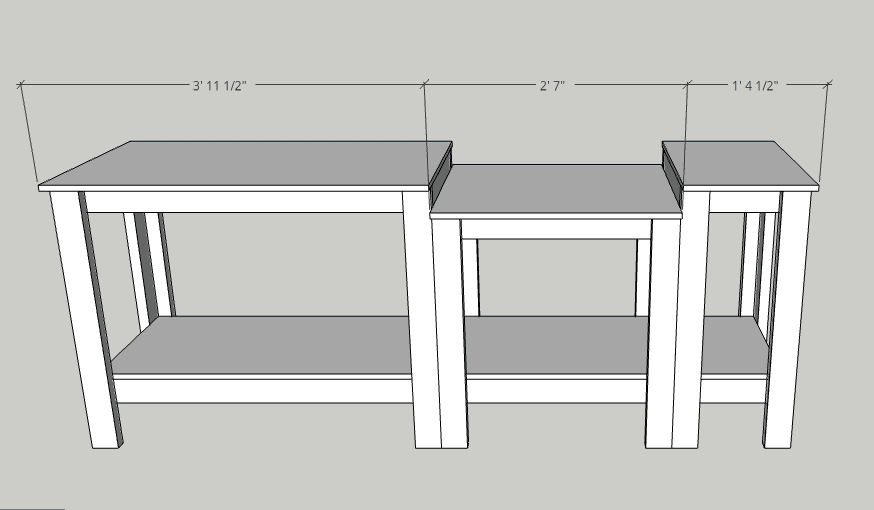
If you add up the total length of all three tabletops, you’ll notice it is 1/2″ short of the full 8′ sheet. I did that to account for the blade width when you cut the sheet into three sections. It’s not a super exact measurement – the important part is that the middle section fits flush in between the right and left bench, and that the right and left tabletops are flush where they meet the middle bench so your saw can sit there without interference.
Use 1 1/4″ screws to attach the tabletops and shelf to the frame. I just countersunk the screws so they won’t catch on anything.
Go ahead and stain or seal the workbench if you want. I left mine unfinished, but it’s totally personal preference!
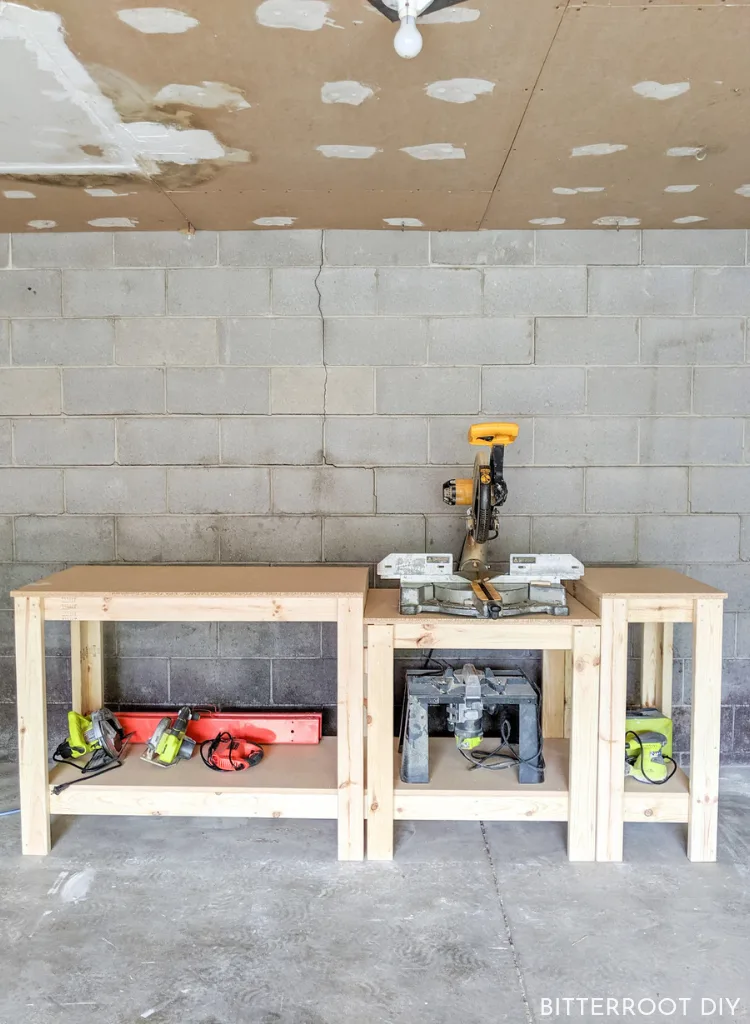
You may want to consider placing your miter saw in the center of the workbench. I offset mine to the right because of how the shop is set up (the bench doesn’t sit in the middle of the wall). Just make sure to take your space into account before you start building.
Please let me know if you have any questions and I’ll get back to you as soon as possible!
If you’d like more information, I’ve also saved a video tutorial for this workbench to my highlights on my Instagram.

Thanks for stopping by!
For more project ideas, you can find me on Pinterest. And to stay up to date with the latest shenanigans, follow me on Instagram.

Jeffrey Boddou
Sunday 16th of May 2021
Hi there. A small question, can you tell me which program you used to make the plans? I'm using sketchup now but I'm looking for a diffirent program. Thanks, Jeffrey.
tylynn_sattler
Saturday 22nd of May 2021
Hi Jeffrey,
I use SketchUp for all my plans.
Chris Hart
Tuesday 27th of April 2021
If I wanted to add a removable zero clearance cutting guide for the mitre saw that ran flush with the left and right boards so the table was 1 flat surface. What’s the best way of doing that?
Dan
Saturday 3rd of April 2021
Great looking plans! Can’t wait to get started. I’m looking to conserve even more space my basement by adding some shelving. How do you think the structure of it would hold up to adding some attached overhead shelving on either side for extra storage space above?
tylynn_sattler
Monday 5th of April 2021
This thing is definitely over-built and super solid, so I think you can add shelving just fine. Good luck!
Anne
Sunday 25th of October 2020
I came across your post while searching for stair tread ideas. Did you actually build the stair treads? If so, could you advise dimensions and the type of wood you used? Thank you!
tylynn_sattler
Wednesday 28th of October 2020
Hi there, I'm sorry but I didn't do any stairs. Someone pinned that image with a link to my site and I've tried to report it to Pinterest multiple times, but they won't remove it because I don't own the image. I'm not sure who the original owner is. Sorry for the confusion 😕
Brian MCCARTHY
Sunday 18th of October 2020
I just built this over the weekend.. ITS AWSOME.... the plans are super easy to follow. It was the first project the wife and I did together where she didn't complain about the designs. I have a table saw and I will be getting the plans for that as well..
tylynn_sattler
Tuesday 20th of October 2020
I'm so glad the plans were clear for you - that's what I strive for! I hope you get tons of use out of the new workbench!