I can’t believe Easter is only a few weeks away! I don’t know about you, but Easter is one of my favorite holidays 🙂
When we were younger, we would spend the whole day with family. We’d spend the morning at Church, then head home and put on a huge Easter egg hunt in the field with family and friends.
This post contains affiliate links. If you make a purchase from one of the links, I may make a small commission at NO EXTRA COST to you. This helps keep the tutorials and plans free here at Bitterroot DIY. Thank you for your support! See my full disclosure here.
There was just nothing better as a young kid – running around a wide open field, beautiful Easter dress, wind in your hair, sun on your face, old plastic Walmart bag in hand, searching for hidden gems 🙂 And the ultimate prize?
The Big Daddy egg.
Every year, the parents/adults pooled together a little cash (like $10 haha) for the Big Daddy … jackpot for any kid.
It was huge.
And green.
And plastic.
Just like every other plastic Easter egg.
But bigger and better.
Turns out … it was really only about the size that my hand is now.
But it seemed so big and glorious in our young eyes 🙂

Ahhh … Easter. How I miss those simple days with all my little siblings and I running around 🙂
Now that I have a son of my own, I want to make Easter just as fond a memory for him.
So I’ve been working on some fun decor and crafts this year in preparation.
I’ve stocked the house with plastic eggs.
Placed the bunnies on the shelves.
Made some more bunnies just for good measure.
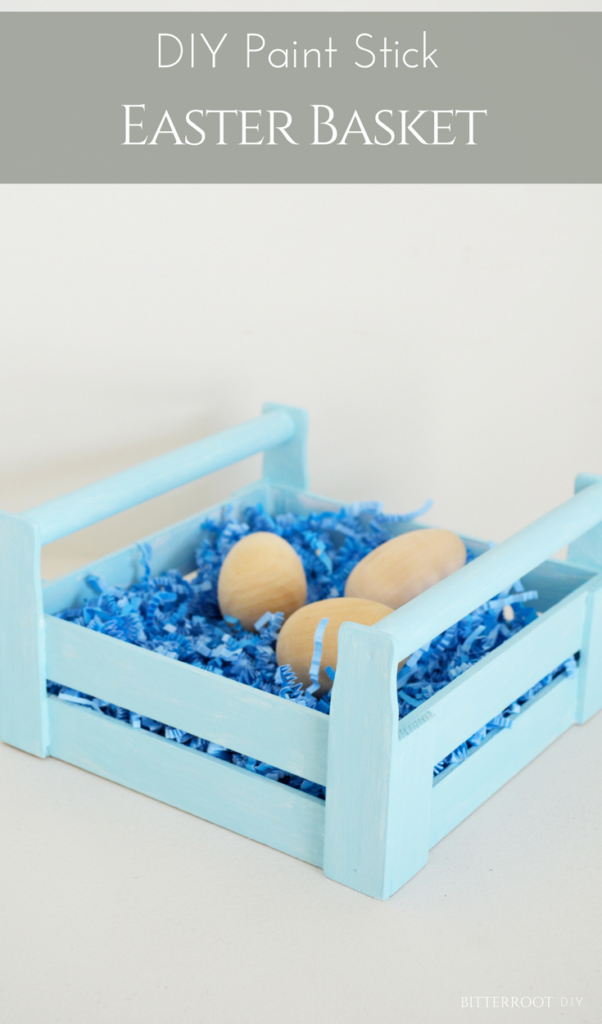
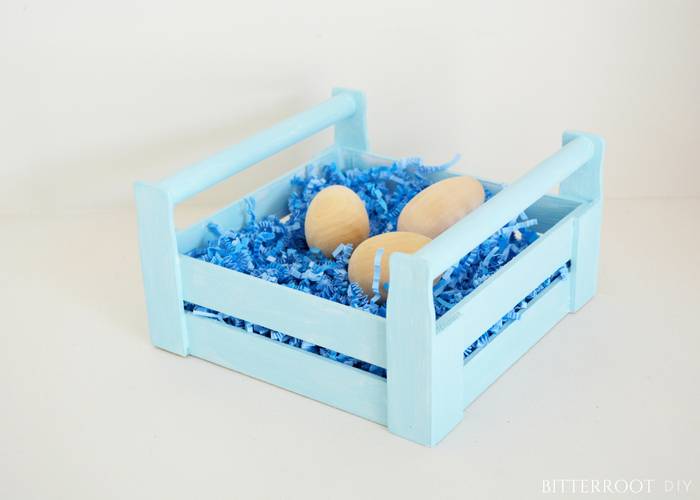
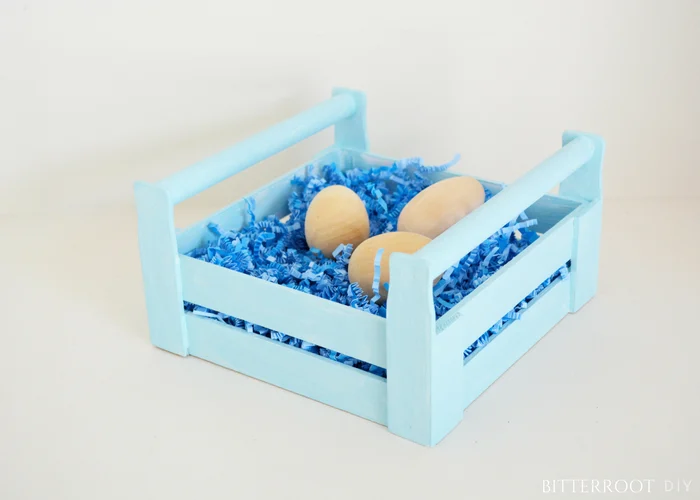
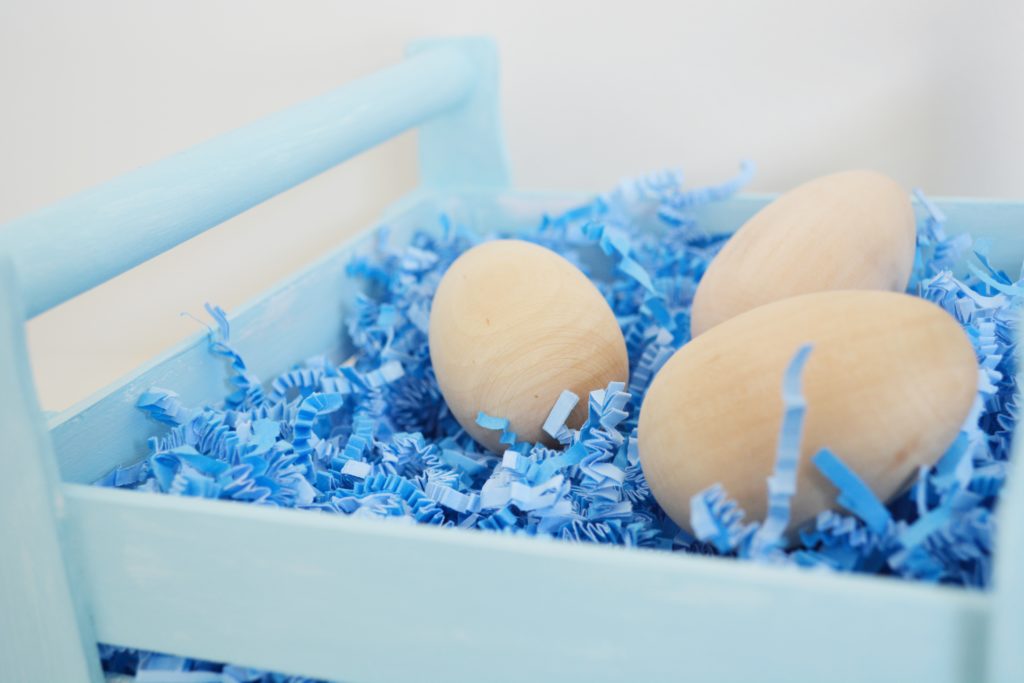
And made Weston his very own Easter basket 🙂
It was a quick project … completed during nap-times – one nap for building, one nap for painting.
Easy Peasy!
Enjoy the project!
I hope it brings you a little Easter joy 🙂
Tools & Supplies:
- 10 Paint Stir Sticks (Home Depot has packs of 8 for $0.98)
- 3/4″ Dowel (found mine at Walmart)
- Spare 7″ x 7″ board (I used a spare piece of plywood)
- Paint of your choice (I used blue chalk paint)
- Wood glue
- Stapler
- Easter Grass
- Plastic Eggs
Cuts:
- 4 | Paint Stir Sticks @ 7″ (side)
- 4 | Paint Stir Sticks @ 7 1/4″ (side)
- 4 | Paint Stir Sticks @ 4″ (handle upright)
- 4 | Paint Stir Sticks @ 2 1/2″ (side uprights)
- 2 | 3/4″ Dowel @ 7 1/4″ (handles)
- 1 | Spare Board @ 7″ x 7″ (base)
Step 1.
Assemble the tall sides of the basket.
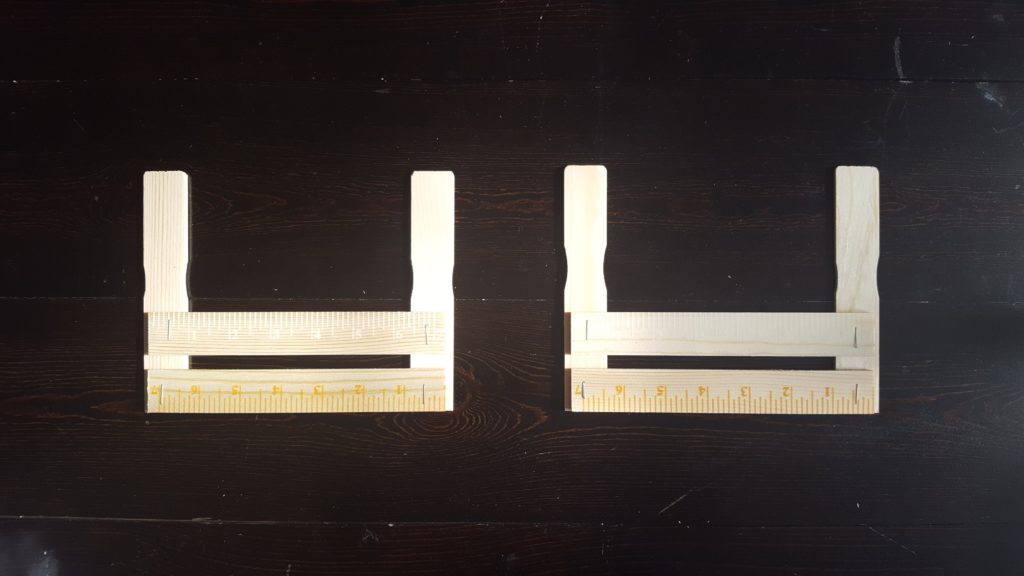
Position the first (bottom) side slat flush with the base of the handle uprights. Leave 1/8″ gap to the outside edges of the handle uprights. Attach with wood glue, let the glue set, and then staple in place.
I used a normal stapler on this project since paint stir sticks are so thin. The wood glue is strong enough to hold the basket together just on its own, so the staples are really just there for reinforcement. They don’t contribute a ton structurally.
Position the second side slat 1/4″ above the first and attach with wood glue and staples. Again, leave 1/8″ gap to the outside edges of the handle uprights.
*Tip: I used a spare paint stir stick to make sure I had the correct gap on the outside edges of the handle uprights. Just place the stir stick flush with the outside edge of the upright and set the slat flush to it.
Build two sides, as shown.
Step 2.
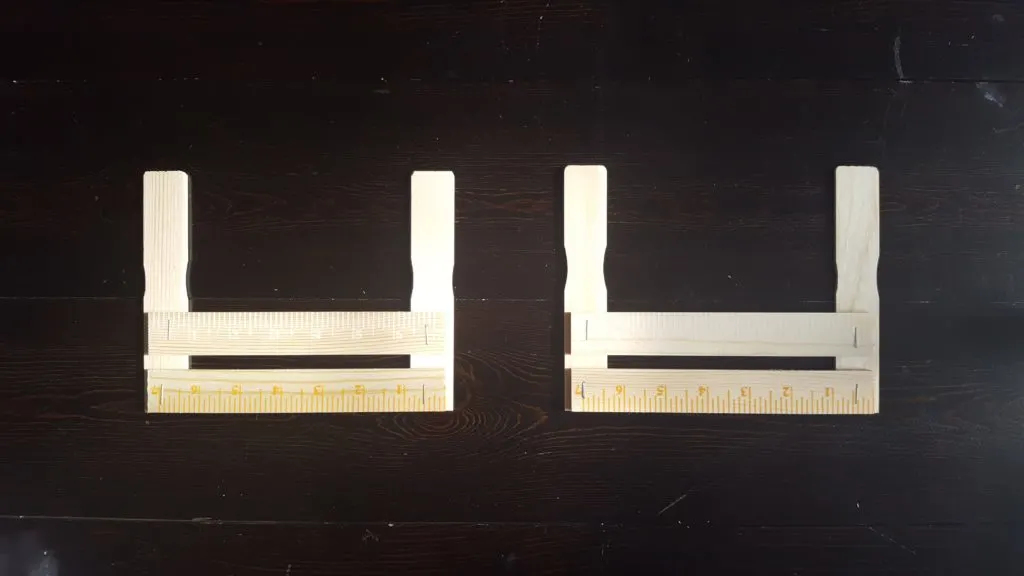
Assemble the short sides of the basket.
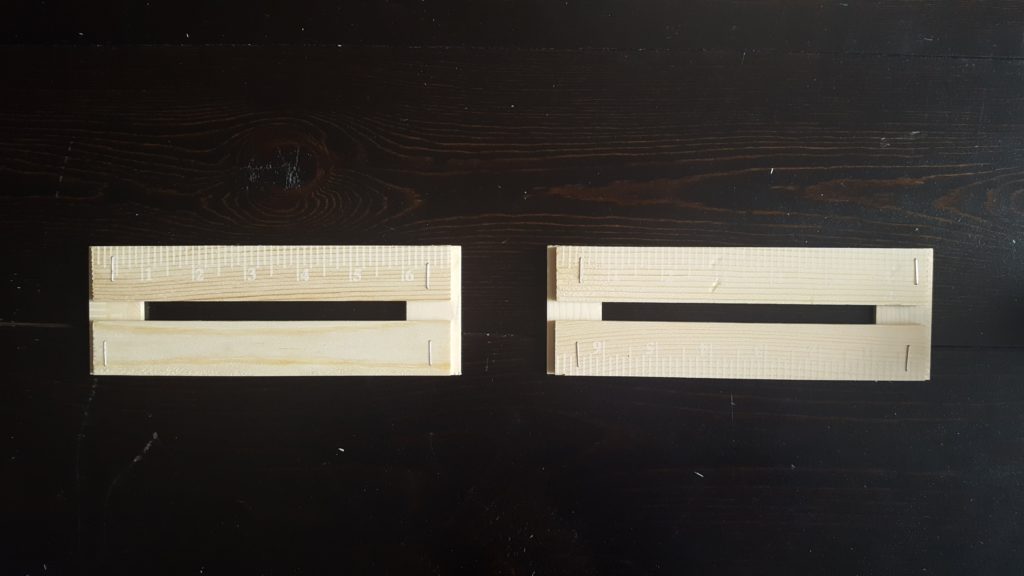
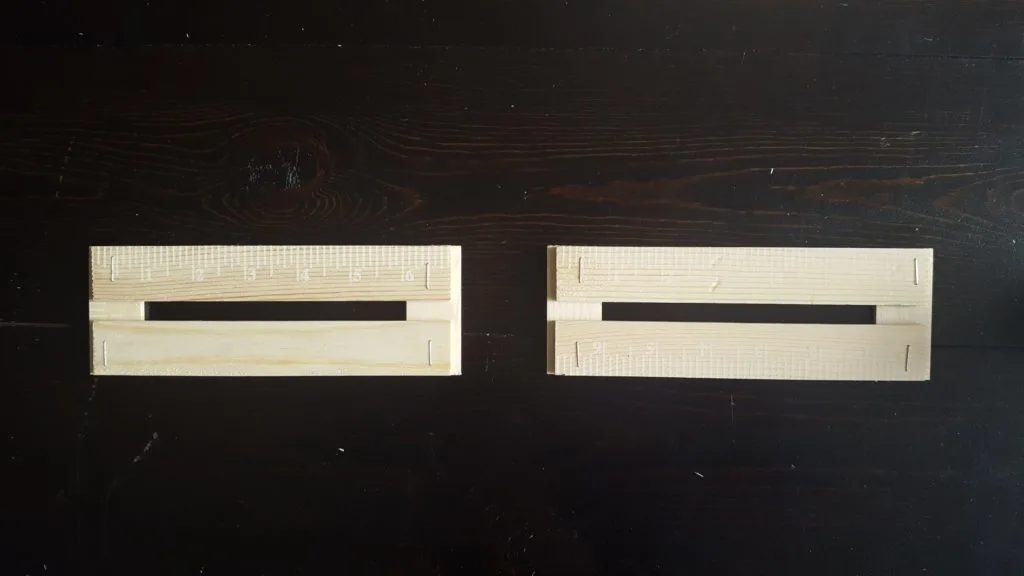
Build these the same way as the taller sides.
Position the first (bottom) side slat flush with the base of the side uprights. Leave 1/8″ gap to the outside edges of the uprights. Attach with wood glue, let the glue set, and then staple in place.
Position the second side slat 1/4″ above the first and attach with wood glue and staples. The top slat should be flush with the top of the uprights. Again, leave 1/8″ gap to the outside edges of the uprights.
Build two sides, as shown.
Step 3.
Attach the short sides to the base of the basket.
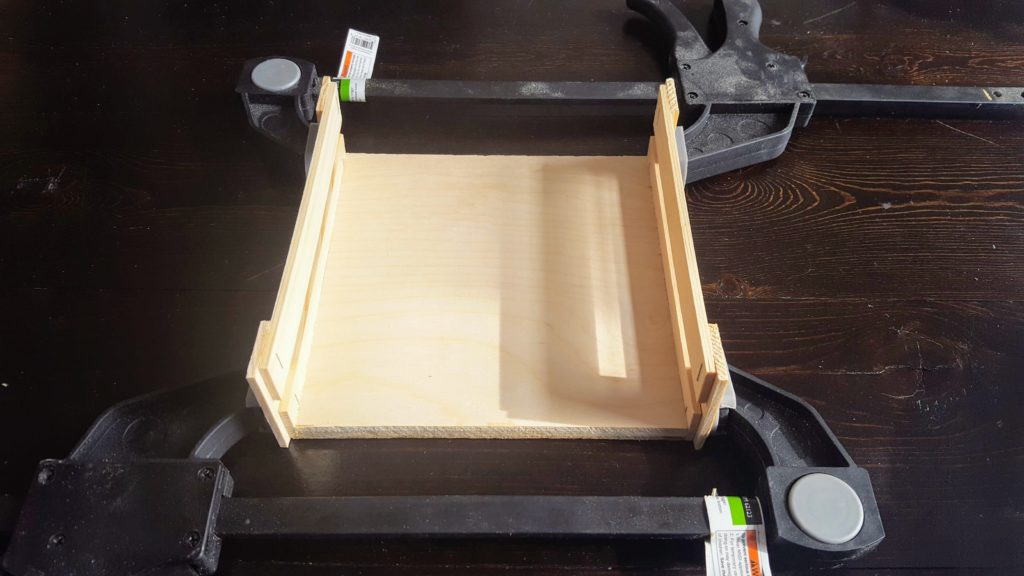

Position the sides so that the slats are flush with the edges of the basket base. The uprights should overhang the base by 1/8″ on either side.
Attach with wood glue, clamp in place, and let dry.
Step 4.
Attach the tall sides to the base of the basket.

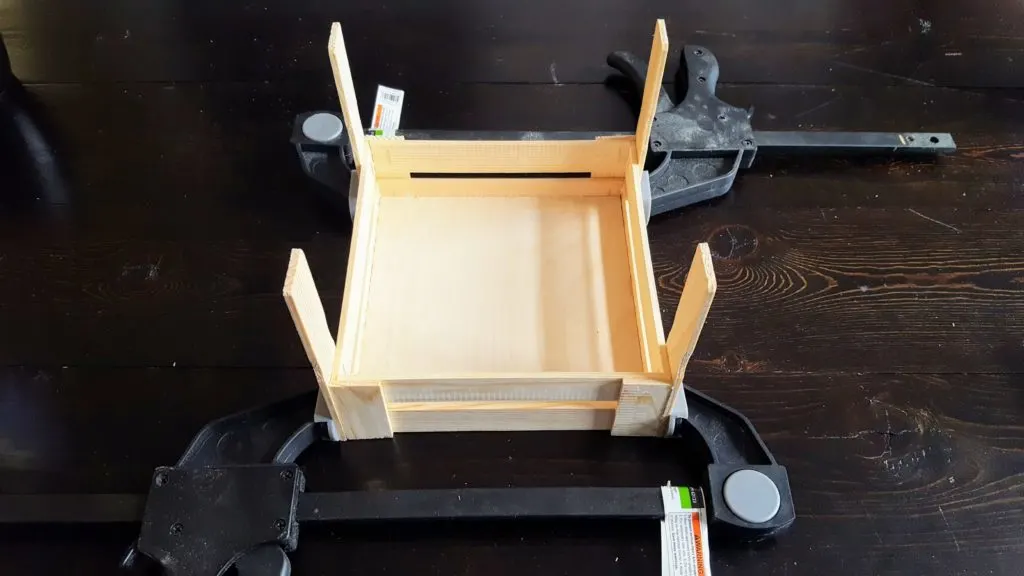
Position the tall sides flush with the base and short sides. Attach with wood glue, clamp in place, and let dry.
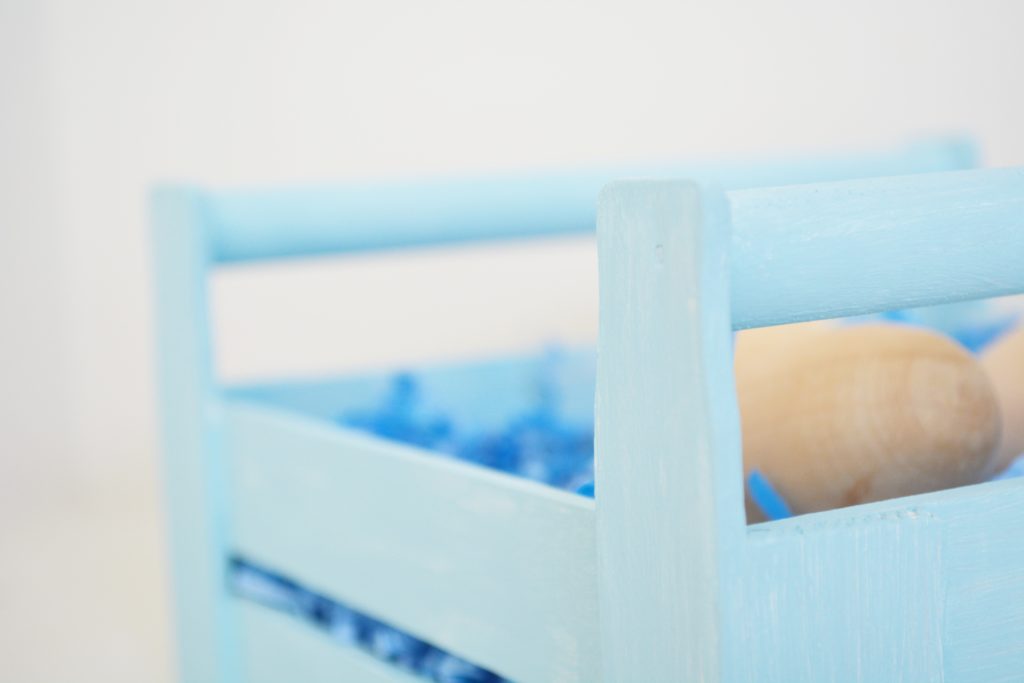
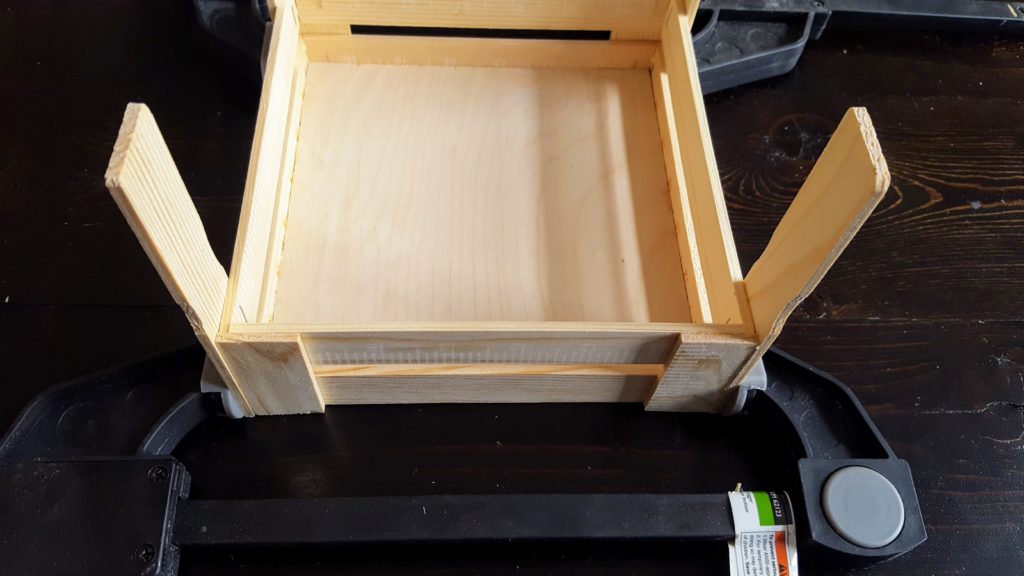
Here is a closer photo to show how the corners come together:

Step 5.
Attach the handles with wood glue, clamp in place, and let dry.
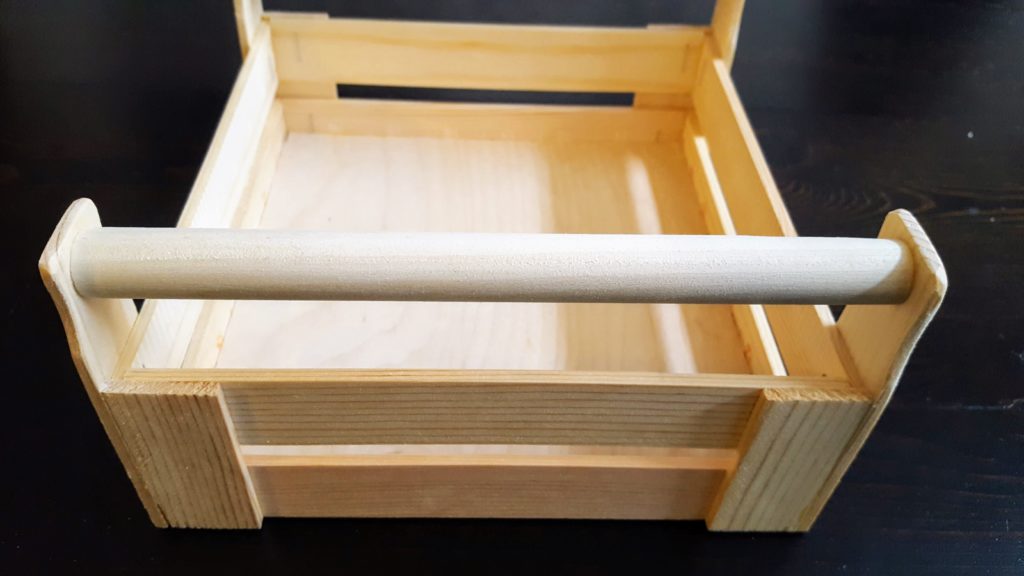
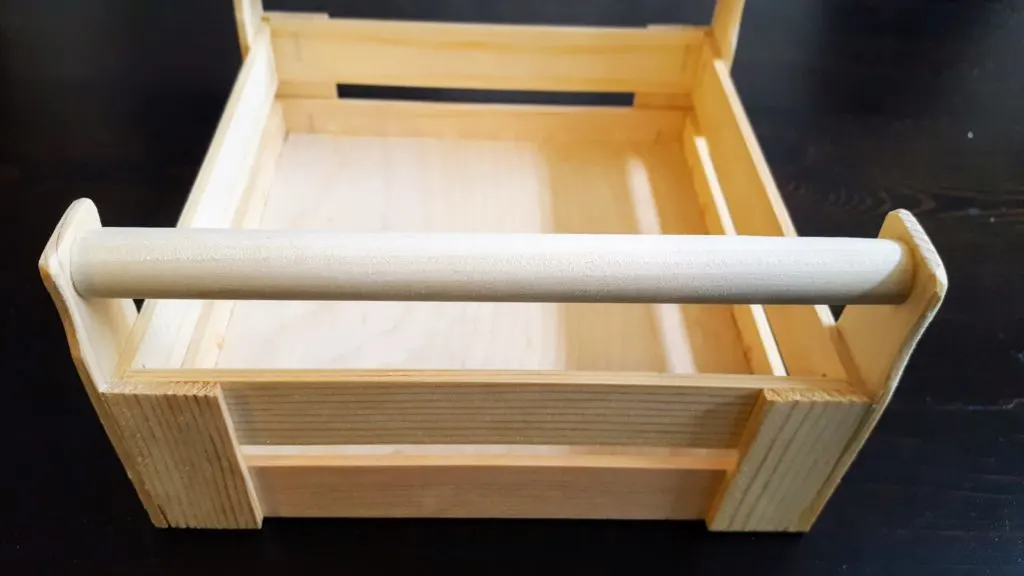
I stapled the ends of the handles into place once the wood glue was dry for a little extra reinforcement.
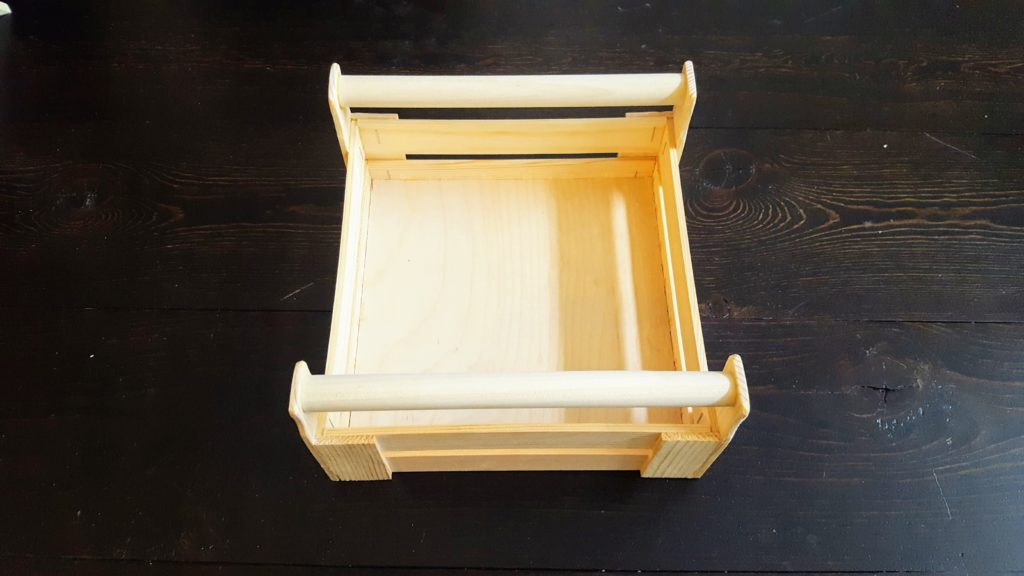

Step 6.
Sand and finish as desired.
I gave the basket a light sanding by hand to remove any little splinters and the markings on the stir sticks.
I finished it with chalk paint in “Pool” from Walmart (Waverly was the brand).
Last but not least, fill it with a little faux Easter grass and a few eggs 🙂

Let me know if you have any questions and I’ll get back to you as soon as possible!
Thanks for stopping by Bitterroot DIY!
For more project ideas, you can find me on Pinterest. And to stay up to date with the latest shenanigans, follow me on Instagram.
![]()
![]()