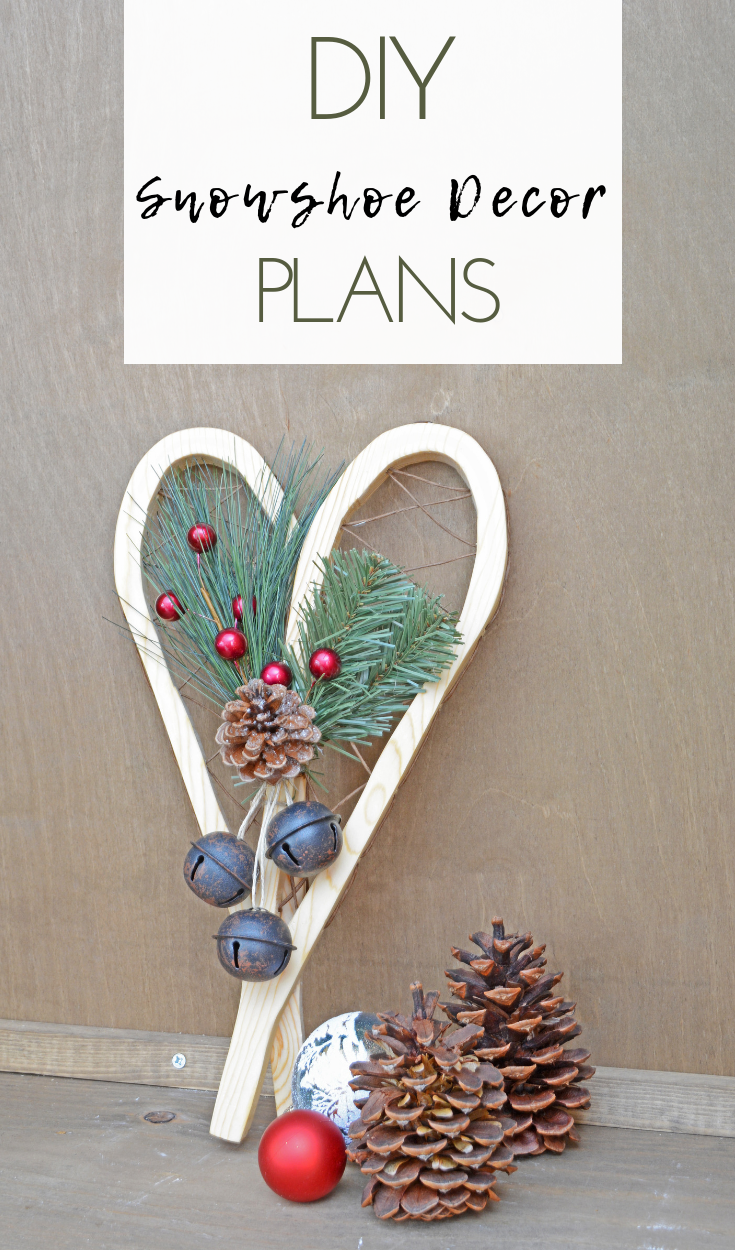
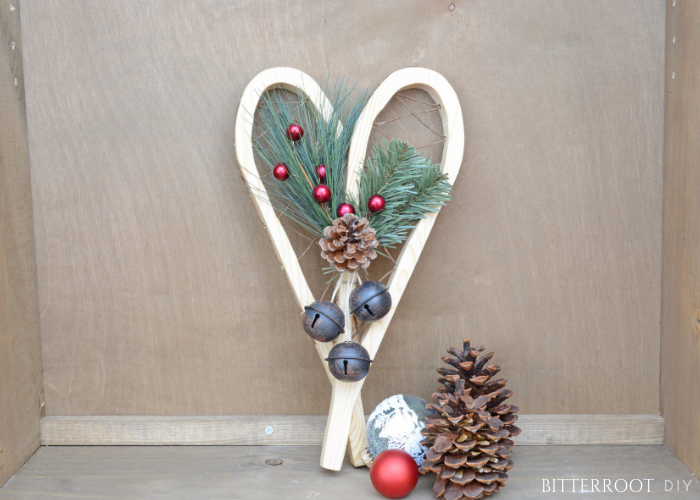
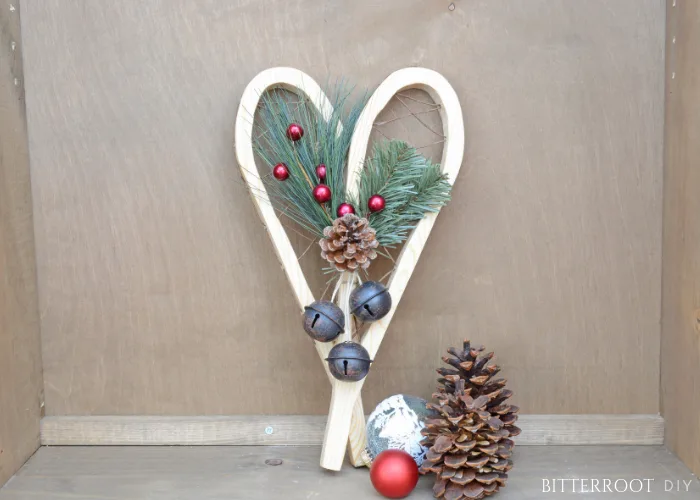
Build your own mini snowshoes for a fun DIY Christmas Decoration.
This post may contain affiliate links. If youmake a purchase from one of the links, I may make a small commission at NOEXTRA COST to you. This helps keep the tutorials and plans free here atBitterroot DIY. Thank you for your support! See my full disclosure here.
With Christmas just a few weeks away, I’ve been busting out decorations like crazy over here. I started a little late this year, but I’m trying to make up for it! These mini snowshoes are one of my favorite seasonal items I’ve made. They’re a simple DIY Christmas decoration – perfect for a scrap wood project!
Enjoy the free plans!
Tools & Supplies:
- Jigsaw
- Sandpaper
- Floral Bind Wire
- Hot Glue Gun & Glue
- Sleigh Bells
- Christmas Greenery
- Scrap Wood (I cut both snow shoes out of a 1 x 12)
Step 1.
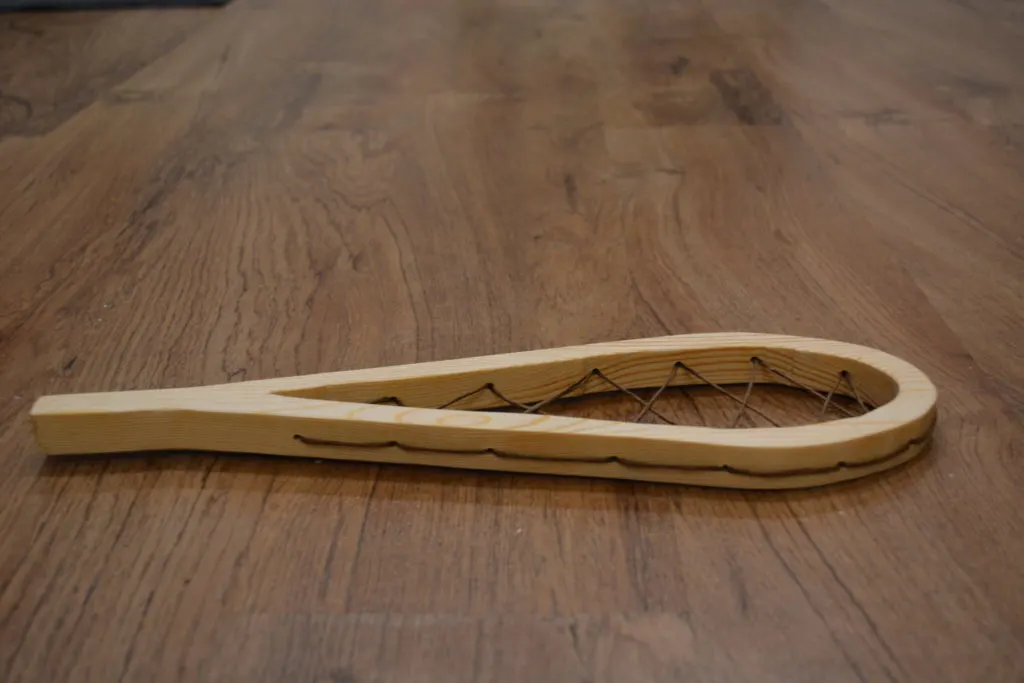
Download the snowshoe shapes part 1 & part 2 and trace two snowshoes onto a scrap wood board. Simply print the shapes, cut out the silhouette, tape them down to your board where the edges line up (approximately), and trace. Once you’ve finished tracing, cut both snow shoes out using a jigsaw.
*Tip: to cut out the center part of the snowshoe, first drill a hole in the center. Then insert the jigsaw blade into the hole and saw your way out to the edge and around the shape.
Step 2.
Drill 1/8″ holes along the outside of both snow shoes. Space the holes 1″ apart and line them up along both edges. This is where you’ll lace up the snowshoes (ignore the laces in the photo below).

Step 3.
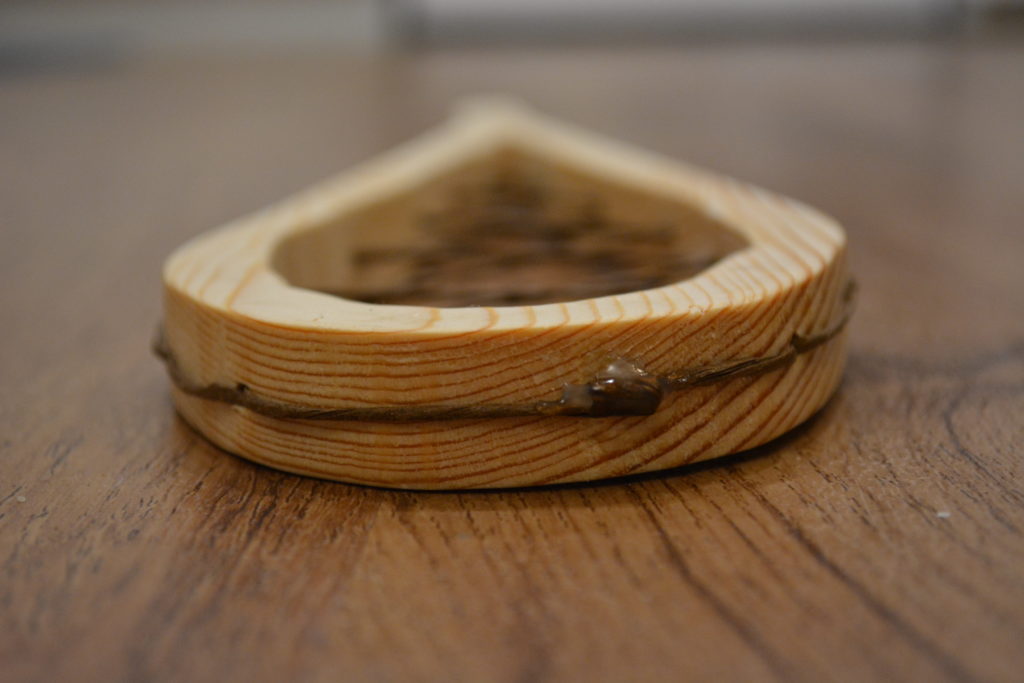
Once you’ve drilled holes along the edges, sand both snowshoes to smooth out any rough edges from the jigsaw and drill.
Step 4.
Finish the wood as desired. I sealed these snowshoes with boiled linseed oil that I had on hand from the cedar blanket chest, but any type of wood finish will work.
Step 5.
Lace up each snowshoe with floral bind wire.

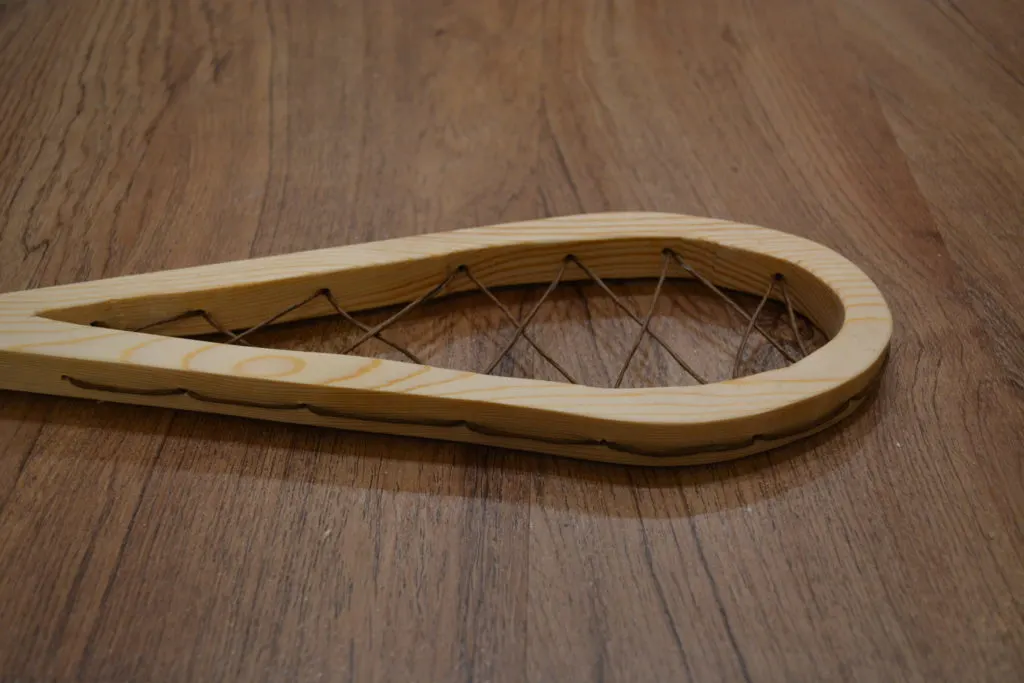
Work your way from the right top of the snowshoe down to the bottom in a zigzag pattern. Repeat the zigzag from the top to the bottom starting on the left side.
You should have two loose ends at the top and two loose ends at the bottom after lacing. Tie the top loose ends together and hot glue them in place on the top of the snowshoe.

Tie the bottom loose ends together and hot glue them to the back of the snowshoe.
Step 6.
Attach both snowshoes to each other. I added a 1 1/4″ screw through the bottom of the snowshoes and tied them together in the middle once I added the greenery to the front.


Step 7.
Now for the festive part! This is entirely up to you depending on the look you want, but I’ll share what I did for reference.
Start with some faux pine branches, faux cranberry, and sleigh bells. I found the pine and cranberry at Hobby Lobby, but they’re available at any craft store this time of year. The sleigh bells are from Target.

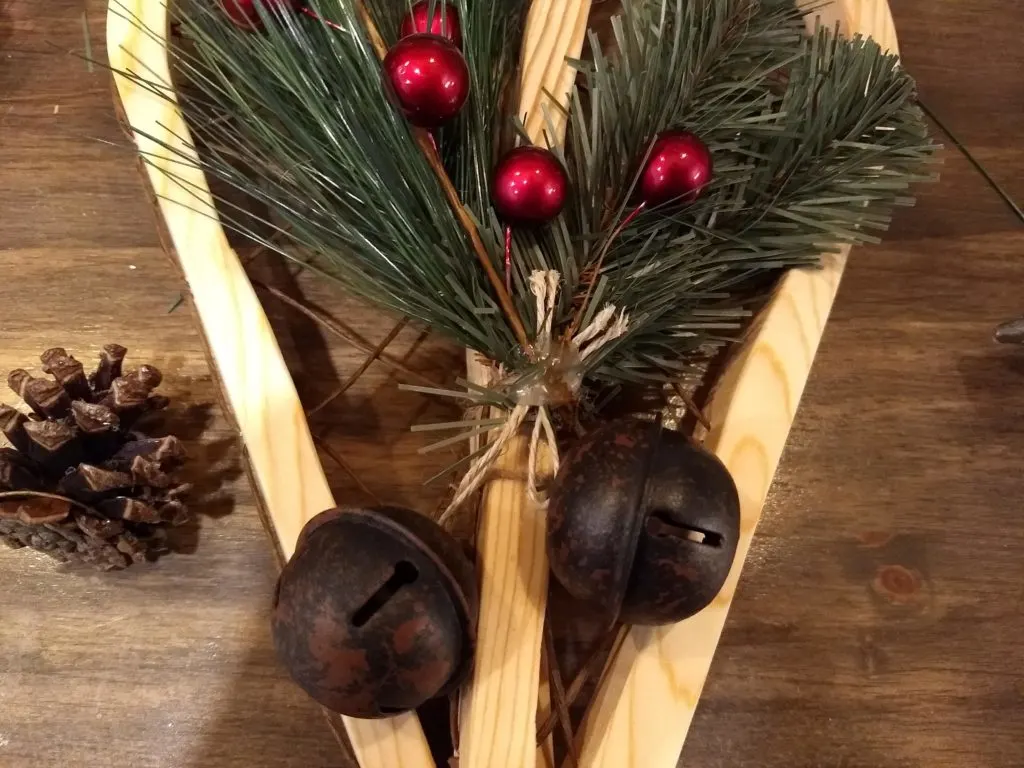
Arrange and rearrange the pieces until you like them, tie it in place with some floral bind wire, and hot glue the top to finish it off. I used jute twine in the photo below, but bind wire works much better and I ended up re-doing it later. Tie the wire at the back of the snowshoes.


Glue a pine cone to the front to hide everything.

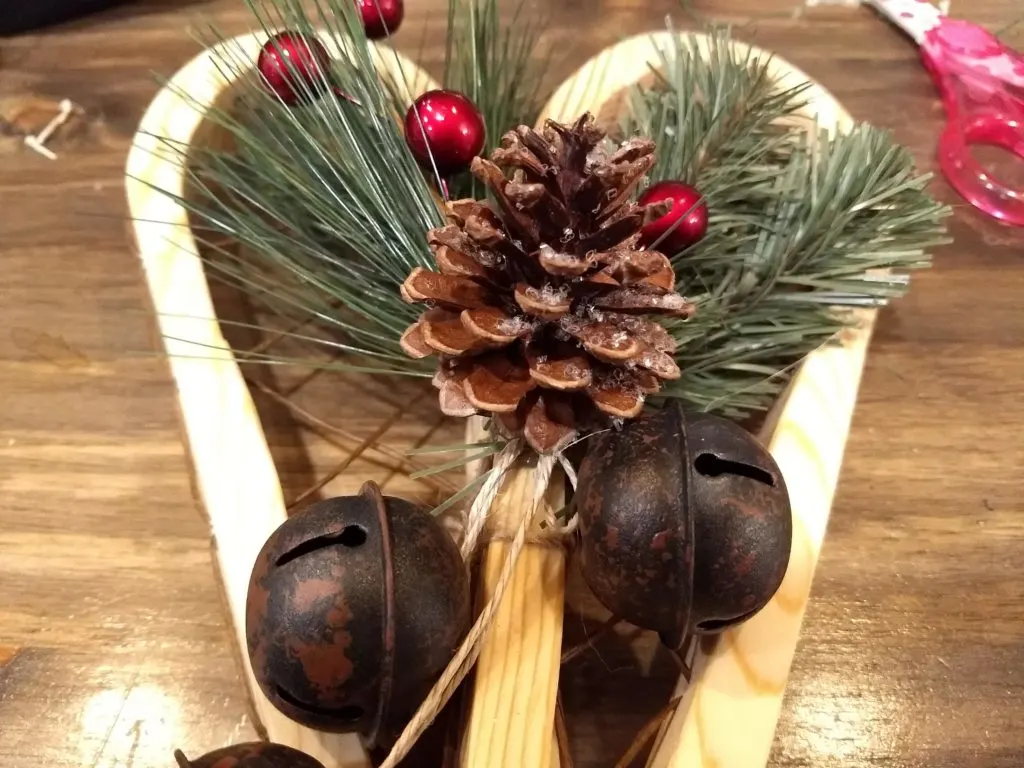
After all the pieces were in place, I wrapped a piece of floral bind wire around the base of the pine cone and twisted it taught at the back to really secure everything.
And that’s that! It looks right at home next to the tree on the bookshelf!


Please let me know if you have any questions and I’ll get back to you as soon as possible.
I’d love to see if you build your own set – tag me on Instagram @bitterrootdiy.
Thanks for stopping by!
For more project ideas, you can find me onPinterest. And to stay up to date with the latest shenanigans, follow me on Instagram.