
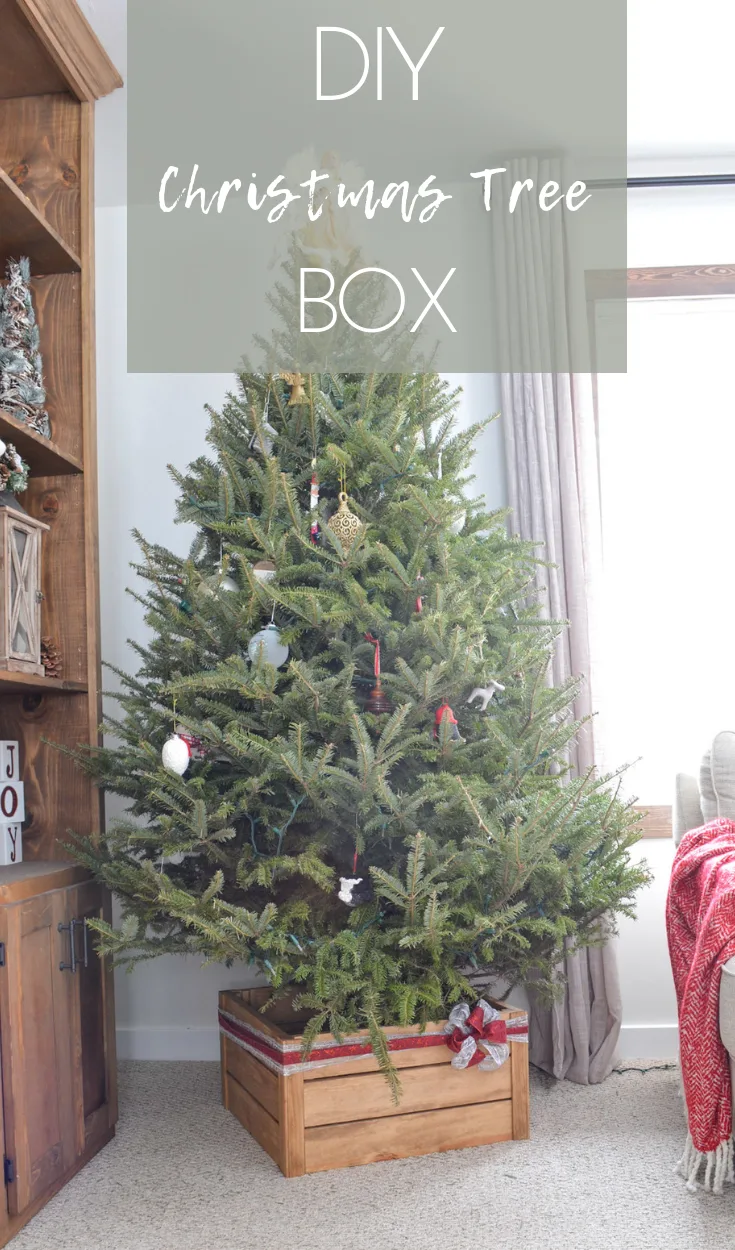
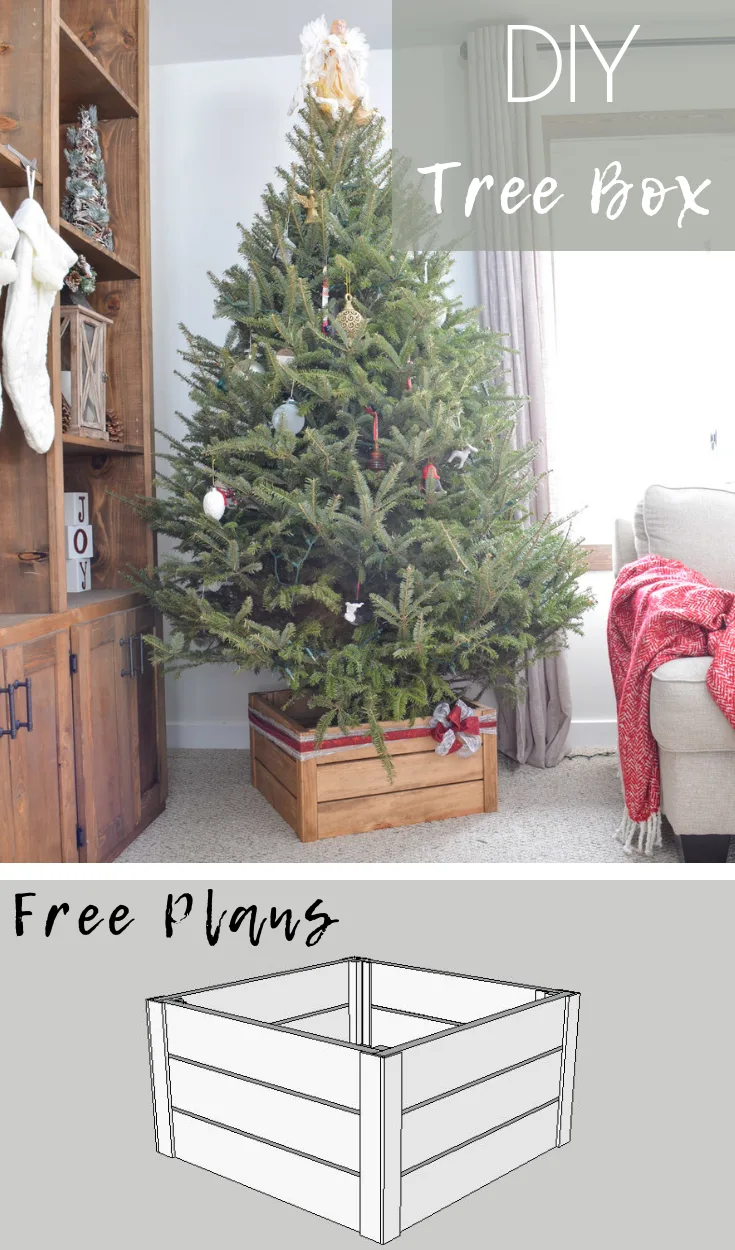
Build a DIY Christmas tree stand that easily disassembles flat storage.


This post may contain affiliate links. If you make a purchase from one of the links, I may make a small commission at NOEXTRA COST to you. This helps keep the tutorials and plans free here atBitterroot DIY. Thank you for your support! See my full disclosure here.
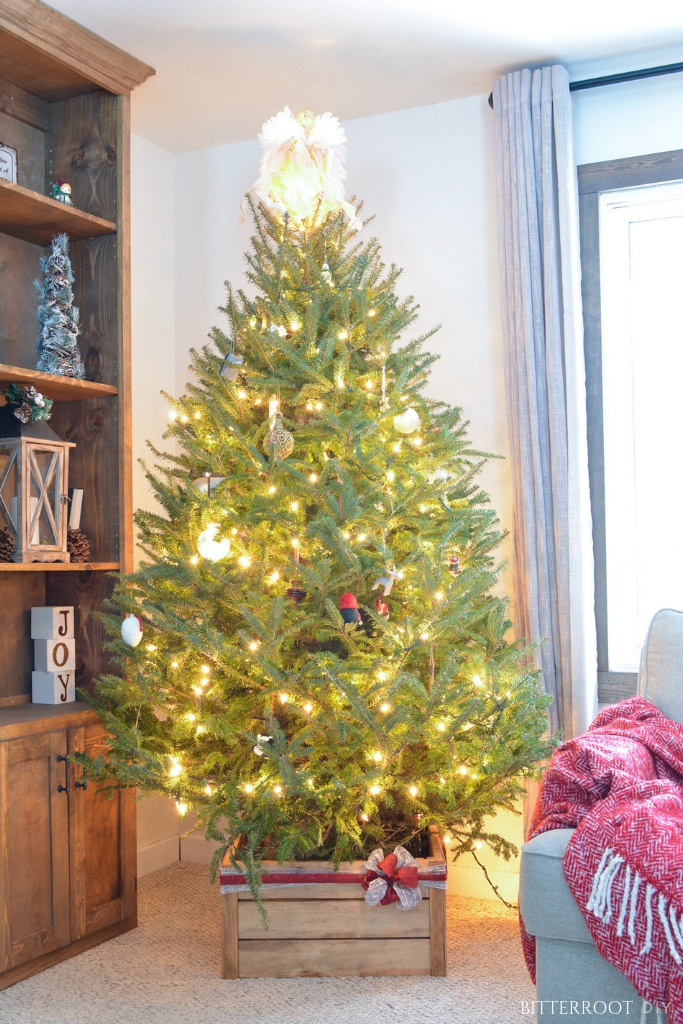
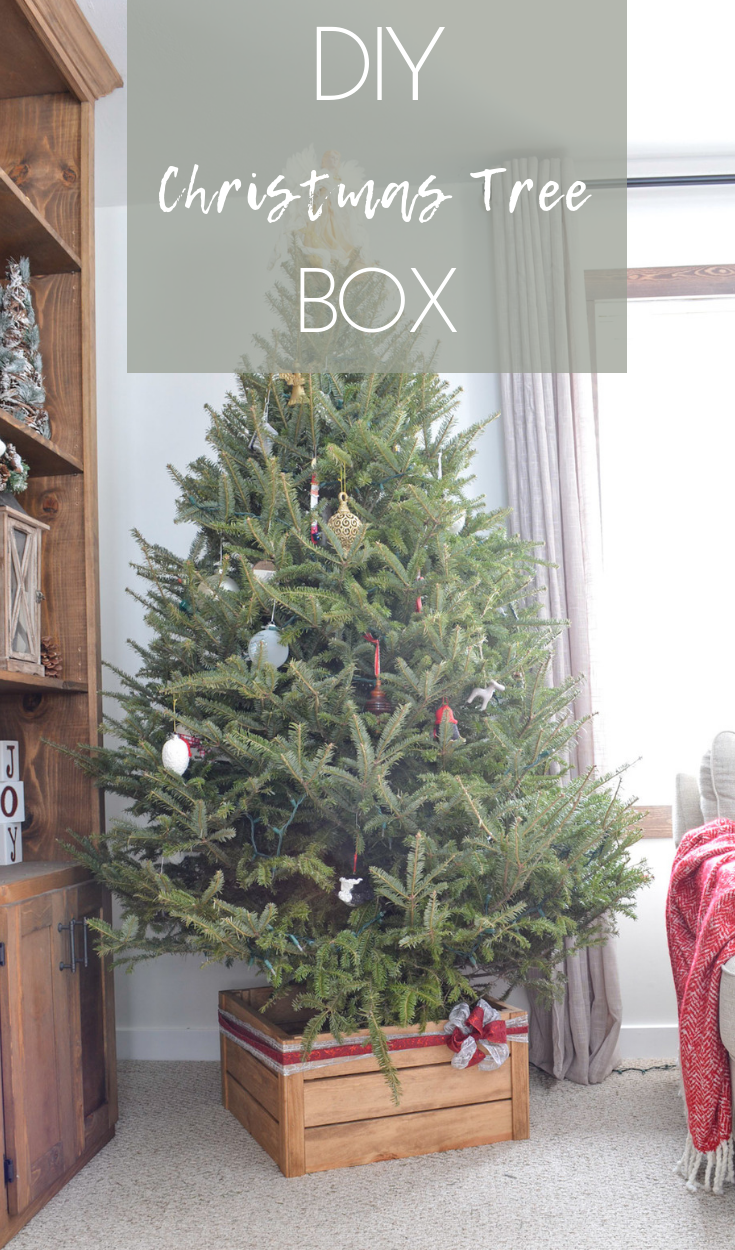
Have you seen all the new Christmas tree boxes popping up lately? Whoever originally thought of that idea is a genius! It makes so much more sense than a tree skirt. I don’t know about you, but tree skirts always end up in a muddled mess around here … makes way more sense just to put a box around the whole thing and call it done!
And don’t worry about storing a giant 20″x 20″ tree box year-round. I got you.
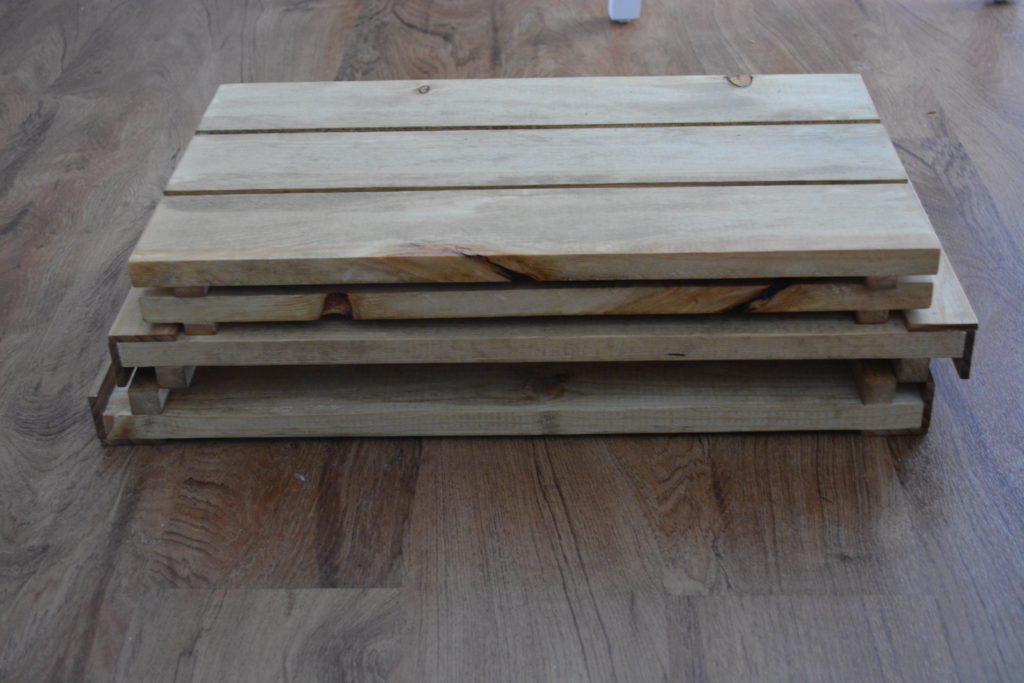
You can take this box apart and store it completely flat … no fuss, no muss. And no need to break out the drill and screws every year to put it back together! I’ve rigged up a simple groove-without-a-router method so all you have to do is slide the box together and then un-slide it when it’s time to go away!
Enjoy the free plans!
Tools & Supplies:
- Miter Saw
- Orbital Sander
- Brad Nailer (or hammer and finish nails)
- 1″ Finish Nails
- Wood Glue
- Small Eye Hooks
- Twine (or any kind of string)
Lumber:
- 3 | 1 x 4 @ 8′
- 1 | 1/4″ x 1″ Trim @ 8′
- 1 | 3/4″ Square Dowel @ 4′
- 1 | 1/4″ x 3/4″ Trim @ 4′
Cut List:
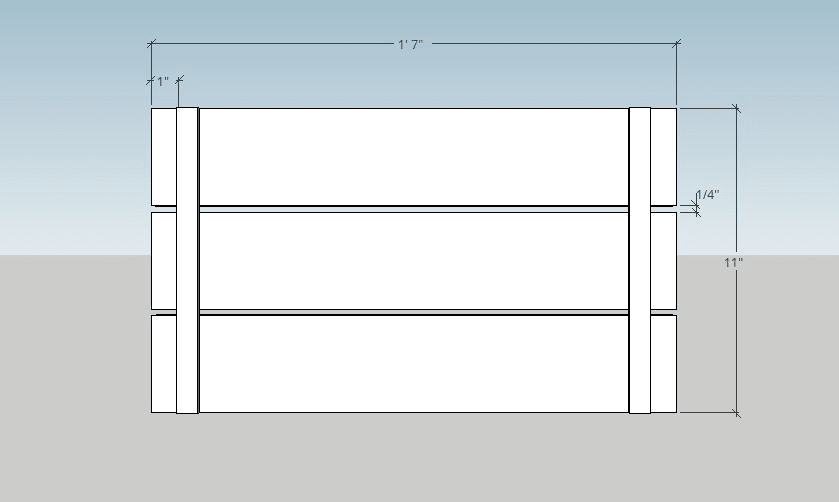
- 6 | 1 x 4 @ 19″ (short side rails)
- 6 | 1 x 4 @ 20 1/2″ (long side rails)
- 8 | 1/4″ x 1″ Trim @ 11″
- 4 | 3/4″ Square Dowel @ 11″
- 4 | 1/4″ x 3/4″ Trim @ 11″
*Tip: If you’re more comfortable working with standard lumber than trim, you can definitely replace the 1/4″ x 3/4″ trim and 3/4″ square dowels with 1 x 2s. Maintain the dimensions from the ends of the rails so the groove works correctly, but the inner dimensions won’t be a problem. I used trim since it’s a little more slim.
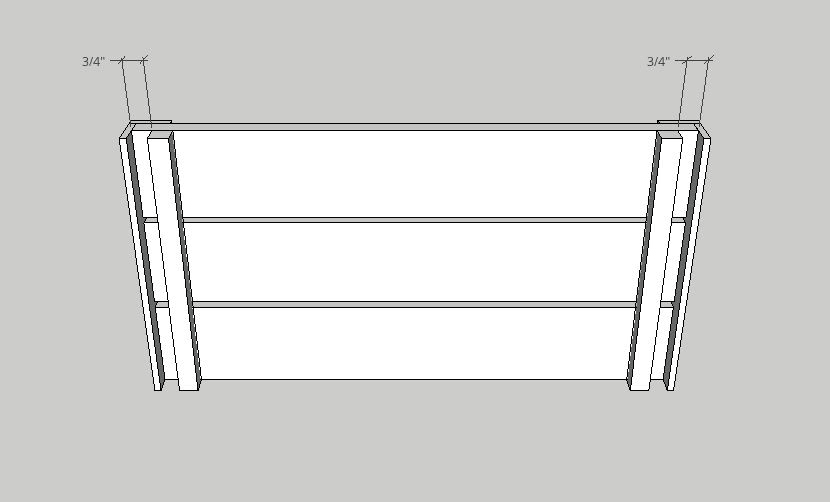
Step 1.
Build the two long sides first. Place one 1/4″ x 1″ trim piece along the ends of each board to join the rails together as shown below. Position the trim so that it overhangs the end of the rails by 1/4″. The overhang will hide the end of the trim pieces coming from the other sides.

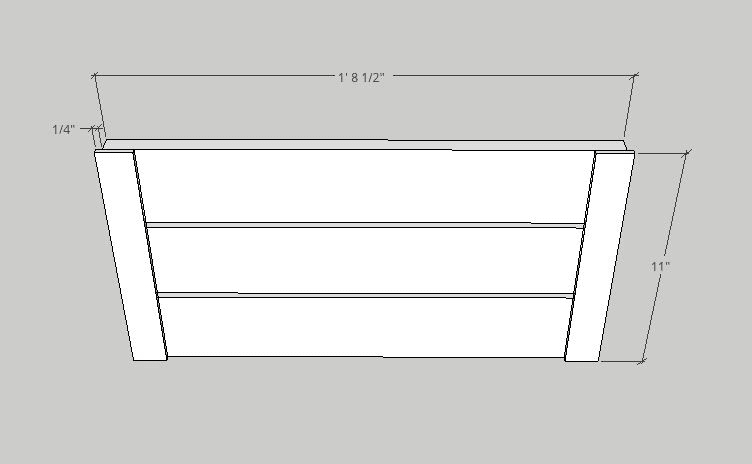
I used and extra piece of 1/4″ trim to space the long rails 1/4″ apart. Use 1″ finish nails and wood glue to secure the rails. The top and bottom of the 1/4″ trim should be flush with the top and bottom rails.
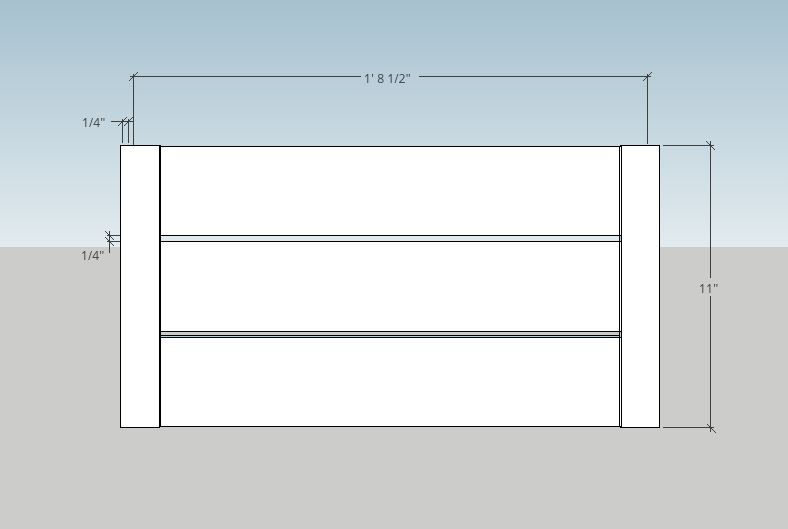
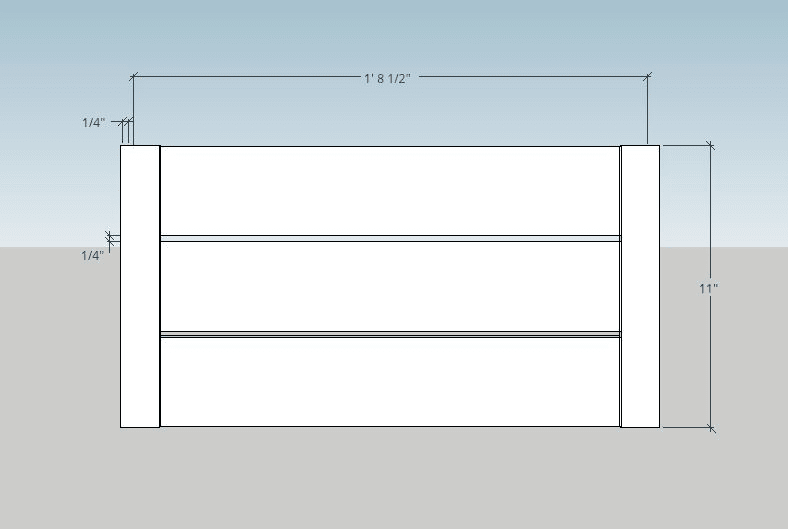
Step 2.
Add a piece of 1/4″ x 1″ trim on the ends of the boards. Attach to the rails with 1″ finish nails and wood glue.
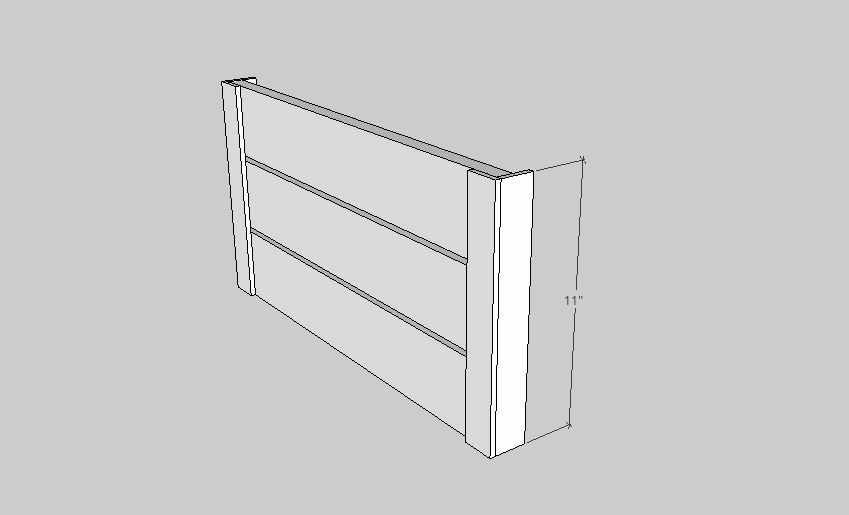

Step 3.
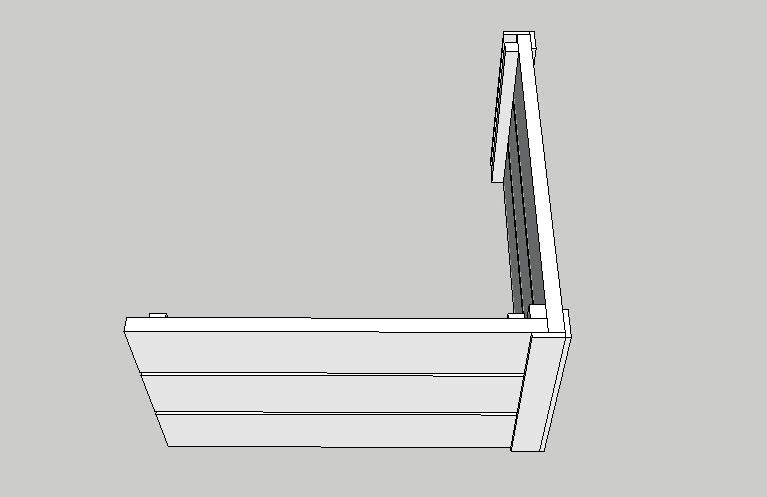
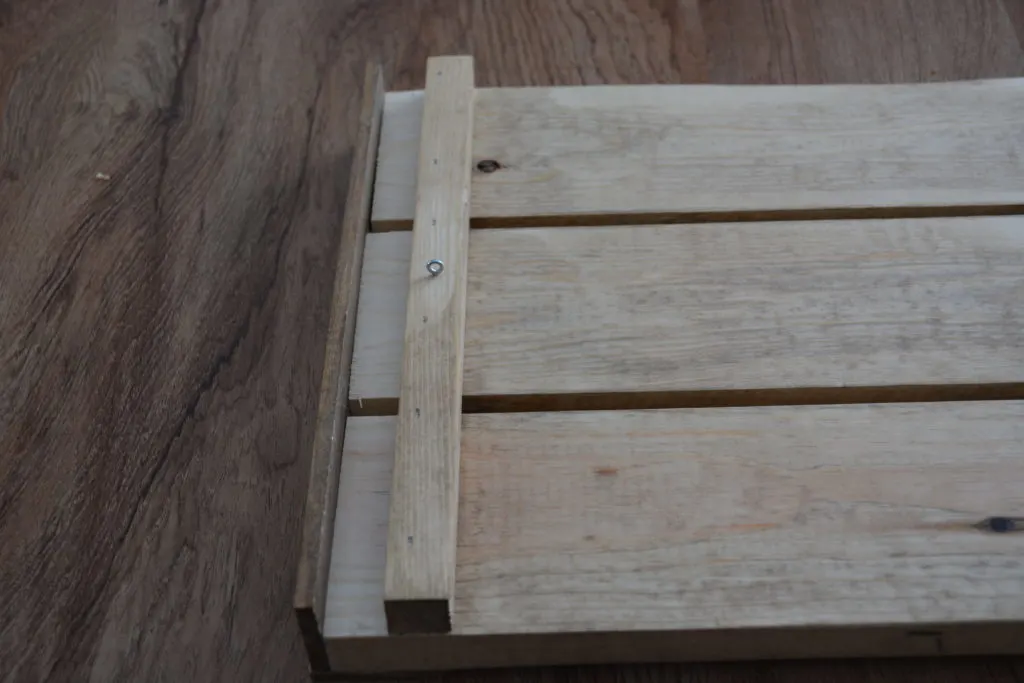
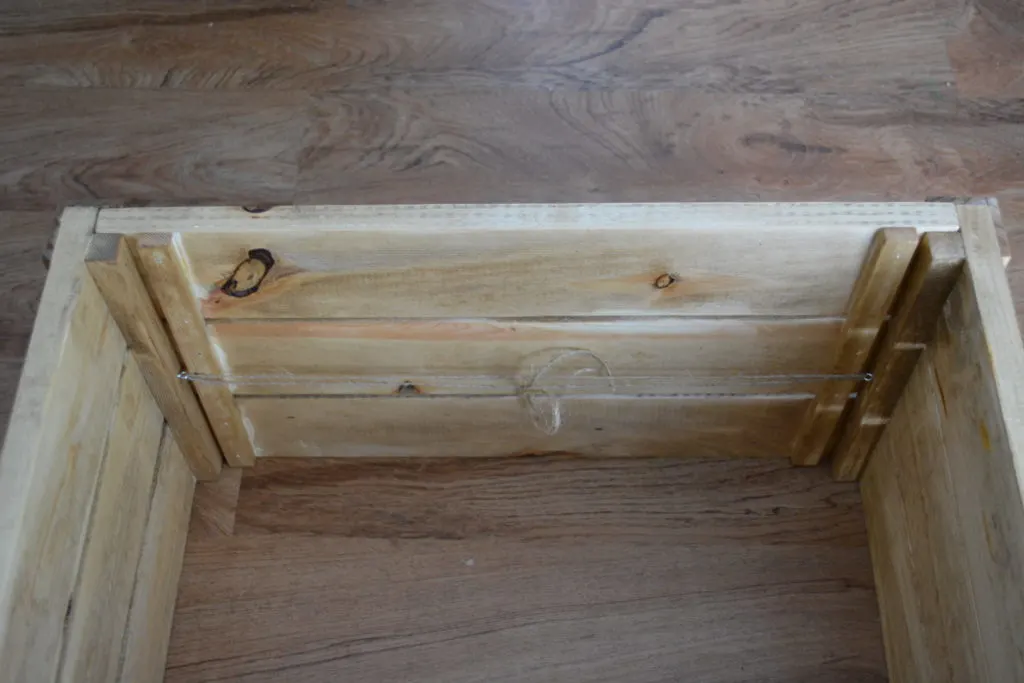
Turn the long side around and add two 3/4″ square dowels on each end. This is a view of the back:

The 3/4″ square dowels create the “groove” that you’ll slide the short sides in and out of. I had a 3/4″ square dowel from a cutoff of a previous project, but any sort of narrow scrap board will work just fine (or a 1 x 2 like I said earlier). The idea is to create that 3/4″ grove on the ends.
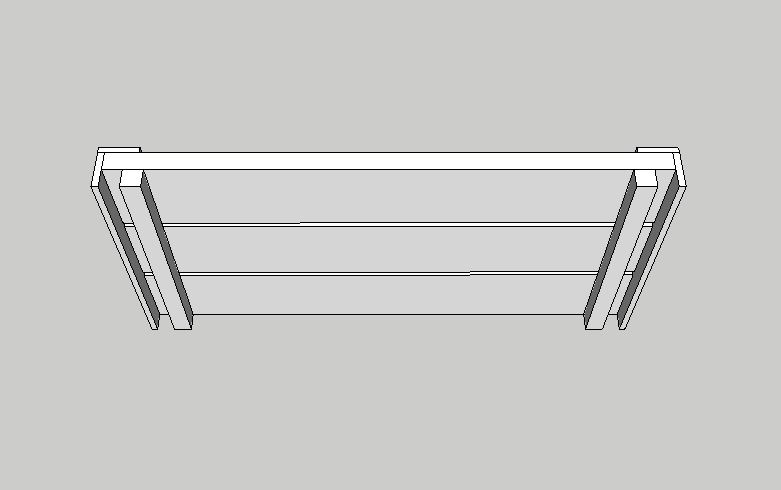
Repeat for the second long side.
Step 4.
Now for the short sides:
Join the short rails together with a 1/4″ x 3/4″ trim piece on the ends.
Place the trim 1″ in from the ends of the rails. Use 1″ finish nails and wood glue to attach the trim to the rails.
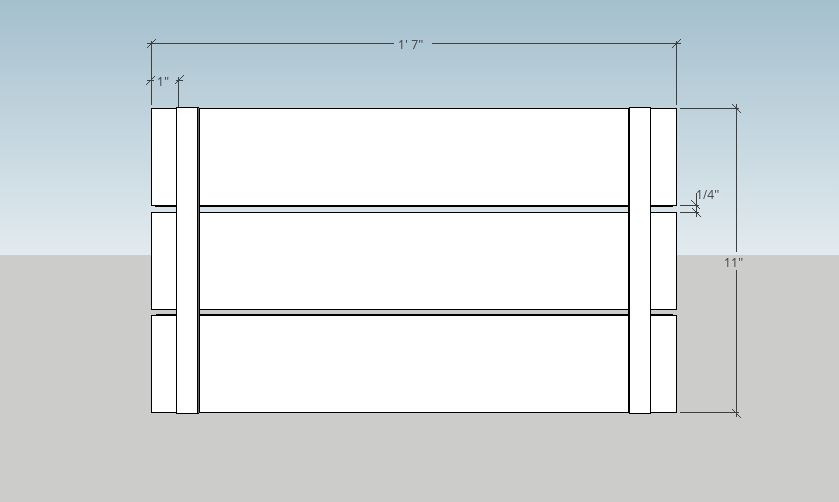
Repeat for the second short side.
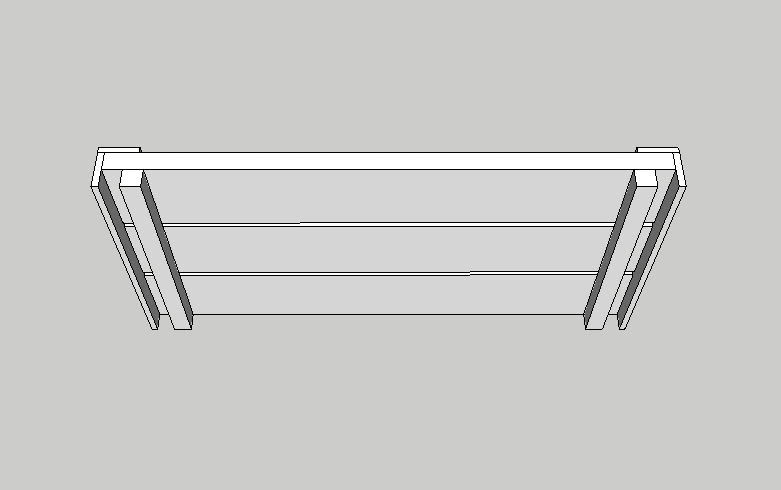
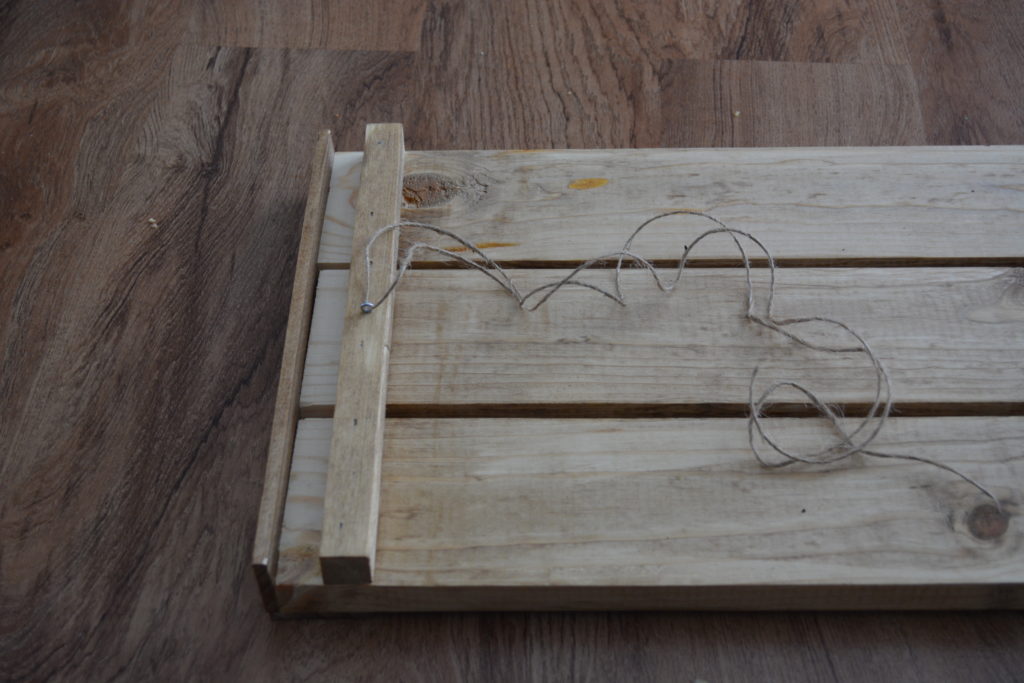
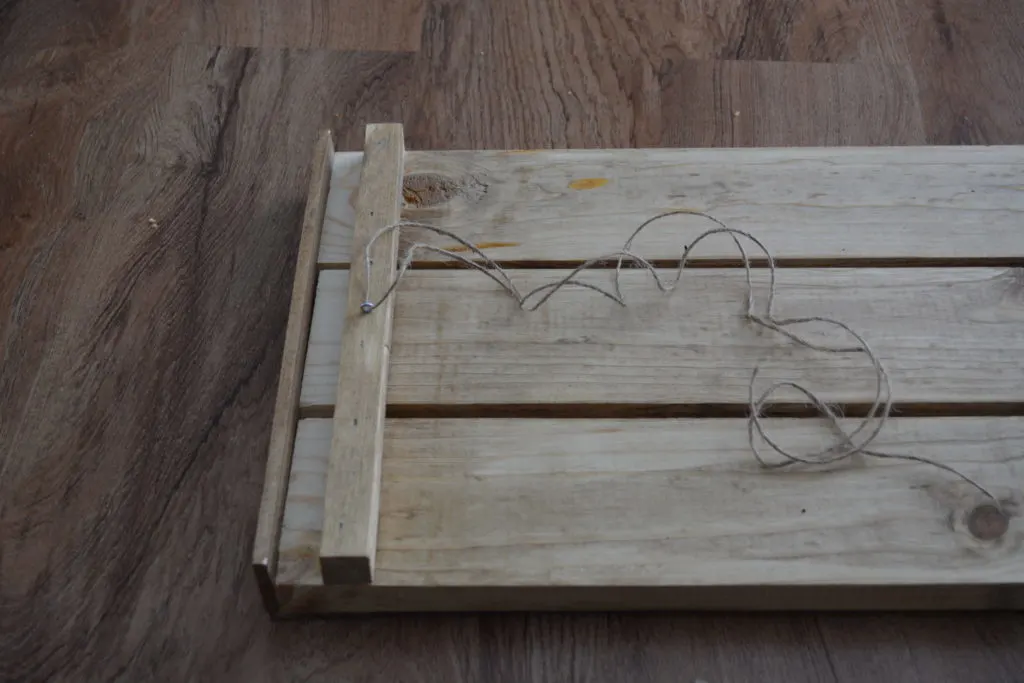
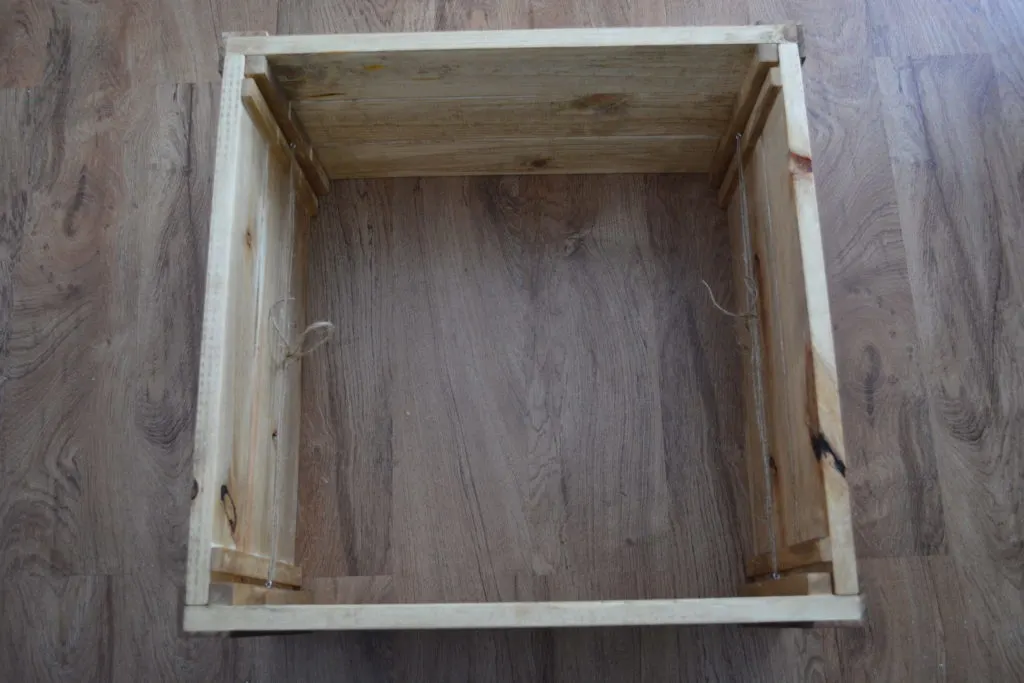
Once you’ve completed all four sides, the short sides slide into the groove on the long sides:

Step 5.
Sand and finish as desired. I finished this box with Dark Walnut Danish Oil for a more rustic look.

Step 6.
Once the finish is dry, screw a small eye hook into the center of all four of the 3/4″ dowels.
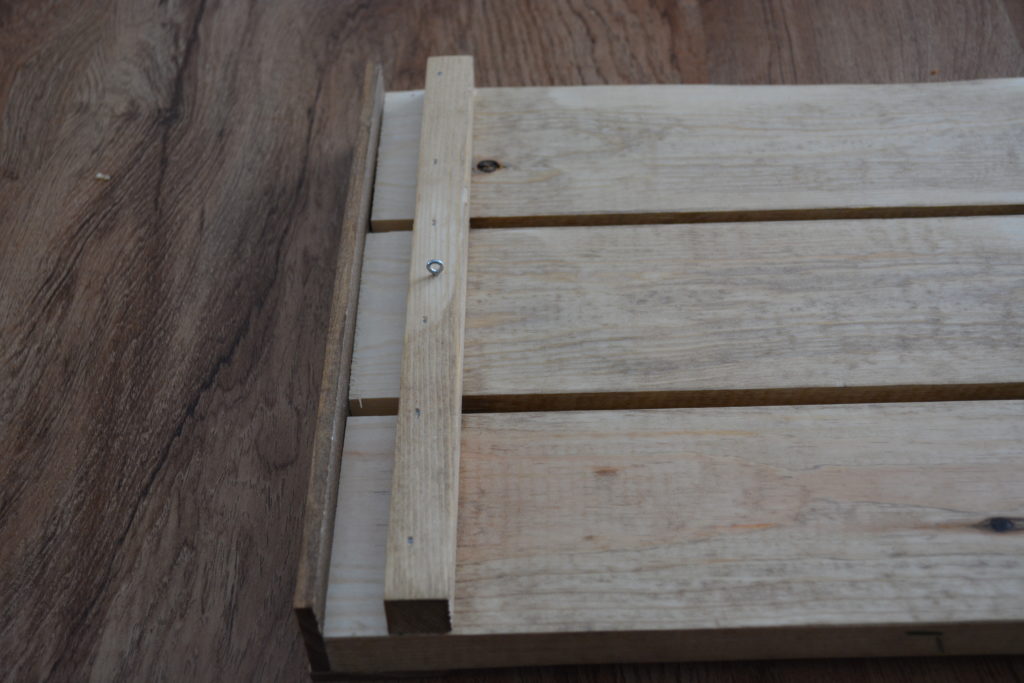
Set the box up and run a piece of twine from hook to hook across the box on both sides.
Tie the twine so the box joints are secure. Now all you have to do to disassemble the box is untie the twine!
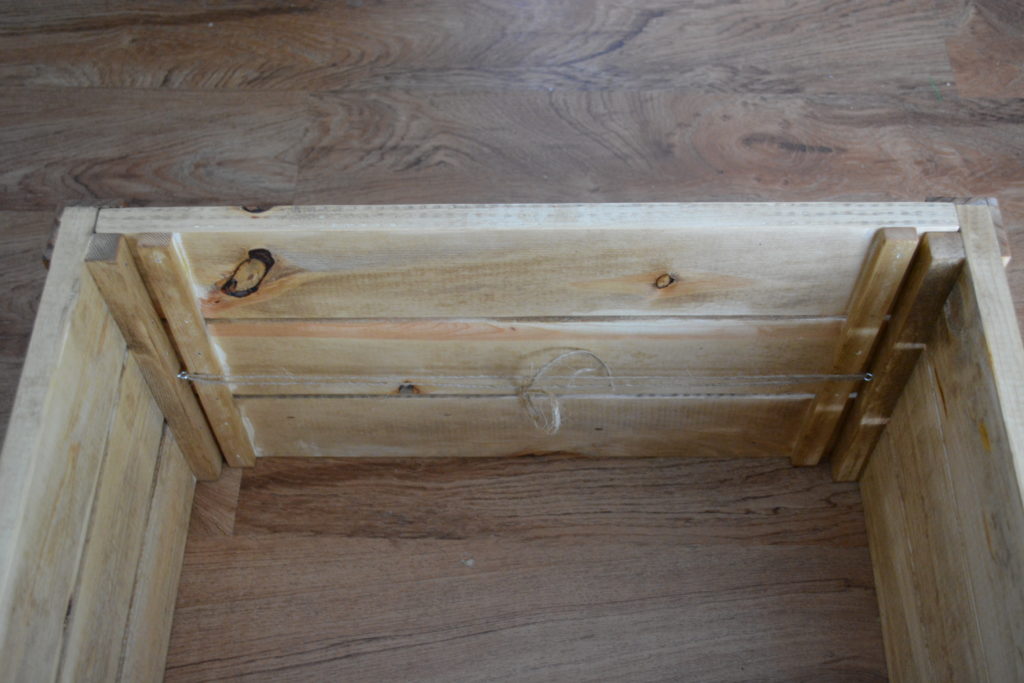
Since the tree box won’t see any heavy use, the twine is just fine to hold it together around the base of the tree.

No need to worry about screwing and unscrewing the box every year!

If you’re feeling real fancy, tie a bow around the whole thing and set the tree inside!
Please let me know if you have any questions and I’ll get back to you as soon as possible!
I’d love to see it if you build from these plans! Tag me on Instagram @bitterrootdiy. I’ve also saved a video of this project on my Instagram profile under highlights!


Thanks for stopping by!
For more project ideas, you can find me onPinterest. And to stay up to date with the latest shenanigans, follow me on Instagram.

Christy
Friday 8th of January 2021
I just found you--I am so excited!! Can't wait to make so many things, starting with the rising miter saw workbench, then this tree box, and then... more! Thank you for all your hard work on the plans and the website. Love it all!
tylynn_sattler
Monday 25th of January 2021
Thank you so much! I'd love to see your projects as you go. If you have Instagram, tag me @bitterrootdiy :)