
This kitchen renovation took so many twists and turns, I’m surprised we pulled it off at all. Renovating a kitchen while living in the house is no small feat! It truly is the heart of the home – the room where all the daily life and activities revolve around. We did our darndest to keep it functioning as much as possible throughout the project. We set up temporary pantry shelving, put the old countertops back on the new cabinets for a few weeks while we waited for the new ones to arrive, and set up a coffee bar cabinet with extra storage space. I shared the design board for this project a year and a half ago. Little did we know, we’d welcome two new family members before it was all said and done. Life is wild!
As with every project, we ran into some curveballs. We made it through 75% of the renovation before we had to put a pause on everything when I went on bed rest for three months. I had no idea how we were ever going to be able to finish this project with two new babies, but as I always tell my kids when they’re overwhelmed – one piece at a time.
After a long break to soak up the newborn days and adjust to our new normal, we finally picked things back up—during nap times, late nights, and all the little in-between moments. It was slow-going, but we kept chipping away at it. Today I’m so excited to share the big reveal. Grab a cup of coffee and come see how it turned out.
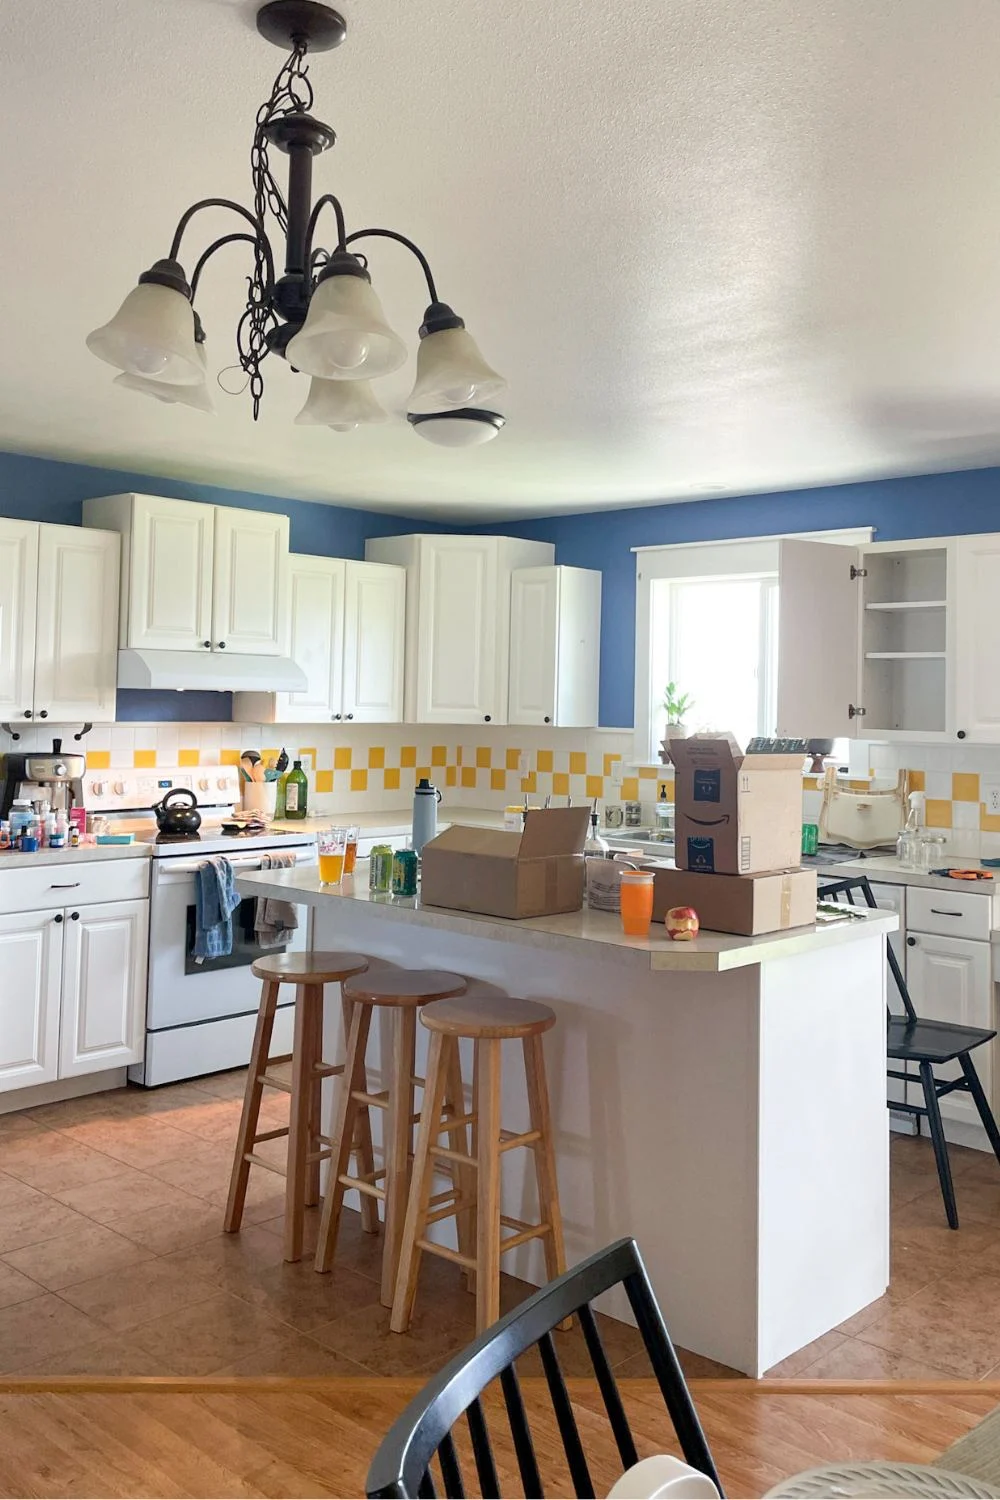
Before

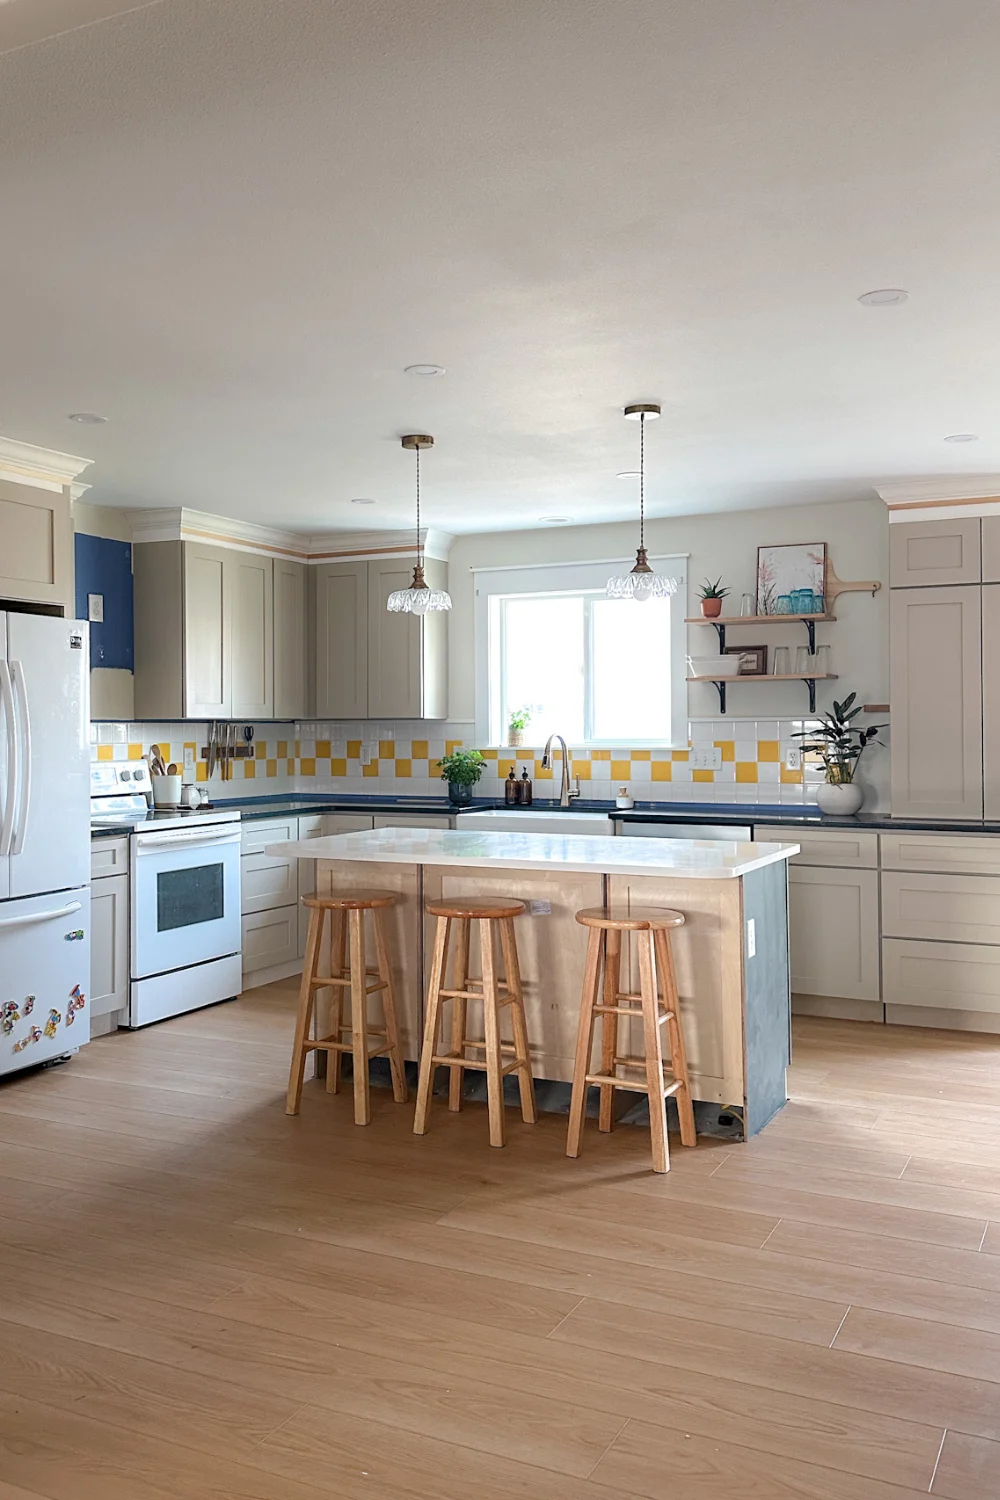
After


Design Plan
I think anyone who builds or remodels (or lives) in a house would probably say that designing the kitchen takes the most time and thought of any room. There are so many different pieces and parts! I spent way too many hours planning and sourcing and over thinking every single detail in here. Worth it? For sure. We are all so happy with how it turned out.
This was the design board:


It’s so crazy to see the design plan versus the final product. Always surprises me how similar they end up looking.


The new layout is open and flows well with our big family. It never feels too tight or cramped! The original layout had a wall between the kitchen, the island was at a diagonal, and there wasn’t much in the way of a dining room. One of our main goals with this remodel was to create a better dining room space by squaring up the kitchen. Now the kitchen, dining room, and walkways have plenty of space and flow much more naturally.
Cabinets
Though we left space for open shelves and the range hood, we actually ended up with more cabinet space than we had before. The new cabinets are taller and we added the countertop cabinet on the right to really maximize space.


To keep costs within reason, we used ready to assemble cabinets. We went through Kitchen Cabinet Kings. They were the best price at the time and one of the only RTA stores that had an unfinished option. Their customer service was top notch. They were in touch right after we placed our order to work out details. We did have one incorrect cabinet delivered, and they replaced it right away. The quality is above and beyond anything we were expecting or could have afforded from a big box store or cabinet shop. The boxes are all 1/2″ plywood, doors and drawers are solid wood, and all soft-close.
That said, the instructions were definitely lacking. And I wish the upper cabinets were a totally different assembly system. We did not use the included brackets to put them together since you’d be able to see them out the bottom once they’re hung. But we just assembled them as you would a traditional cabinet with wood glue and staples from the inside for the face frame. I used wood glue and brad nails for the back panel.
Overall, we’re very happy with them. We opted for the unfinished Versa Shaker style. We were so nervous to build all the cabinets, but the finishing process was way more stressful and tedious. I would 100% do RTA cabinets again, but I don’t know if I’d do the finishing again. I shared a little more about it in this post: Kitchen Remodel with RTA Cabinets. But basically just comes down to time versus cost.
The final piece of the cabinets was extending them to the ceiling. We used 39″ tall cabinets, which left about a 5″ gap to the ceiling for crown molding. You can read more about that process here: How to Extend Cabinets to the Ceiling.


Countertops
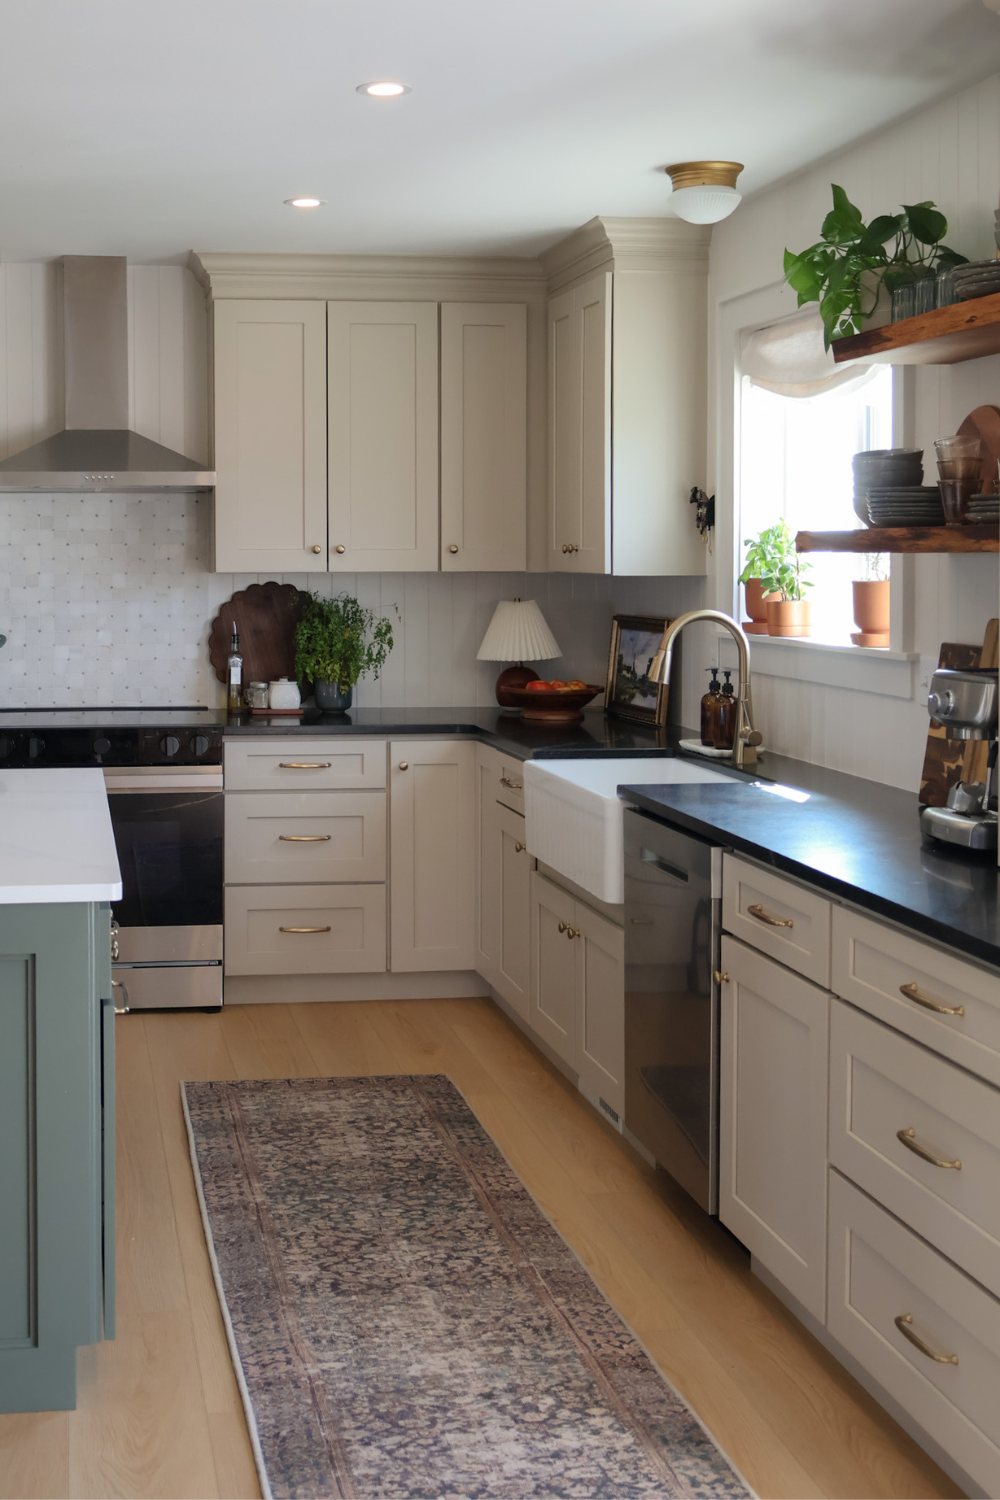
I really loved the look of soapstone countertops for the perimeter cabinets, but they were out of the budget. So we ended up going with Black Mist Honed Granite from Home Depot. They are absolutely stunning and much more affordable. They look pretty much as close to soapstone as you could get without being actual soapstone. Granite is generally more durable than soapstone as well, so it worked out for the best.


Kitchen Island
We flipped colors on the island and did dark cabinets with a light countertop. It is Silestone Quartz in Calacatta Gold.


The island is definitely the workhorse of this kitchen. We do all our meal prep, baking, cooking with the kids, hosting, etc. right there. It’s a set of three base cabinets that we attached together, then added a back panel and trim. The clearance is really tight with getting the fridge in and out, so we opted to round the edges on the countertop overhang. The stools are so comfortable and have held up great so far! I’ve been really happy with the quality of anything we’ve gotten from Poly and Bark. Our dining chairs are from them as well and still look and feel good as new after 4 years of heavy use and kids.
Flooring
To square up the kitchen we removed the old flooring across this main area from the living room through the kitchen. If you look at the “before”, the kitchen tile ran at a diagonal across the room to match the island. It was the toughest demo ever but so worth it for the new layout. I’ve had a lot of controversial comments about installing the cabinets before the flooring. This is a floating LVP floor, which needs space to expand along the edges. So we set the cabinets, then laid the floor up to them. We left 1/4″ gap for expansion that is covered by the cabinet kickplates. Be sure to check your flooring for instructions on installation. Different materials have different requirements.


Backsplash
The backsplash is where we had to pause mid-renovation. The old yellow tile looked so nice with the new cabinets and black countertop, let me tell ya. It sat like that for 6 months and was really a statement piece when you walked in the house 😂. It was a good day when I finally got to take it out!

I tried to chip the old tile out, but it was easier to cut the old tile and drywall out all together. Then I just replaced the drywall sections.
The new backsplash is v-groove planks, painted in Benjamin Moore White Dove, color matched and mixed by Sherwin-Williams in their satin urethane trim enamel paint. I had wanted to do tile in here, but the planks were a great affordable alternative. It’s nice and simple, but still adds a little character and looks finished. I kinda want to add them all over the house now!


Where it had to be non-combustible behind the oven, I did an accent tile insert with Elida Ceramic White Honed Natural Stone Mosaic Tile. It pulls in all the colors from the rest of the kitchen and really completed the space.


Open Shelving
These open shelves were just the right touch to warm up the colors in here. I made them from a live edge slab I found at a local lumber shop. They’re alder, finished with a clear hard wax oil and hung with Hovr Brackets. It was my first time using that type of bracket. I’m happy with how sturdy they are, though the installation was a little labor intensive. But I’m hopeful they’ll hold up better than the dowel floating shelf brackets so we don’t ever have to worry about sagging over time.
What’s Next?
That wraps up the main area of the kitchen! It such a relief to be at this point. We still have quite a bit of work ahead of us, but completing the main part of the kitchen is such a massive milestone. It’s a huge weight off our shoulders.
During the renovation, we also removed the pantry on the left side of the kitchen. I know it sounds crazy. But there is a garage attached to the house on that side. It was built after the original house, but they never added a door. So it’s attached, but functions more like a detached garage. This is the only (and I do mean only) spot where it’s possible to add a door.


After a lot of back and forth, we decided the pros outweigh the cons, especially living in a northern climate with long winters. There is plenty of space to add a large set of pantry cabinets on the opposite side of the kitchen as well. Which is what we’ll be tackling next – custom pantry cabinet built-in! Then we’ll add the door to the garage and a set of entryway/mudroom cabinets.
Maybe it sounds crazy, but those two projects sound so manageable now that the rest of the kitchen is done. Like, yeah, we got this!


Sources
- Perimeter Cabinet Paint Color: Sherwin Williams Shiitake in Satin Emerald Urethane Trim Enamel
- Perimeter Countertop: Black Mist Honed Granite
- Island Paint Color: Sherwin Williams Pewter Green in Satin Emerald Urethane Trim Enamel
- Island Countertop: Silestone Quartz Calacatta Gold
- Cabinet Hardware: Top Knobs Dakota Bar Pull, Top Knobs Dakota Bar Pull 8″ (garbage pull out), Top Knobs Mushroom Knob
- Range Hood: 30″ Convertible Wall Mount Range Hood
- Backsplash Tile: Elida Ceramica White Hone Stone Mosaic Tile, white grout
- Fridge: Samsung Bespoke 30 cu. ft. 3-Door French Door. I didn’t think it would be a big deal, but we really love the internal water dispenser and autofill water pitcher. It took some getting used to opening the doors from the bottom, instead of handles. And we do end up with fingerprints where everyone closes the doors. But I just wipe it down more often now (maybe not a bad thing haha.) Overall, we love it so far.
- Oven: Samsung Bespoke Slide-in Electric Range
- Dishwasher: Samsung Stainless Steel Dishwasher
- Sink + Faucet: Fireclay Farmhouse Sink, Delta Lenta Gold Faucet
- Backsplash: V Groove Planks, Benjamin Moore White Dove mixed in Sherwin Williams Satin Urethane Trim Enamel
- Scallop Wood Cutting Board: Maris Home Walnut Scallop Cutting Board
- Over the Sink Light: Schoolhouse Flush Mount Light
- Stools: Poly & Bark Ligna Counter Stool
- Pendant Lights: Vintage Pendant Lights
- Runner Rug: Loloi Amber Lewis Georgie Collection Denim/Spice and Grip Rug Pad
- Flooring: Malibu Wide Plank LVP in French Oak Astoria. The flooring was tough to install because the edges were pretty fragile. We also had to order way over what we needed because there were some issues with the boxes arriving damaged. However, we’ve been living with them for a little over a year now and they have held up wonderfully. They still look brand new. And we’ve had kids, dogs, and construction over them. We take care to use pads on the bottom of chairs, cover them during the renovations, etc. But we’ve been happy so far.
- Countertop Lamp: Oval Lamp with Pleated Shade
- Dinnerware: Famiware 24 Piece Dinnerware Set for 8
- Glass Cups: Recycled Glass Tumbler
- Green Ribbed Cups: Plastic Ripped Tumbler
**NOTE: I listed the appliances we have. However, appliances are such a personal preference thing and I hesitate to recommend too strongly in case of a malfunction or something. They’re such an investment piece. So please please please, do your own research. But I included them in the list if you’re curious, and we’ve been happy with ours.
Shop the Kitchen

I hope you enjoyed the tour! Join me on Instagram, YouTube, and/or TikTok to see these renovations come to life.
Let me know if you have any questions and I’ll get back to you as soon as possible.
| Tylynn |


Join me on YouTube and Instagram for the behind the scenes on our latest projects. And follow along on Pinterest for more projects, DIYs, and ideas to make home your own.
This post contains affiliate links. If you make a purchase from one of the links, I may make a small commission at NO EXTRA COST to you. See my full disclosure here.