
Alriiiiiiight! I can’t even explain how excited we are to be almost ready to jump into phase 2 of the kitchen. If you remember, we did a quick kitchen refresh about a year ago – I tried to organize the spices and it devolved into removing half our cabinets and moving the island and painting and adding open shelves and and and … kidding. That’s as far as we got (see the Quick Kitchen Refresh here). Then we reigned ourselves in and focused on some kitchen organization [more on that HERE]. But we’ve been planning to do more of a kitchen reno since we moved in, and we’re so ready to tackle it!
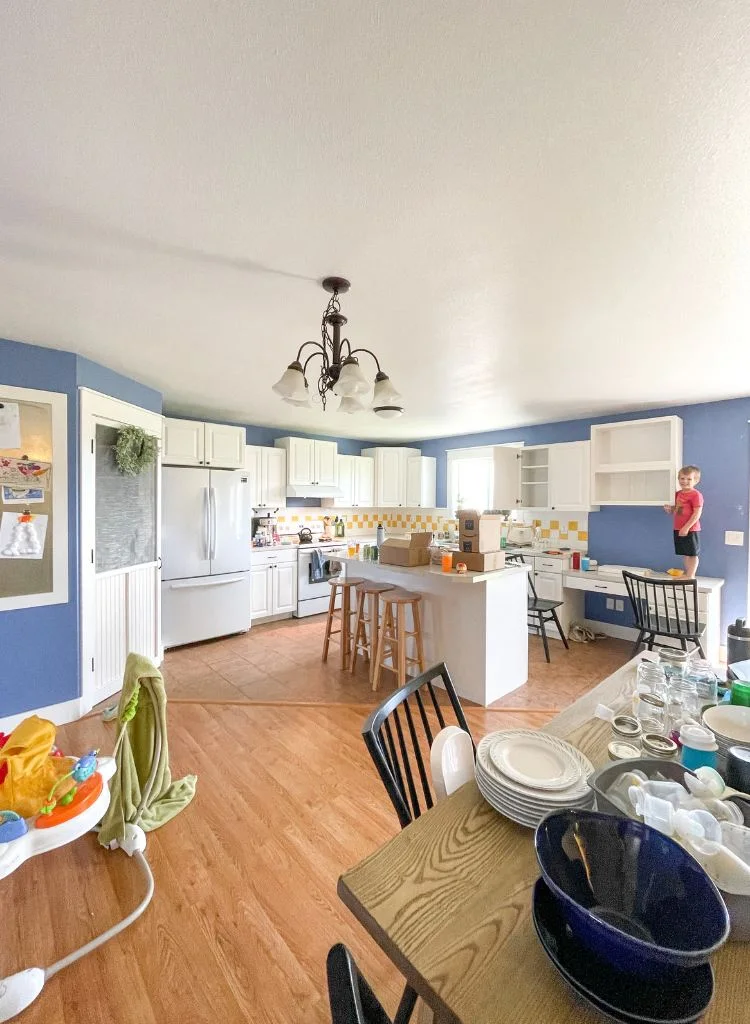
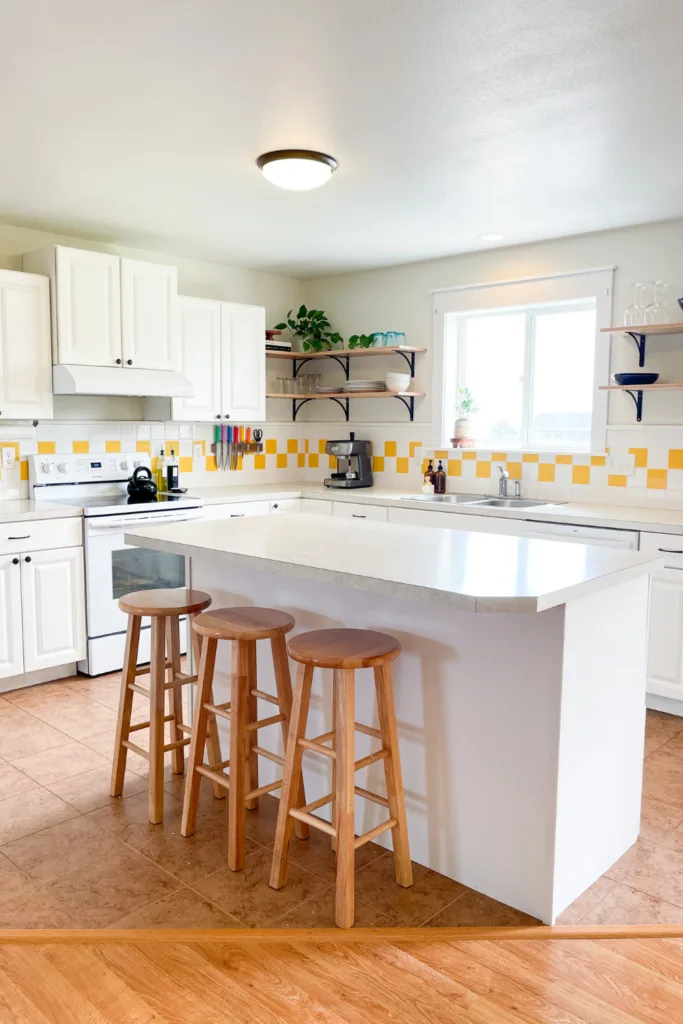
This is where we started at the very beginning and then after “organizing the spices”:


The original plan was to wait until we could completely gut and redo this space. Basically do a dream kitchen. I had a few budget-friendly updates I wanted to do before a full remodel, such as change countertops out for butcher block, paint the yellow backsplash, and paint the pink floor tile – keep it all pretty simple and mostly save for the big remodel. Though we didn’t have any timeline in mind yet. But, as fate would have it, our dishwasher broke a couple months ago and then the sink faucet went down a few weeks later. That was enough to spur us into action. Actually, we were stupid-excited when the faucet broke because it finally gave us an excuse to jump into it!
Just for kicks and giggles, I figured we might as well at least look around at quotes for custom or semi-custom cabinets to get a ballpark idea if we wanted to just go all-in on the renovation or stick with the plan to do a few smaller, budget-friendly upgrades and wait for the big reno. Well, let me tell you. After getting a few quotes for cabinets, our kitchen started to look a lot more beautiful just as it is … no need for a remodel. Ever. 😅
But for real. Do you know how expensive new cabinets are?! On the low end for semi-custom cabinets in our medium sized kitchen (so not even full custom cabinets) it was like $25k. Semi-custom being like cabinets from Lowes or Home Depot or a cabinet store. While we absolutely LOVE renovating our houses and would like to do this kitchen, $25k or more for cabinets just isn’t realistic at this time.
Our original plan was to try to reuse as many of our existing cabinets as possible. I found the matching style on Home Depot – same color, doors, drawers, everything. However, when they arrived, we ran into some issues with the drawer faces. Somewhere along the line, the drawer face design was changed ever so slightly, and is now 3/4″ larger than our existing cabinets.
Yes … they had already arrived. Big oversight and mistake on my part. It’s so fun to share mistakes like that on these public platforms 🙈 I hope it’s a good reminder: we’re all human. And if you’ve ever made a renovation mistake, you are NOT alone. We were so bummed, to say the least.
I considered building new drawer fronts to make it work, but the opening is also different, as is the spacing to the door. There really was no good way to replace the drawers and doors and get them all to line up correctly. We also want to ensure that renovations are adding to the house and increasing it’s value, not detracting from it. The existing cabinets are good quality, and I wouldn’t want to replace them with anything less. Trying to mix and match started to feel a bit lower quality.
So we started looking into other options and found a couple that may be feasible, including ready-to-assemble cabinets. That would fall somewhere near $6k for a kitchen of this size, with the customizations we’re looking for.
There’s been some back and forth on the final layout. But, after much deliberation, musical kitchen trying different layouts, and some awesome input from Instagram, we’ve landed on the final design. It’s still going to be a couple phases to get to the end goal. But now we have a plan and realistic approach! Phase one was the quick kitchen refresh. Here’s the plan for phase two.
Modern Classic Kitchen Phase 2 – L Shaped Kitchen with Large Island
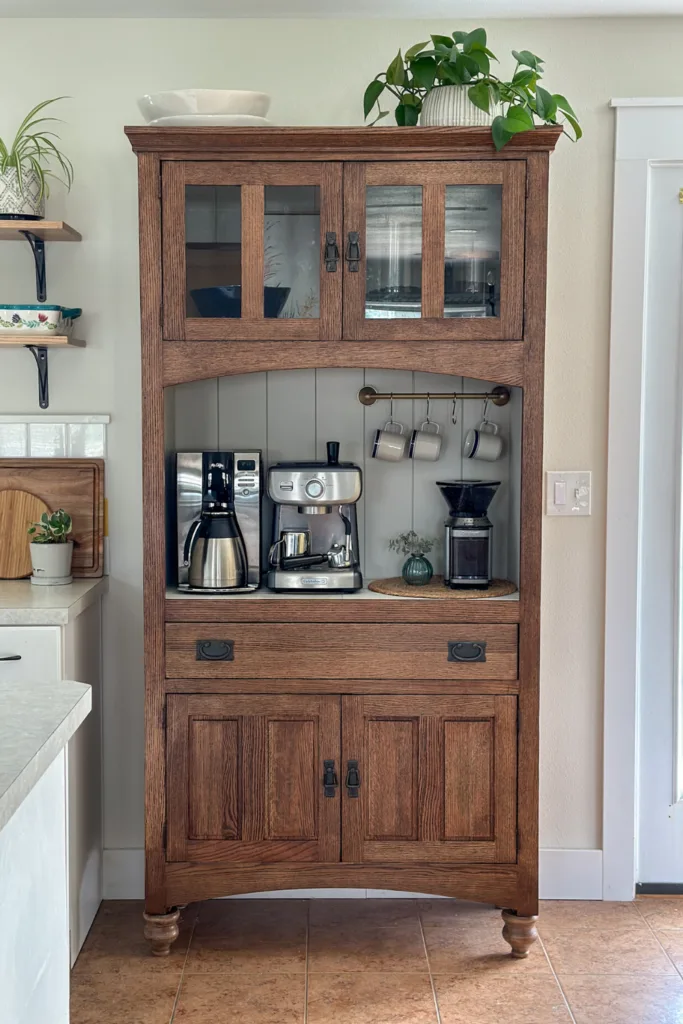
Phase 2 will get us about half way to the final plan. We’re going to start with the new cabinets. The new cabinets will extend all the way through where the desk used to be (circled below). We put the coffee hutch there for a bit when we first took out the desk cabinet [see DIY Coffee Hutch], but the long-term plan was always to add cabinets back in there during the full renovation. Then we’ll shift the cabinets in just a bit on the other side of the kitchen next to the fridge to accommodate a door into the garage (see phase 3 below).


The new island will be similar in size but with different cabinets to make it more functional. There will be a large center cabinet with doors and a drawer and two side cabinets, one of which will house the garbage. We loved having a pullout garbage in our last house [see that DIY Kitchen Island here], and I’m so excited to add it to this kitchen.
Once the cabinets are set, we’re going to install new flooring across this main area – including the living room, dining room, kitchen. If you’ve been following along on Instagram, that’s already been a whole long saga. But we finally got there! We’ve settled on Malibu Wide Plank French Oak Astoria from Home Depot. It’s a beautiful warm, but light, flooring. It pulls the lighter stone colors from the fireplace and compliments the darker furniture. We can’t wait to see it across the space! And we are also fairly nervous 😅 It’s so tricky to pick flooring. The colors are wildly different in the house than in-store or online. Boy, do I have some lessons-learned to share from that experience! I’m working on a post to share what finally did work for us.
We’re also going to do new countertops, sink, faucet (the one we replaced the old one with when it broke a few weeks ago), and backsplash.
Kitchen Phase 3 – Pantry & Mudroom Lockers
Phase three will be the final phase. During kitchen demo in phase two, we’ll remove the pantry to make room for a door to the garage. So when the weather warms up, we’ll be set to add the door. The attached garage was added after the house was built and they never put a door into the house. So it’s technically an attached garage but functions more like a detached garage. It would be so nice to be able to access it from the house. We are also in desperate need of some sort of entryway or mudroom.
So we’re adding a door in place of the pantry, building floor-to-ceiling cabinets for a mudroom, and floor-to-ceiling cabinets along the far wall of the kitchen replace the pantry space.
Which brings us to: our design vision and mood board for the kitchen (though it won’t look like this for a while).

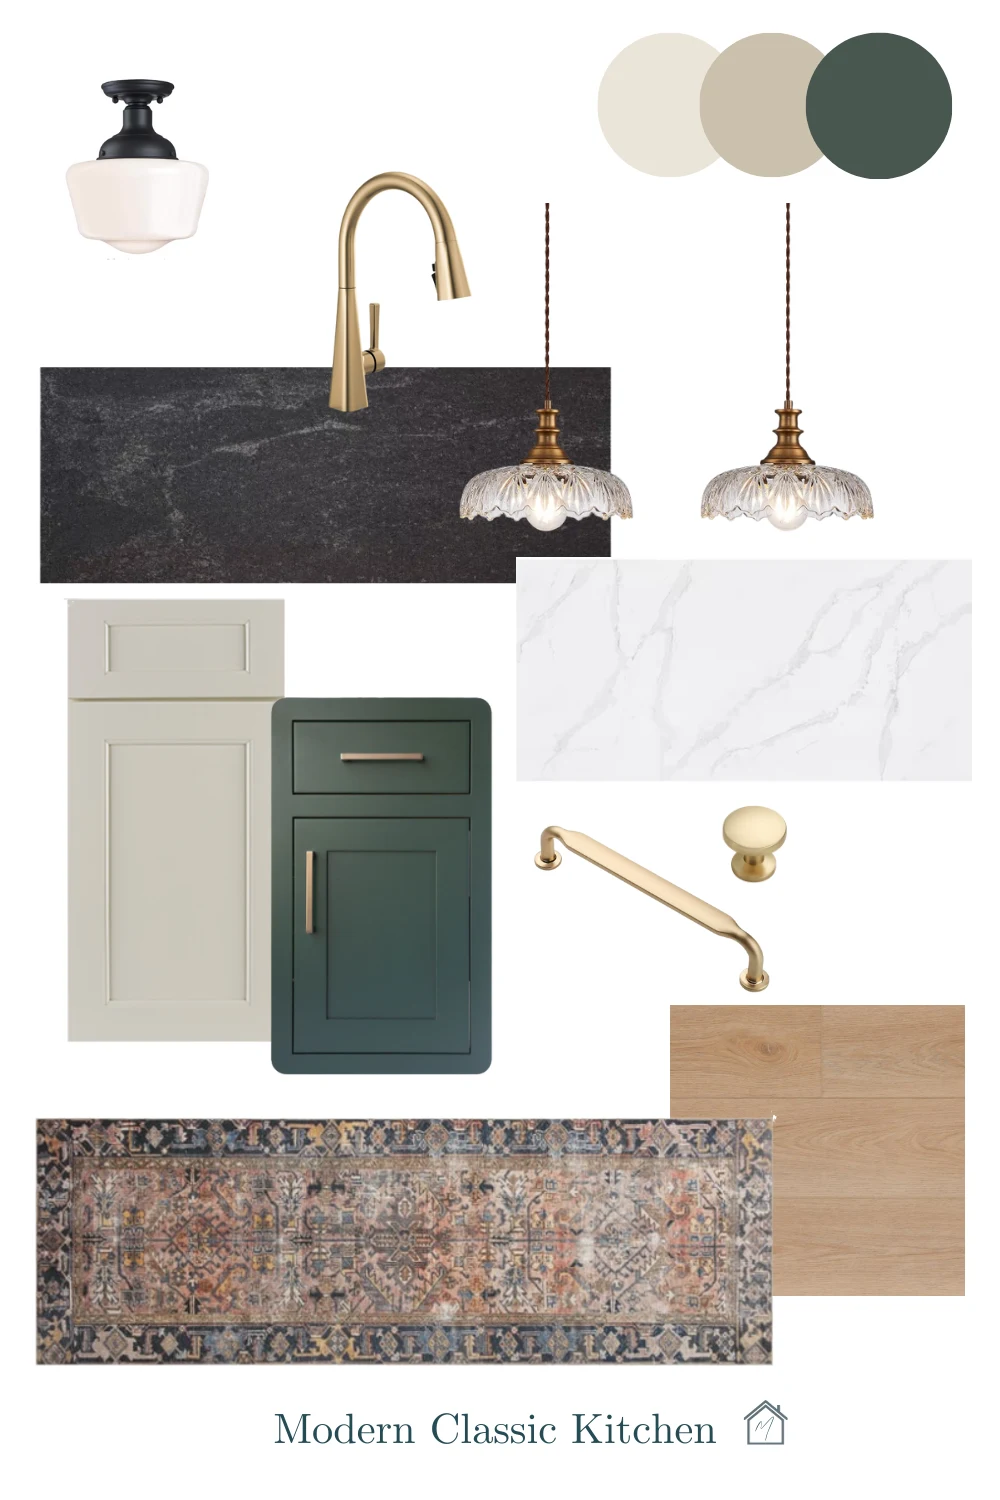
I’ve been loving earthy tones for this kitchen. The goal is a more classic kitchen feel while bringing in some depth and color.
The plan is mushroom cabinets with black countertops around the walls of the kitchen and a dark green island with a light countertop for the island. The contrast with the island and cabinets and countertops is so beautiful. I can’t wait to see how it compliments the stone on the fireplace in the living room. Going for an alpine classic vibe. Or something like that. I don’t know 😂 Nature-inspired, but classic and modern.
Why aren’t we doing phase 2 and 3 at the same time? That would seem to make sense, I know. But we’re spacing it out to help with costs AND it’s too cold right now to bust a hole in the wall to add the door to the garage. That’s a fair weather project. So here we are! Taking it one piece at a time in a way that makes sense for us.
There you have it – our modern classic kitchen design board and inspiration. We’re very excited to get started and can’t wait to share the process with you. Follow along on Instagram to see it all come together in real time!
It’s always a little intimidating at the beginning of a project, knowing the amount of work ahead. But it’s always worth it!
| Tylynn |
This post contains affiliate links. If you make a purchase from one of the links, I may make a small commission at NO EXTRA COST to you. Thank you for your support so I can continue to share content and ideas with you. See my full disclosure here.