


As the snow melts away and the first green sprouts begin to peek through the soil (or even if it’s still snowing, like this year 🙈), one of my favorite ways to welcome the new spring season is with a fresh pop of color for the front door. Today, I’m excited to share with you another easy DIY spring wreath. I made this eucalyptus spring wreath quite a few years ago, and it was high time for a new one!
- 14″ Metal Floral Hoop (also at Hobby Lobby, Michaels, etc)
- A selection of faux flowers and greenery – I used Faux Gypsophila Leaf Stems, Faux Wildflower Stems Bundle, and a few Faux Boxwood Stems
- Floral Wire
- Wire Cutters
- Hot Glue Gun and Glue Sticks
- Velvet Ribbon (they have so many colors that would be beautiful for spring)
Step 1: Lay Out Your Design
Before you dive into attaching anything, lay out your flowers and greenery around your wreath to get a sense of how you want your final product to look.


Lately, I’ve been loving the really simple wreaths with just a few stems along the bottom. I arranged a few gypsophila stems along the bottom and weaved in a couple boxwood leaves and wildflower stems.
This step is all about letting your creativity flow. There are no rules here—mix and match colors and textures until you’re happy with it.
Step 2: Secure Your Greenery
Start with your greenery as the base layer. Use floral wire to secure the stems to the wreath. This not only adds depth to your wreath but also creates a lush backdrop for the pop of color. If needed, add a dab of hot glue to ensure everything stays exactly where you want it.


I attached the gypsophila stems first, as the main greenery. Then added a few stems of the boxwoods. The wire was flexible enough that I was able to weave the boxwood stems into the wire I attached the gypsophila stems with. As you can see above, I wove the wire around and around the hoop and added in stems as I went. You could also just do single loops of wire around each stem in a few spots (twist them tight to tie it off in the back). Add wire as necessary, or use hot glue.
Step 3: Add Your Flowers
Once your green base is in place, it’s time to add the pop of color – the flowers! Attach each flower individually, experimenting with placement until everything looks balanced. I either weaved the flowers into the existing wire or used hot glue to secure them.
This part usually involves a fair amount of wrestling the wreath … it can take some “finesse” to get the stems into place and secured.


Step 4: The Finishing Touches
After all the stems are securely attached, step back and see how it looks. This is your chance to tweak the arrangement, fill in any gaps, or add any final stems.
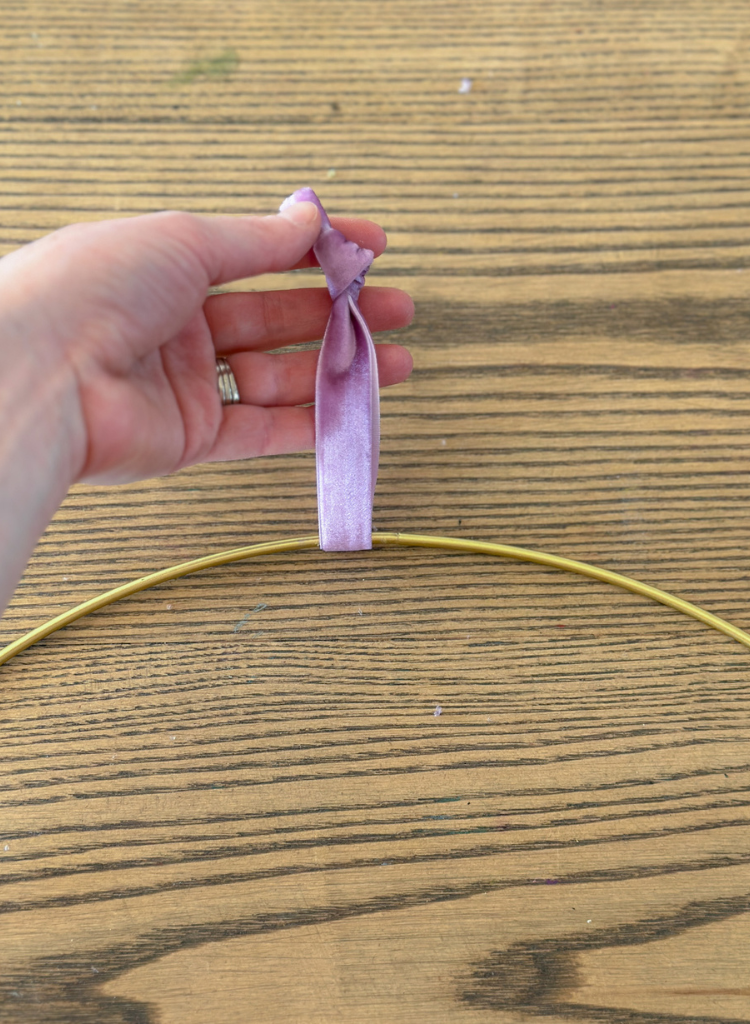
Tie a loop of velvet ribbon to the top of the wreath for hanging it on the door. If you want, you can also add a bow along the bottom – I’ve done that on quite a few wreaths a love the extra texture and color. I just decided to keep this one really simple and focus on the stems.

DIY Spring Wreath
There you have it—a stunning spring wreath that’s sure to brighten up your front door! My favorite thing about making your own wreaths is how different they all are. No matter how many you make, there’s always a new style or different stem combinations to try!


Remember, DIY projects are about making something your own. So feel free to adapt this guide to suit your tastes and the materials you have on hand!
Shop the Post

| Tylynn |
This post contains affiliate links. If you make a purchase from one of the links, I may make a small commission at NO EXTRA COST to you. See my full disclosure here.
Don’t forget to pin for later!
Follow along on Pinterest for more projects, crafts, recipes, and ideas to make home your own. And join me on Instagram to see things come to life in real time.


