
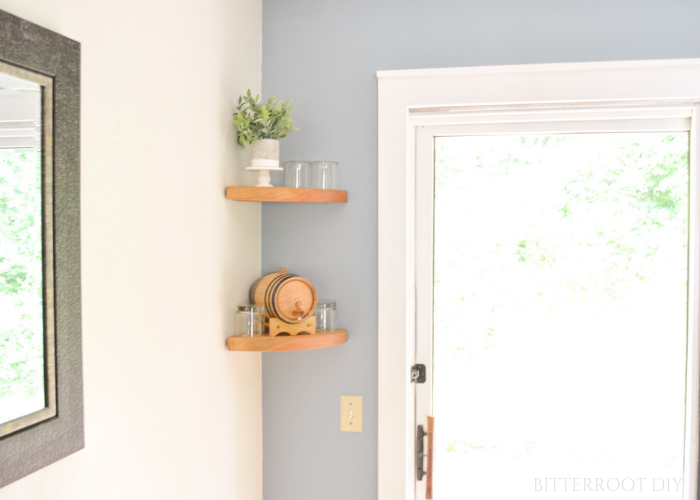
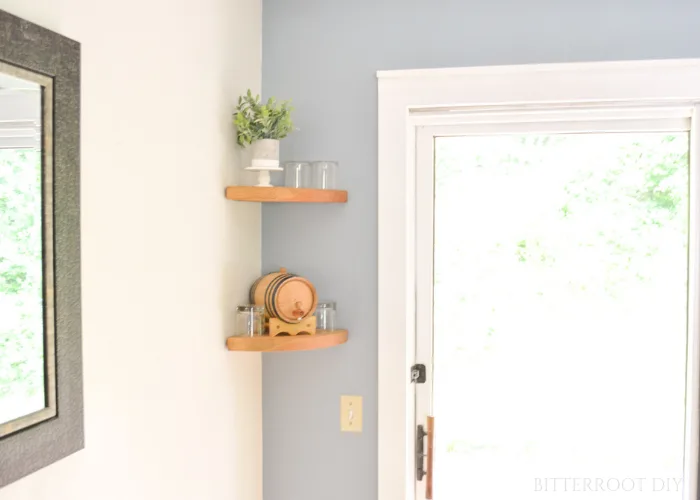
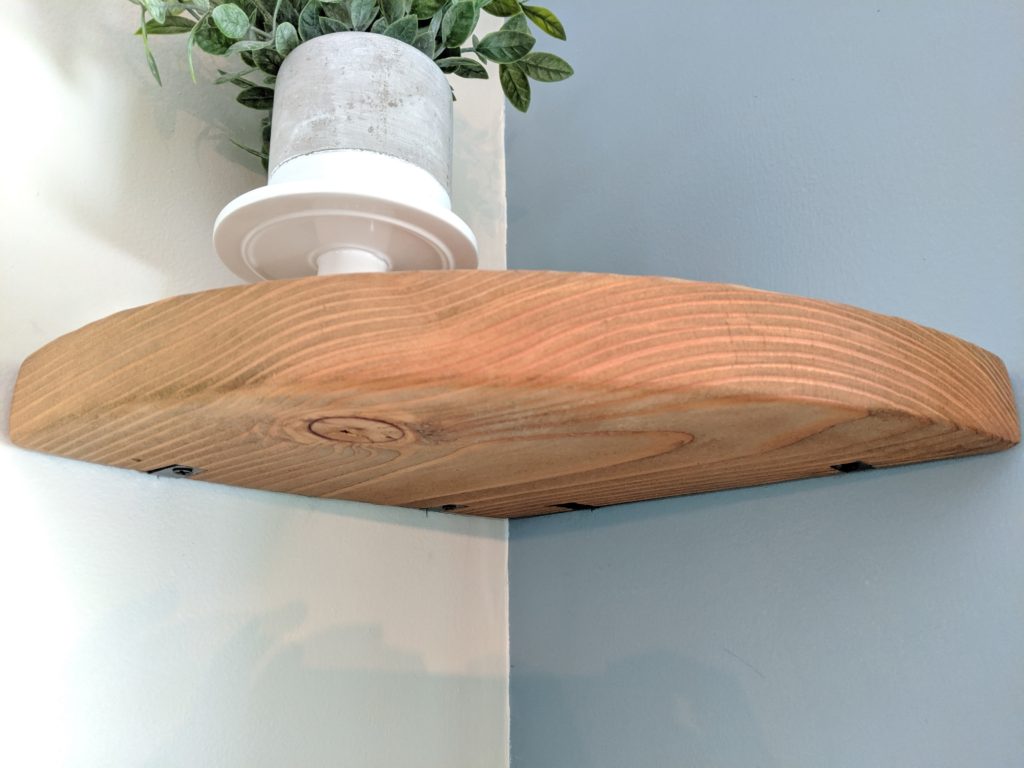
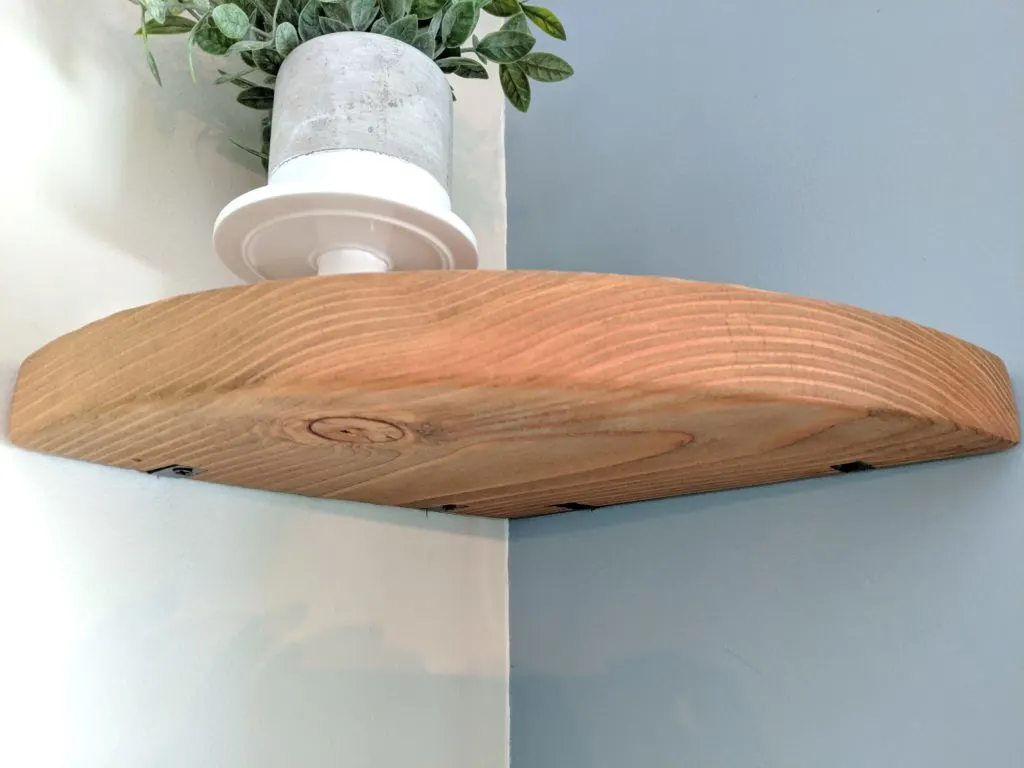
Build your own round floating corner shelves to add storage and decoration to unused space.
This post may contain affiliate links. If you make a purchase from one of the links, I may make a small commission at NO EXTRA COST to you. This helps keep the tutorials and plans free here at Bitterroot DIY. Thank you for your support! See my full disclosure here.
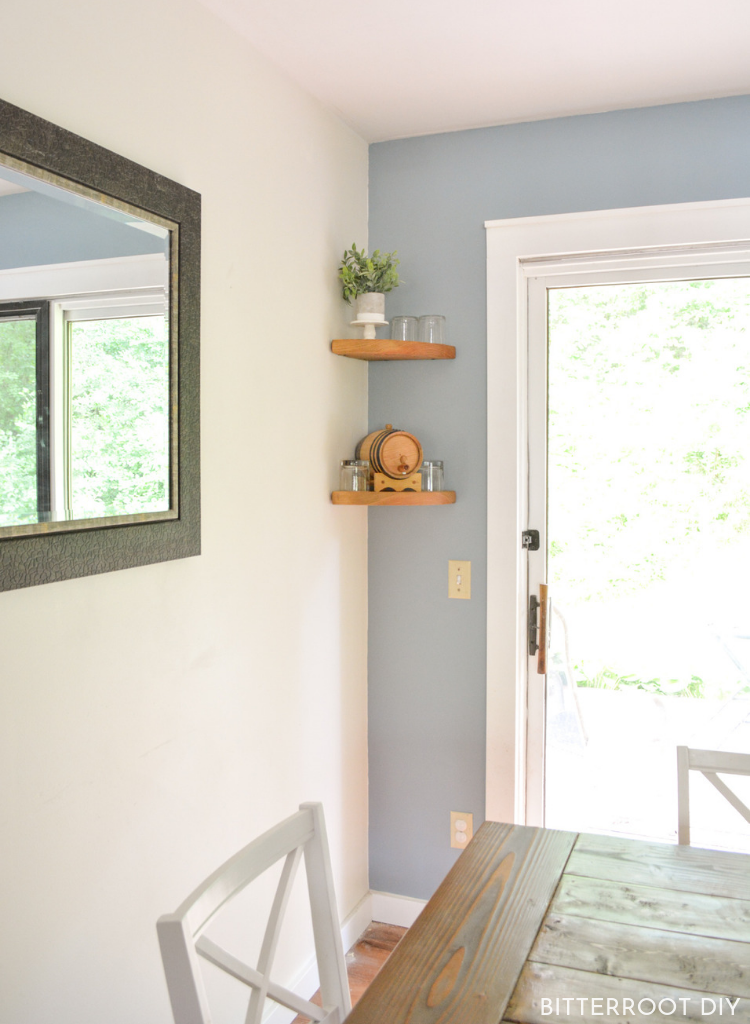
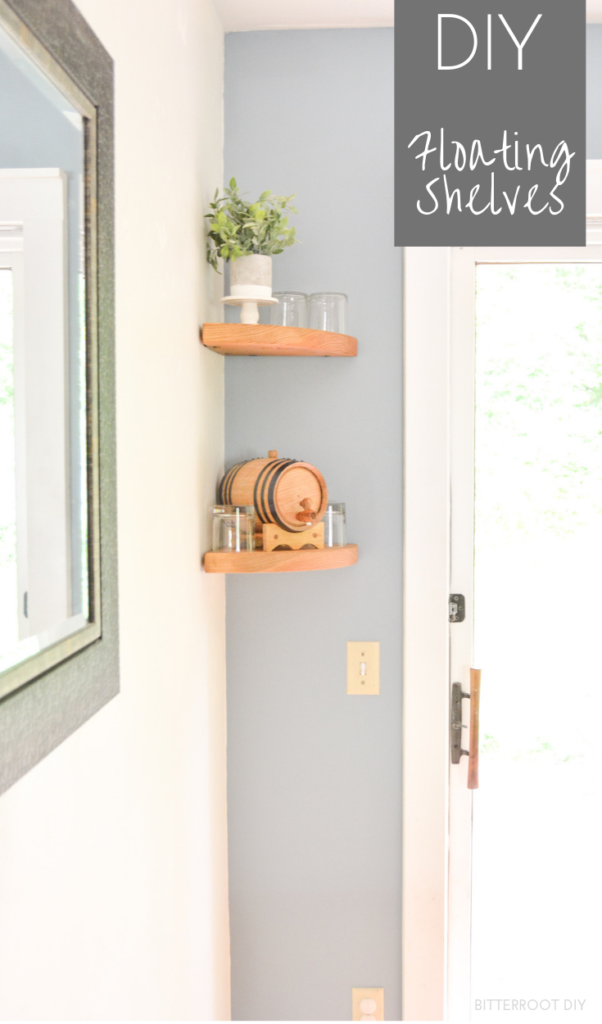
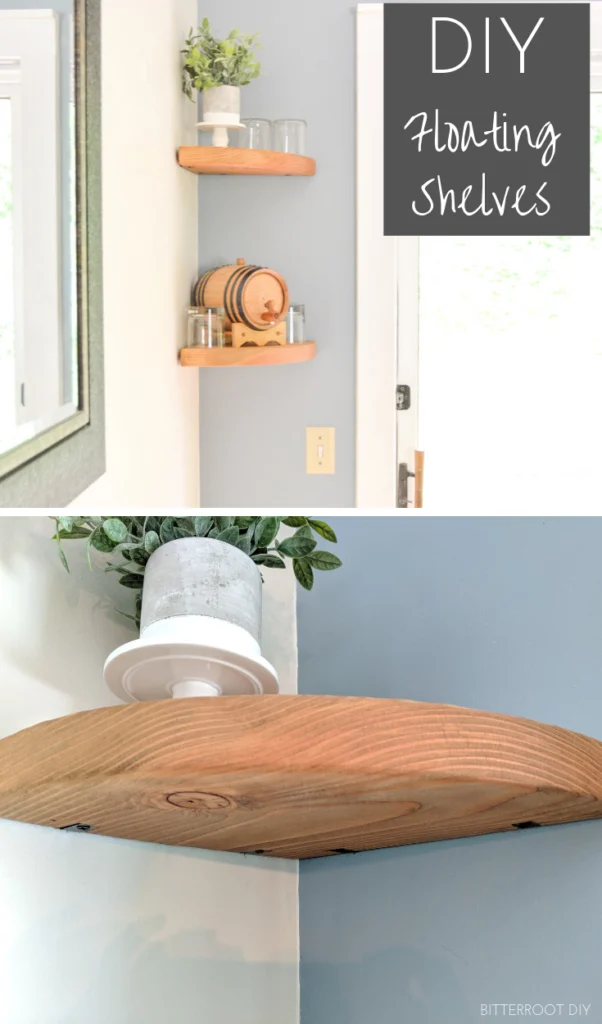
This corner of our dining room/kitchen has been kind of an awkward unused space since we moved in. I wasn’t exactly sure what to put there. The Mr. made a request for round floating corner shelves last week, and I think it was just the thing! It’s a great way to add more “storage” space to the kitchen (who doesn’t need more of that!?!) and bring some decor to an empty space.
I found a few different ways to make round floating corner shelves, but most of the methods require a router. So I decided to go a different direction and try out this “exposed hardware” version. You don’t need any special tools and they look like true floating shelves when it’s all said and done.
Enjoy the plans!
I also put together a quick video here to help clarify the build.
Tools & Supplies
- Jigsaw (or a Router)
- Orbital Sander
- Tape Measure
- Clamps
- 1″ Corner Braces (4 per shelf)
- Pencil
- Safety Glasses
- Ear Protection
Lumber
- 1 | 2 x 12 @ 3′ (just long enough to cut two semi-circles out)
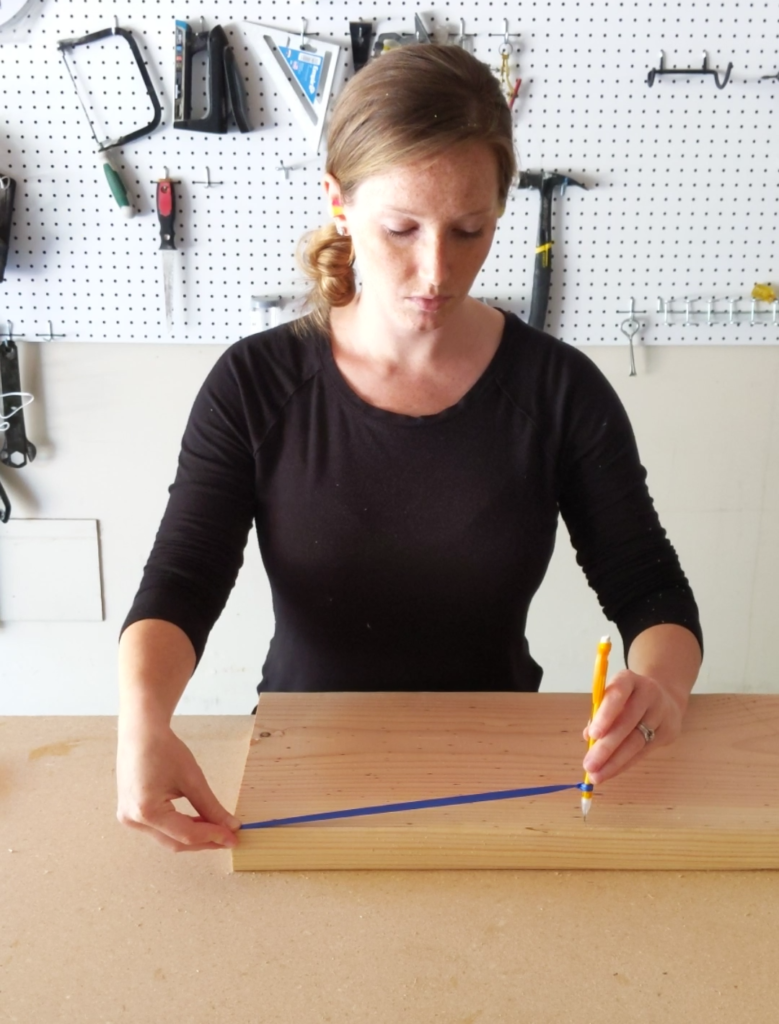
Step 1.
Trace and cut a semi-circle with an 11 1/4″ radius out of the end of the 2×12.
I simply tied a string on the end of a pencil, measured it to 11 1/4″ (full width of the 2×12), held one end at the corner of my 2×12, and traced the semi-circle around to the other corner (see the video for clarification).

Step 2.
Cut the semi-circle out with a jigsaw or router. I used a jigsaw to keep these shelves as simple as possible, but a router is great for cutting circles. Use whatever method you have available.
Sand the shelf down to smooth any rough edges from the cut.
Step 3.
Install four corner braces where you want the shelf. Install braces into the studs, or use drywall anchors.
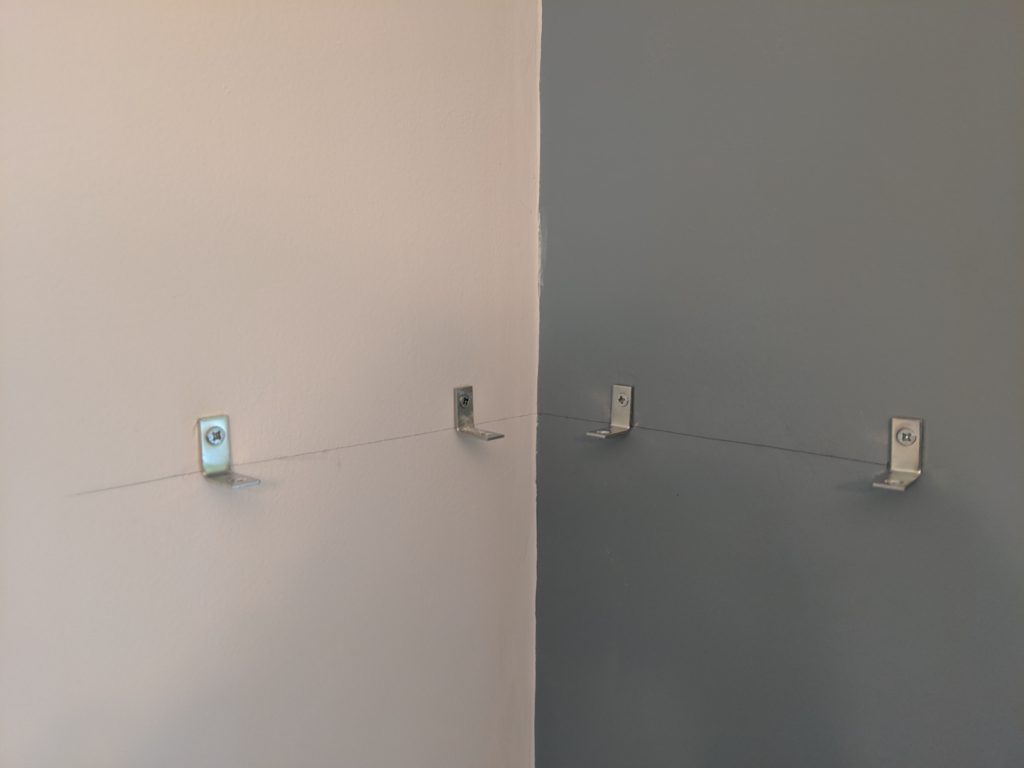
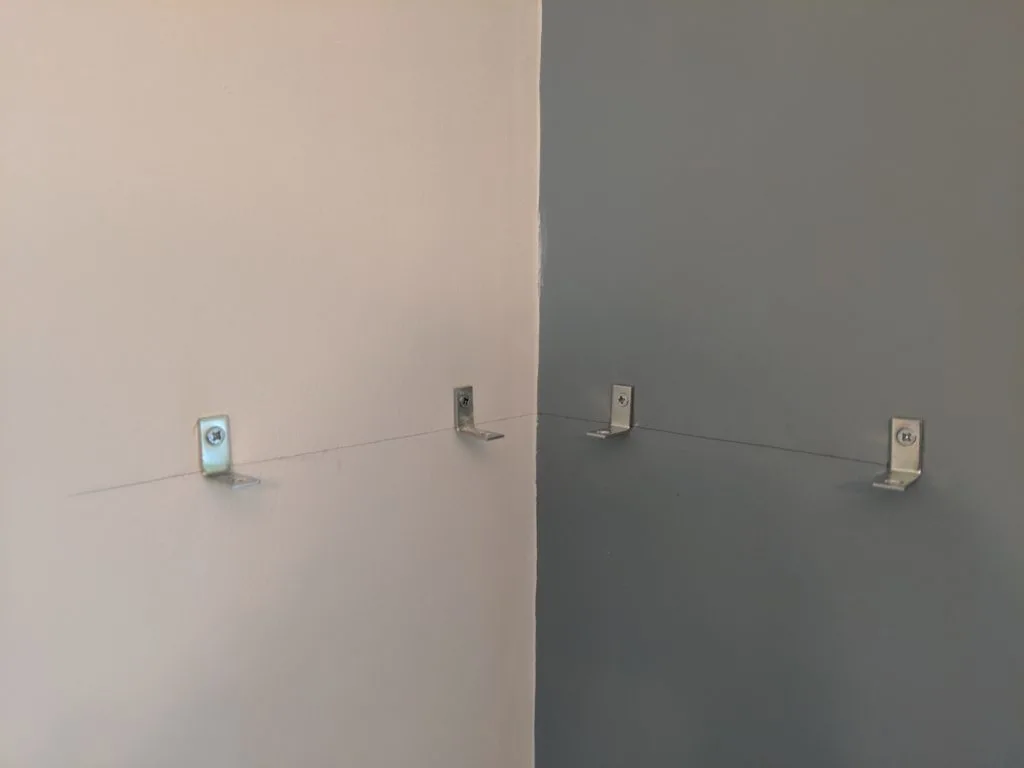
Placement depends on the size of your shelf, but I put mine 2 1/2″ from the corner and 9″ from the corner for an 11 1/4″ radius shelf.
Step 4.
Set the shelf in place (don’t attach it yet) and mark the location of the braces with a pencil.

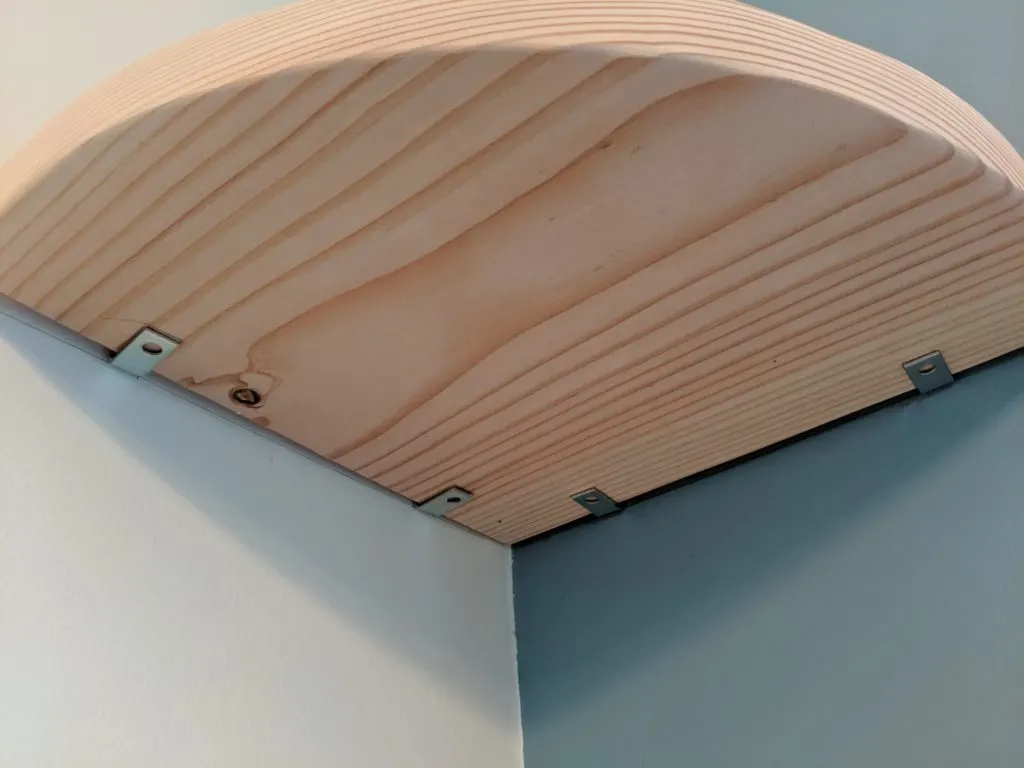
Remove the shelf and score around the corner brace outline with a sharp utility knife. Position a chisel on the scored line and chisel a small mortise for each brace. I cut about 1/8″ deep for each one.
Step 5.
Sand the shelf again (if necessary) and finish it with stain/paint/oil/etc. I used Watco Danish Oil in Dark Walnut to match the plate rack that hangs just across from it in the kitchen.
Let it dry.
Step 6.
Place the shelf on the corner braces. The braces should sit flush inside the mortises on the bottom of the shelf. Attach the braces to the shelf with small screws (usually included with the braces).
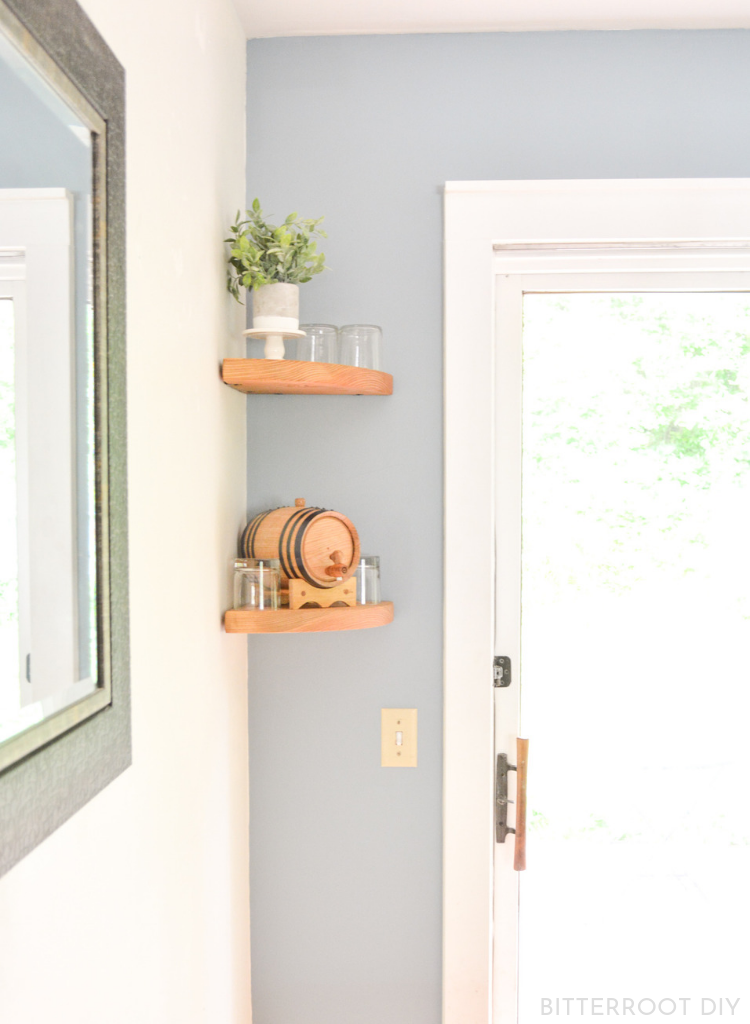
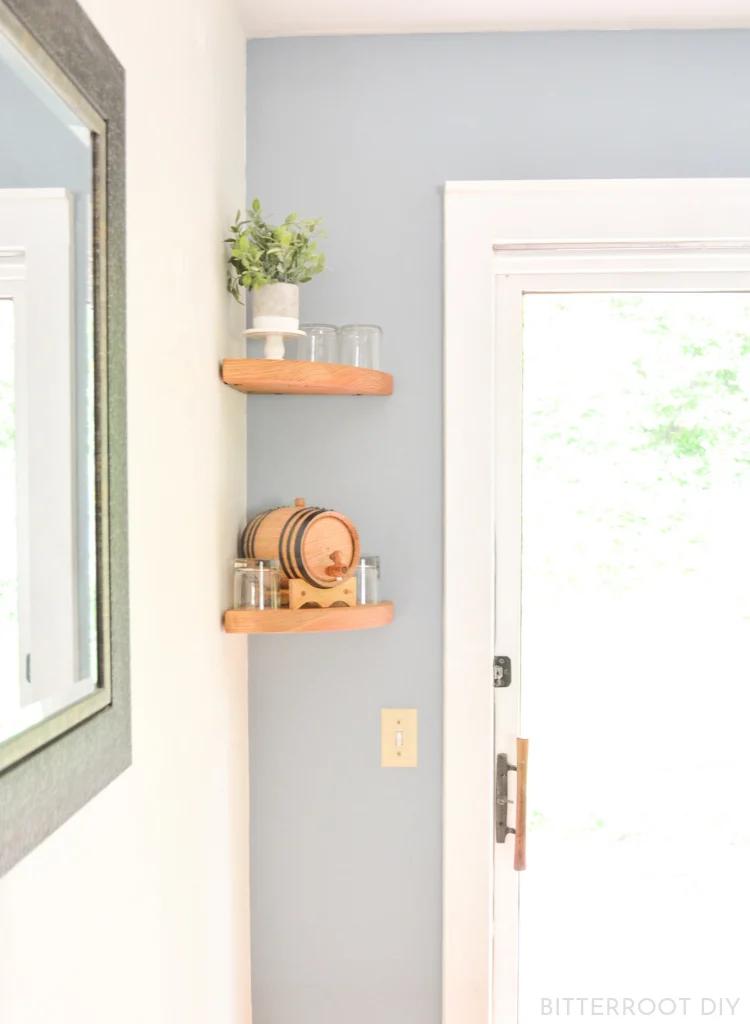
I painted the braces and screws black to match the rest of the hardware in the kitchen. You can buy hardware in the color of your choice, or paint it.
Please let me know if you have any questions and I’ll get back to you as soon as possible!


Thanks for stopping by!
For more project ideas, you can find me on Pinterest. And to stay up to date with the latest shenanigans, follow me on Instagram.


Lynne
Wednesday 30th of September 2020
Thank you for posting this. I'm going to venture into a Home Depot today, and buy one of their 24 inch panels. Hopefully they can cut it into four pieces for me, and then I'll have four solid wood shelves at a fraction of the price of what they are selling for online. I couldn't figure out how to attach them to the wall until I found your page.
This is my solution since I live in a small apt with no wood cutting equipment.