
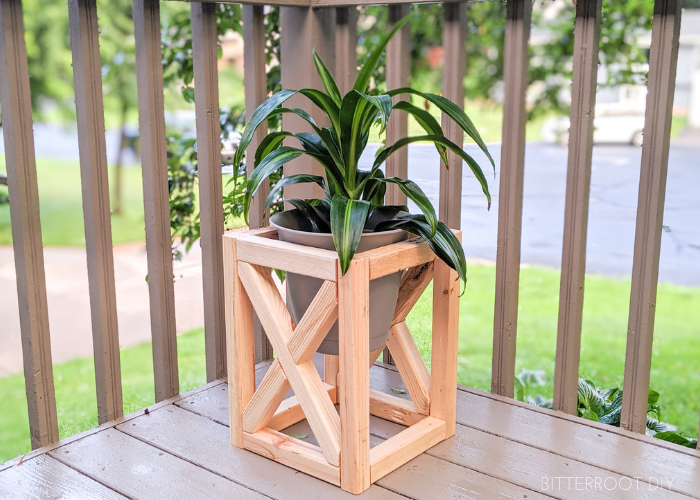
Build this DIY plant stand to showcase your favorite foliage.
This post may contain affiliate links. If you make a purchase from one of the links, I may make a small commission at NO EXTRA COST to you. This helps keep the tutorials and plans free here at Bitterroot DIY. Thank you for your support! See my full disclosure here.
I’m joining up again this month with a group of fellow DIY bloggers to bring you another At Home DIY challenge – this month is all about 2 hour projects! I put this DIY plant stand together during nap time the other day, so I think that qualifies (not including finishing and drying).
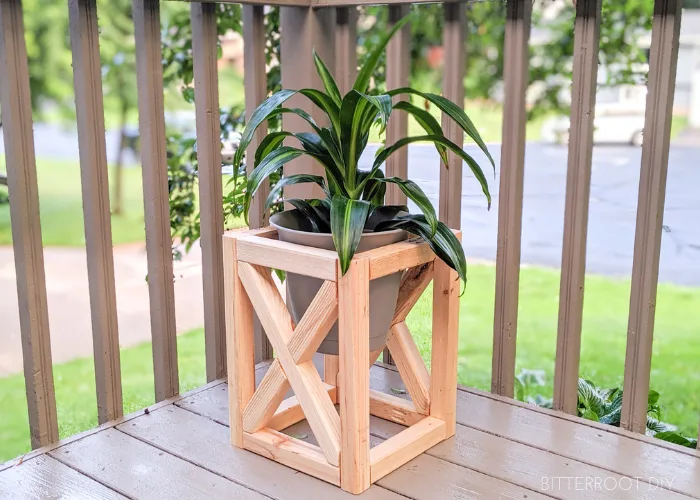
I used all “exterior” supplies for this plant stand – exterior poly, screws, and wood glue – so I could put it on our deck. If you plan to put it inside, use interior supplies instead.
This plant stand is 8 1/2″ wide and works with a 10″ planter pot. Adjust dimensions as necessary to fit different sized planters.
Enjoy the plans!
Tools & Supplies
- Miter Saw
- Drill
- Brad Nailer
- Kreg Pocket Hole Jig
- Orbital Sander
- Tape Measure
- Clamps
- Exterior Wood Glue
- Exterior Spar Urethane (I think it’s cheaper at Home Depot than Amazon, but that’s what it looks like)
- 2 1/2” Screws – Exterior Grade
- 2″ Finish Nails
- 1 1/4″ Finish Nails
- Level
- Speed Square
- Pencil
- Safety Glasses
- Ear Protection
Lumber:
- 3 | 2 x 2 @ 8′
Cuts:
- 4 | 2 x 2 @ 15″ (legs)
- 8 | 2 x 2 @ 8 1/2″ (supports)
- 4 | 2 x 2 cut to fit for the Xs (explained below)
Step 1.
Cut the boards to length and drill pocket holes in the ends of the horizontal support pieces


I drilled two pocket holes on one end and one on the other. Two pocket holes on one side prevents the board from twisting and the single just attaches the other side. You can drill two pocket holes in both sides for an extra secure joint, but, with smaller builds like this, I do the single on one side to save screws.
Step 2.
Assemble the two outside frames with wood glue and 2 1/2″ pocket hole screws.


Place pocket holes on the back of the frame to best hide them.


Step 3.
Measure and cut the Xs for both frames.
Start by marking the center-line of the 2×2:


Next, place the 2×2 under the first frame and line the center-line up with the two opposite corners.


Mark the angles in the corners with a pencil and use your miter saw to cut it to fit.


Repeat the same process for the opposing X.
Place the 2×2 under the frame with the first X in place. Align the center of the 2×2 with the opposite corners and mark the angles at both corners. Mark the center of the X intersection as well.
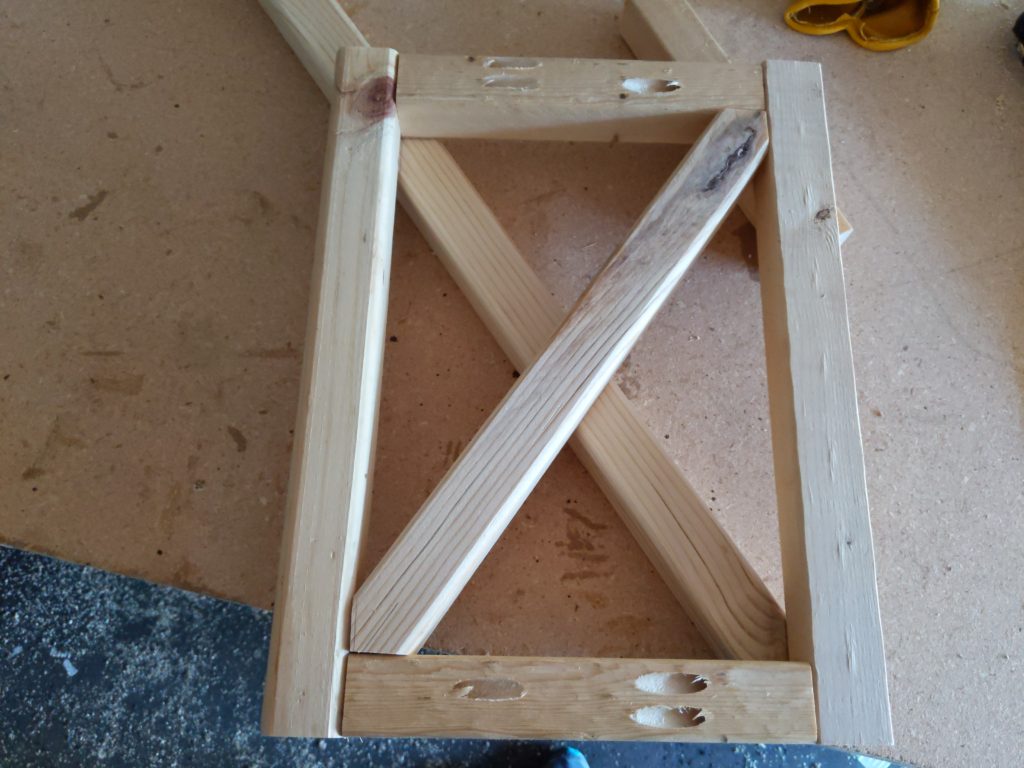

It’s a little difficult to see in the photo since I used a pencil, but there should be four lines to mark your cuts:


Cut the Xs to fit. It’s best to err’ on the side of caution when cutting the angles. You can always trim more off, but it’s difficult to fix things if you cut them too short.
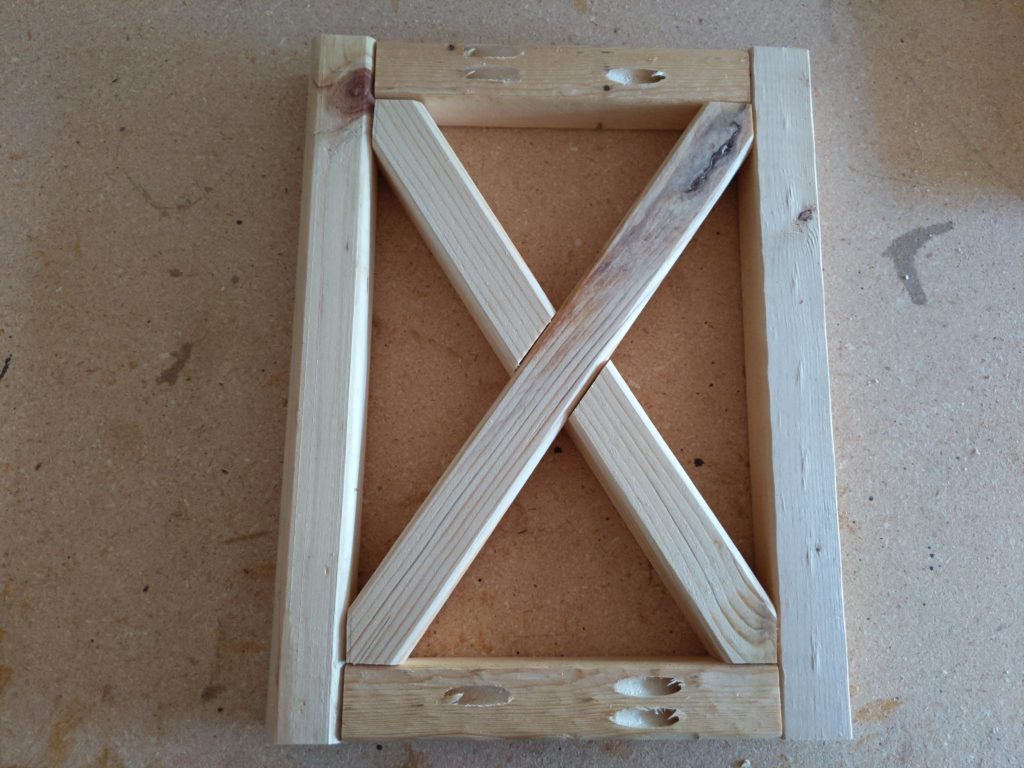

Step 4.
Attach the full-length X with wood glue and 2″ finish nails.
I drove nails into both sides – two through the legs and two through the horizontal supports.


Step 5.
Attach the short Xs with wood glue and finish nails.
Drive 2″ finish nails into the short Xs through the legs and horizontal supports.


Drive 1 1/4″ finish nails at an angle through the ends of the short Xs into the intersection with the full-length X.


Repeat for both frames.


Step 6.
Connect both frames together with the other horizontal supports along the bottom of the plant stand (it’s upside down in the photo).
Face the pocket holes toward the outside of the plant stand so you can get the drill in place to drive the screws.


Repeat for the top of the plant stand.


Once everything is attached, you should have a nice cube:


Fill the pocket holes with wood filler or wood plugs and let the glue (and/or filler) dry.
Sand and finish as desired. I left my plant stand the natural pine color and simply sealed it with exterior spar urethane.


Please let me know if you have any questions and I’ll get back to you as soon as possible!
Don’t forget to check out the rest of the 2-hour DIY ideas:


Thanks for stopping by!
For more project ideas, you can find me on Pinterest. And to stay up to date with the latest shenanigans, follow me on Instagram.


Terry Hughes
Wednesday 19th of May 2021
Very nice design, and very simple to build. I have made two — using cedar, and left them unfinished. Also added a small adjustable shelf in case we get a long narrow pot sometime. Added small rubber feet too to raise the endgrain (on the uprights) above any water. They definitely add to the appearance of the flower pots, as well as raising the pots to a more convenient height for dead-heading etc.
Patricio
Friday 4th of September 2020
Que bonito el porta macetero, también me gusta el pino natural cepillado, me gusta como queda con el aceite de linaza o sellarlo con laca a la piroxilina en caso de humedad. 👏👏👏👏👏
Toni | Girl, Just DIY!
Tuesday 23rd of July 2019
What a great project, I love the X design on the front and back. 2x2s are great for making all kinds of stuff.
Meegan
Friday 19th of July 2019
This would look amazing on my new back porch! Can't wait to make my own very soon. Thanks so much for sharing the detailed tutorial. Have a great weekend.
tylynn_sattler
Monday 22nd of July 2019
Thank you! I'd love to see it if you build one!
Sherry
Wednesday 17th of July 2019
This looks great and I can't believe that it can be built so quickly. I am pinning this so that I can make one.
tylynn_sattler
Thursday 18th of July 2019
Thanks so much Sherry!