
Whether you’re a seasoned baker or a newcomer to the world of sourdough, understanding how to properly care for your sourdough starter is a key part of your sourdough journey. A sourdough starter is a living culture that requires attention and care to maintain its health and vitality. This guide will take you through everything you need to know about caring for your sourdough starter, while keeping it very simple.


Let me start this out by saying I’d definitely classify myself as a “casual” sourdough baker. My goal isn’t to make artisan loaves and seek perfection. My goal with sourdough is to give our family a healthy, more nutritious option than store-bought bread and baked goods. And that is 100% possible! Turns out – it isn’t as finicky as some articles might have you believe.
I like to keep it simple and realistic to be able to work into our everyday life. I don’t bake every day or worry about feeding my starter everyday or create huge amounts of discard. Instead, I feed the starter once a week or once every other week and bake in bulk. Other than that, I store it in the fridge and don’t worry about it. I also keep the discard to a minimum (unless I want it for a specific recipe). If I want to bake more during a week, I simply pull it out of the fridge and prep it to bake whenever. Easy peasy!
Keep it Simple
In my opinion, many tutorials make sourdough more complicated than it needs to be. It’s just like any kind of baking or cooking – you can make it as complex or simple as you like. And you can find success both ways! I probably shouldn’t say this and I know it’s going to be controversial, but it all seems like a great money-making scheme to me. You really don’t NEED anything fancy. But there are a lot of products available. And it’s easy to push products for something when you’re told it’s “necessary” for success.
There. I said it. The sourdough side of the internet is going to come for me. 😂
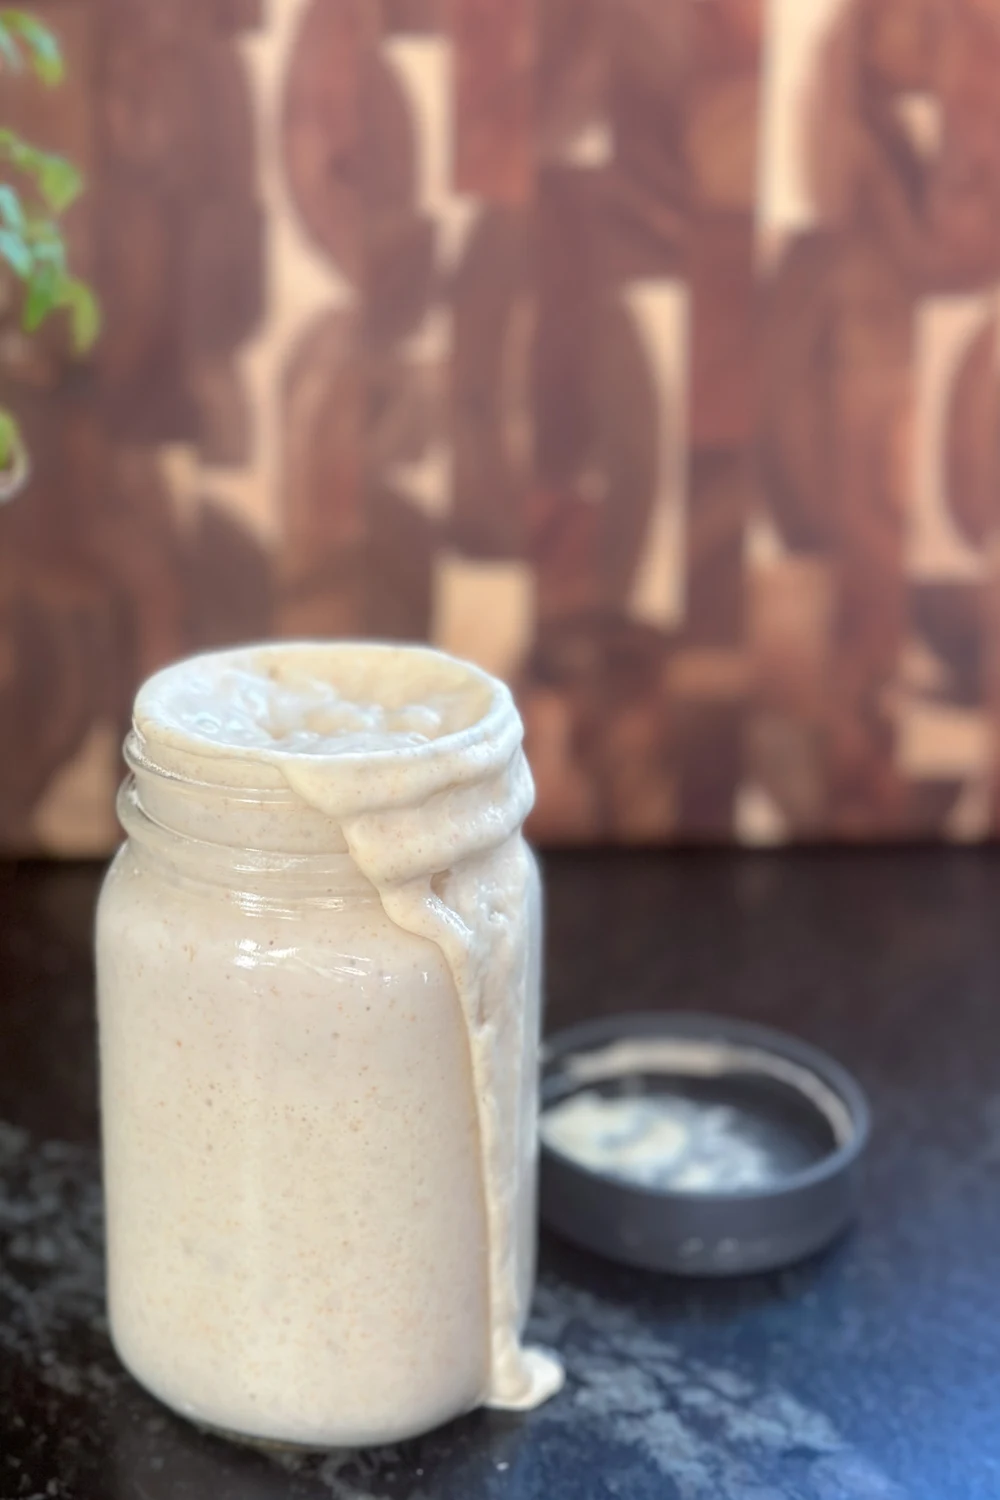
You don’t need any fancy bowls, covers, or starter jars. No fancy “sourdough tools”, cutters, or spatulas. You don’t have to weight everything (unless that’s your preferred method of cooking, of course). Can I say that? Is that allowed in the world of sourdough? You can use your plain ol’ glass mixing jars and silicon spoons and spatulas. Store the starter in mason jars with reusable lids.
Again, it’s just not as finicky as some articles make it seem. You can make sourdough a very low stress, low waste, casual situation. You’re just making bread the traditional way!
If you like to deep dive and totally nerd out on the specifics of sourdough and baking perfect artisan loaves, more power to you! Just like any hobby.
Grandma Sourdough Era
I’ve said it before and I’ll say it again – I’m in my grandma era of sourdough baking. People have been making bread this way for all of existence. Before you could buy yeast at the store, you grew it in a jar. They started manufacturing yeast so they could make bread faster and faster and bag it and fill the grocery stores. But, before you could buy yeast, this is how every household made bread! And I don’t think great great great great grandma had a kitchen scale. Or, if she did, I doubt she used it every time she made bread, which was a daily task. Of course, this is speculation, but I’m guessing she just knew the measurements and whipped those loaves up like they were no big deal. Little of this, little of that, needs a bit more flour, bada bing bada boom – loaf of bread. You know how grandma cooks – a little of this, little of that, dash of this, and voila! The most beautiful meal you’ve ever tasted.
You don’t have to be intimidated or overwhelmed by sourdough. You can keep it very simple!
Ooof – now that I got that off my chest – let me walk you through how to keep the starter in the fridge and my personal “schedule”, as well as how to keep it at room temperature if you prefer to bake more often.

Starting Your Sourdough Starter
Of course, the journey begins with creating your sourdough starter. Mix equal parts of flour and water in a clean jar, and let it sit in a warm spot in your kitchen (or by a vent for warmth and air circulation). Whole grain flours are particularly beneficial in the beginning because they contain more nutrients and wild yeast. After a few days, you should start seeing bubbles, indicating that fermentation is happening. For more information, see my post all about how I started my sourdough starter as a complete beginner! Or you can purchase dehydrated starter and go from there.
Feeding Your Starter
Feeding your sourdough starter is crucial to keep it active. A balanced diet for your starter consists of regular feedings of flour and water. The frequency of these feedings depends on where you keep your starter:
- At Room Temperature: Feed your starter once or twice a day to maintain its activity. This is ideal for bakers who use their starter frequently.
- In the Refrigerator: Storing your starter in the fridge slows down its fermentation, making it lower maintenance. It’s perfect for bakers who only bake once a week or less frequently. If you store your sourdough starter in the fridge, it only needs to be fed about once a week. If you bake frequently, you can feed it more often, but weekly maintenance (or every other week) is sufficient for long-term storage.
What to Feed Your Starter
All-purpose flour is my flour of choice for feeding our starter on a regular basis. But, every now and then, you can boost it with a whole grain flour to introduce more nutrients and diversity to the starter. Rye and whole wheat are excellent choices. I do a boost feeding with whole wheat flour every few months or if the starter is acting a little lazy (fewer bubbles and/or not doubling in size after being fed).
Feeding Ratios
- Flour: 1/2 cup (60 grams)
- Water: 1/4 cup (60 grams)
- Starter in the Jar: approximately 1/2 cup
These amounts can be adjusted up or down depending on how much starter you need, but aim for a 1:1 ratio by weight (water:flour). I keep approximately 1/2 cup of starter in my jar at a time and feed it with 1/2 cup of flour and 1/4 cup water at each feed. In the interest of keeping things simple, I do not use a food scale. That’s a great option if you prefer to be exact, but it’s not necessary. Again, you can be successful with sourdough while keeping it simple.
Why can you get away with feeding it approximately? The key difference in feeding a smaller amount of starter with more flour and water or less flour and water is the activity and dilution level.
For example:
Lower Feed Ratio: Feed 1/2 cup of starter with 1/2 cup flour (60g) + 1/4 (60g) cup water
- Dilution: This dilutes the existing starter more, resulting in a lower proportion of active microorganisms relative to the food (flour and water).
- Activity: It will take longer for the starter to become bubbly and double in size because the microorganisms need more time to process the larger volume of food.
- Outcome: This approach is ideal if you plan to store the starter for longer periods or if you want a milder flavor profile in your bread (less sourness).
Higher Feed Ratio: Feed 1/4 cup of starter with 1/2 cup flour (60g) + 1/4 cup water (60g)
- Dilution: This maintains a higher concentration of active microorganisms compared to the food provided.
- Activity: The starter will become active and bubbly more quickly since there’s less food to process.
- Outcome: This method is better if you need a starter that’s ready to use sooner or want a tangier flavor profile in your bread (more sourness).
So, really, the important part is that you keep your flour:water ratio equal in grams. And, depending on how much starter you have, it’ll become active sooner or later. Not a big deal. It doesn’t mess the starter up at all. Just takes the active yeast less or more time to eat through the feeding.
I keep about 1/2 cup to 1 cup of sourdough starter in my mason jars. To keep things very simple, I always feed it with 1/2 cup flour + 1/4 cup water (or 60g flour + 60g water).
Now, if you are an avid baker or baking for orders, you may keep a much larger starter and want to feed it with much larger quantities, maintaining the equal water:flour ratio. But, for the everyday home baker, 1/2 cup flour + 1/4 cup water (60g and 60g) works great to maintain all the starter you’d ever need.
When to Feed Your Starter
Feeding Schedule for the Weekly Baker
If you like to bake once a week or every other week, keep your starter in the fridge.
I keep two separate jars of starter. One: so I can bake two loaves of bread at a time. Two: once upon a time I dropped my jar of starter and it shattered all over the floor and I had no backup. Thankfully, I had given some of mine to our neighbor who saved my booty and gave me some back. But I like to keep a couple now just in case!
Also to note – I mostly bake overnight sourdough recipes. I’ve found that it works best into our schedule. So I typically pull my starter out of the fridge in the morning, feed around noon, mix dough in the evening, bake the following morning.
When I’m baking a recipe throughout the daytime, I pull the starter out of the fridge in the afternoon or morning, feed it before bed, mix dough the following morning, bake in the evening.
Feed by Sight
I go mostly by sight when feeding my sourdough starter. I know I like my quart mason jar to be around half way full after I feed my starter, before it grows, to have the correct amount of starter for my usual bread recipes. If it starts about half way full, it will grow to fill the jar (doubles) by the time it’s ready to bake with. This is more starter than many recipes call for, but I find it simplest to keep the starter around 1/2 cup to 1 cup measurements in most my recipes. And they rise a little faster and are less tangy than recipes that only use 1/4 cup starter.
I make two of my simple sandwich loaves about once a week. To bake two, I feed both my starters and use 1 cup of active starter from each.


Sourdough Starter Feeding for an Overnight Recipe:
- Remove Starter from the Fridge
- Take your jar of starter out of the fridge and let it warm up at room temperature for a bit. This isn’t strictly necessary but helps “wake up” the starter. I pull it out in the morning and let it sit until the afternoon.
- Discard Some Starter (optional)
- If I have quite a bit of starter in the jar (more than half the jar), I will move some to a discard jar to be used for discard recipes. If there’s approximately a quarter of the jar or a little over, I skip discarding and just feed what’s in the jar.
- Feed the Starter
- Add 1/2 cup (60 grams) of flour and 1/4 cup (60 grams) of water to the starter.
- Mix thoroughly until there are no dry spots of flour. The mixture should resemble a thick batter. You can add a little bit extra water if it’s too thick, particularly when you do a boost feeding with whole wheat or rye flour which soaks up more water than all-purpose. I know, I know – breaking ratio “rules”. But we’re casual around here. Your starter will do the same thing and the yeast will eat and grow as usual. Don’t drown it, of course. But a little extra water will do fine (think 1 Tbsp – 2 Tbsp). You’ll get more comfortable at judging the consistency over time and figuring out how you like to bake with your starter.
- Let It Grow
- Leave the fed starter at room temperature for 4-6 hours. It should become bubbly and double in size during this time. In the winter, I keep mine near the stove or under a light so it’s warm enough. In the summer, it grows pretty much anywhere on the counter since the house is warmer.
- Check for Readiness
- Your starter is ready to bake with when it’s bubbly, has doubled in size, and passes the “float test.” Drop a small spoonful into a glass of water—if it floats, it’s ready to use.
- Bake!
- Bake with your active starter.
- Store It Back in the Fridge
- After baking, feed your starter again and place it back in the fridge. It will go dormant and remain stable until the next feeding. Based on my measurements and feedings, I usually have about 1/4 cup of starter left after baking with it. Then I feed it with 1/2 cup flour and 1/4 cup water, which leaves me with about 1/2 cup starter after it grows and then goes dormant in the fridge over the course of a few days. So next time I pull it out, I have about 1/2 cup of starter again (the jar is somewhere between a quarter or half full), feed it with the 1/2 cup flour + 1/4 cup water, bake. And around and around you go.
Sourdough Starter Feeding for a Daytime Recipe:
Follow the same process as above, but feed your starter at night before bed and mix the dough the following morning.
My Step by Step Feeding Schedule
To summarize, this is what I do every week or so:
Pull quart mason jar out of the fridge. The jar is quarter to half full with dormant starter. Let it rest at room temperature for a few hours. Feed starter with 1/2 cup flour + 1/4 cup water. Let rest at room temperature again until it becomes active (4-6 hours, doubled in size). Bake with 1 cup of starter. Then feed the remaining starter (around 1/4 cup after baking) with 1/2 cup flour + 1/4 cup water. And put back in the fridge. Repeat whenever you want to bake.
This keeps waste to a minimum and you can maintain a casual baking schedule. No stress!
Feeding Schedule for the Avid Baker
If you bake once a day or every other day, keep your starter at room temperature. Feed it each day about 4-6 hours before you plant to mix your dough.
I keep my sourdough starter on the counter whenever I bake a few days back to back. Then I’ll pop it back in the fridge to take a week or two off. You can make your starter and baking schedule work for you!
Troubleshooting and Tips
Hooch Formation:
A layer of liquid (called hooch) on top indicates the starter is hungry. Stir it in or pour it off, then feed the starter.
Mold or Off Smell:
If you see mold or notice a foul smell, discard the starter and start fresh. A healthy starter smells almost like fresh bread with a little tang. You’ll know if it’s not right.
Consistency:
Adjust water amounts slightly if your starter is too runny or too stiff. The goal is a thick, pancake-batter consistency. Everyone keeps theirs a little different consistency. You’ll figure out what you like best as you work with it.
Sluggish Starter?
If your starter gets sluggish, don’t panic. Give it a boost feeding with whole wheat or rye flour to revive it. Then discard half and repeat. Or you can give it a boost feeding and then a couple feedings with all-purpose flour, and it will bounce back to life. Discard between the extra feedings so you don’t overflow your jar as you bring it back to life.
You can also try moving your starter to a warmer area. Place it by an air vent or next to your cooking area if necessary, especially in the winter months. You can also turn the oven light on in your oven and put the starter in there. I’ve done this before, but I like to leave the oven door open so I don’t accidentally forget about it and preheat the oven and completely cook my starter. That would be way to easy to do 😂 But the light adds just a little extra warmth in there to give the starter a little boost.
I accidentally left my starter on the counter for about a week without feeding it and it was VERY sluggish the next time I fed it. It pretty much did nothing. So I fed it with whole wheat flour, which got it to grow again, discarded half, then fed it with all-purpose flour two more times until it was lively and healthy again. Then baked with it, fed it once more, and back to the fridge it went. Basically, it had gone dormant from sitting at room temperature for too long without flour + water to feed the yeast. The whole wheat and extra feedings boosted it back to life.


Commonly Asked Questions
Can I use different flours to feed my starter?
Absolutely! Experimenting with different flours can enhance the flavor and vitality of your starter. You can use them for boost feedings or simply to mix up the flavor of your starter a bit. Just keep in mind that you may want to add a little extra water with different flours to maintain the consistency of your starter, as mentioned above.
How do I know if my starter is ready to use?
The float test is a simple way to check. Drop a spoonful of your starter into a bowl of water; if it floats, it’s ready to leaven your dough.
Can I recover a neglected starter?
In many cases, yes. Begin by discarding a portion of the starter and feeding the remainder with fresh flour and water. Repeat this process until the starter shows consistent signs of activity. See above under “Troubleshooting and Tips” for more info.
How much starter should I discard?
If you maintain your starter similar to my schedule above, you don’t necessarily have to discard starter very often. However, if you want to make a recipe with sourdough discard, simply feed your starter an extra time, let it rise, and then put aside some of it in a separate jar for the discard recipe. You can also save the discard whenever your starter needs a boost feeding or two.
Can I use the discard in recipes?
Definitely! Sourdough discard can be used in a variety of recipes, from pancakes and waffles to cakes and biscuits, adding a delightful tang and reducing waste. Try my Sourdough Banana Bread for a great way to use up your sourdough discard.
Sourdough discard will keep for 1-2 weeks in an airtight jar in the fridge. If it goes past this point, you may see it start to develop some hooch on top. If you still want to use it, pour of the hooch, feed the starter, let it rise and then go dormant again and you have yourself some “fresh” discard. Really, you just made another starter and can treat it the same. But use it in the dormant state (after it rises and falls) for discard recipes. Honestly, sometimes I just use it in the active state for discard recipes too. It works both ways. I’m tellin’ ya – keep it simple.


I hope this is helpful! Please let me know if you have any questions, or if I missed something. My goal is to explain sourdough simply and show you how not-complicated it is.
Your sourdough starter is a fermented, live culture of yeast. You feed it with flour and water to keep it alive and active. When you feed it, it grows and expands and rises in the jar. Right when it reaches the peak, or just starts to fall from the peak, you know it’s hungry again. So you add it to a bowl and give it more flour and water and a bit of salt – the dough. The yeast starts to grow and expand and rise again as it feeds on the new flour. Bam – that rises your bread. That’s all there is too it! You have yeast, you feed it, it grows – either in a jar or in a loaf.
You can bake sourdough without dedicating an entire corner of your kitchen, 752 hours a week, and your firstborn child to it. You got this!
Top Sourdough Recipes
- Simple Sourdough Sandwich Bread (I bake two loaves of this almost every week)
- My Go-To Sourdough Round Loaf Recipe
- Sourdough Discard Banana Bread
My Favorite Sourdough Supplies
Like I said above, I don’t own any tools that are specifically for sourdough. But these are the standard kitchen gadgets I use to bake sourdough recipes:
- Nesting Glass Bowls
- Silicone Spoon + Spatulas
- Quart Wide Mouth Mason Jars
- Reusable Mason Jar Lids (or these fun colorful ones!)
- Pint Mason Jars (for keeping discard)
- Loaf Pans
- Lodge Dutch Oven (for round loaves)
- Reusable Bowl Covers, Reusable Silicone Stretch Lids, or plastic wrap works too

| Tylynn |
Join me on YouTube and Instagram for the behind the scenes on our latest projects. And follow along on Pinterest for more projects, DIYs, recipes, and ideas to make home your own.
This post contains affiliate links. If you make a purchase from one of the links, I may make a small commission at NO EXTRA COST to you. See my full disclosure here.


