
Are you ready to start baking delicious sourdough bread at home? The first step is to make your own sourdough starter. With just flour, water, and a little bit of patience, you’ll be able to create a living, bubbly, and delicious sourdough starter from scratch!

This post contains affiliate links. If you make a purchase from one of the links, I may make a small commission at NO EXTRA COST to you. Thank you for your support! See my full disclosure here.
Updated 4/3/2024
It’s been about a year and a half now since I started making sourdough and it has been such a fun journey! When I first started, I had no idea such a world existed. I just saw a reel on Instagram and thought “Hey, that looks cool. Maybe I could make that.” And Joseph loves the sourdough taste. So, that was that – I figured I’d just go ahead and do it!
I posted a little blip about it on my Instagram stories, and, HOLY SMOKES, everyone was so helpful. I received so many messages of encouragement and helpful advice. It was. so. cool. I had no idea there were so many people, from all around the world, learning the old traditional art of making bread. And not only bread – TONS of other baked goods that you can make with sourdough.
Did It Work?
In short – yes! There was a lot of learning and troubleshooting along the way. But it was successful, and I was able to make a decent loaf of bread after about 2 weeks!
Since then, I’ve learned how to care for my sourdough starter, when to feed the starter based on when I want to bake, keeping it in the fridge versus on the counter, nutritional benefits, troubleshooting, and many many new recipes.
The biggest advice I can give is just to go for it! That’s the best way to learn. And you’re in the right place to get started!
The Basics – What is a Sourdough Starter?
A sourdough starter is a live fermented culture of wild yeasts and good bacteria. When you combine fresh flour and water, the culture begins to ferment and cultivates wild yeasts and good bacteria that acts as a natural leavening agent, rather than commercial yeast. Over time, the yeast and bacteria in the starter develop into a unique, live culture. Continue to feed it with flour and water to cultivate the yeasts and good bacteria, and you’ll have a healthy, strong starter that can be used time and time again.
You Got This
Now, if you’re intimidated at the thought of trying to make your very own starter, DON’T BE! I had a few people reach out and say they’ve always wanted to make sourdough from scratch but don’t know where to start or if they’d be able to do it. Well I’m here to tell you that apparently you can go into it completely blind, having absolutely no idea what you’re doing, or what to make with it once it’s started, and STILL get’r done (basically how I started into sourdough).
Don’t do too much research. I know that sounds counterintuitive. But there’s a lot of information out there to get bogged down in. I almost think it was best to start into it without much research or any idea what I was doing! I didn’t even know I should have been stressed before starting 😅 Honestly, if I had done more research, I think I would have been too intimidated to even try! It’s unfortunate, but I think that happens quite often. Sourdough is often presented in such a complicated way. But it really doesn’t have to be.
Let’s think about this. People have been leavening bread naturally for thousands of years! This is how ALL bread and baked goods used to be made. Nothing fancy – just flour, water, time, and knowing what it should look/feel like.
And another bit of encouragement: one of my friends sent me a message and said her husband started his sourdough starter way back in college, kept it alive in a bro house, and he still has it to this day.
Sooo, yeah. You can do this!
Beginner Sourdough Starter Recipe & My Experience with the Process
I started by following the beginner sourdough starter recipe from The Clever Carrot. But, as sourdough goes, I had to alter a few things and figure it out as I went. This is the recipe I ended up with and what my experience was.
Supplies & Ingredients
- Quart Mason Jars
- Reusable Storage Lids
- Wood Mixing Spoon
- Measuring Cups
- Rubber Bands (or you can use tape)
- Kitchen Scale (kind of optional, more details below)
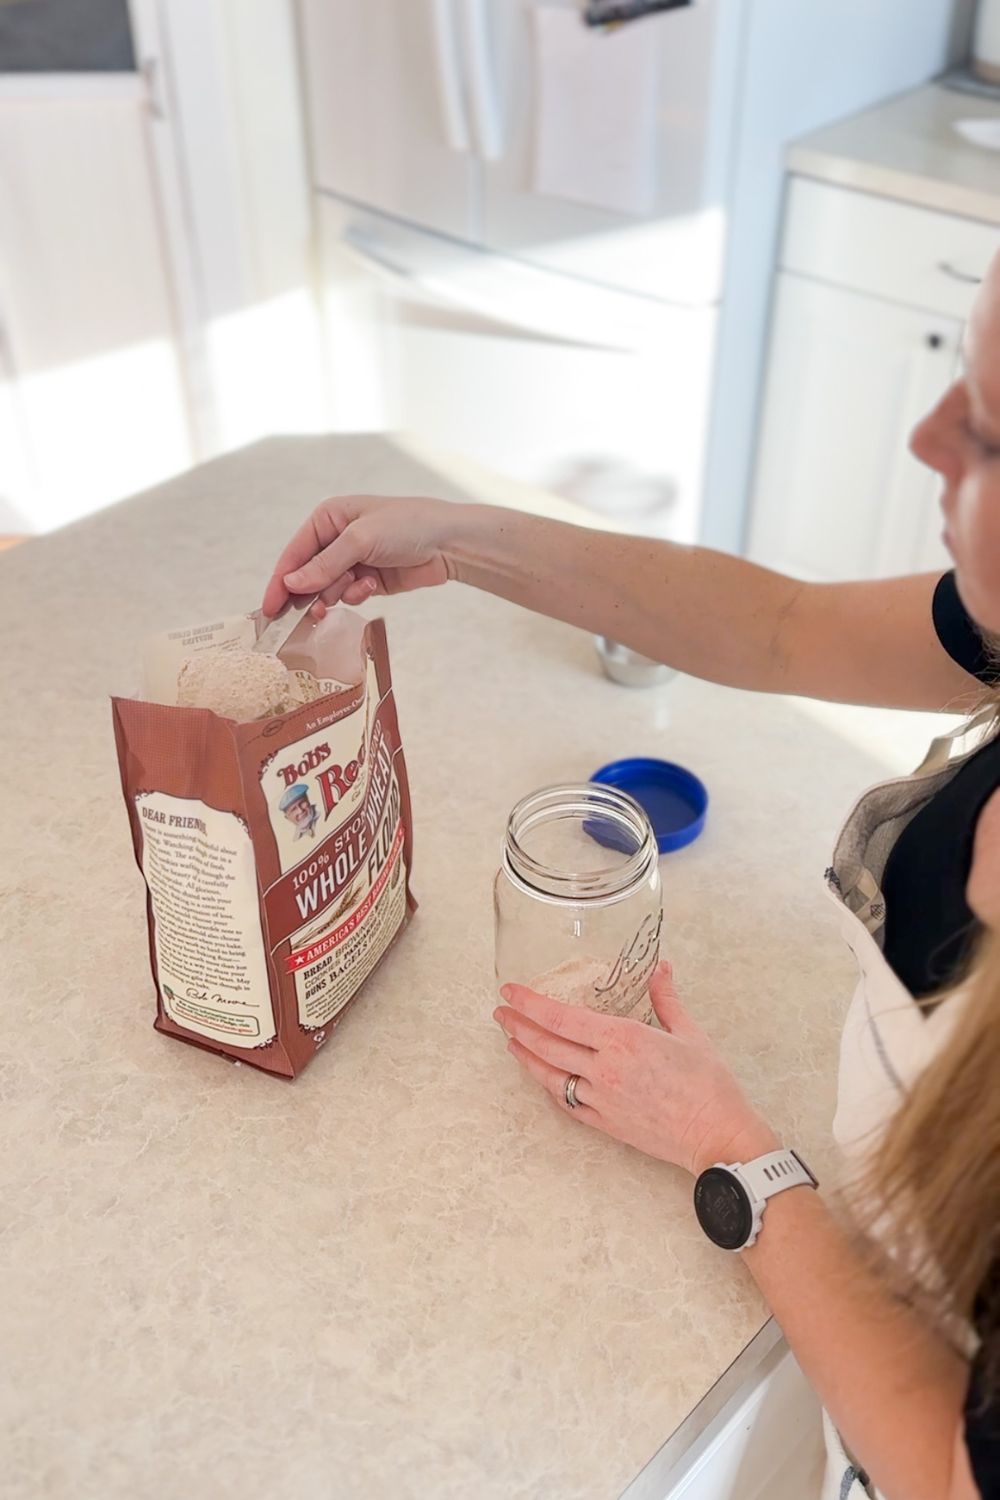
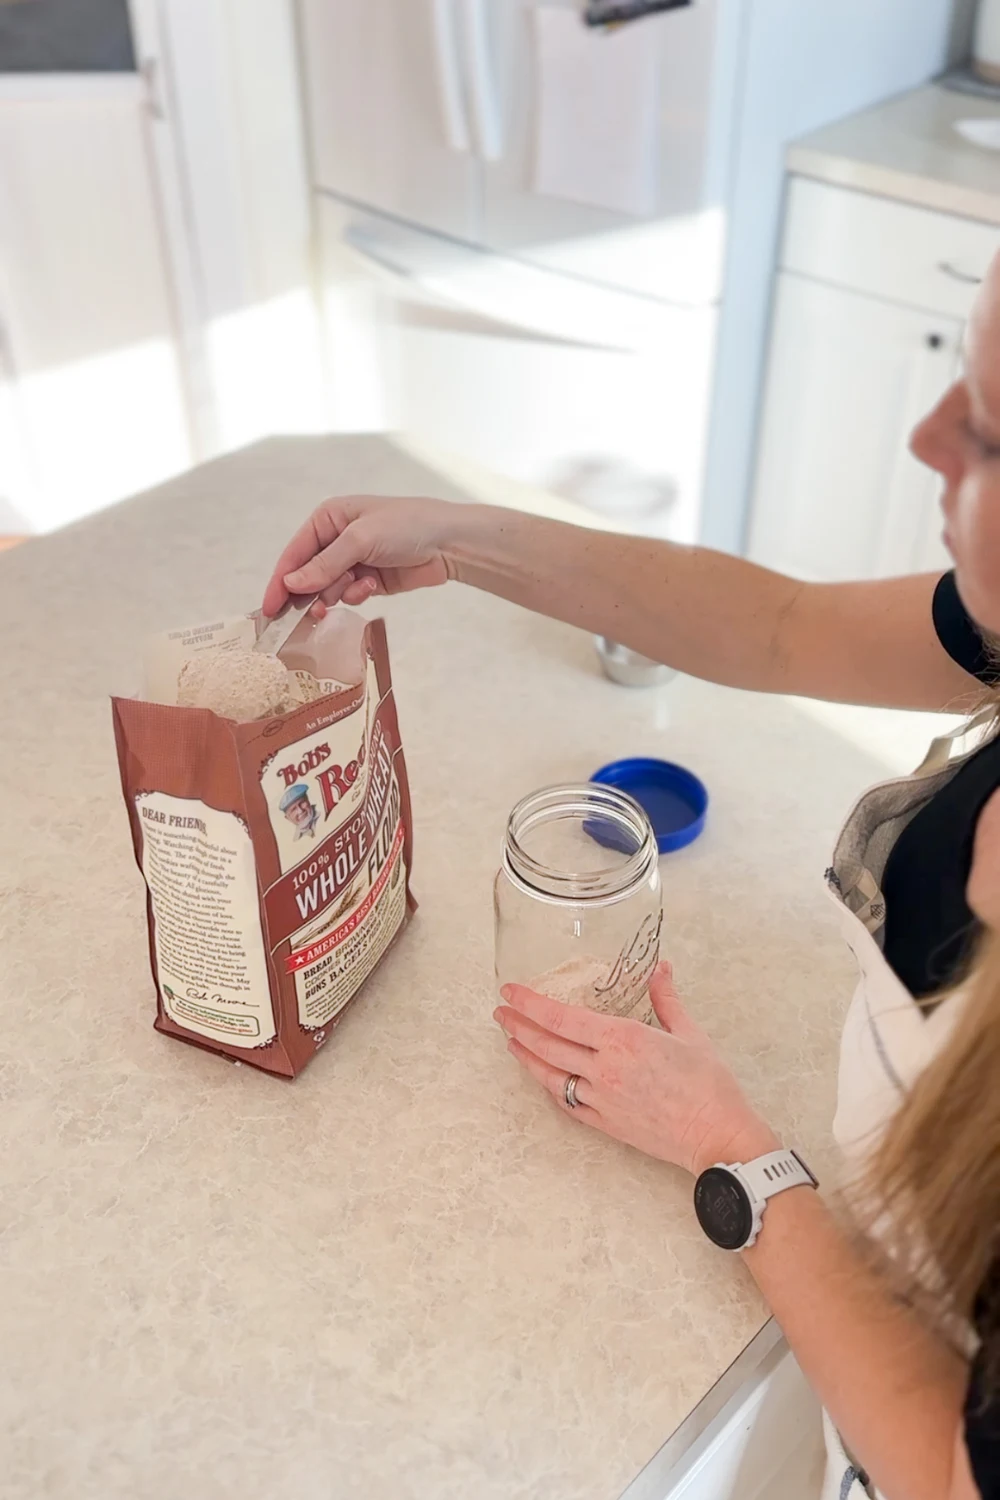
- Wheat Flour (Bob’s Red Mill Whole Wheat Flour or King Arthur Whole Wheat Flour)
- All Purpose Flour (Wheat Montana All-Purpose Flour or King Arthur All-Purpose Flour)
- Water
- Dutch Oven (for baking once the starter is ready to go)
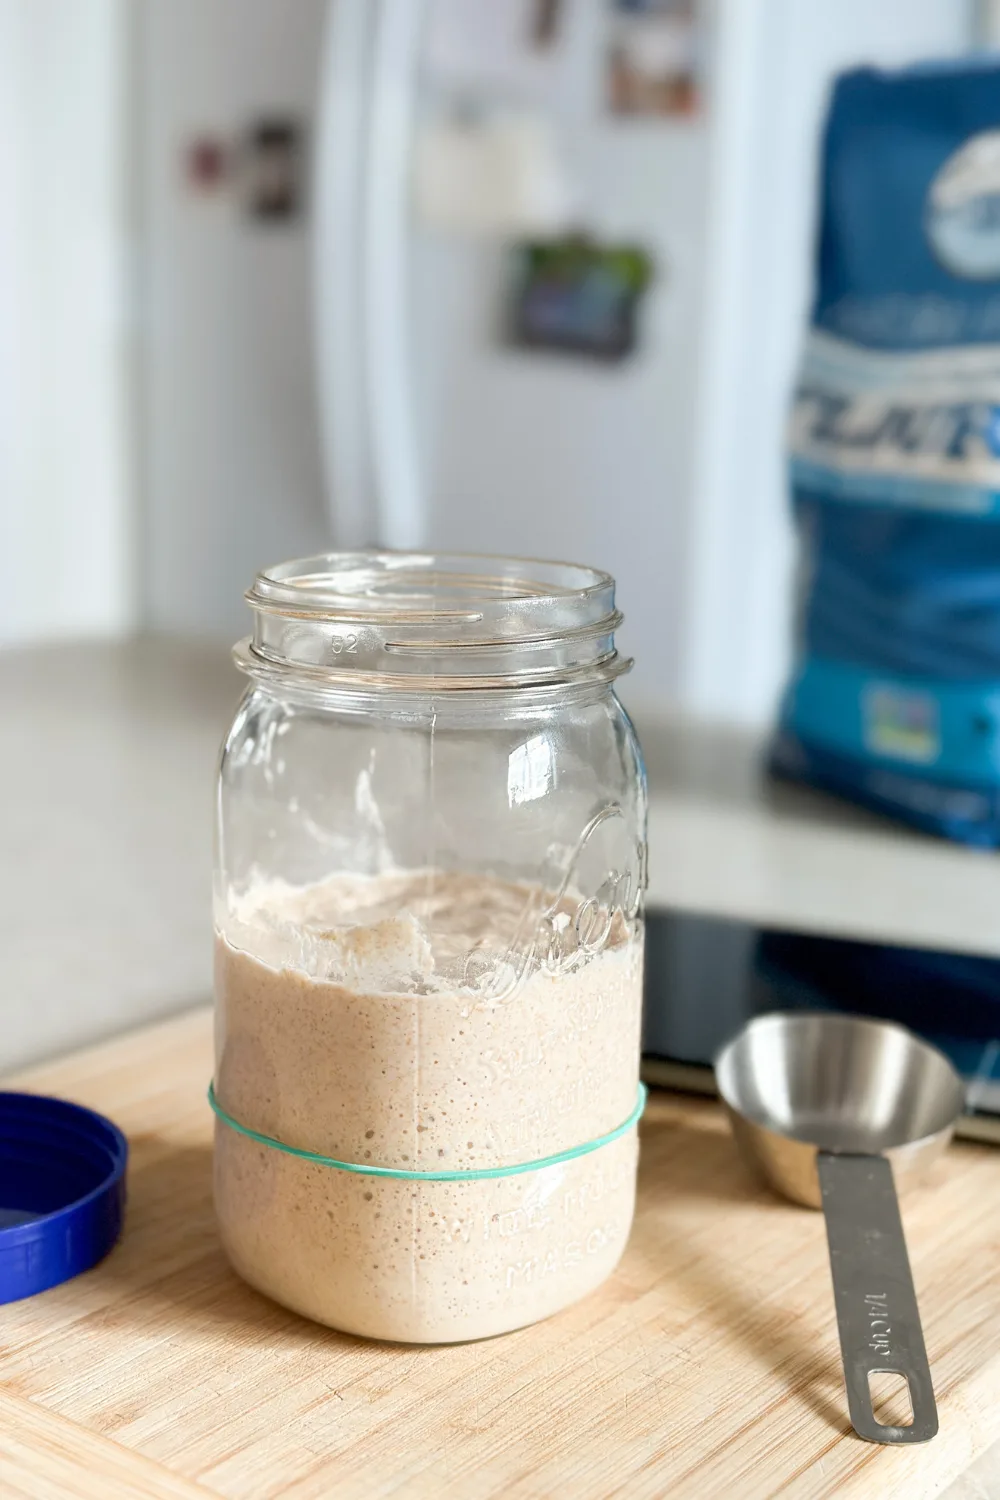
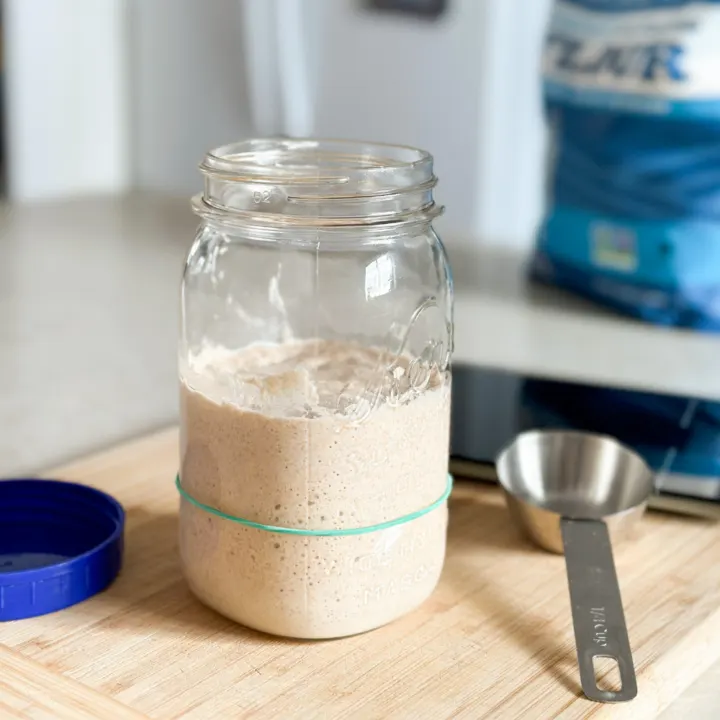
Throughout this process, I used two 32oz mason jars so I could switch the starter to a new jar a few times. I had a large pack of them on-hand from summer canning [HERE], but you can also buy them as singles [HERE]. I do recommend the wide mouth jars so it’s a little easier to mix, though I’m sure the regular mouth would work just fine. We use the Ball reusable storage lids [HERE] for our opened canned food and they worked great for my sourdough starter as well. I just set the lid lightly on top of the jar so the starter still got some oxygen (you don’t want it airtight).
Most recipes say that creating a sourdough starter from scratch will take about 7 days, but it can be longer or shorter, depending on your environment. It took mine 16 days before it was active enough to bake with (probably because I was unknowingly harming it … see below paragraph…). Patience is key. Just continue the feedings and it will get there!
Instructions
Day 1: Mix the Starter
In a clean, glass container, mix together 1/2 cup (60 g) of whole wheat flour and 1/4 cup (60g) of water. You can use either filtered water or tap water. Using a wood spoon or silicon spatula, stir until the mixture is smooth and there are no lumps. It will be very thick and pasty. Cover the container with a lid or cloth and let it sit in a warm spot (70°-75°) for 24 hours.
Whole wheat flour is minimally processed so it’s packed with nutrients and microorganisms to jumpstart fermentation. If you don’t have whole wheat flour, all-purpose is fine, but it may take a bit longer to get going. I used Bob’s Red Mill Whole Wheat Flour but have heard good recommendations for King Arthur Whole Wheat Flour as well. A lot of recipes call for Rye flour. Everyone’s sourdough starter is different, which is part of what makes it so cool!
** (Non) Pro Tips & Lessons Learned – PART 1 **
At first, I set mine on the counter next to the oven, but that wasn’t quite warm enough. So I ended up moving it to the top of the oven with the overhead lights on. Temperature is a big factor in fermentation. I noticed a significant increase in activity when I moved the starter to the stove versus on the counter. It will ferment both ways, but cooler temperatures ferments slower. A few people suggested putting it inside the oven with the light on (oven off). But I was 110% confident that I’d forget about it and completely cook it to death the next time I preheated the oven. On top of the stove was much safer. I just moved it off the stove any time I was cooking so it wouldn’t get too hot.
I had started out mixing my starter with a stainless steel fork or spoon, but a few of my Instagram friends reached out to let me know that the metal can react with the mixture and kill off some of the good yeast. It was around day 10 and the starter just didn’t seem as active as it should have been. I switched to wood spoons and noticed a big difference right away. Turns out, I was killing some of the yeast I was trying to cultivate. Just another reinforcement that you can do this! You don’t have to get it perfect right away.
Day 2: Check It Out!
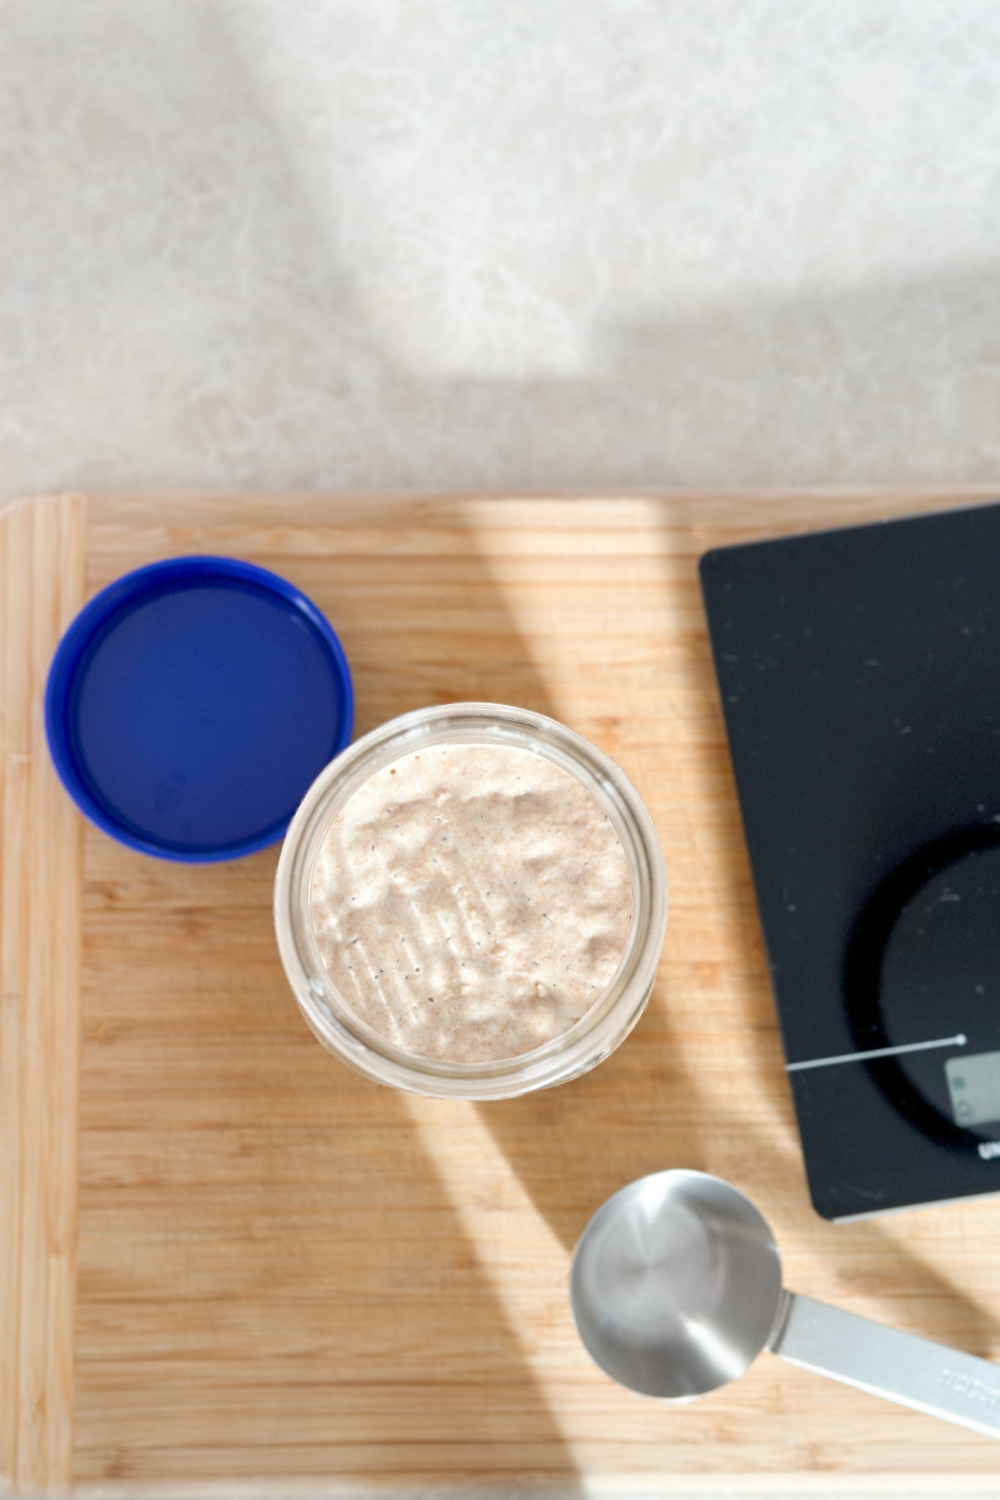
On day two, you should notice some bubbles on the surface of your starter. Bubbles mean fermentation!
Some recipes advise you begin feedings on day 2, but I let mine sit for another 24 hours.
Honestly, it seems like a lot of sourdough is both personal preference and depends on your own environment, water, flour, etc. It’s going to be different for everyone.
During the next 24 hours (day 2), a dark liquid may also appear on the top of the starter. This is called hooch and indicates that your starter is fermenting and is hungry! It’s best to pour it off, but for now, just leave it. You can discard it when you start the feedings on day 3. If you prefer, you can mix the hooch in when you feed it, but it will make the bread a bit more sour (I chose to dump it off).
Day 3: Start Feeding
By day 3, the starter will be very stretchy and hungry. Pour off any hooch, and, using a spoon, discard half of the mixture. You should have about 60g left.
Add 1/2 cup (60g) of all-purpose flour and 1/4 cup (60g) of water to the remaining mixture. Stir until the mixture is smooth and there are no lumps. It should be about the consistency of thick pancake batter. Add a bit more water if necessary to get the consistency right. I added about 1 TBS of extra water on day 3 to thin the starter just a bit. Cover the container again and let it sit in your warm spot for another 24 hours.
Day 4 – 7: Discard & Feed
Repeat the process for the next few days. Discard half of the mixture and add 1/2 cup (60g) of all-purpose flour and 1/4 cup (60g) of water every 24 hours.
You can add more flour if you want to grow a bigger starter, but I just kept with the 1/2 cup flour + 1/4 cup water. I figure I can increase to bigger portions if I’m baking with it a lot and need more.
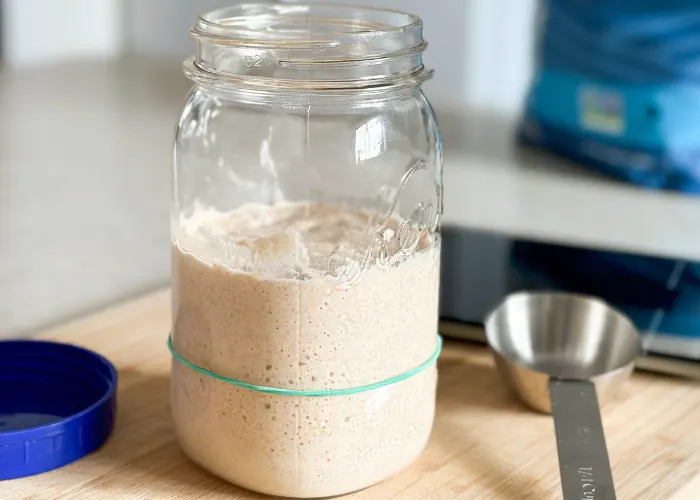
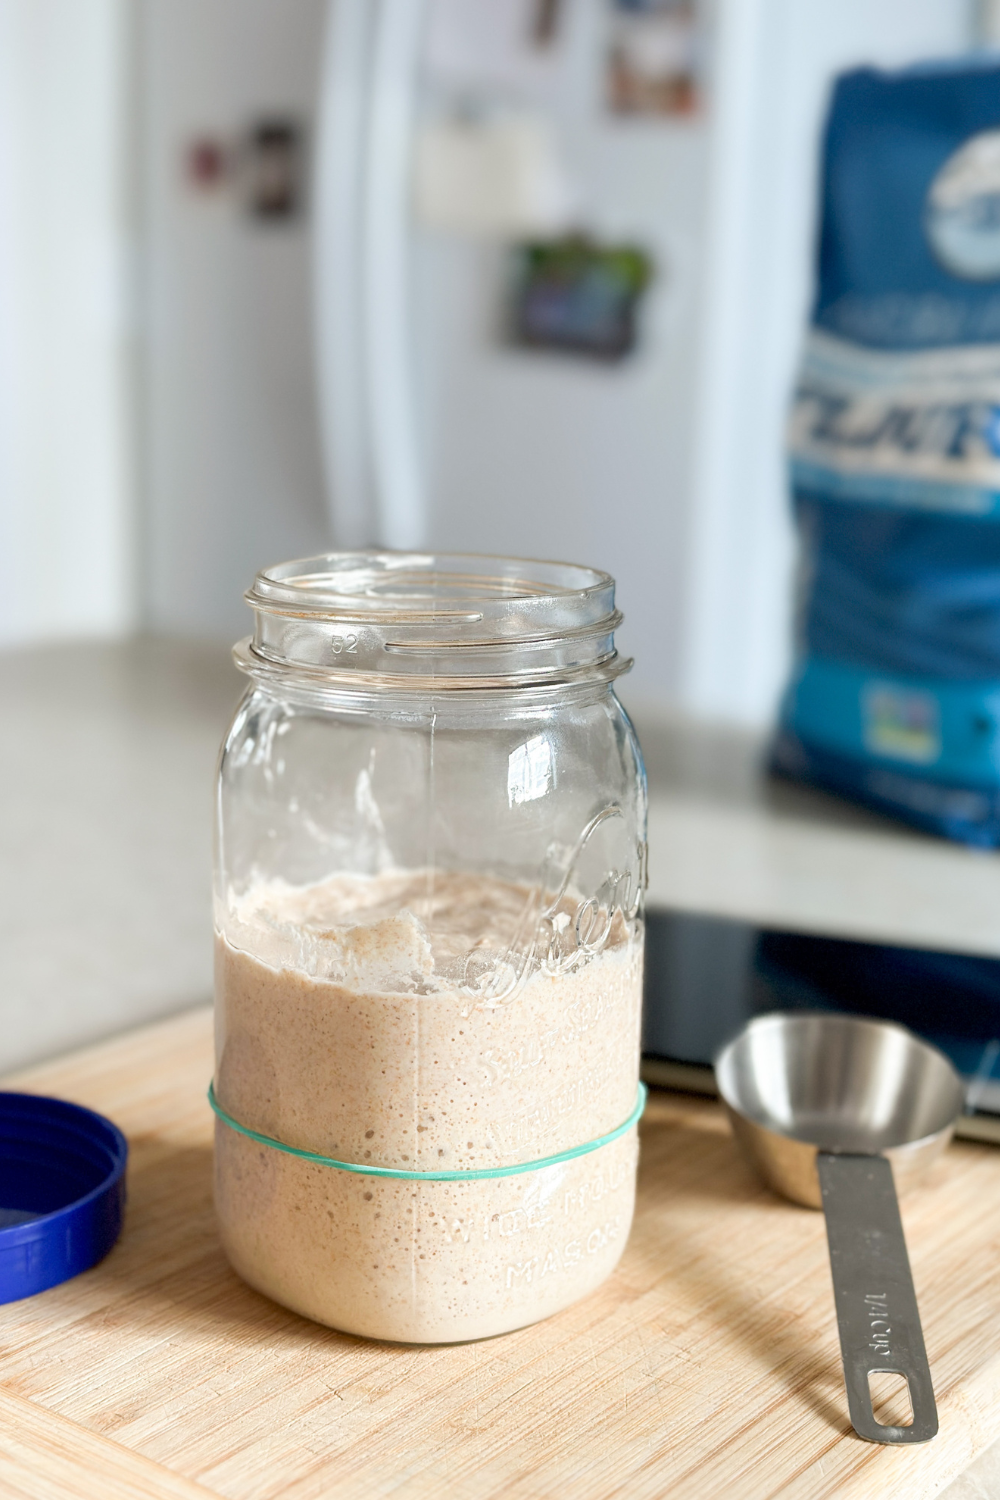
As the yeast develops, you’ll start to see bubbles forming in the starter and it will have a sour, yeasty aroma. With each feeding, use a rubber band (or tape) to measure the growth of the starter. Place the rubber band to mark the height after the feeding and watch it expand over the next 24 hours. Once it falls, it’s time to feed again.
There are recipes that call for different portions of flour versus water. Feeding the starter with equal parts starter, water, and flour (60g in this recipe) gives you a starter at 100% hydration. Altering the measurements will give you a different hydration level, which affects the final crust and crumb structure. Since this is my first time dabbling in sourdough, I stuck with consistent measurements and approximately 100% hydration. I’ll probably play with it more at some point to see what happens. But for now, keeping it simple!
It may take more than 7 days for your starter to become active enough to bake. Again, it took mine about 16 days. I just continued discarding, feeding, and keeping it in the warm spot. Which brings me to …
Troubleshooting
These are a few things I ran into as I was getting my sourdough starter going.
** (Non) Pro Tips & Lessons Learned – PART 2 **
My Starter Stinks
At some point in the process, you starter may (will) start to smell pretty bad – either very sour, stinky socks, vinegar, or (the worst of all) vomit. By day 7, mine smelled like straight vomit.
Straight.
Vomit.
Joseph was a bit skeptical at this point that I’d ever get to the baking point.
I was a bit skeptical at this point that I’d ever get to the baking point.
It was so bad.
After some research, I found that it’s a very normal part of the process. There are a lot of different smells as the starter develops. The stink means the good bacteria has eaten through all the flour and your starter is hungry. Once the good bacteria and yeast find a balance, your starter should smell fresh and yeasty – not stinky at all.
Now, if there is any discoloring (pink or orange) or mold growing, that’s a different situation. It can happen if bad bacteria makes its way into the starter (which can happen in a kitchen). Get rid of the starter and start fresh.
My starter still had great color, no signs of mold, and bubbles were forming. So I followed all the advice and just kept at it with the feedings. I did switch it over to a new jar at this point (just in case), then continued to switch it to a new jar with every-other feeding. Not necessarily necessary, but it seemed to help with growth and made it easier to track the growth since the sides of the jar were clean. Things finally turned around on day 12, and it started to smell fruity and yeasty again!
My Starter Doesn’t Seem as Active As It Should Be
Once I made it through the stinky stage, I ran into another small quandary. The starter just didn’t seem quite as active as it should be after 2 weeks of regular feeding and care. It wasn’t yet doubling within 4-6 hours after a feeding (the benchmark my Instagram buddies said to look for before baking) and it didn’t look like there were enough bubbles to leaven bread.
I posed the situation to my Instagram stories, and a few friends reached out with tips & tricks. They all advised moving it to a fresh jar and giving it a little boost with a whole wheat flour feeding. Boy, was that a game changer. I had to feed it twice that same day, and then it was definitely ready to bake some bread!
Measuring Cups vs Kitchen Scale
For the first few days, I used measuring cups for the discard and feedings. But for that boost feeding with whole wheat flour, I tried out the kitchen scale. Based on the scale, I think I had been discarding a little bit too much for each feeding, causing the starter to lose more of the active yeasts and bacteria than it should. Using the kitchen scale helped get that back on track.
But, honestly, I only used it a few times – just enough to get a good idea of what each measurement should look like. Now that I know how my measuring cups measure, I quit using the scale simply for ease of feedings. My takeaway: it’s up to you. I think you can get away with or without the scale. With a little experimenting, you can figure out what works with your measuring cups. But a scale can be helpful if you want to get really particular, which is good for some recipes.

So, all in all, if you hit day 7 and beyond and your starter doesn’t seem quite as active as it should be, try a feeding with whole wheat flour. The whole wheat will give it a little boost and get the yeast going. Also, make sure it’s in a warm enough spot. Try for 75° ish. Use the same measurements – 1/2 cup flour + 1/4 cup water.
Is Your Sourdough Starter Ready to Bake?
The sourdough starter is ready to use when it doubles in size within 4-6 hours after feeding, has lots of bubbles on top and throughout the culture (like a sponge), and smells fresh and yeasty. You can also do a float test to double check: scoop a bit of the starter out and drop it into a cup of water. If it floats to the top, it’s ready to bake.
Storing Your Sourdough Starter
Once your sourdough starter is active, there are several options for storing it.
Fridge
One popular method is to store the starter in the refrigerator. Remember how important temperature is in the fermentation process? Keeping it cold slooooowwwws things down. Lightly cover it with a lid and feed it about once a week or so to keep it active, then put it back in the fridge. When you’re ready to bake with it, take it out of the fridge, feed it like a normal feeding (1/2 cup flour + 1/4 cup water), and let it rest at room temperature until it rises to its peak.
If you’ve been feeding the starter regularly in the fridge, you can keep the discard to use for other baked goods that require less leavening (pancakes, biscuits, crackers, tortillas, etc). Follow your nose. If it smells good and is in good shape, go ahead and use the discard. If it’s super hungry, has a bunch of hooch on top, and/or smells weird – probably just discard that discard or give it another feeding to bring it back to life before using.
Room Temperature
Another option is to keep the starter at room temperature, which can be more convenient for those who bake regularly (a few times per week). However, this method requires more frequent feedings to keep the starter active. I would only keep it at room temperature if you plan to bake with it every day or every other day.
Freezer
A third option is to freeze the starter, which can extend its shelf life for several months. However, your starter may take several days to become fully active after being thawed. I’d reserve the freezer for any time you need to take a break from sourdough baking for an extended period of time.
How Am I Storing Our Sourdough Starter?
I keep mine in the fridge and feed it about once a week. I bake once a week, which is a good balance for now. I pull it out and feed it a few hours (or the night before) I plan to bake.
What is All This Stuff About Discard?
Discarding part of the sourdough starter with a feeding can help control the growth of the starter and prevent it from becoming too large. Your sourdough starter can also accumulate wild yeast and bacteria that can alter the flavor and texture of the bread. Discarding part of the starter helps to maintain that balance of yeast and bacteria.
I did not save any of the discard during the first two weeks of starting the sourdough starter. It was all pretty stinky. I’d recommend waiting until your starter is established and active to start saving and using the discard. Again, follow your nose. If it smells and looks good, give it a try!
You can also time your feedings so you don’t have to discard anything. Like I said above, I typically feed my starter a few hours before I plan to bake (or the night before). Once it’s active and reaches its peak, I use it for my recipe. Then I give the starter a regular feeding of 1/2 cup flour + 1/4 cup water and put it back in the fridge. Over the next few days, it rises and falls in the fridge (the cold temperature just slows this process down).
When I’m ready to bake again, I pull it back out and give it the regular feeding of 1/2 cup flour + 1/4 cup water, wait for it to become active, and bake again. I end up with more starter than if you discard before the feeding. But I usually use 1 cup of starter in my recipes. This is the perfect amount of starter to still have a bit of starter left after baking, be able to feed it and put it back in the fridge, and pull it out again and feed without discarding for the next baking day.
I hope that makes sense? You’ll get the hang of it as you start to learn your own starter. Every now and then, I will discard before a feeding if the starter has been in the fridge for a while. Or if I get my timing off and end up not being able to bake on a day that I thought I would. Then I use that discard in other non-active sourdough discard recipes.
Sourdough is actually very flexible. As long as you feed it equal parts flour and water, your hydration will stay consistent and the yeast will be nice and active.
Ready to Bake!
Whew. That was a lot. But I think I went over all the issues and weird questions I ran into.
On day 16, after the whole wheat feeding (plus a couple extra because the whole wheat made it go crazy and was eating through flour like crazy 😅), I attempted my first loaf of sourdough bread. I borrowed a dutch oven – a great option if you want to try out a loaf but aren’t quite ready to purchase one. But I’ve enjoyed the process so much that I think I’m going to invest in one of my own now.
**UPDATE – this is the dutch oven I ended up purchasing and LOVE!
**UPDATE – here is my Go-To Sourdough Round Loaf Recipe and my Simple Sourdough Sandwich Loaf.
Starting your own sourdough starter can be a bit of a rollercoaster, but it’s so worth it. You can learn so much about sourdough right from the get-go!
Please let me know if you have any questions and I’ll get back to you as soon as possible.
| Tylynn |

Beginner Sourdough Starter
Make your own sourdough starter from scratch with just flour, water, and a little bit of patience.
Ingredients
- Whole Wheat Flour
- All-Purpose Flour
- Water
Instructions
- Day 1: In a clean, glass container, mix together 1/2 cup (60g) of whole wheat flour and 1/4 cup (60g) of water. Stir until the mixture is smooth and there are no lumps. It will be thick. Cover the container with a lid or cloth and let it sit in a warm spot (70°-75°) for 24 hours.
- Day 2: Let it continue to ferment. No need to do anything.
- Day 3: Discard half of the mixture and add 1/2 cup (60g) of all-purpose flour and 1/4 cup (60g) of water to the remaining mixture. Stir until the mixture is smooth and there are no lumps. It should be stretchy and a consistency similar to thick pancake batter. Add a little extra water if necessary. Cover the container again and let it sit in a warm spot (70°-75°) for 24 hours.
- Days 4-(?): Repeat the process of discarding half of the mixture and adding 1/2 cup (60g) of all-purpose flour and 1/4 cup (60g) of water every 24 hours. You should start to see bubbles forming in the mixture and a sweet, yeasty aroma developing. When the starter rises and then falls, it's time to feed again.
Notes
Many sourdough recipes say that the starter will be ready around day 7, but it can go quicker or take longer, depending on your environment. Mine took a little over 2 weeks before it was ready to bake with. This can be due to temperature, timing of the feedings, etc. I did an extra feeding with whole wheat flour to give my stater a boost on day 13. Continue with the feedings and you'll get there!
I found it helpful to transfer the starter to a clean jar every other (or every few) feedings. Though it's not necessary for success, it was easier to see the growth when the jar was clean.
See post above for more info.
Elisha
Saturday 11th of February 2023
Such a wealth of information Tylynn! Thanks for sharing- i’m definitely interested in trying this out🙀😍
tylynn_sattler
Tuesday 14th of February 2023
You totally should! It's such a cool new hobby :) I still have no idea what I'm doing but it's fun to learn haha!