
Let’s make a DIY fall wreath to spruce up your fall front porch!


Seasonal wreaths are quite possibly one of my favorite crafts. I’ve shared quite a few here, and I’ve made even more … more than we should probably talk about 😅 I don’t know why, but I just love making them. I used to work in a flower shop waaaay back in high school, and it reminds me of that – endless options of beautiful flowers and foliage to do with what you will! Each one is unique and can be a completely different style. It’s way too much fun!
This fall I made a new one for the front door, featuring magnolia leaves, pumpkins, and an assortment of autumn foliage.
Here’s what you’ll need:
- 18″ Grapevine Wreath Form (Hobby Lobby, Michaels, Joann’s, etc.)
- Floral Vine Wire (or you can use twine – I use both, depending on what I have on hand)
- Magnolia Leaves (Hobby Lobby or you can find them on Amazon)
- Pumpkins Picks (Hobby Lobby or your local craft store)
- Ivory Sunflower (Hobby Lobby or Amazon)
- Mini Flowers (Hobby Lobby or Amazon – burgundy and cream)
- Orange Cornflowers – Amazon or Target
- Velvet Ribbon in Burnt Orange
Build Your Base
Start by filling in the base of your wreath – this will be the background for everything else. I used a grapevine form and magnolia leaves. Grapevine forms are simple to weave your stems into and add so much texture.
Separate the individual branches from the main stem and begin arranging them over the wreath. It’s helpful to figure out your general layout before you start attaching the stems. Try a few different arrangements and just move things around until you’re happy with it!


When you have a general plan of which stems to put where, weave the stems into the grapevine form and use a bit of hot glue to secure them. Just dab the hot glue onto the stem and grapevines – you won’t be able to see it from the front once all the stems are in.
I offset the magnolia leaves to the side for an asymmetric wreath.


I also wrapped twine around each stem as I put it in place. I’ve skipped this step on other wreaths and the hot glue was plenty strong enough to hold everything. However, a few of the stems I used on this fall wreath are heavier, so I added the twine just in case [HERE]. I just tied it to one of the grapevine stems on the back of the wreath and then weaved it around each stem as I put them in place. Then I tied it off at the bottom along the back. You could use floral wire or floral vine [HERE] as well – I just use whichever I have on hand at the moment!
Add Some Color
Once you’re happy with the base of your fall wreath, bring it to life with a few accent colors. I like to use a small foliage and a medium foliage to give the wreath some dimension – like mixing patterns. Too many small patterns and it can be overwhelming. Too many medium or large patterns and it looks like it’s missing something. A mix of both is the sweet spot!


I pick the colors based on the centerpiece of the wreath. You want to draw those colors from the centerpiece out to the rest of the wreath with your accent foliage.
Attach them the same as the base – weave through the grapevine and hot glue in place.
The Centerpiece
And now for your centerpiece! You can go as bold or reserved as you like. Pumpkins, flowers, gourds, pinecones – they all make wonderful centerpieces in a fall wreath. Look for the larger stems at the craft store and aim for 1-3 as the “anchor” point for the whole wreath.

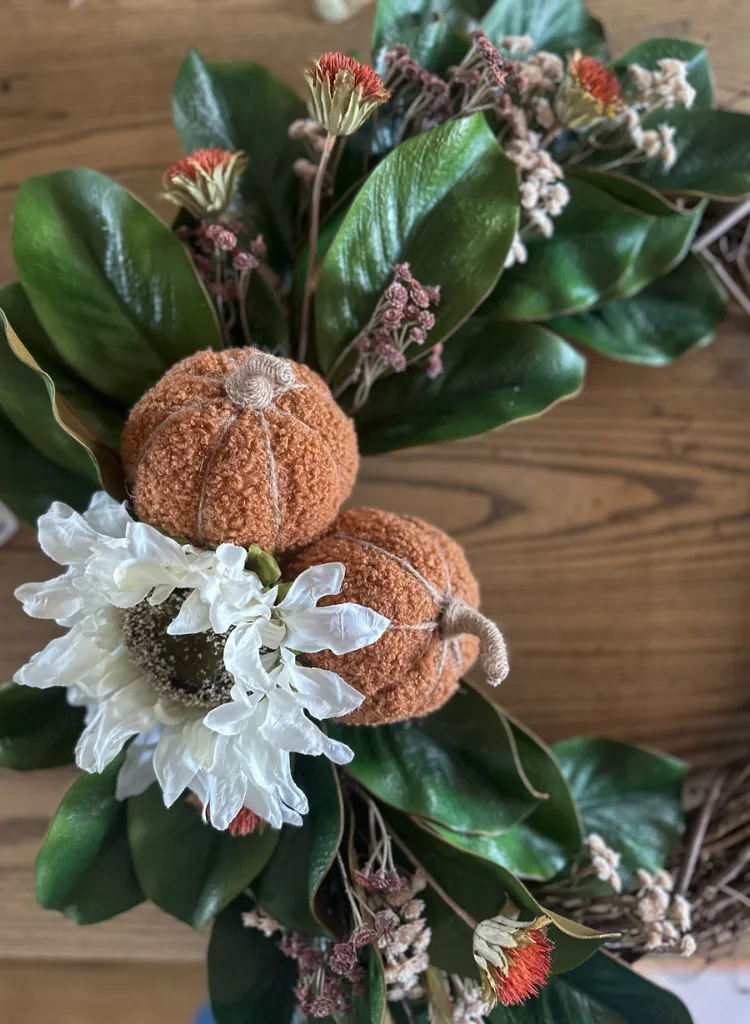
I’ve done some more colorful ones and some more neutral. I’ve been loving the subdued fall colors this year, and these rust boucle pumpkins and an ivory sunflower were just right.
See how I drew the ivory and orange out to the rest of the wreath with the smaller accent flowers? That’s the secret sauce to make it all go together!


Hanging Loop
Last, but not least, tie a loop at the top to hang the wreath.
You can do a hidden loop with twine or clear string, but lately I’ve been LOVING this velvet ribbon for wreaths! It’s another great way to carry the colors through the wreath and I just love how it accents the whole thing once it’s on the door.


Why try to hide the loop when you can make it part of the design?!
Form and function 😉


Please excuse the dirty door – I did give it a quick wipe down but then I noticed how dirty it still looks after I took the photos 🙈
But how about that wreath, huh?!?
Happy Fall!
| Tylynn |
Please let me know if you have any questions and I’ll get back to you as soon as possible.
This post contains affiliate links. If you make a purchase from one of the links, I may make a small commission at NO EXTRA COST to you. Thank you for your support! See my full disclosure here.


