
Today I’m sharing three easy ideas for a DIY fall garland – mushrooms, acorns, and faux mums.

Fall.
The season of cozy – crafting, baking, and evenings by the fire. I love switching up our decor with the change of seasons to bring that autumn warmth into our home. Garlands are one of my favorite ways to decorate through the fall and holidays. Last year, I saw Christine @forthehome on Instagram hang her fall and Christmas garlands across her kitchen window and fell in love with the look! I wanted to give it a try this year.
I was originally planning to make just one and fill in the rest with garlands I already had. But standing in the aisles of Hobby Lobby, ALL the inspiration struck and I couldn’t just keep it to one idea! It doesn’t always happen like that … there have been many a times I walk all over that dang place and can’t come up with an idea. I figured I might as well embrace it. So here we are – with DIY fall garland … three ways!
And the best part?
They’re all so simple and quick to make!
The perfect afternoon fall craft.
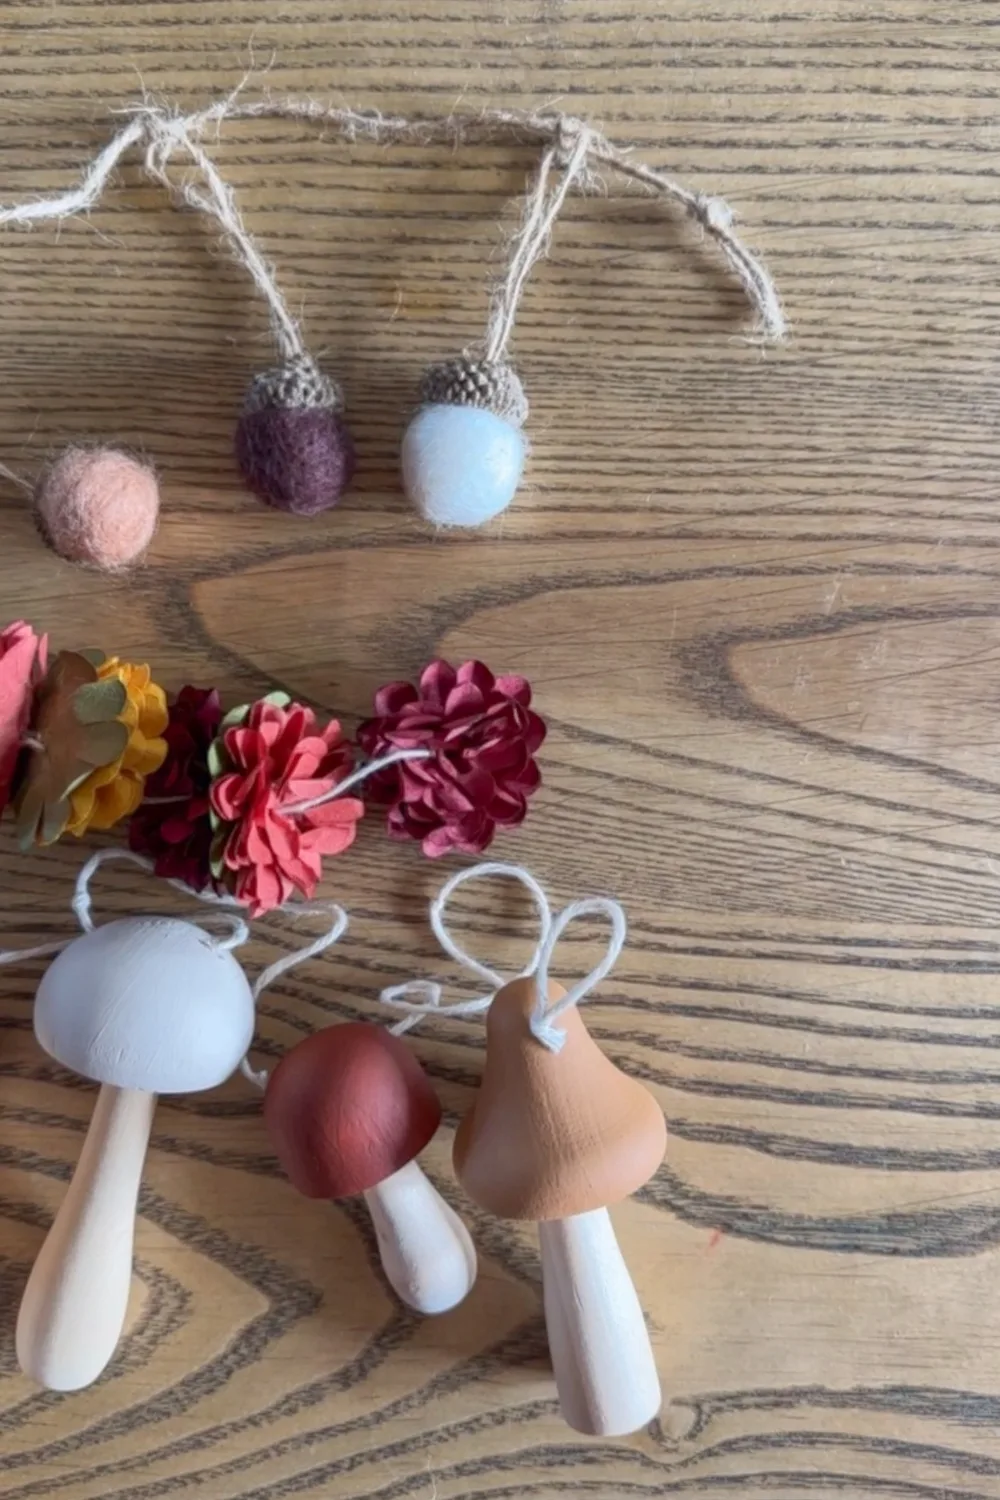
- Felt Acorns
- Wood Mushrooms
- Mini Mums Flower Stickers
- Cotton Twine
- Upholstery Needles
- Acrylic Paints in colors of your choice (I used traditional burnt sienna, honey brown, thicket, and linen)
- Paint Brushes
Felt Acorns
This one is so fun – a little whimsical!
Pick up a pack (or few) of these felt acorns [HERE], measure the length of garland you need for your window (or wherever you plan to hang it), space the acorns evenly, and tie a small knot around the top of each one to secure it to the twine (included in the pack of acorns).
That’s it!


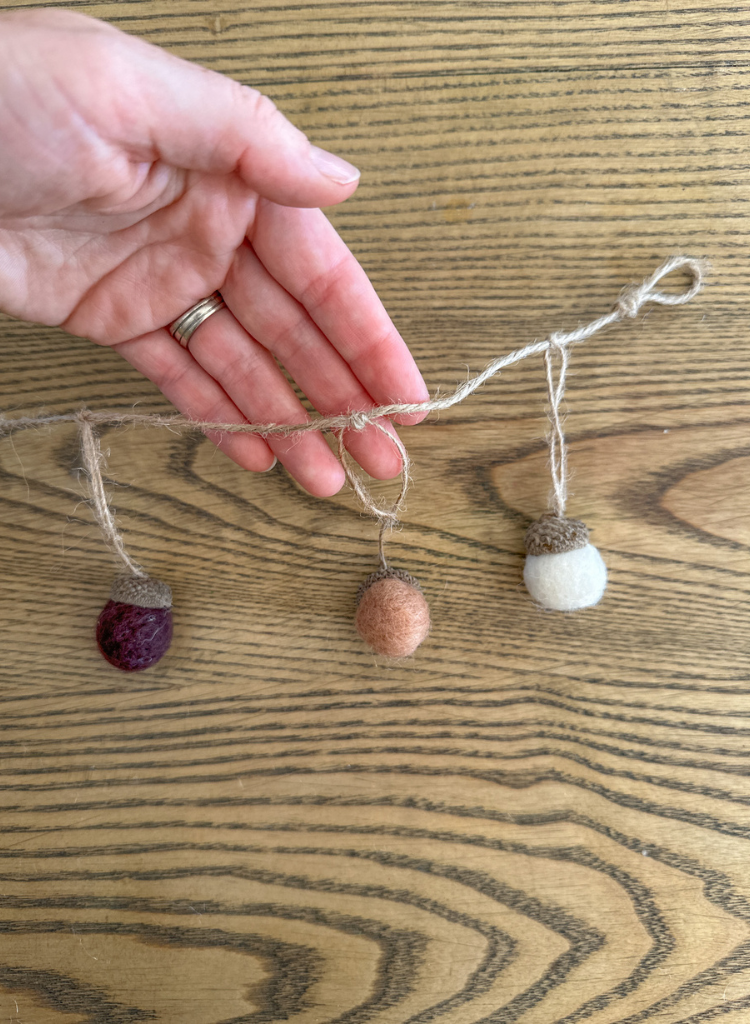

I added about a foot onto the final length that I was going for to account for the amount of space taken up by tying the knots and loops on each end. That seemed to work out pretty close for this one, but I always err on the side off too much string and then just cut the excess off.
I ended up leaving out the yellow acorns – they were a little brighter than what I wanted for this one, but they would be a fun pop of color if you include them! I used just one pack of acorns, spaced about 3″. That made a 40″ garland to fit across our kitchen window.

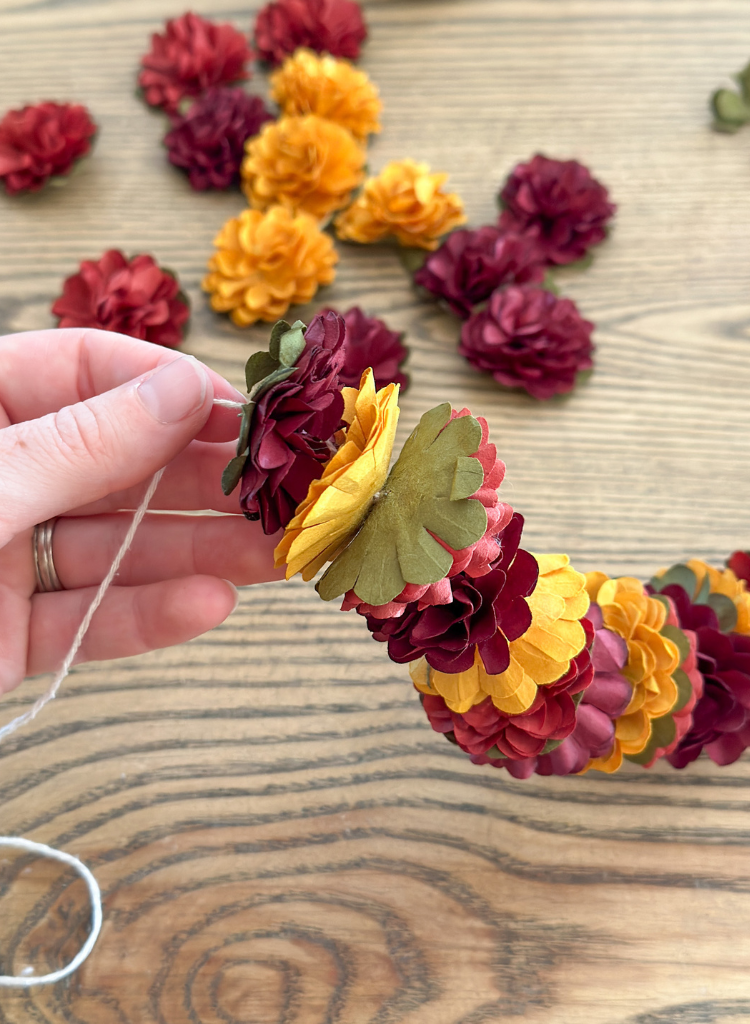
Faux Mums
This one is inspired by a beautiful fall garland I saw from Terrain, made from preserved helichrysums [HERE]. I found these paper mum stickers at Hobby Lobby and thought I’d give them a try for a similar look! I used 6 packs for a 40″ garland.
You can find the same mum stickers on Amazon, but the best price is to get them at Hobby Lobby. Or there are a few similar options on Amazon HERE, HERE, and HERE.
If you use the same mum stickers, gently pull the sticker off the back of each flower, and use an upholstery needle to thread the cotton twine through the center of each flower. Rotate the direction the flowers face to add some nice texture and movement to the garland.


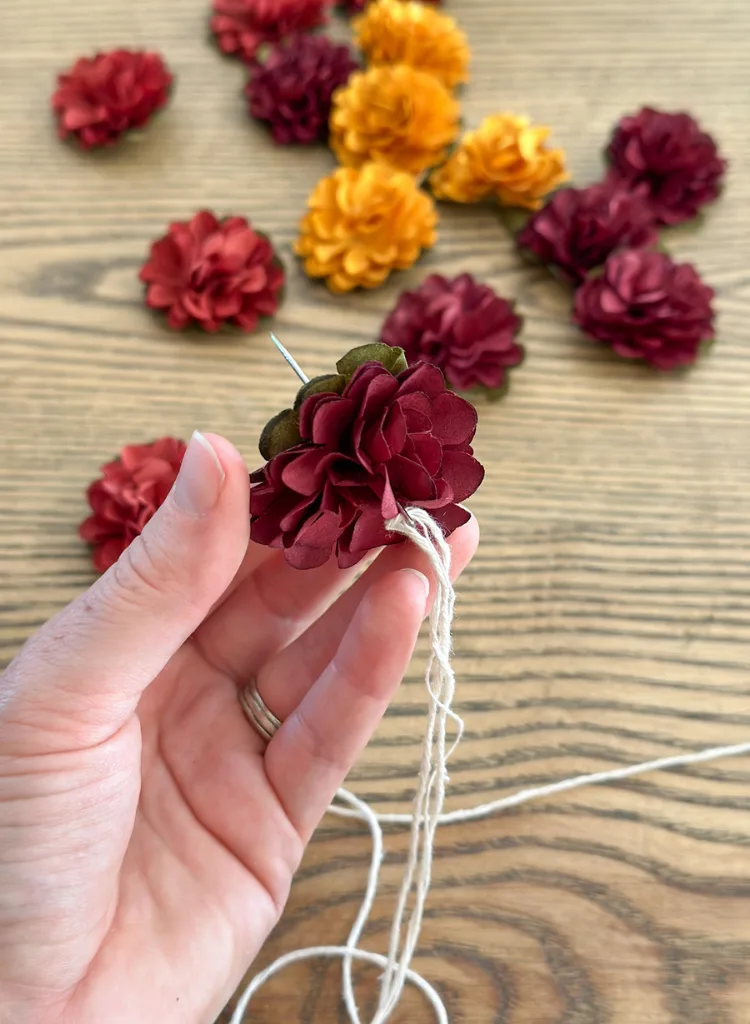

I did have to divide the cotton twine in half so the string was small enough to fit through the upholstery needles I had. So keep that in mind when you select the size of needles and string. It’s not a big deal but it was a somewhat tedious process!
Honestly, if I make a similar garland to this again, I plan to use a combination of these mixed flowers and these ones. Those colors would go great together for fall and the flowers are a little bigger. There are also a lot more flowers included in each package, so it would be great for a longer garland!


Wood Mushrooms
This wood mushroom fall garland turned out even better than I hoped! It was the most work of the three, but I think it’s my favorite.
I used one pack of wood mushrooms [HERE], which was enough for about a 40″ garland.
Drill a hole across the top of each mushroom with a 1/8″ bit. Be careful with this step. It was a bit challenging to get the bit into the mushroom top and not just slip across it. WATCH OUT FOR YOUR FINGERS, especially when the bit goes through the back side.


Next, paint the top of the mushrooms with the colors of your choice. I used traditional burnt sienna, honey brown, thicket, and linen (also available at most craft stores of course).
Then, lay the mushrooms out along the string to figure out the spacing. Add an extra foot or so to account for the extra length taken up by the knots (I err on the side of too much string so I don’t run out – you can always just cut the excess once you’re done). Tie a loop at one end of the string, and then string the mushrooms on. Space the mushrooms about 2-3″ apart and tie a small knot on the sides of each one so they won’t slide along the string. Once all the mushrooms are on, tie another loop at the end for hanging the garland.
There are smaller wood mushrooms too [HERE], if you prefer that option – would also be super cute!


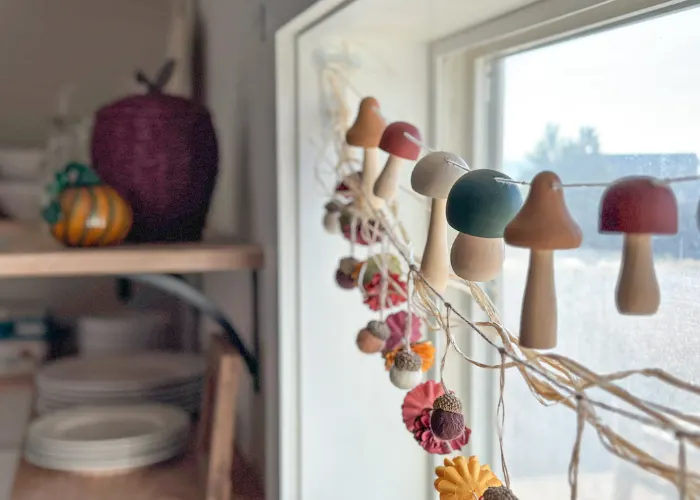
I used command hooks to attach the garland to each side of the window and added a few strings of neutral raffia [HERE] to pull all the colors together.
My new favorite fall garland!


It was dang hard to get a photo of it against the bright window. I tried all different lighting schemes and times of day – limits of photography with a phone I suppose. But you can mostly see it there!
Don’t forget to tag me on Instagram @tylynnm_ if you make one of these. I’d love to see it!
| Tylynn |
Let me know if you have any questions and I’ll get back to you as soon as possible.
This post contains affiliate links. If you make a purchase from one of the links, I may make a small commission at NO EXTRA COST to you. Thank you for your support so I can continue to share content and ideas with you. See my full disclosure here.
Pin for later!


