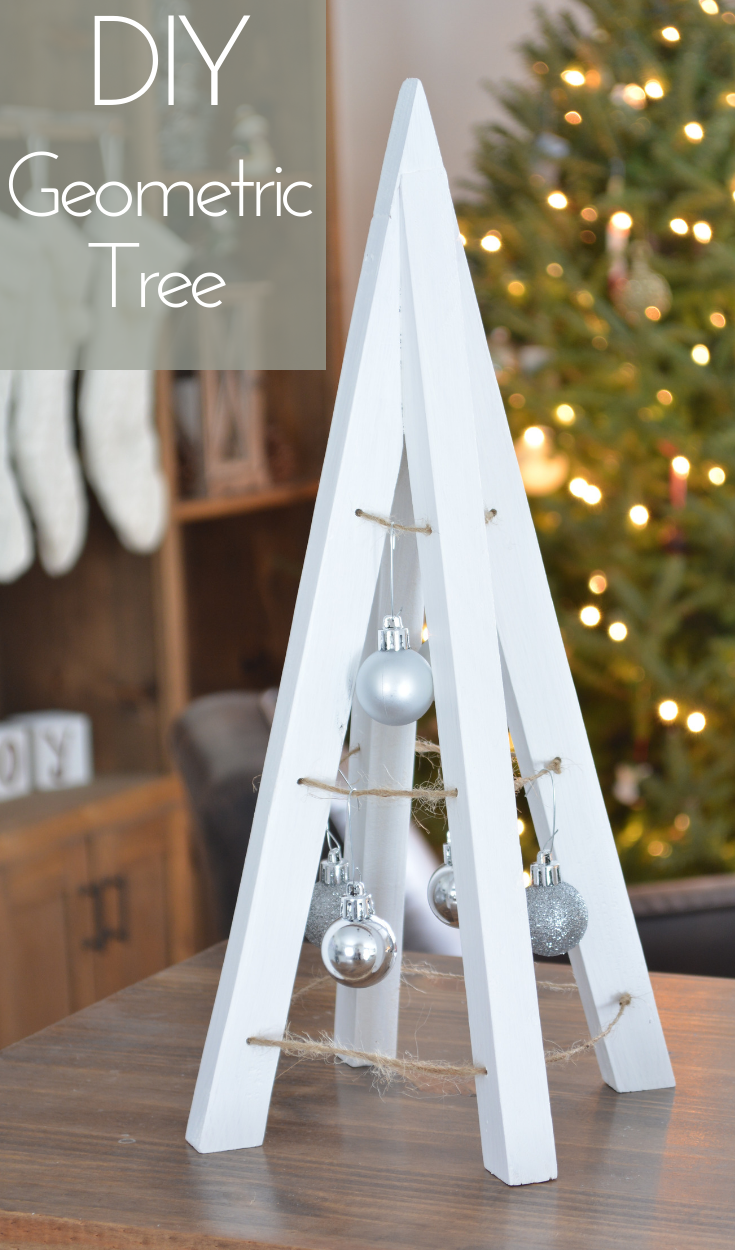
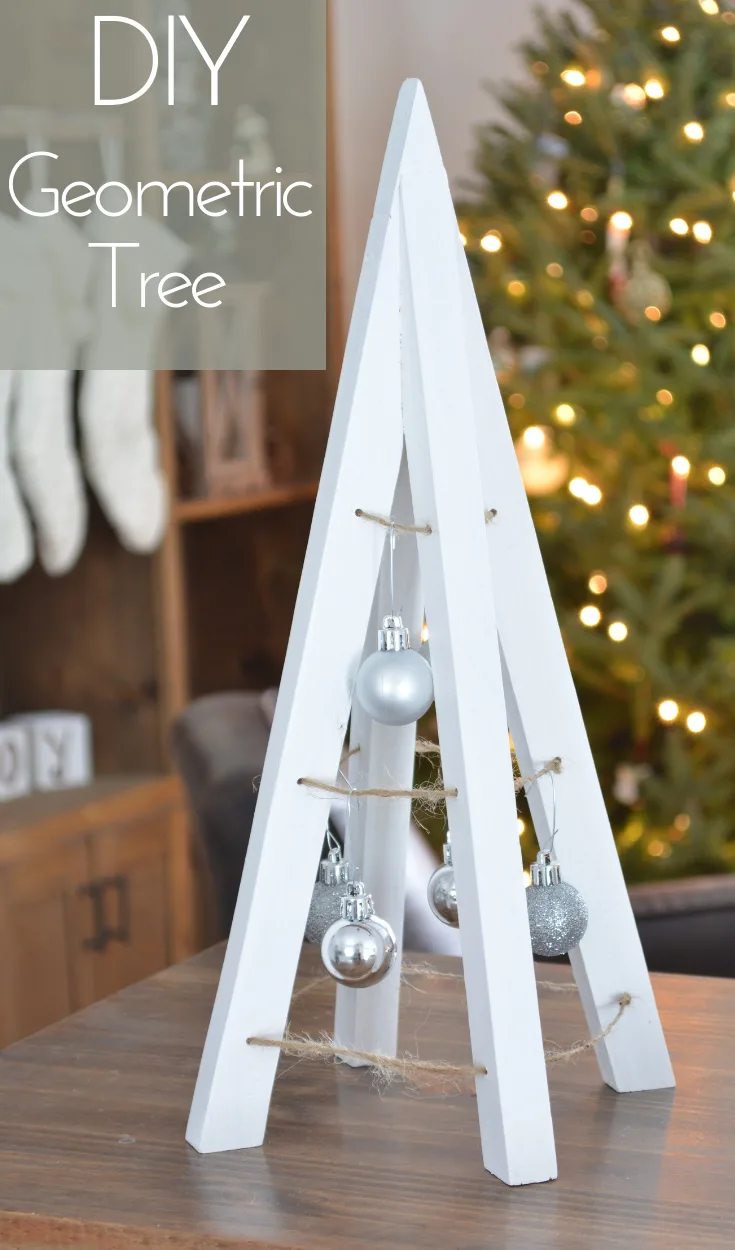
Build your own 3D Christmas trees for great DIY Christmas decor.
This post may contain affiliate links. If youmake a purchase from one of the links, I may make a small commission at NOEXTRA COST to you. This helps keep the tutorials and plans free here at Bitterroot DIY. Thank you for your support! See my full disclosure here.
Are you ready for Christmas? I can’t believe it’s only 10 days away! How does that happen!?! Time flies, that’s for sure. I still feel like I have a million things to do so hopefully I can pull myself together this week!
If you find yourself with a little free time … or just need a break from the hustle and bustle 😉 , this is a great project. It’s really quick, and you actually end up with 2 different decorations! It’s a two-fer! Snag the tutorial for the geometric trees once you finish this one up.
Enjoy the free plans and good luck with all the holiday shenanigans!
Tools & Supplies
- Jigsaw
- Drill
- Drill Bits
- Wood Glue
- Jute Twine
- Acrylic Paint (I used white from Target)
- Mini Ornaments
Lumber:
- 1 | 1 x 10 @ 6′ (or just long enough to cut both trees)
Step 1.
Mark the tree shape along a 1 x 10 board as shown and cut it out with a jigsaw:
Step 2:
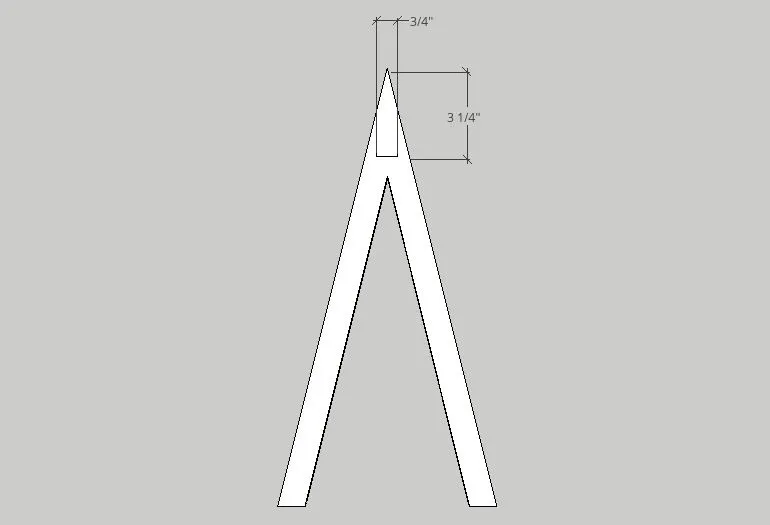
Draw a line offset 1″ to the inside of the large triangle and cut the center out with a jigsaw:

Repeat for the second tree.
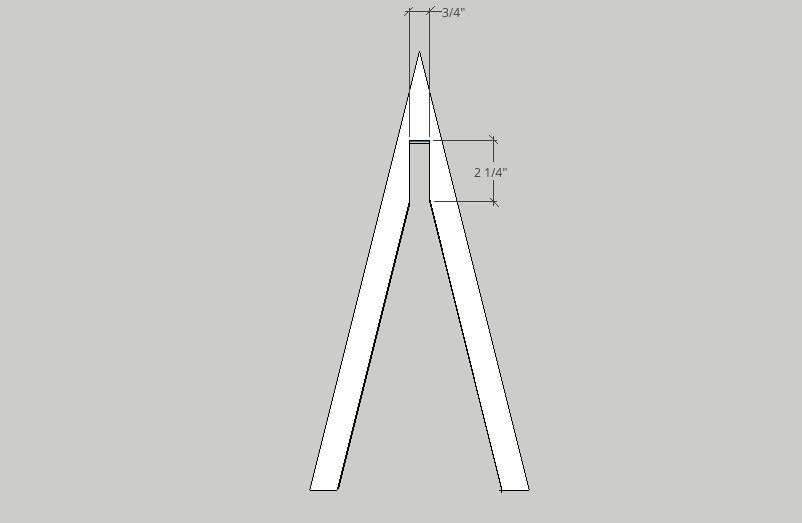
Step 3.
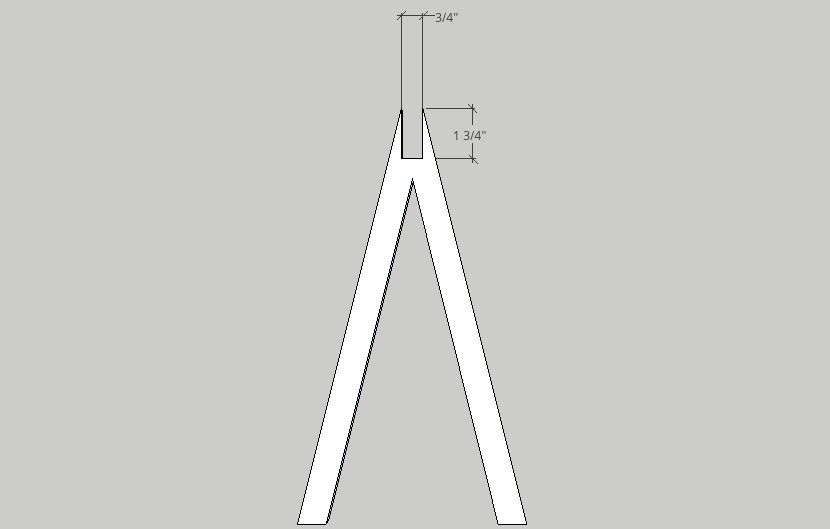
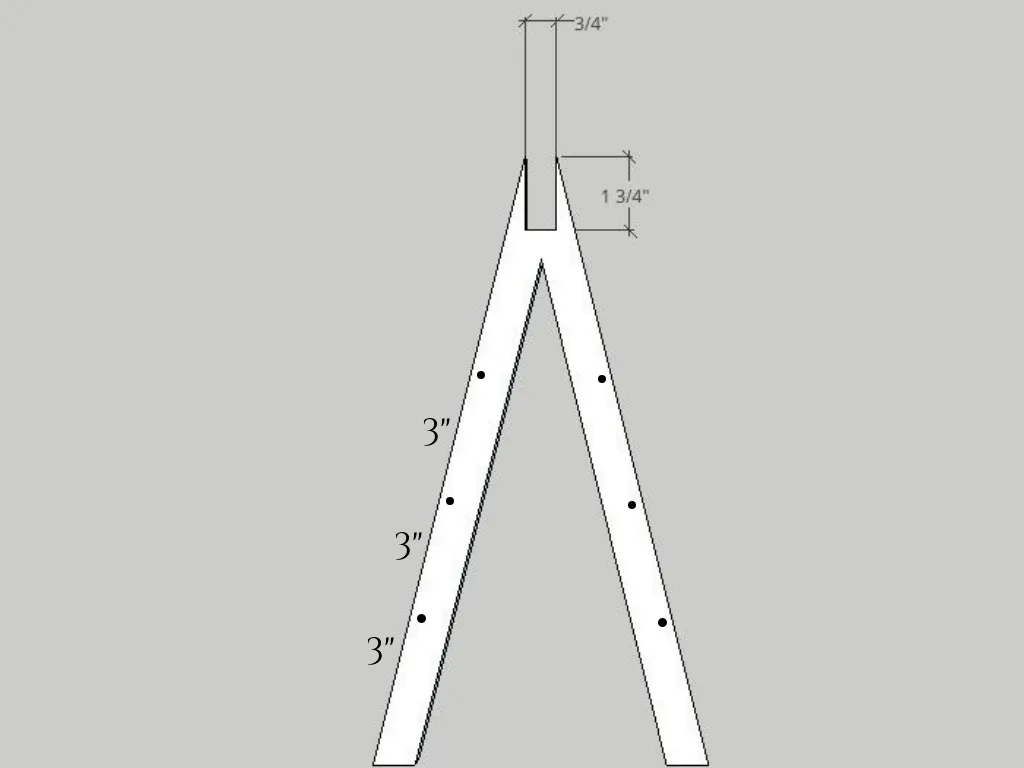
Mark 3/4″ up from the center of the peak and draw a rectangle 3/4″ wide down until it meets the sides of the tree:
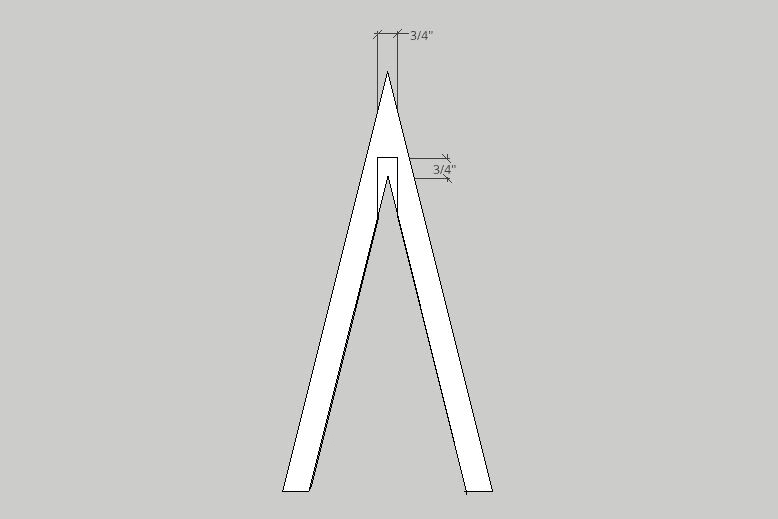
Cut out the rectangle for one side of the top joint:
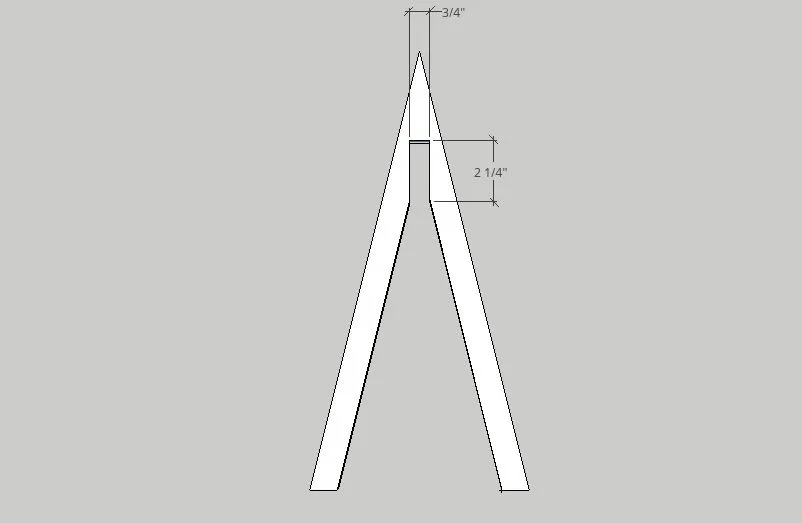
Step 4.
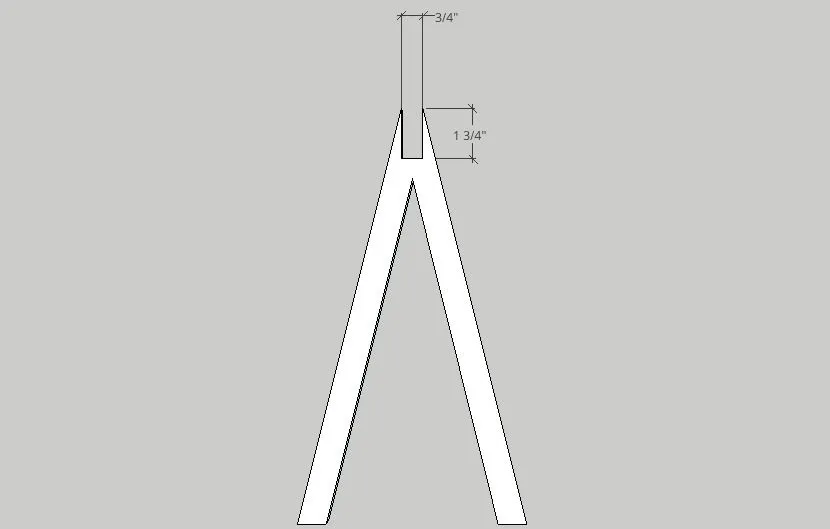
Mark the opposite joint on the second tree:
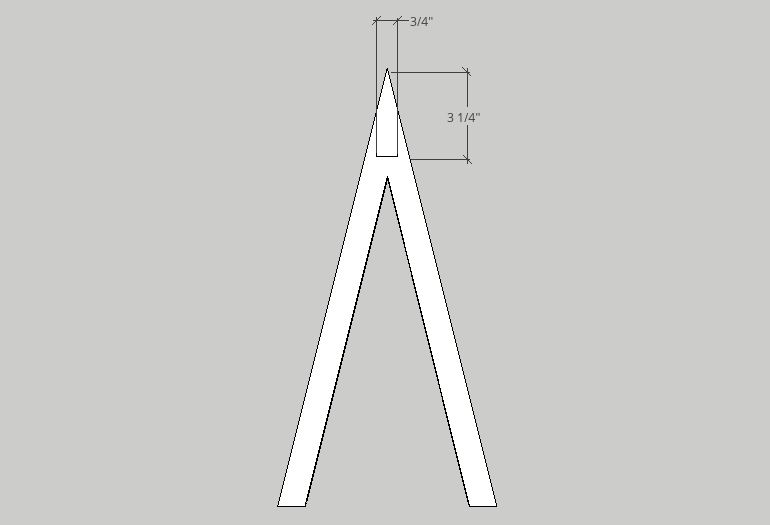
Cut out with a jigsaw:
Step 5.
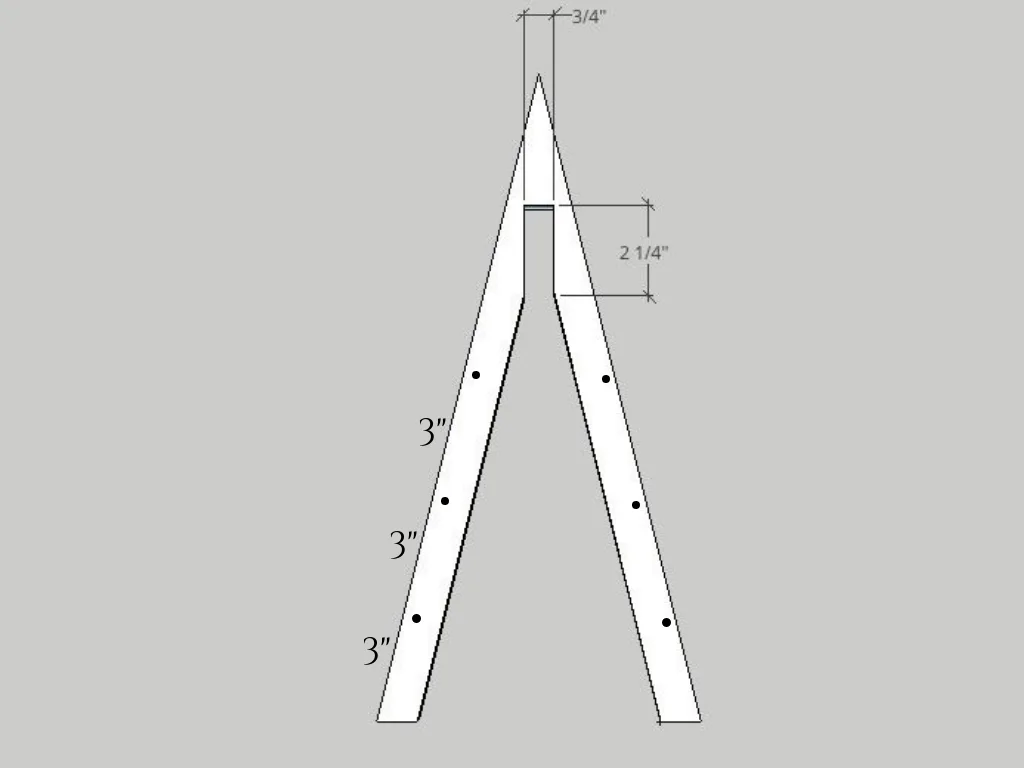
Drill three 1/8″ holes through the tree legs. Space the holes 3″ apart, measured from the bottom, and 1/4″ from the outer edge.


Step 6.
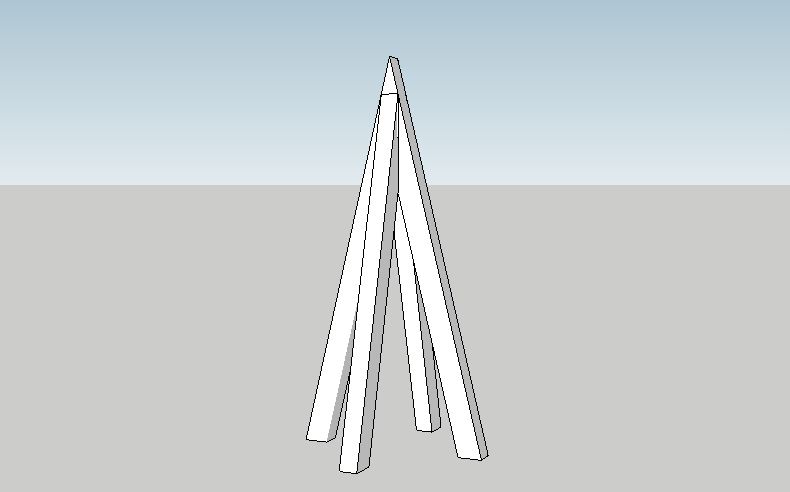
Sand the trees before you attach them. Once they’re sanded, turn the trees perpendicular to each other and fasten the joint with wood glue.
Step 7.
Finish the tree with paint of your choice. I just used some white acrylic paint from Target, but any type of wood paint will work!
After the paint dries, string twine through the tree legs on all three levels. Hang some mini ornaments and you’re good to go!
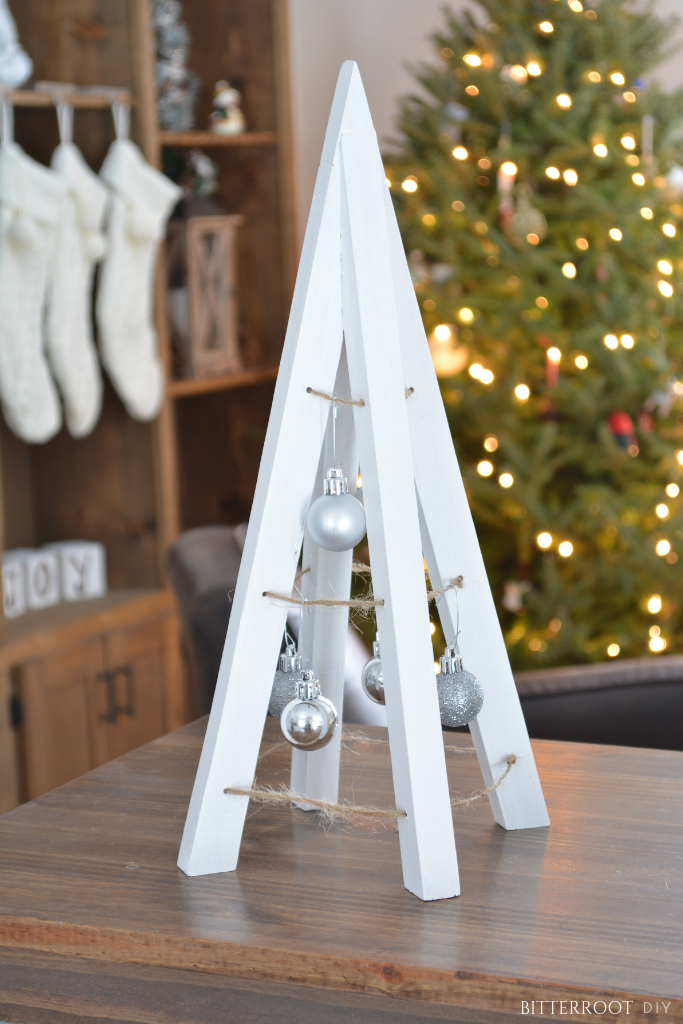

Pay no attention to the ornament-less bottom row on my tree … I didn’t measure it before I drilled and it’s too close to the table to hang ornaments. But I fixed that for the plans and yours should fit just fine! Do as I say, not as I do 😉
Please let me know if you have any questions and I’ll get back to you as soon as possible!
I’d love to see it if you build from these plans! Tag me on Instagram @bitterrootdiy. I’ve also saved a video of this project on my Instagram profile under my highlights!


Thanks for stopping by!
For more project ideas, you can find me on Pinterest. And to stay up to date with the latest shenanigans, follow me on Instagram.