Hey all, thanks for stopping by Bitterroot DIY!
For more project ideas, you can find me on Pinterest. And to stay up to date with the latest shenanigans, follow me on Instagram.
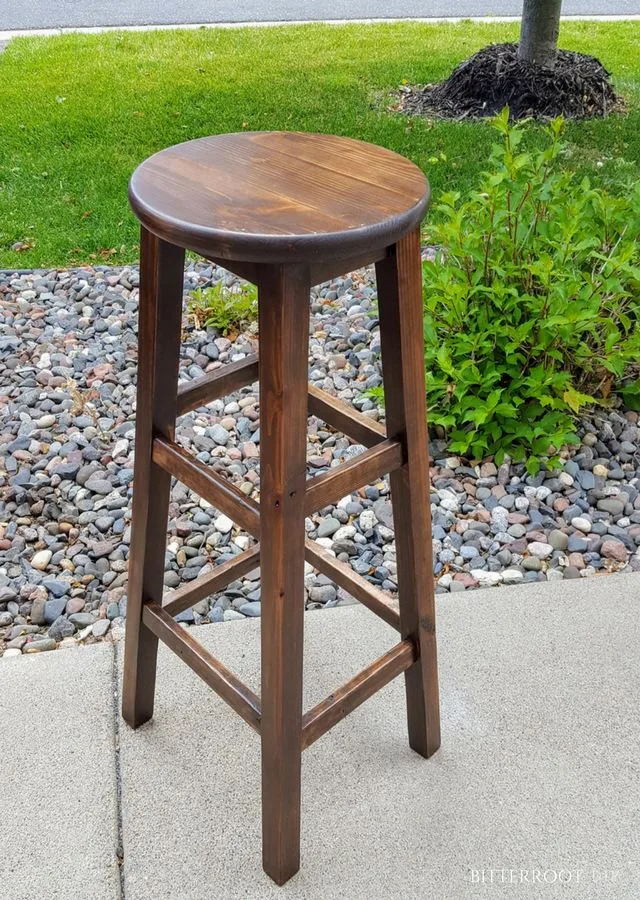
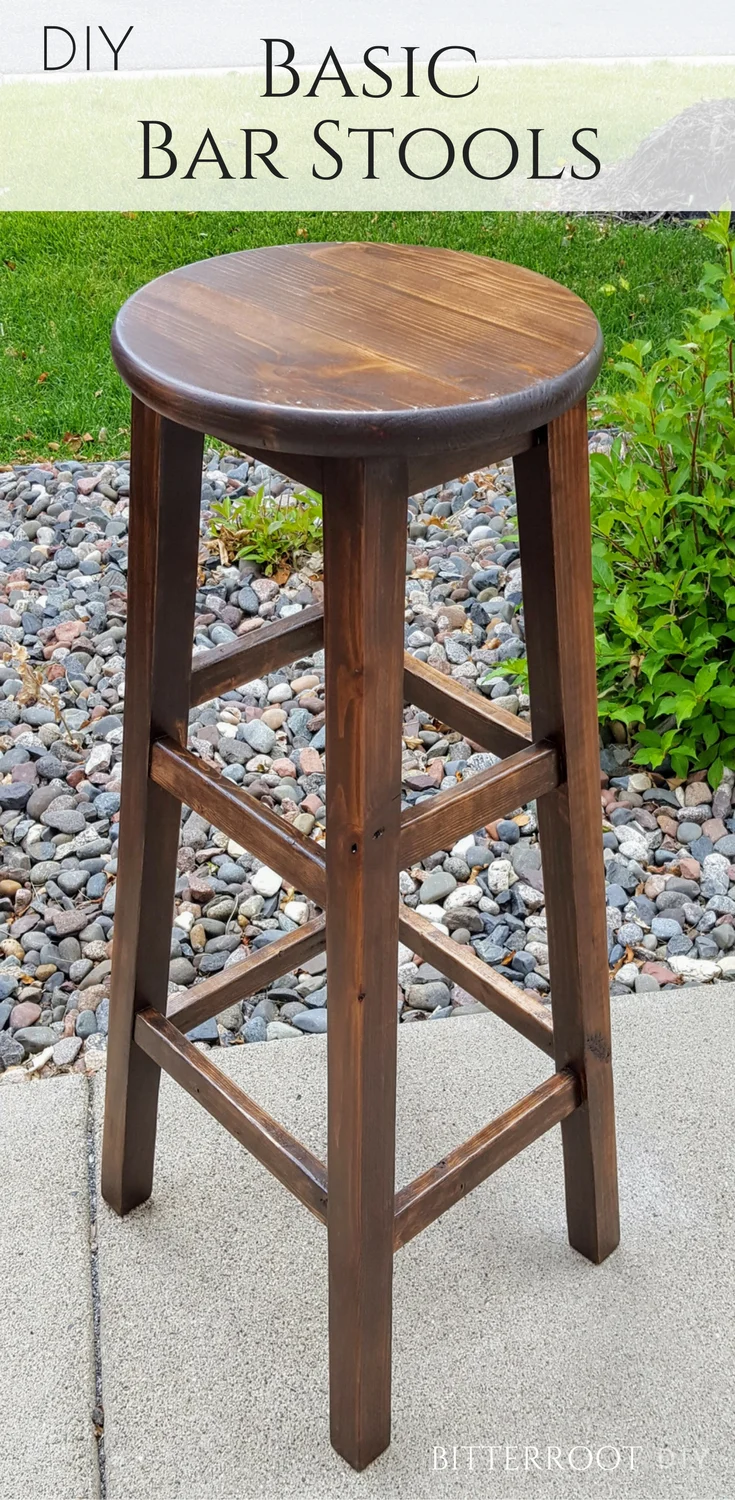
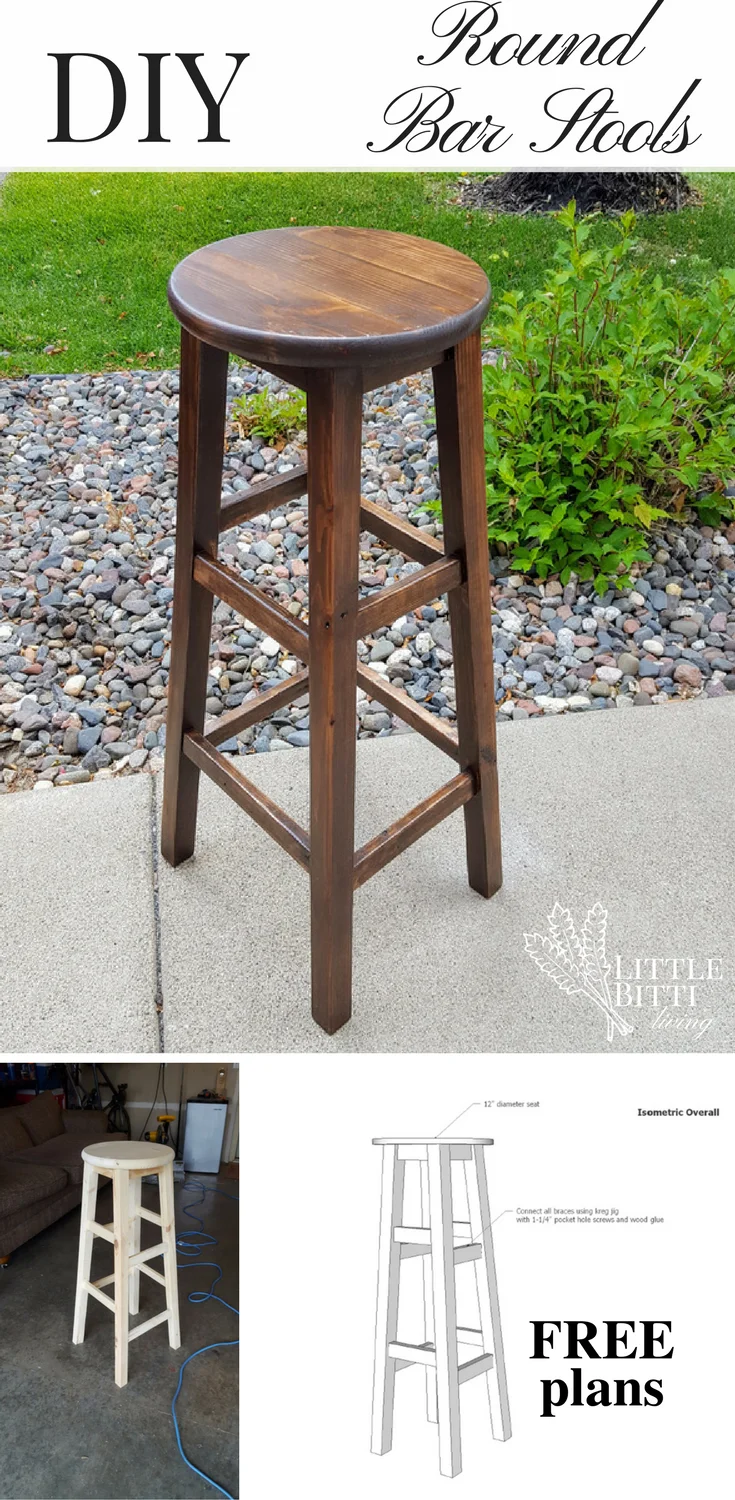
We have been searching for a set of bar stools for quite a while now. However, our countertop bar is 47” tall. In order to fit properly, I’ve been looking for 33″ tall bar stools … not an easy thing to find.
So this week I threw in the towel and decided to build them.
I’ve written these plans for one barstool. Adjust as necessary for the number of stools you need.
Lumber:
- 2 | 2×2 – 8ft
- 1 | 1×2 – 6ft
- 1 | 12” Round Edge Glued Board
Cuts:
- 4 | 1×2 @ 4” along short side with 5° perpendicular miter (Top Brace)
- 2 | 1×2 @ 5” along short side with 5° perpendicular miter (Brace)
- 2 | 1×2 @ 6-1/2” along short side with 5° perpendicular miter (Brace)
- 2 | 1×2 @ 5-1/4” along short side with 5° perpendicular miter (Brace)
- 2 | 1×2 @ 6-3/4” along short side with 5° perpendicular miter (Brace)
- 4 | 2×2 @ 32-9/16” with 5° miter and 5° bevel parallel (Legs)
Tools & Supplies:
- Miter Saw
- Orbital Sander
- Kreg Jig & Bits
- 1-1/4” Pocket Hole Screws
- Drill
- Wood Glue
Let me clarify the stool legs a bit before we get too crazy with the plans.
Number 1:
The stool legs will have both a miter and a bevel which will allow them to angle toward the center of your stool top (like a standard round stool). The ends will all be parallel to each other, so you just have to slide your board along the saw from your first cut to your second cut. No need to flip the 2×2 over or anything like that. I only turned my 2×2 over and over and over approximately 1.2 bazillion times to figure this out …
Number 2:
Because the legs are angled, the length you cut is not exactly the stool height you end up with. If you want a stool that is exactly 33” tall, the legs will actually be 32-9/16”. You can adjust for this using triangles and some trigonometry … or you can just cut the legs to the height of your stool (minus the thickness of the stool top) because it won’t make that much of a difference.
Number 3:
Mark the tallest corner of your stool legs as you cut them. It’s hard to tell which corner goes toward the center of your stool since they are only at a 5° slant. Like so:

Now, on to the plans!
Download Bar Stool Plan Set PDF or follow along below.
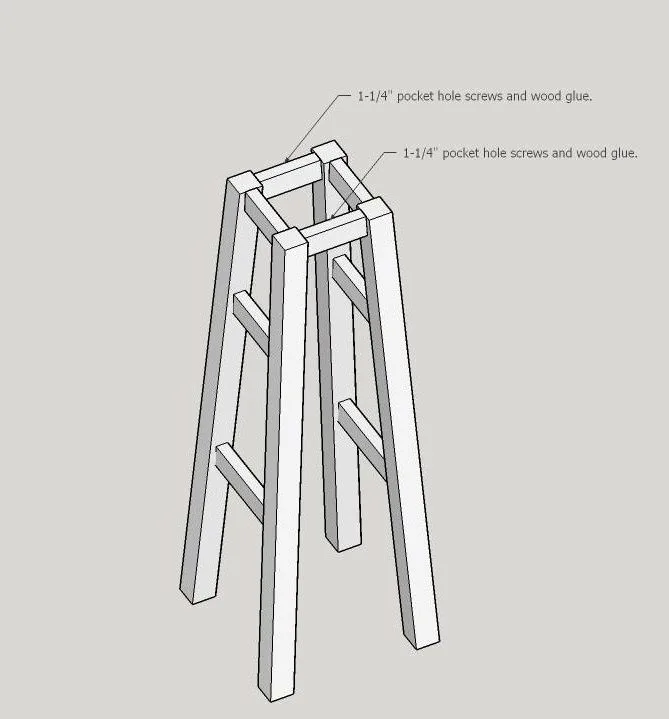
Step 1.
Attach two stool legs with a 4” top brace. I centered the top brace on the legs, but that’s up to you. It won’t affect the overall dimensions if you line it up off-center or flush with the front or back of your legs. Repeat for the other two legs.

You should now have two leg frames that look like the frame shown above.
Since I made three stools, I had quite a pile of frames at this point:

And yes … that’s my kitchen. It got too cold to assemble these outside. I just couldn’t stand out in the garage any longer, so the kitchen island became the new workbench 🙂
Step 2.
Add a 5” brace and a 6-1/2” brace. They will split the stool approximately into thirds.
Repeat for the other leg frame. You should now have two leg frames that look like this:

In real life:

The cross pieces are all drilled and attached on the back side of the frame. I filled the pocket holes at the end, But I still wanted to place them toward the inside of the stool so they were a little less obvious.
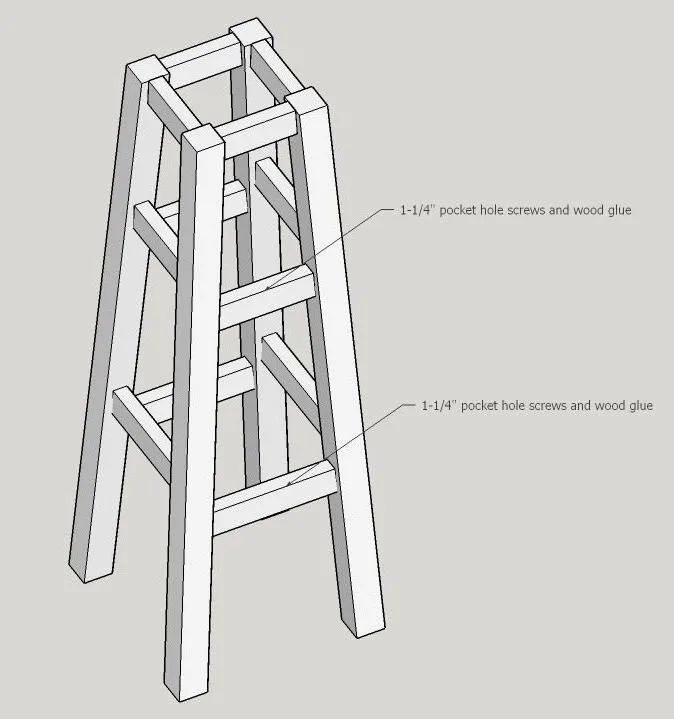
Step 3.
Attach the leg frames to each other with 4” top braces.
Step 4.
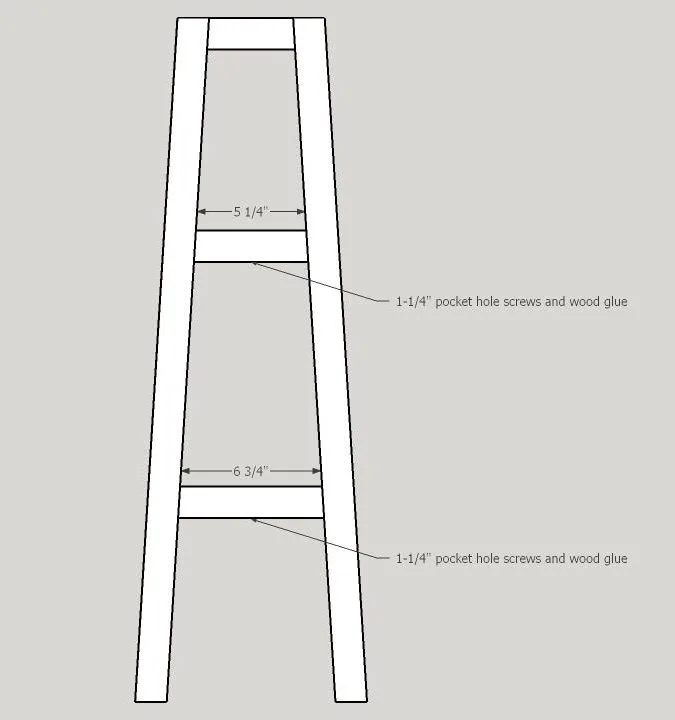
Add a 5-1/4” brace and a 6-3/4” brace between the leg frames.
These braces will be offset about 1” below the first set of braces.
Viewed directly from the side, you should have a frame that looks like this:
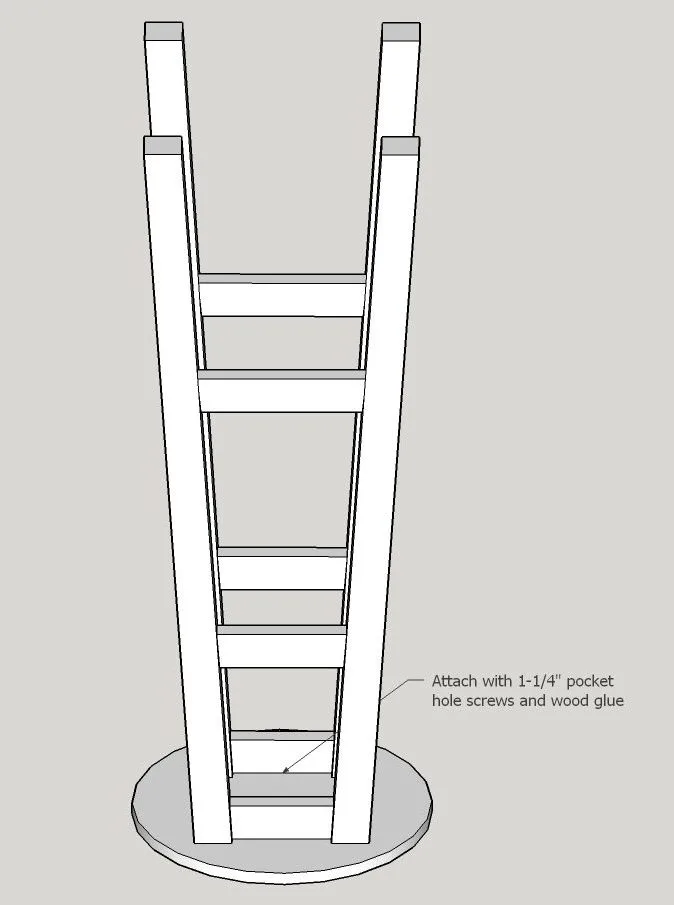
Step 5.
Attach the seat-top of the stool from its underside.
Fill all visible pocket holes. I like to use either Kreg wood pocket hole plugs or wood filler.

After placing the pocket hole plugs and allowing to dry, sand them down and finish up with your favorite stain or paint.
There you have it: One bar stool ready to go!
Let me know if you have any questions and I’ll get back to you as soon as possible!
![]()


Michael Neuendorfm
Wednesday 18th of November 2020
Why do your tops look more than 4 inches. I could barely get the drill in there with an extension. Looks more like 6 at the top
tylynn_sattler
Monday 7th of December 2020
It was difficult to get the drill in there. I used a 90 extension.
Rachel Park
Wednesday 28th of October 2020
Hi would you send me the link to the PDF plan please as when I click on it comes up error not found many thanks Rachel
tylynn_sattler
Wednesday 28th of October 2020
Hi Rachel,
I updated the link, so it should work now. Let me know if you still have trouble.
Thanks
Carlos
Friday 4th of September 2020
What color is that stain?
tylynn_sattler
Wednesday 9th of September 2020
Varathane Special Walnut
AB
Saturday 11th of July 2020
This project requires more than 1 {2"x2"x8ft} board. In order to get long enough legs.
tylynn_sattler
Sunday 12th of July 2020
Thanks for letting me know that mistake - just fixed it!
30 Awesome & Easy Scrap Wood Projects – Woodworking Master
Sunday 21st of June 2020
[…] Tutorial: Bitter Root DIY […]