
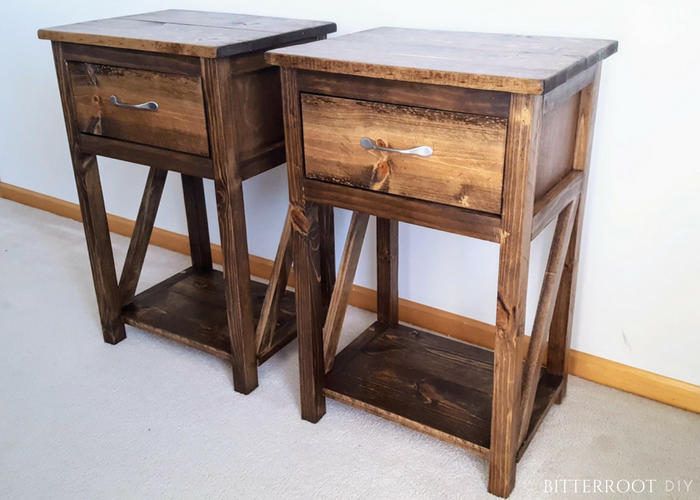
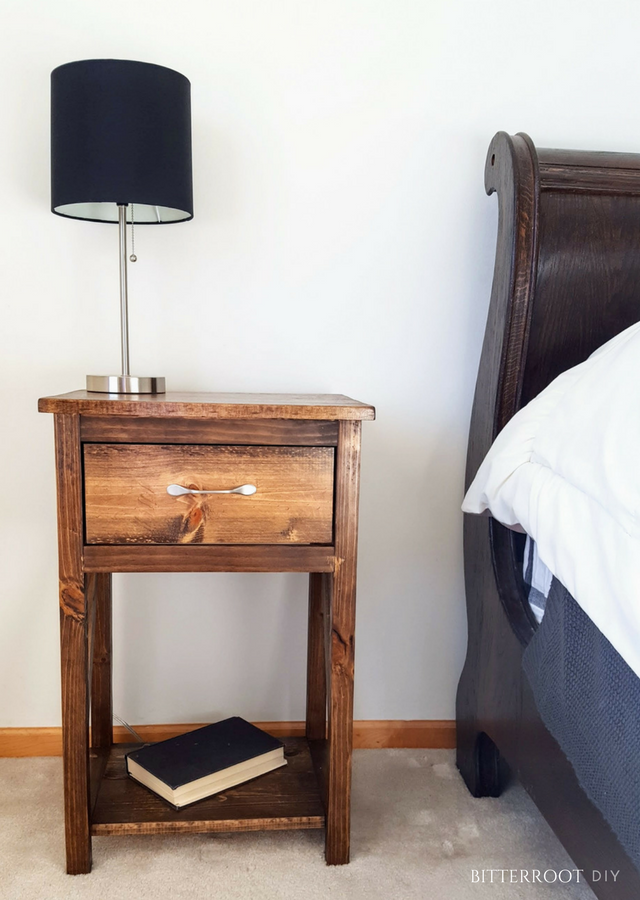
So, about a year ago I promised Joseph I’d build us a set of matching nightstands …
They were supposed to be my second build.
No matter.
I’m only 1 year behind.
I guess I can’t complain too much next time I ask him to do something and he takes a year to get around to it …
Ahhhh, marriage 😉

This post contains affiliate links. See my full disclosure here.
Enjoy the plans!
Tools & Supplies:
- Kreg Jig
- 1-1/4” PH Screws
- Drawer Slides
- Finish Nailer & Nails (or hammer & nails)
- Drill
- Miter Saw
- Circular Saw
- Orbital Sander
- Corner Cat Sander
- Tape Measure
- Square
- Pencil
- Safety Glasses
- Hearing Protection
Lumber:
- 3 | 1 x 2 – 6′
- 2 | 2 x 2 – 6′
- 1 | 1 x 4 – 8′
- 1 | 1 x 4 – 6′
- 1 | 1 x 6 – 6′
- 1 | 3/4″ Plywood 2′ x 4′ sheet (or scraps if you have some lying around)
Cuts:
- 4 | 2 x 2 @ 27″ (legs)
- 4 | 1 x 2 @ 14″ (front & back framing)
- 6 | 1 x 2 @ 10″ (side framing)
- 2 | 1 x 2 @ parallel miter (see Step 6)
- 4 | 1 x 4 @ 18″ (tabletop)
- 2 | 1 x 4 @ 10″ (drawer sides)
- 1 | 1 x 4 @ 11 1/2″ (drawer back)
- 1 | 3/4″ Plywood @ 11 1/2″ x 9 1/4″ (drawer bottom)
- 2 | 1 x 6 @ 14″ (bottom shelf)
- 1 | 1 x 6 @ 13 3/4″ (drawer face)
- 2 | 3/4″ Plywood @ 10″L x 9″W (top side panels)
- 1 | 3/4″ Plywood @ 14″L x 9″W (top back panel)


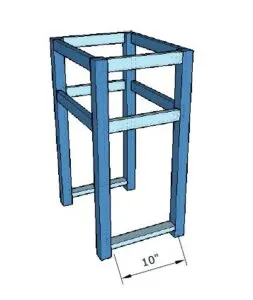
Step 1.
Start by building the front and back frames. Attach the front & back framing to the legs with 1-1/4″ pocket hole screws and wood glue. Position the framing flush with the outside edge of the legs.
Position the front frames 8 3/4″ apart. This will leave 1/8″ clearance on the top and bottom of the drawer face. Position the back frames 9″ apart.
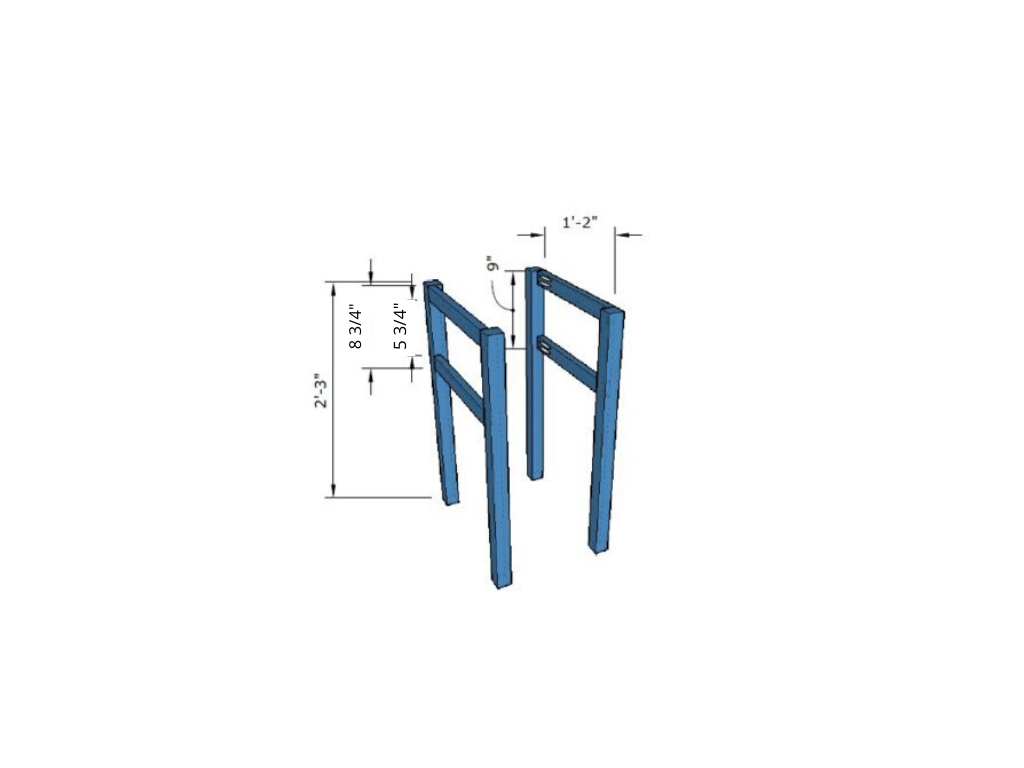

I spaced the side and back frames 9″ apart because I had a 9″ piece of plywood lying around to use. If you’re ripping new plywood, you could just space the sides and back 8 3/4″ apart to match the front. Either way won’t make a huge difference.
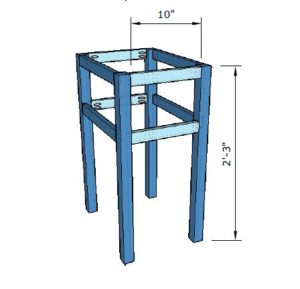
Step 2.
Connect the front and back frames. Position the side framing flush with the outside edge of the legs and attach with 1-1/4″ pocket hole screws and wood glue.
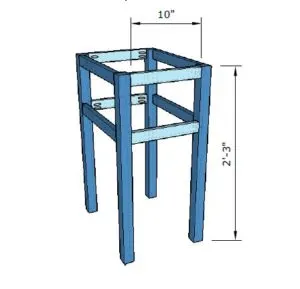
Step 3.
Position the bottom side framing flush with both sides of the legs and attach with 1-1/4″ pocket hole screws and wood glue. Place the pocket holes on the underside of the 1 x 2 to hide them.

Step 4.
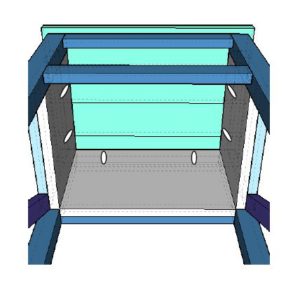
Attach the inside panels for the drawer section of the nightstand. They should sit flush with the inside edges of the legs and the top and bottom of the framing.
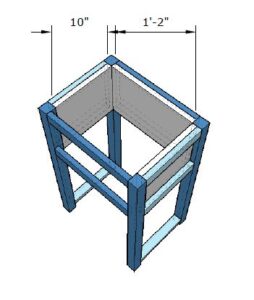

Attach to the frame with wood glue and finish nails (or attach to the legs with 1-1/4″ pocket hole screws and wood glue).
Step 5.
Center the bottom shelf along the bottom 1 x 2 framing and attach with 1-1/4″ pocket hole screws and wood glue.

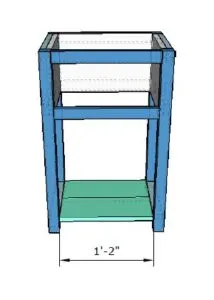
When centered, the bottom shelf will overhang the legs by 1/2″ to the front and back. Place pocket holes on the bottom of the shelf to hide them.
Step 6.
Position the \ braces flush between the side framing and attach with wood glue and finish nails. Place finish nails on the bottom of the \ brace to hide them.
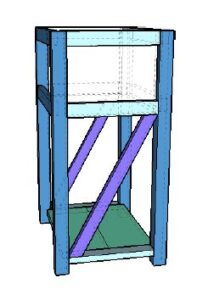

To cut the \ braces, hold a 1 x 2 flush against the side of the nightstand and mark the angle with a pencil. Adjust your miter saw to that angle and cut. Repeat for the other side of the \ brace and cut again. Repeat for the second \ brace.
Step 7.
Attach the tabletop to the nightstand with 1-1/4″ pocket hole screws and wood glue.
Place pocket hole screws at the top of the inside panels to hide them and attach the tabletop from the bottom.

Step 8.
The drawer for this nightstand is 13″W x 10″L x 3.5″H
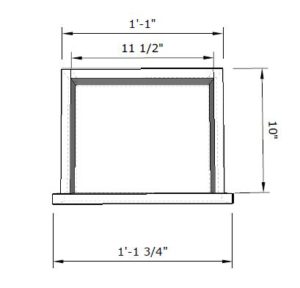

Adjust the width as necessary for your drawer slides. Typically, drawer slides require 1/2″ clearance. So the drawer for this nightstand is 13″ wide to fit the 14″ opening. I used these drawer slides and they’re great!
Use 1 x 4s for the sides of the drawer, 3/4″ plywood for the base, and a 1 x 6 for the face.

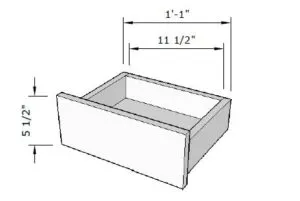
Add a drawer pull, and you’re good to go! I grabbed this pack of drawer pulls and have been using them on various projects. They’re super stylish at a good price – win win!
For more info, see How to Build a Drawer.
Step 9.
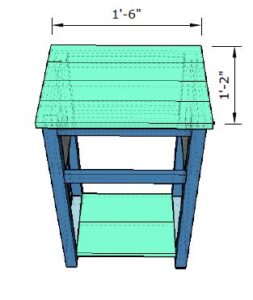
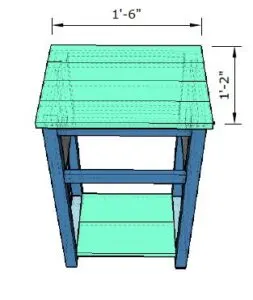
The tabletop for this nightstand is 18″W x 14″L. Use four 1 x 4s for the tabletop panels and place pocket holes on the underside to hide them.

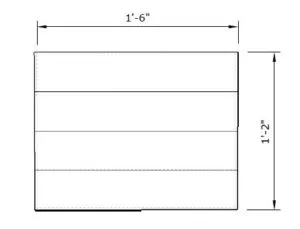
For more info, see How to Build a Tabletop.
Let me know if you have any questions and I’ll get back to you as soon as possible.
And if you build from these plans, please tag me on Instagram @bitterrootdiy! I’d love to see it!


brooke
Thursday 21st of May 2020
HI!
I was a wondering if you used the boards as is, or did you rip them to get the squared edges and exact measurements?
tylynn_sattler
Thursday 28th of May 2020
I used 1x lumber that had perfectly square edges and used them as-is.
Casey
Monday 18th of May 2020
Is the wood listed for one nightstand or two?
tylynn_sattler
Thursday 28th of May 2020
One
Kristen
Tuesday 7th of January 2020
Hi! Lovely table! I’m about to get started, and I noticed that the plans allow for 5 1/4” for the drawer face, but the drawer is 5 1/2” wide. Shouldn’t the spacing for the front 2 cross pieces be 8 3/4”? I’m a novice here, so please correct me if I’m wrong.
tylynn_sattler
Tuesday 7th of January 2020
Yes, that was my mistake! The spacing should be 8 3/4". I'll make the edit. Thank you for catching that and letting me know!
Mike
Wednesday 27th of November 2019
I know this was a while ago, but do you remember what stain was used?
tylynn_sattler
Monday 2nd of December 2019
I'm pretty sure it was Minwax Special Walnut. Not 100% but I think that'd be close!
John
Friday 8th of November 2019
great plans. I plan to build two of these did my granddaughter good plans
tylynn_sattler
Monday 2nd of December 2019
That sounds great! Thank you