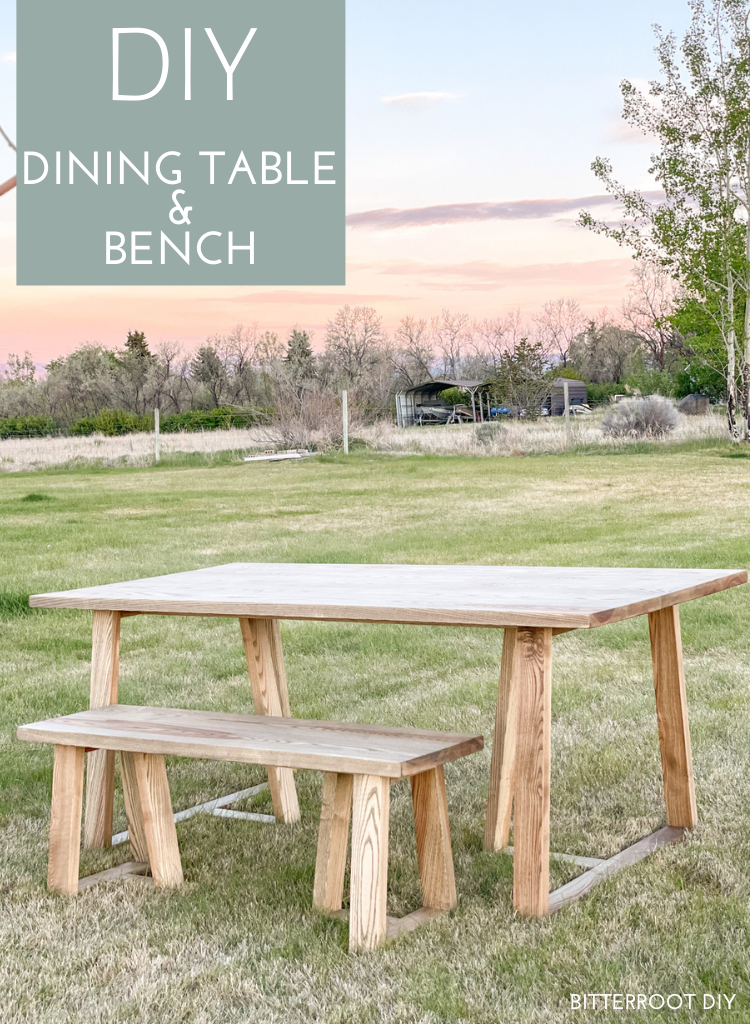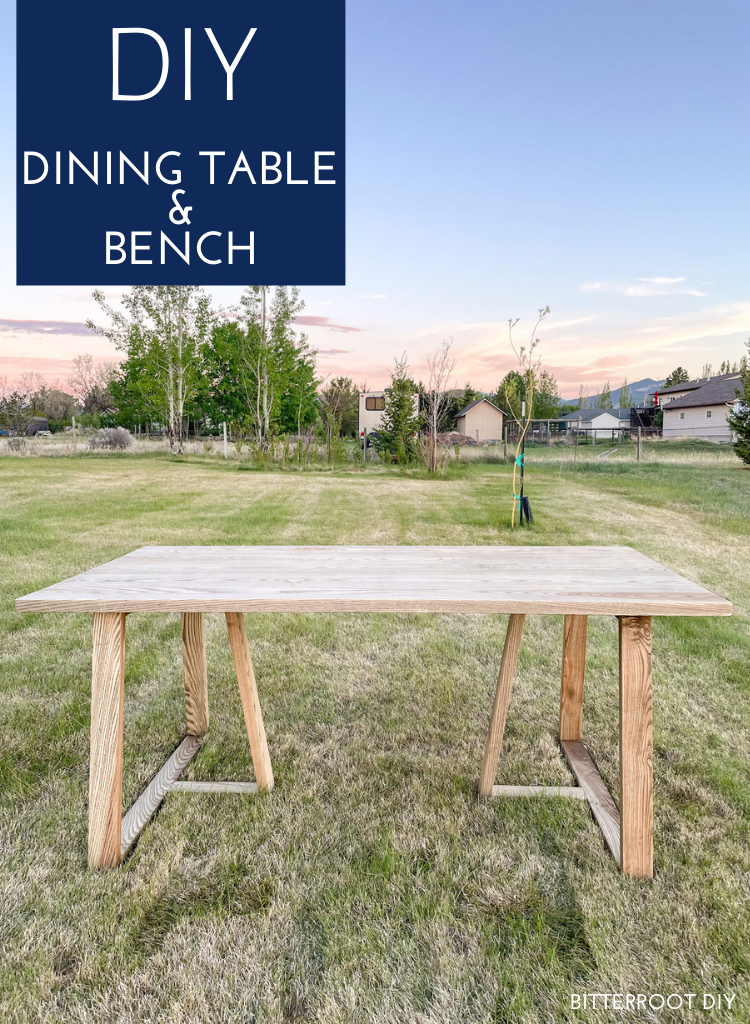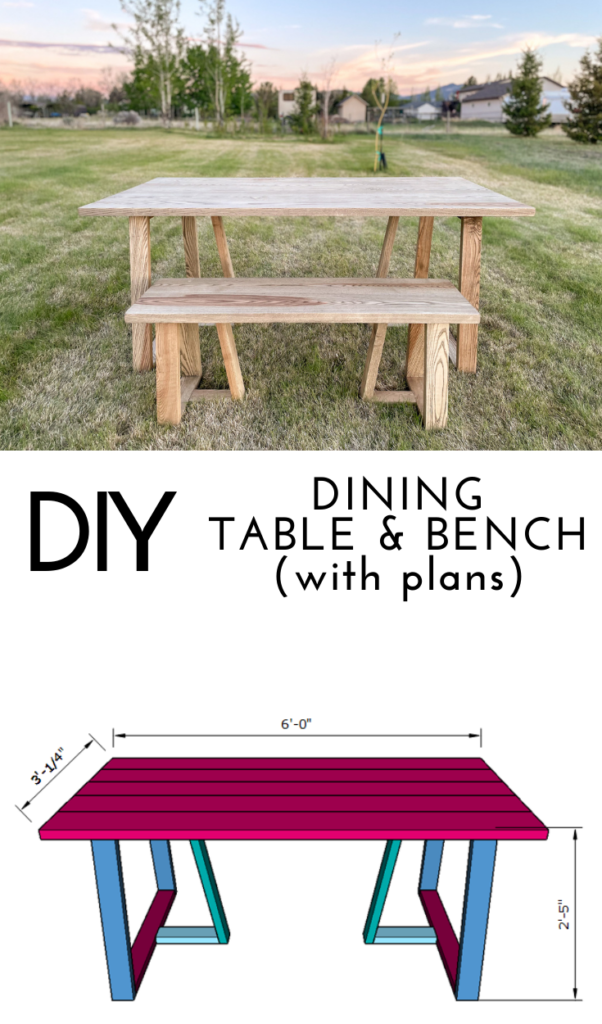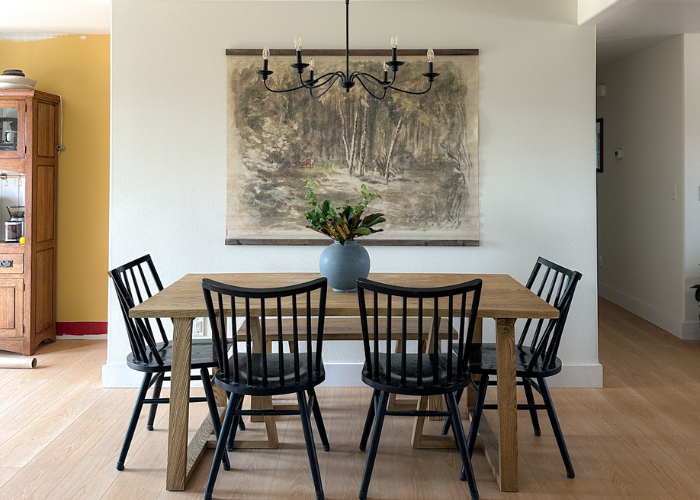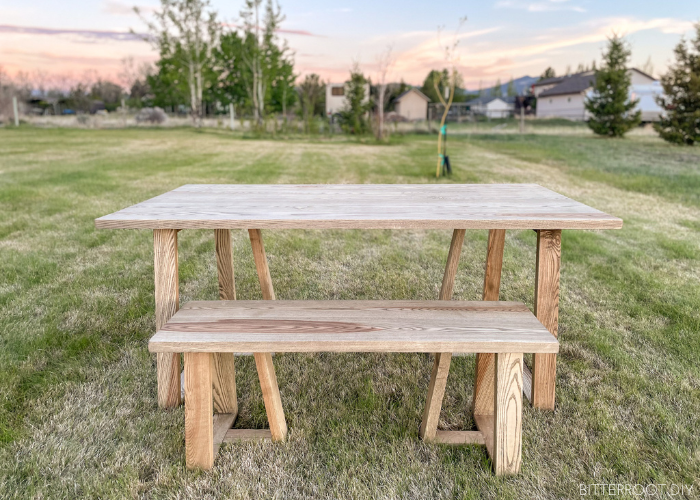
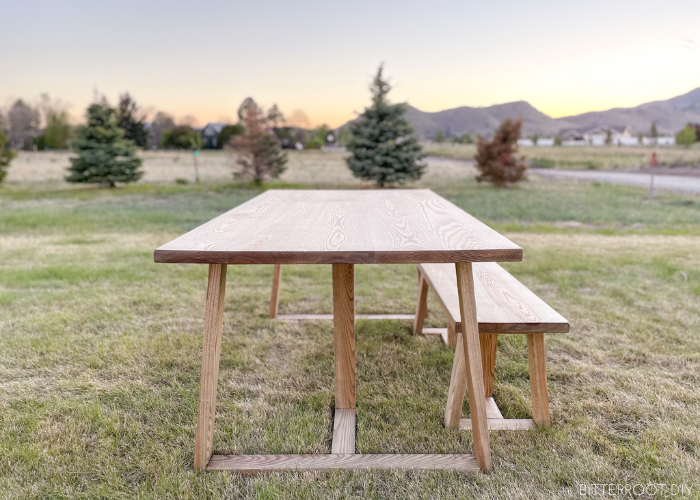
Build a modern truss DIY dining table with these plans.
This post may contain affiliate links. If you make a purchase from one of the links, I may make a small commission at NO EXTRA COST to you. This helps keep the tutorials and plans free here at Bitterroot DIY. Thank you for your support! See my full disclosure here.
Tools & Supplies
- Finish: Rubio Monocoat Oil Plus 2C
- Kreg Pocket Hole Jig
- Table Saw (optional)
- Miter Saw
- Circular Saw
- Orbital Sander
- Drill
- Tape Measure
- Wood Glue
- 2 ½" Pocket Hole Screws
- Tabletop Fasteners or ¾" Corner Braces (8)
- Clamps
- Level
- Speed Square
- Pencil
- Safety Glasses
- Ear Protection
Lumber List
- 2 | 2x4 @ 6' (frame)
- 4 | 2x4 @ 8' (frame)
- 5 | 2x8 @ 8' (tabletop)
Cut List
- 2 | 2x4 @ 2'-3 ⅜" with 7° perpendicular bevel (top of leg frames)
- 4 | 2x4 @ 2'-4 ¾" with 7° parallel bevel (side of leg frames)
- 2 | 2x4 @ 2'-10" with 7° perpendicular bevel (bottom of leg frames)
- 2 | 2x4 @ 1'-0" on long side with 10° bevel on one end (bottom of truss frame)
- 2 | 2x4 @ 2'-3 7/16" with 10° parallel bevel (truss leg)
- 3 | 2x4 @ 4'-5" (tabletop support frame)
- 5 | 2x8 @ 6' (tabletop)
Up until this point, I've built all my projects with soft woods - mostly pine, as well as some cedar every now and then. This is the very first time I've ventured into hardwoods.
Why?
I thought it would be a fun challenge - a good time to stretch my woodworking skills a bit and build something a little more durable since it's a dining table.
I'm happy to report that I only contemplated burning it a few times during the process.
Ok.
Maybe more than a few times.
But I learned a lot. And I'm sure my next hardwoods project will be that much easier.
Both the table and bench are solid ash, finished with Rubio Monocoat oil in walnut. The walnut color is much cooler and more rustic than I expected. I wish I had left it the natural color, but it still turned out beautiful (just not the exact color I had pictured).
If you do decide to build with hardwoods and use pocket hole joinery, I highly recommend SC Johnson paste wax. Just dip the screws in it and it will allow you to drive them into the hardwood easily ... ask me how many screws I broke before one of my Instagram friends shared that little tip ...
If you want to keep it simple, DON'T WORRY. I kept all the dimensions to standard off-the-shelf lumber that you can get at the home improvement store (typically pine).
Enjoy the plans!
And don't forget to check out plans for the matching DIY modern truss dining bench!
Step 1.
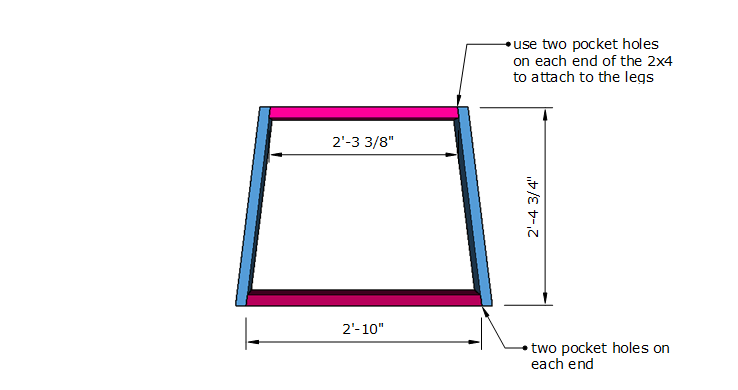
Assemble the first leg frame with wood glue and 2 ½" pocket hole screws.
Place pocket holes on the top of the top 2x4 to hide them (the tabletop will cover them once it's attached). Place pocket holes on the bottom of the bottom 2x4 to hide them.
Step 2.
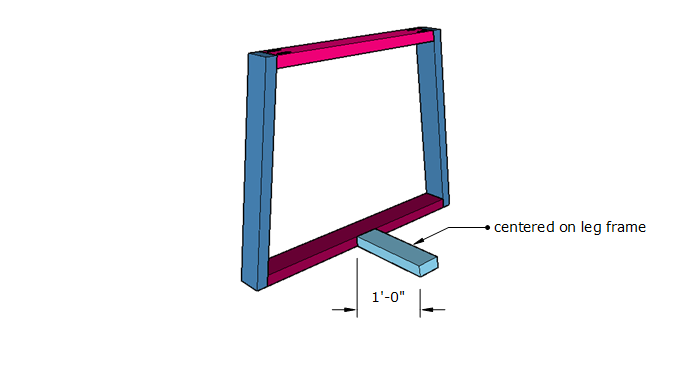
Assemble the first leg frame with wood glue and 2 ½" pocket hole screws.
Place pocket holes on the top of the top 2x4 to hide them (the tabletop will cover them once it's attached). Place pocket holes on the bottom of the bottom 2x4 to hide them.
Step 3.
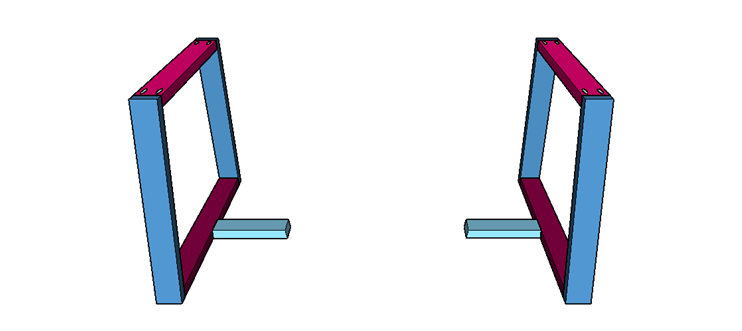
Repeat steps 1 & 2 to build the second leg frame.
Step 4.
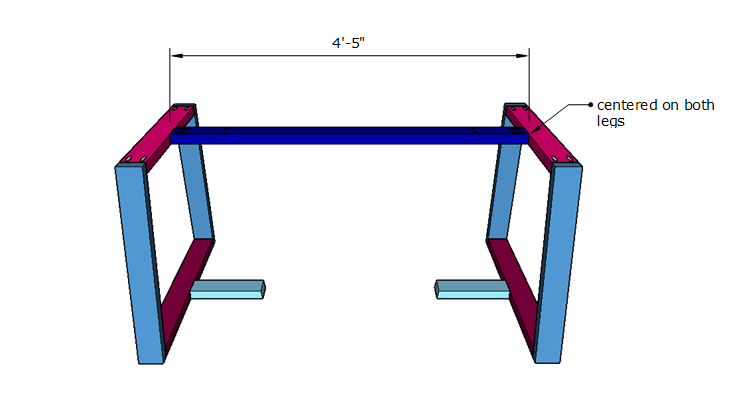
Join the two legs together with the top 2x4 support. Center the 2x4 on both legs and attach with wood glue and two 2 ½" pocket hole screws per side.
Place pocket holes along the top of the 2x4 to hide them once the tabletop is attached.
Step 5.
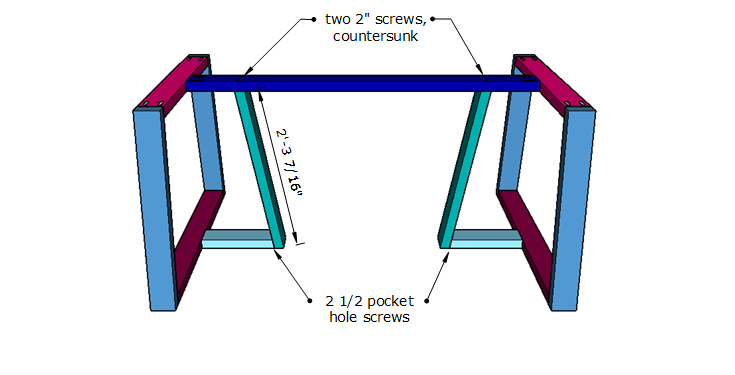
Attach the angled supports boards to the legs and top frame. Use wood glue and 2 ½ pocket hole screws to attach them along the bottom. Use wood glue and drive 2" nails at an angle through the top 2x4 into the truss boards. Countersink the screws on the top so they won't interfere with the tabletop.
Step 6.
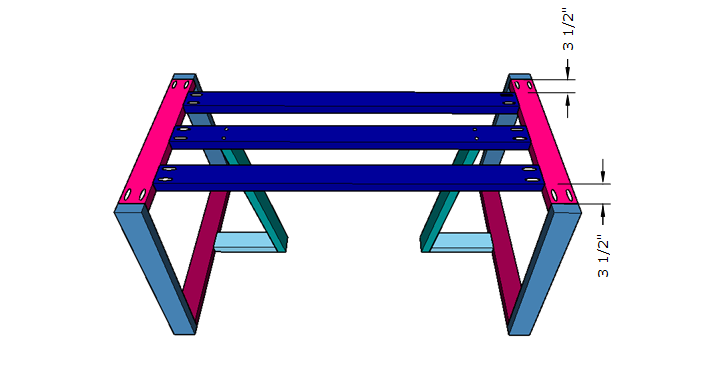
Add the outside top 2x4 supports. Attach them to the legs with wood glue and 2 ½" pocket hole screws.
Step 7.
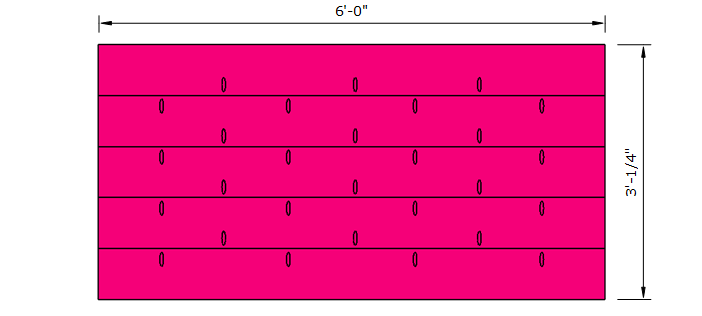
Build the table top.
If you have a table saw, you can rip the rounded edges off the 2x8s to get perfectly square edges before joining the boards together. Keep in mind it will make your tabletop narrower and you may want to adjust dimensions, start with 2x10s, or add another board. If you don't have a table saw, you can build the tabletop with 2x8s as is, but you'll be able to see the joints between boards.
There are a ton of ways to build tabletops, so use whichever method you prefer. If you own pipe clamps, you can edge glue all the boards. If you're new to building (or don't have large enough clamps), use wood glue and 2 ½" pocket hole screws. Stagger the pocket holes along the back as shown above.
Once all wood glue is dry, sand and finish as desired.
I finished this table with Rubio Monocoat Oil Plus 2C. It's a bit more spendy than stain & poly, but is hands-down my favorite wood finish and worth every penny. It was SO EASY to apply and has held up to our three young kiddos better than any other dining table we've owned or built.
Step 8.
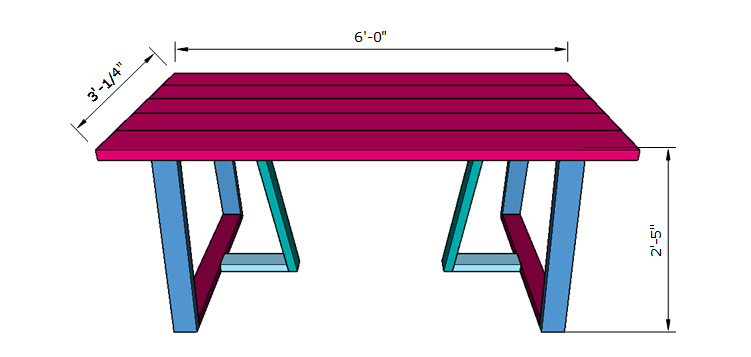
Attach the tabletop to the base with tabletop fasteners or small ¾" corner brackets.
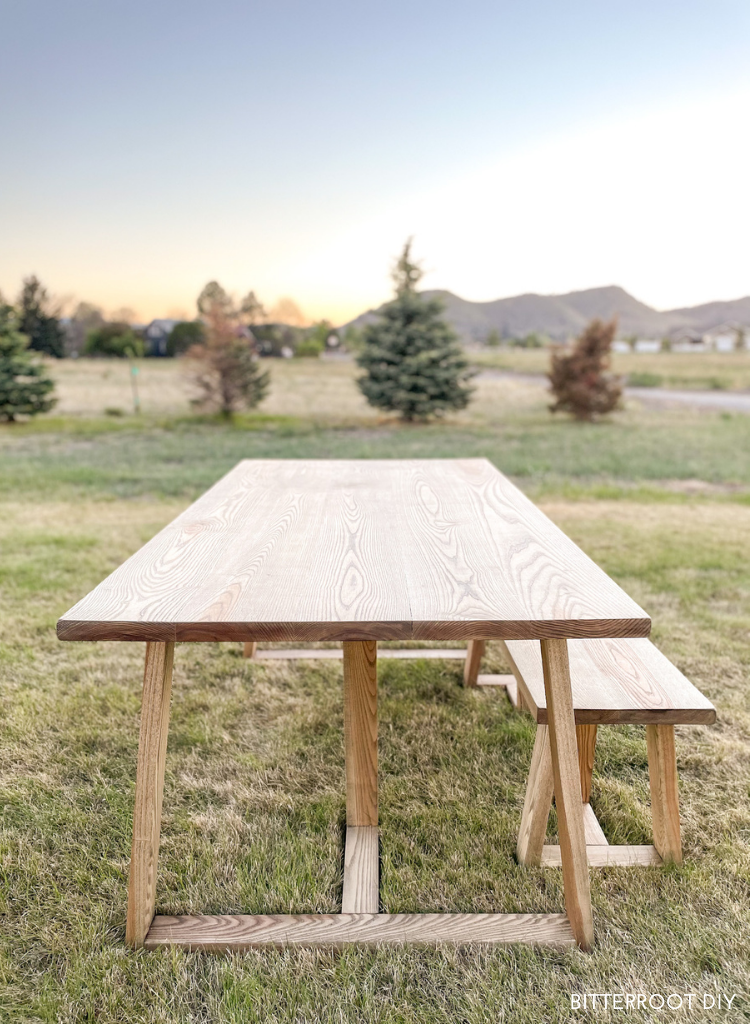
I’d love to see your take on this DIY dining table & bench, so tag me over on Instagram @bitterrootdiy or shoot me an email at bitterroot.diy {at} gmail.com if you build it!
As always, please let me know if you have any questions and I’ll get back to you as soon as possible.