Head to my YouTube channel for the full video on how I installed a gas fireplace. And don’t forget to SUBSCRIBE while you’re there to see lots more how-to videos!
This post may contain affiliate links. If you make a purchase from one of the links, I may make a small commission at NO EXTRA COST to you. This helps keep the tutorials and plans free here at Bitterroot DIY. Thank you for your support! See my full disclosure here.
Second to installing all new floors, adding a gas fireplace was the biggest project of the small space living room renovation. This is the first time I’ve put in a gas fireplace, and I had absolutely no idea where to start. The whole thing was a learning experience, but I’m so glad I tackled it!
Now, installing a gas fireplace is different for every house depending on gas line location, size, venting, etc. But I’ll walk you through how I did it to try to at least give you a place to start.
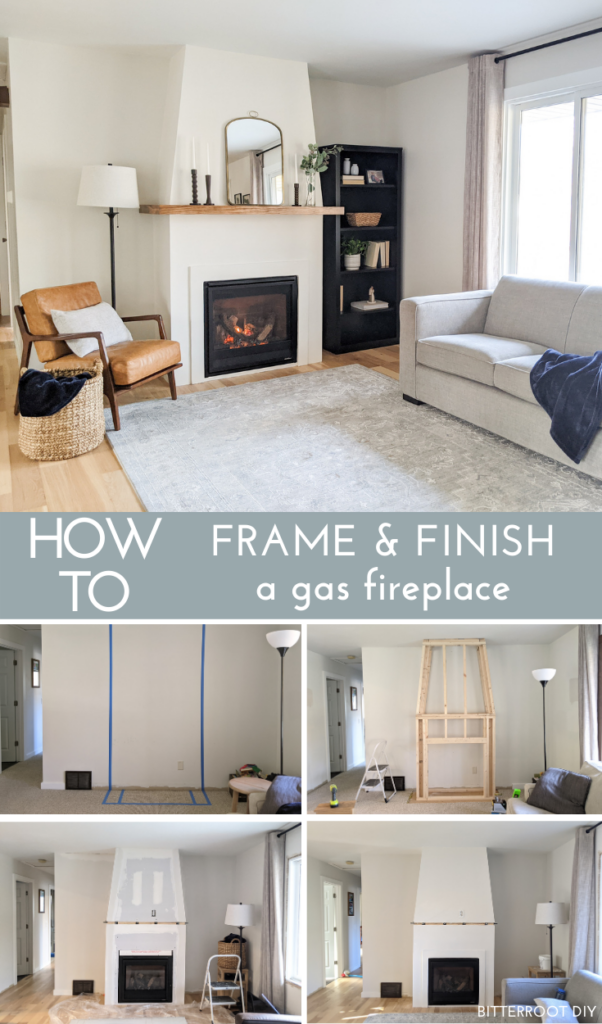
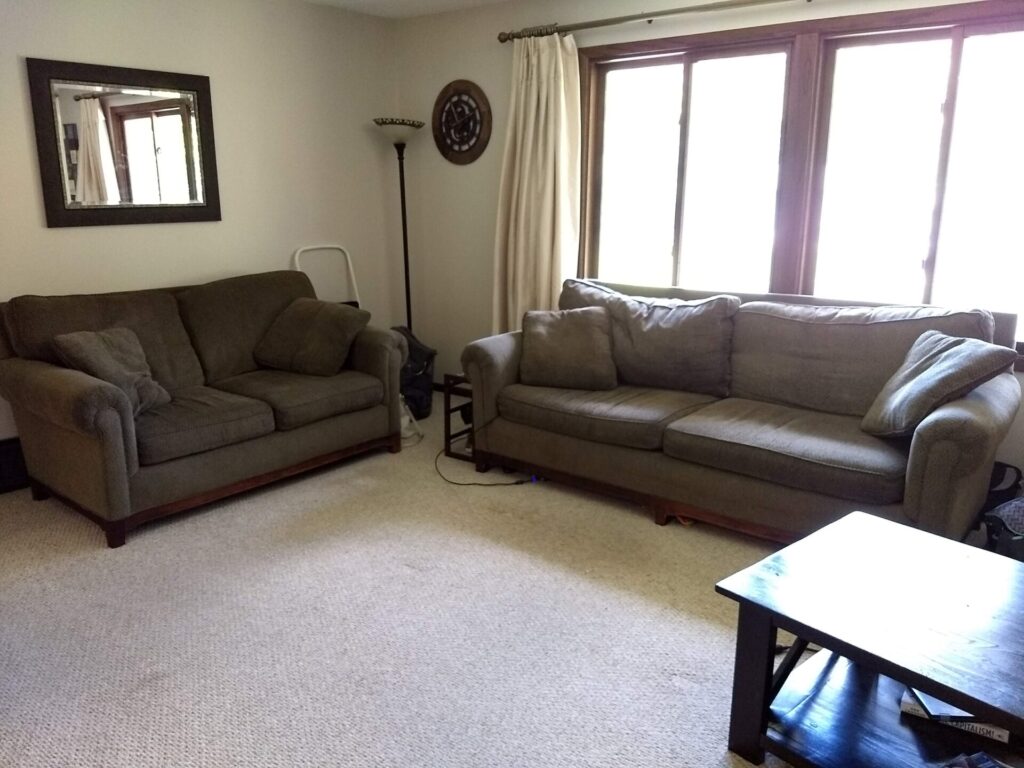
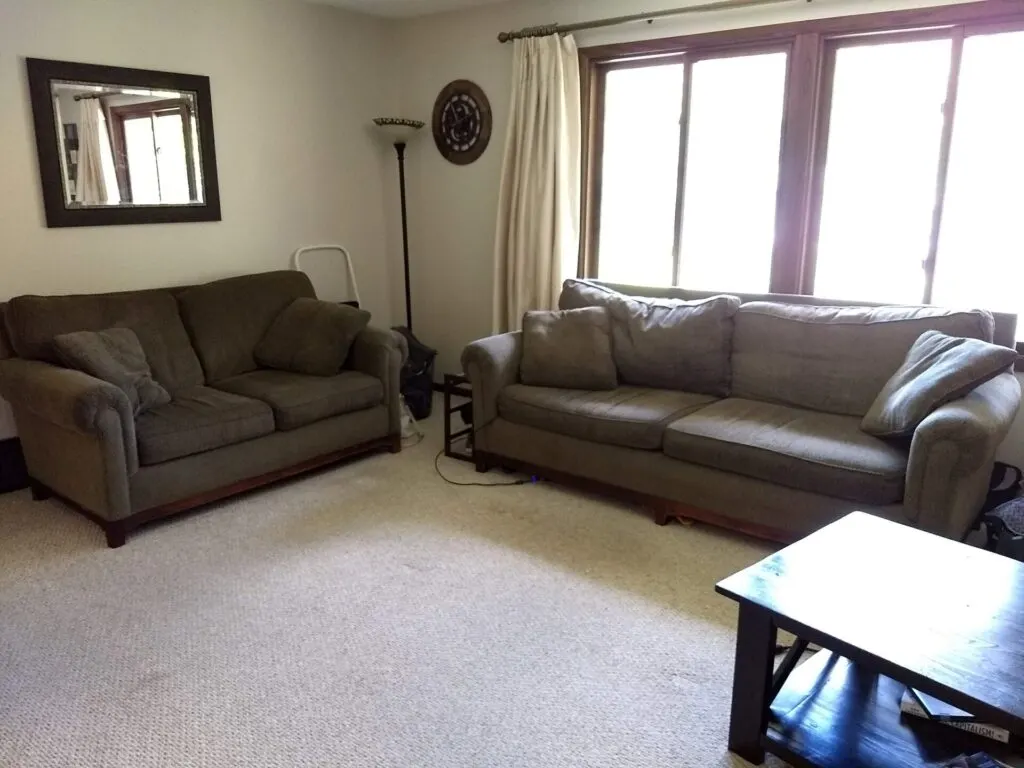
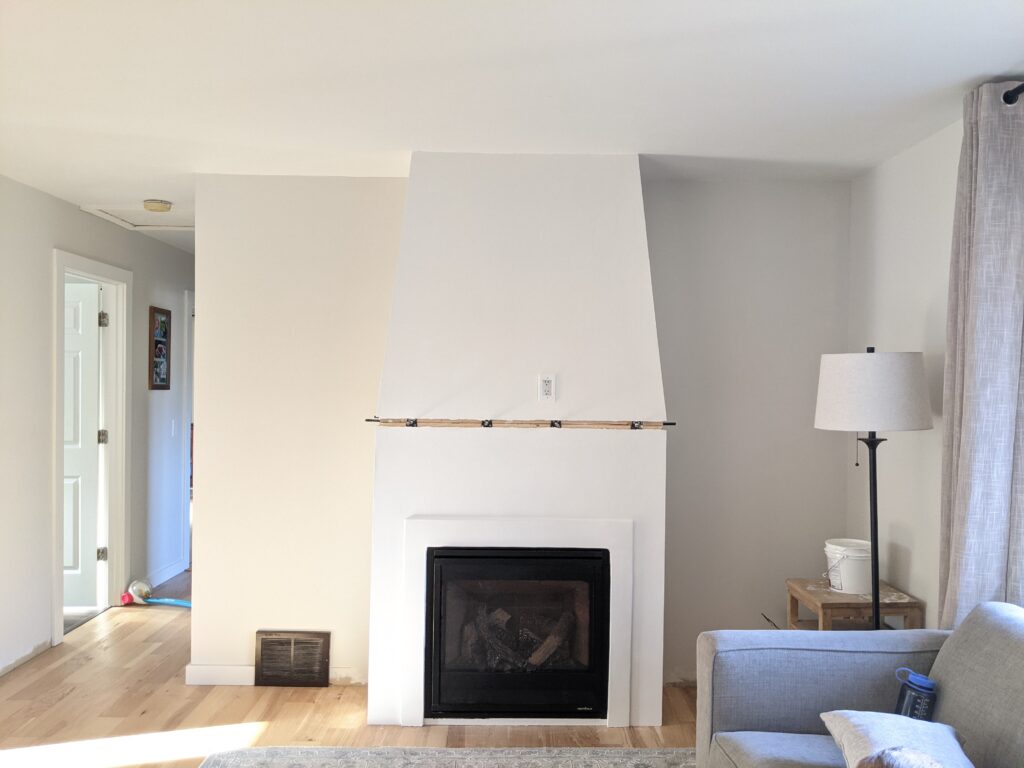
Before we jump into it, let’s take a look at the before. This is what the living room looked like right when we moved in:
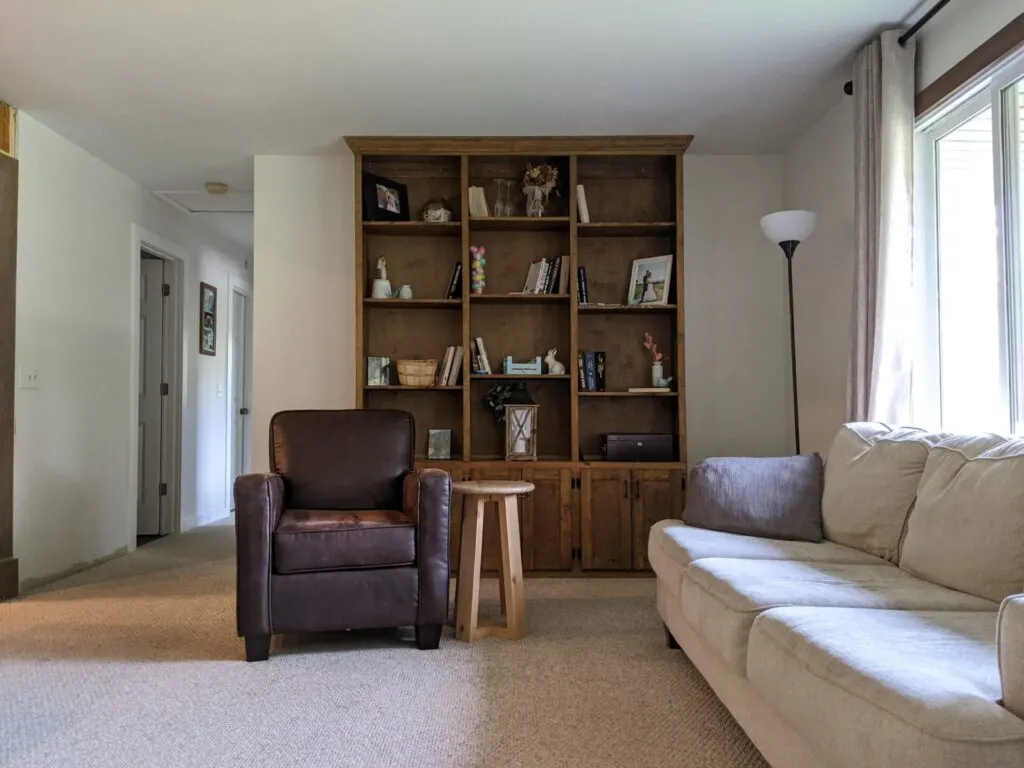
After the first round of renovations:

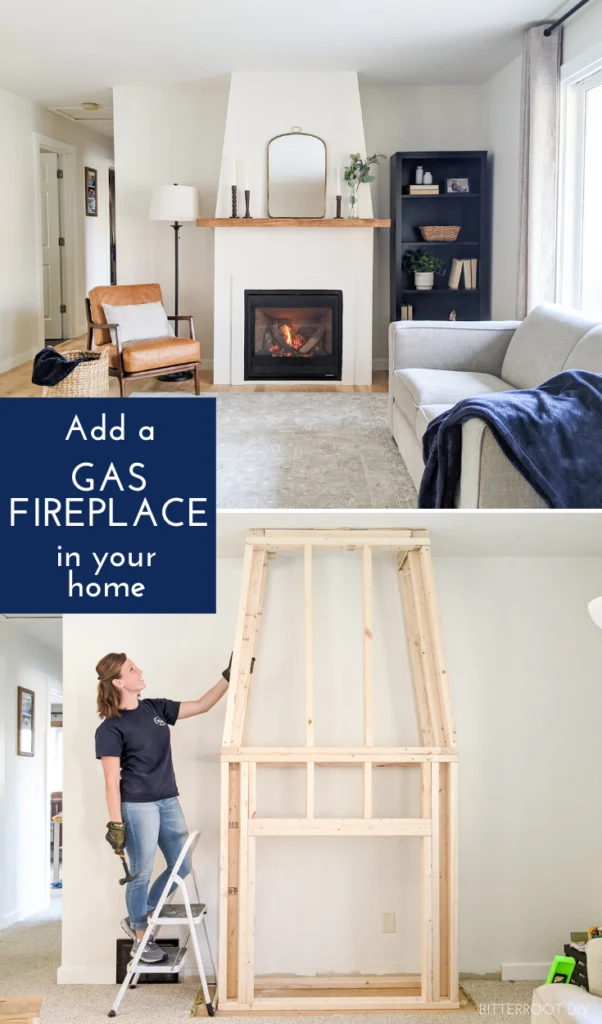
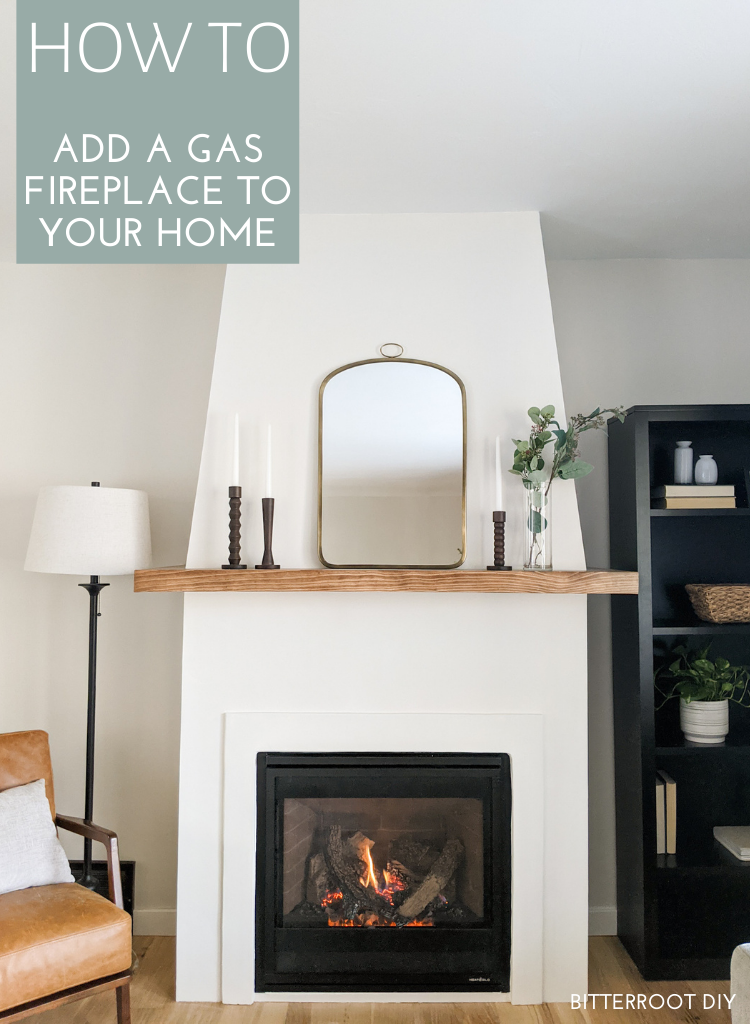
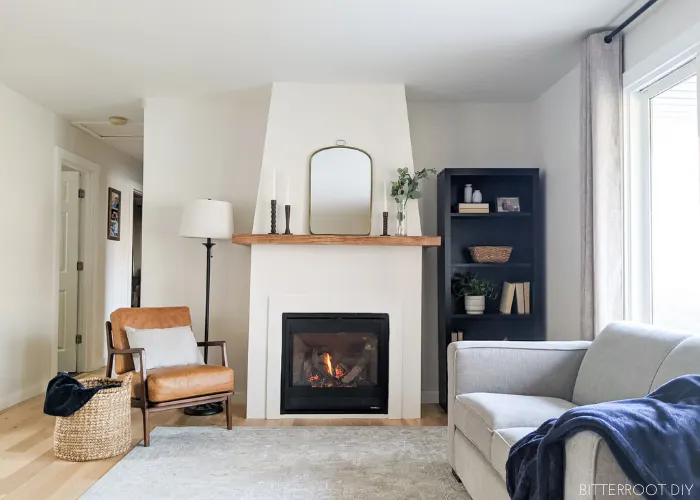
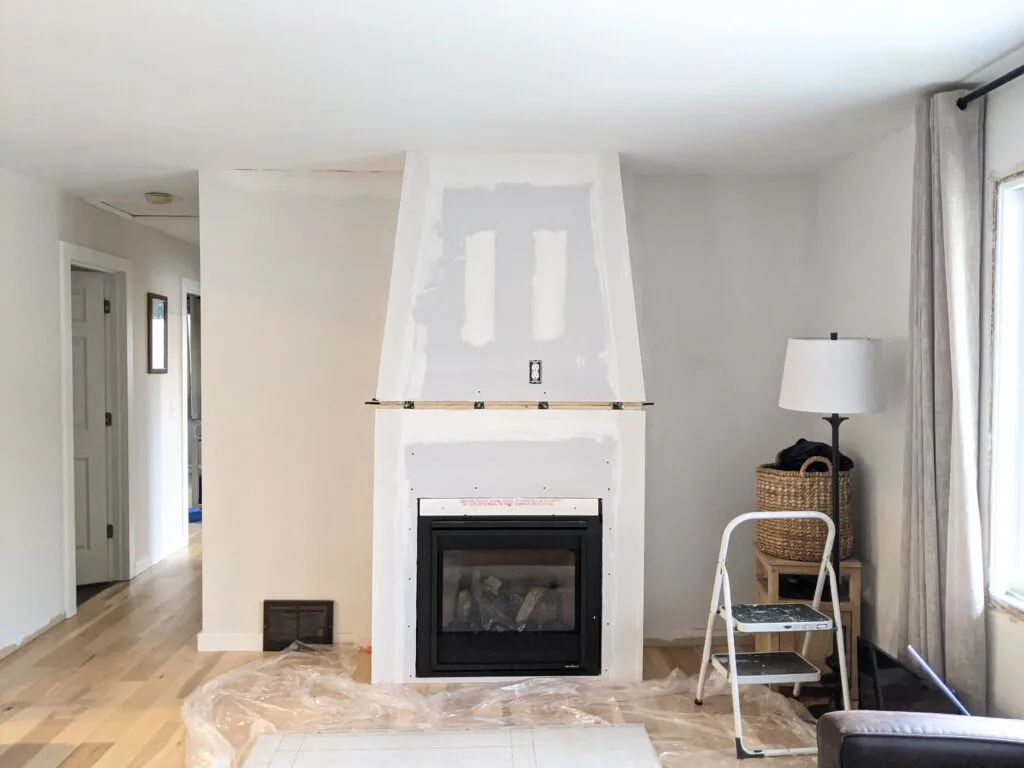
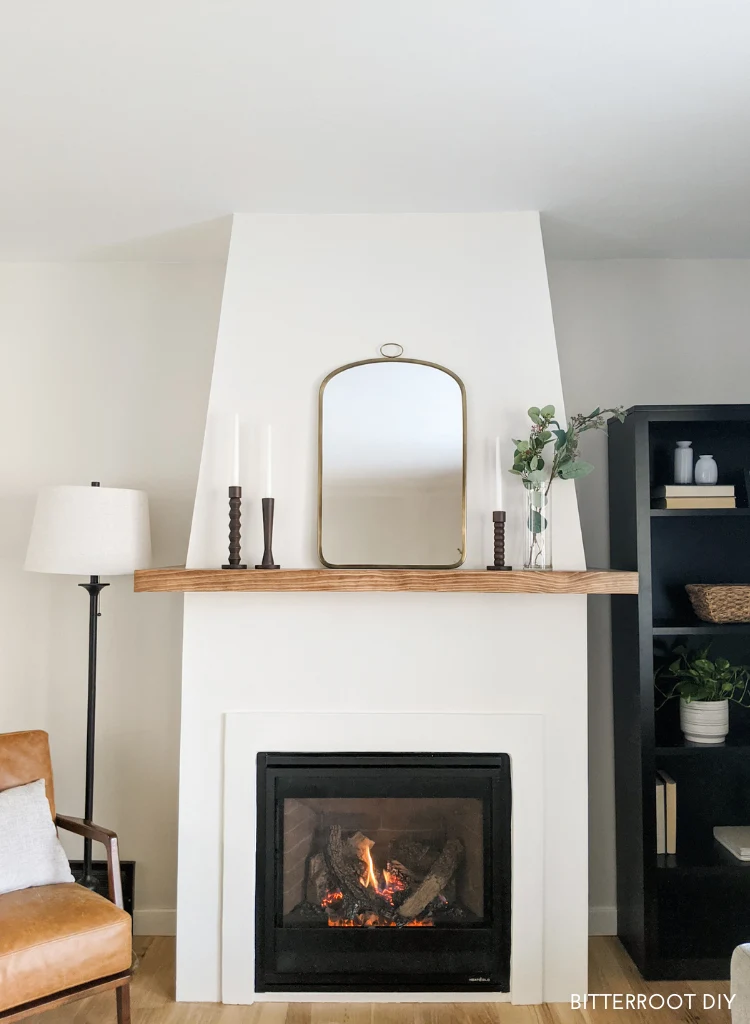
And here’s what it looks like today:

The very first thing I did was look up a local fireplace shop, walked myself right in there, and started asking questions. I’m not even kidding you. I set my pride aside and seriously walked in and was like “yeah, I’d like to add a gas fireplace in my house but have no idea where to start …”
Nice and smooth like that.
*face palm*
But how else do you learn, you know – asking the experts is a pretty good place to start.
Thankfully, the owner was very kind and took the time to walk me through a lot of the basics. We went over the different brands, pricing, finishing options, where to find specs for each unit, and how to do the venting. If you’re around Minneapolis, I highly recommend Fireplace Creations out of Buffalo, MN. They were wonderful to work with.
I did all the framing and finishing work myself but hired the shop to run the gas line & roof venting and install the unit. One of the great things about doing a DIY gas fireplace is that you can do as much or as little yourself as you want. I knew it would take me forever to get the gas, venting, and unit hookups figured out and, quite frankly, didn’t think it was worth the risk. Totally up to you. I still saved a few thousand dollars by doing the framing and finishing myself, and it only took them about 3 hours to run the gas line and venting.
So that brings us to …
step 1 – framing
I went with a Heat & Glo unit – the SL 3X Slimline. You can find authorized dealers on the Heat & Glo website if you’re interested. Again, if you’re around Minneapolis, I recommend Fireplace Creations out of Buffalo, MN.
I looked up the framing specs (listed on the Heat & Glo site for each unit) and taped out a rough idea of what I was going for:
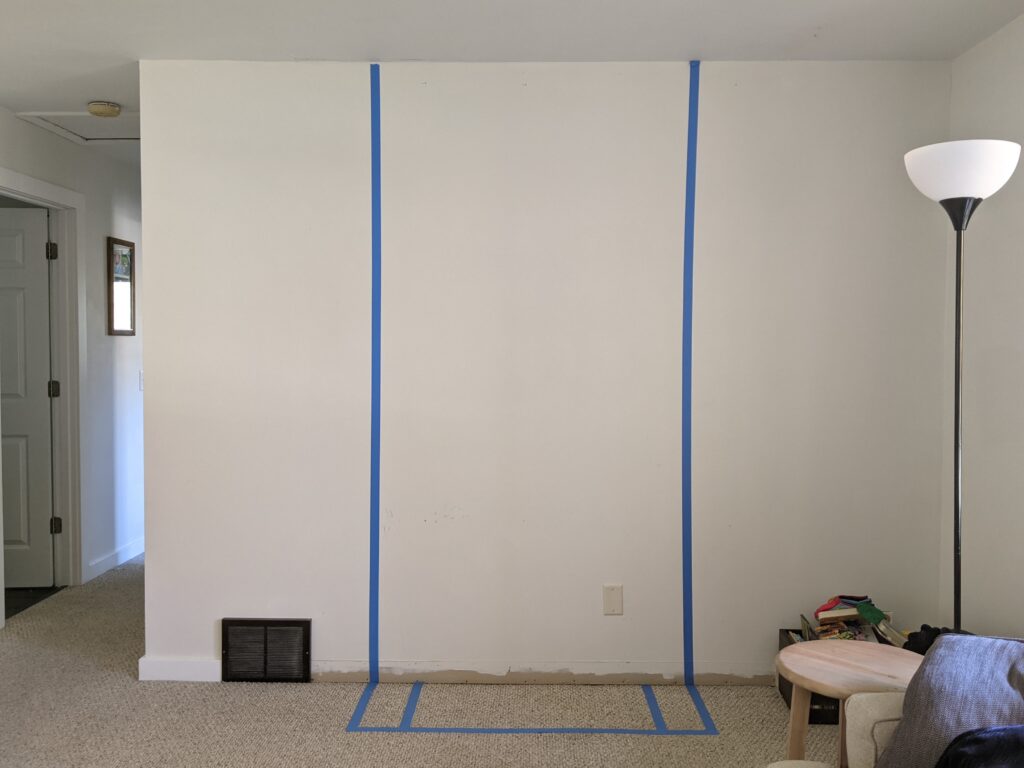
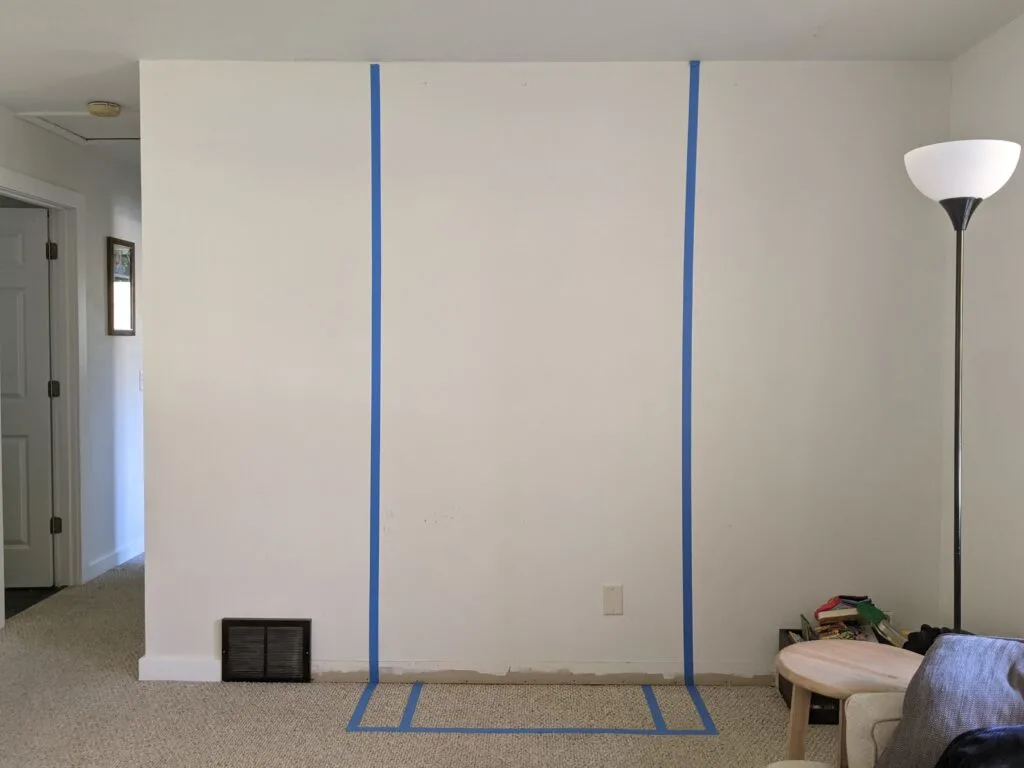
The tape worked wonders to help me visualize how wide to go and just get a general feel of it in the room.
Once I was happy with the overall size, I drew it in SketchUp and framed it up:
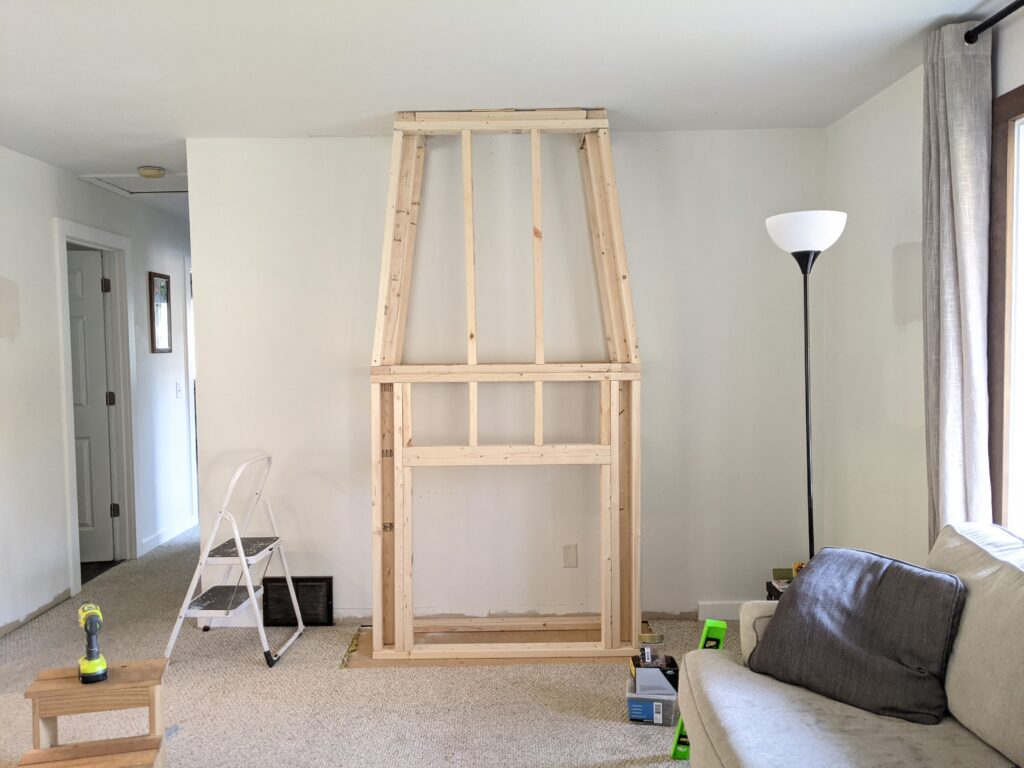
The top is tapered at 7° on each side, which is perfect for the 8′ ceilings.
Depending on what unit you install, follow all specifications listed in the manual. This unit is zero clearance along the bottom, so I didn’t have to worry about building a hearth and was able to place it directly on the floor. It was also acceptable to frame everything with wood – no need for steel studs.
FOLLOW YOUR FIREPLACE UNIT SPECS.
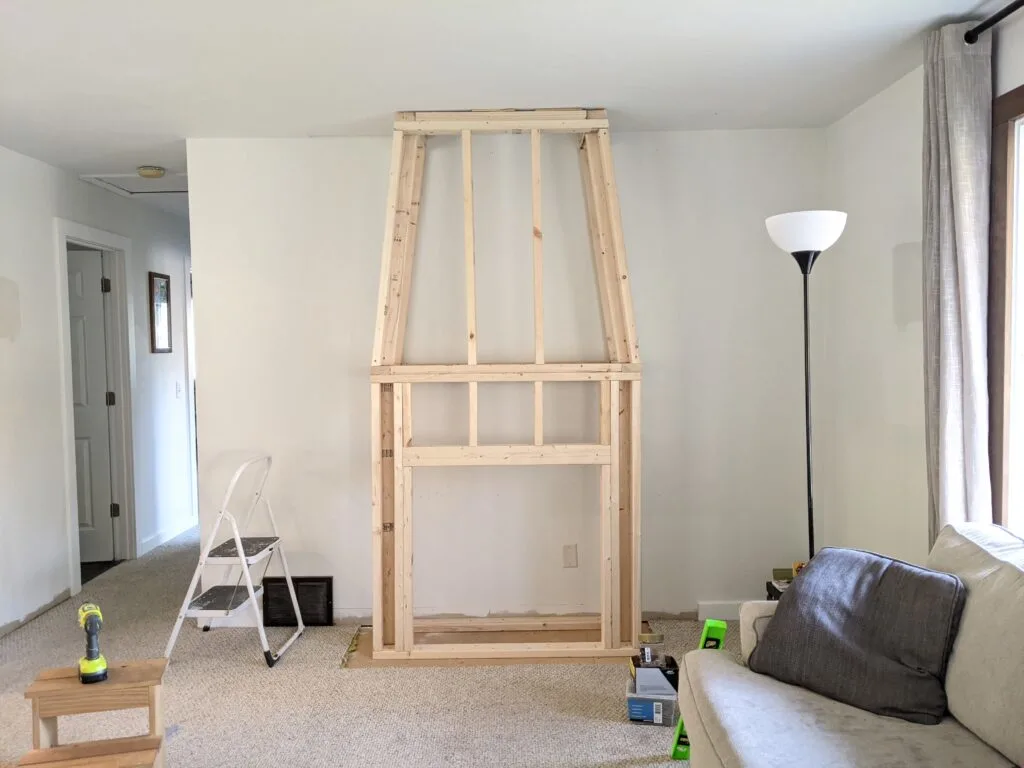
We installed the new floors at this point, so here’s what it looked like after that:

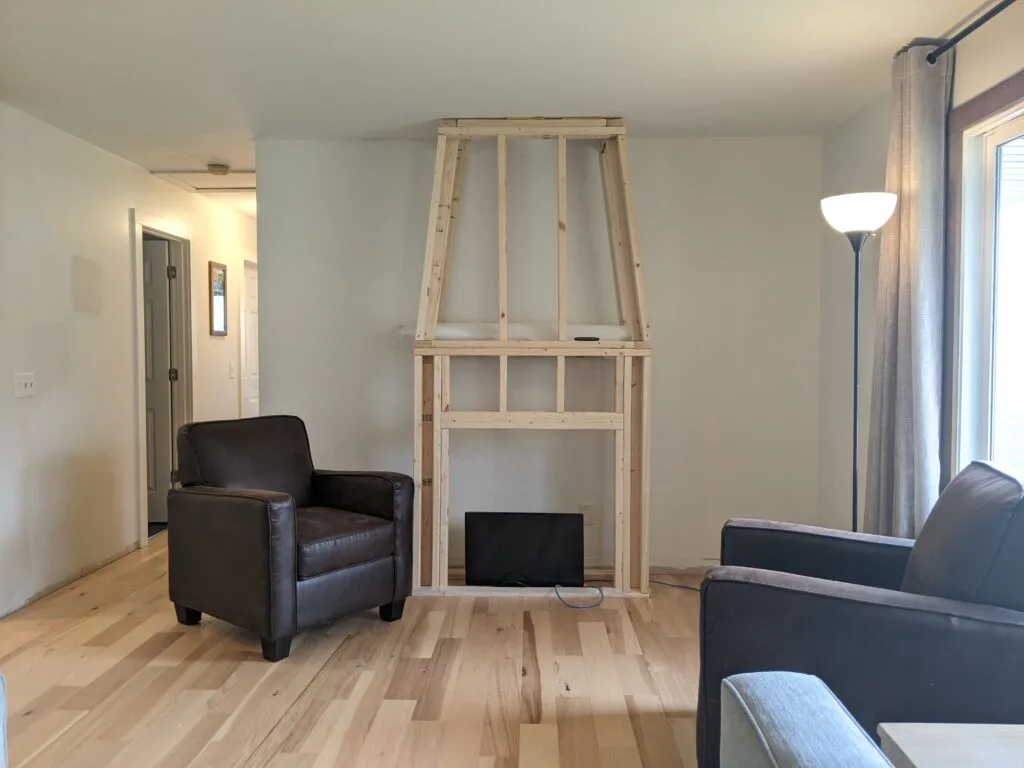
Pretty cool to really start to see things take shape!
Don’t worry – that’s a TV in the bottom of the framing, not the fireplace unit.
Step 2 – Install
Next, the contractors came out and ran the gas line, vented through the roof, and hooked up the unit.
I don’t have many details on that since I didn’t do it myself, but you can find information and instructions for the installation included with the fireplace unit you purchase.
Step 3 – Faux Stucco Finish
My original inspiration for this fireplace came from one of the homes featured in Joanna Gaines’ design book Homebody (left in the photo below). As I did more research, I also found the tapered stucco fireplace that Chris Loves Julia recently finished in their new home (right in the photo below).


All in all, my goal was some sort of combination of the two. Due to structural limitations (this is not the ground-level of our house), I had to come up with a way to get that look and stay as lightweight as possible.
I’ve seen a few people use Roman Clay finishes for a faux cement look, and decided to give it a try for this faux stucco finish. You simply apply it over a finished drywall surface, which is plenty lightweight for this spot.
But before drywall, I installed metal brackets for a floating mantel (don’t mind that the faux stucco is done in the photo – it’s the best shot I have of the brackets).

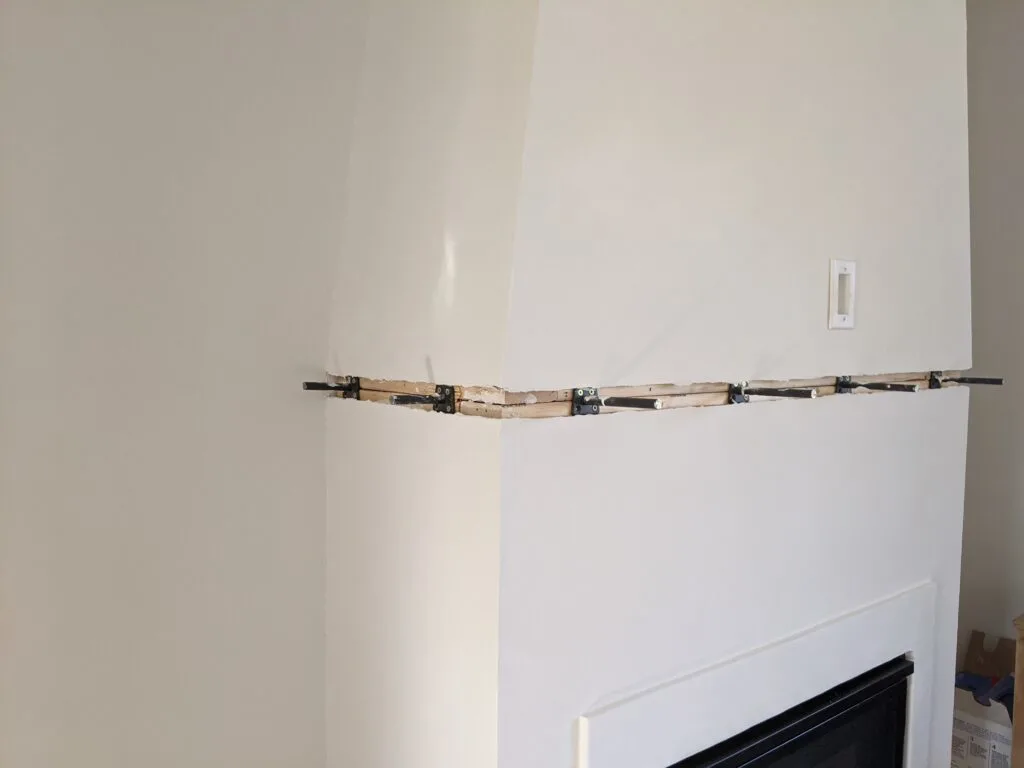
You can install floating shelf brackets over drywall, but there’s a risk of the drywall starting to buckle under the weight causing a slight wobble in the shelf. To be safe, it’s best to attach them directly to studs. Since the studs were exposed anyways, I just installed them ahead of time.
See the full YouTube video for more information.

For this gas fireplace, it was acceptable to use standard drywall all the way to within 3″ from the top and 1/2″ from the sides of the unit.
Again – pay attention to the specifications on your particular unit.
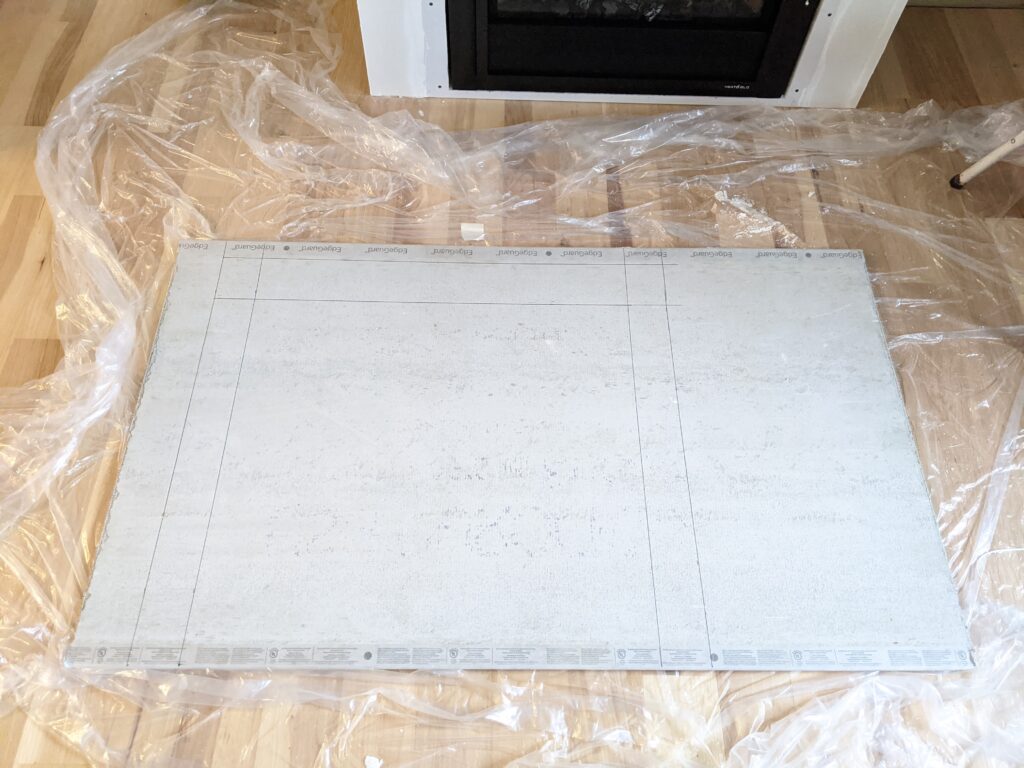
I drywalled and mudded & taped the entire surround and then used a small piece of cement board to finish off the non-combustible area.

I cut out a frame, mudded and taped the inside edges, and then attached it to the surround right around the fireplace unit. To finish it off, I mudded and taped the outside edge to make it seamless with the rest of the surround.
**Note: Make sure to use cement-board screws. They have a corrosion-resistant coating so they won’t rust.
Once all the drywall work was done and perfectly smooth, I primed everything with a multi-purpose primer and applied the Roman Clay finish. I used Portola Paints & Clays Roman Clay in the color Brooks.
They have a great, in-depth tutorial on how to apply it over on their YouTube channel. It’s a versatile plaster finish applied with a putty knife.

It’s so hard to capture the texture on camera, but the Roman Clay turned out really really beautiful. I love all the texture – it’s exactly what I was going for. You can see it a little better in the YouTube video.
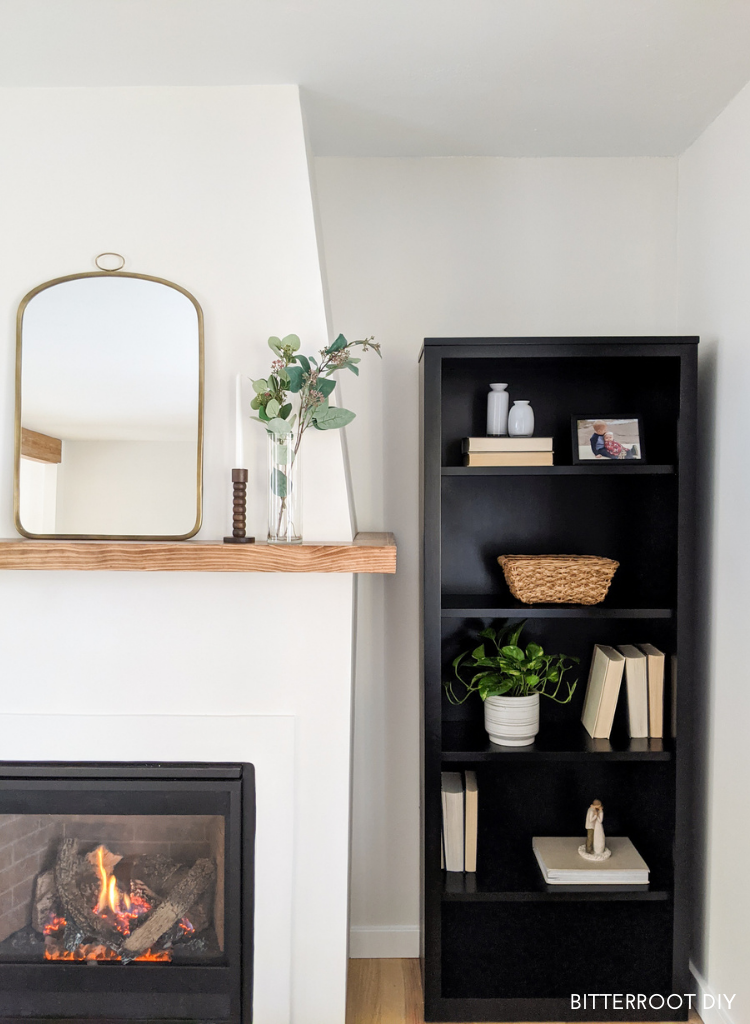
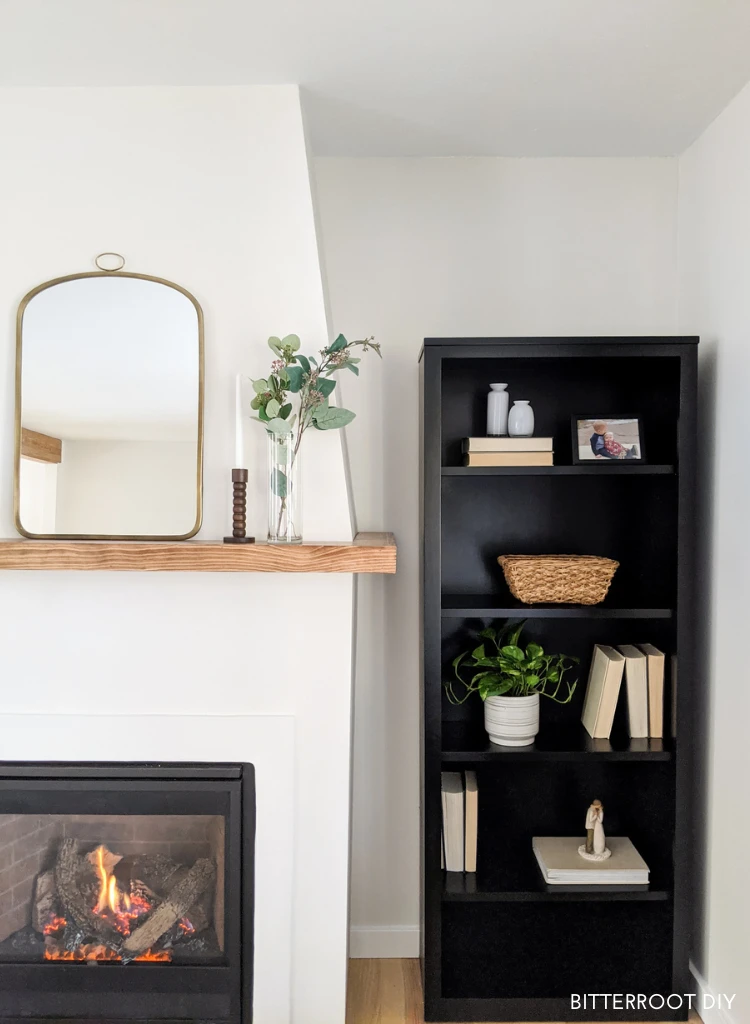
Step 4 – Floating Mantel
The final piece to finish this DIY gas fireplace off was building the floating mantel. As with any project, there are a million ways to do it.
Unfortunately, I forgot to take photos of the process … trying to do too many things at once … but I did make an entire separate YouTube video tutorial.
In summary, I installed a 2×6 along the front and 2x4s on the sides on the metal brackets. Then I wrapped the top and bottom with 1/2″ plywood and finished of the front and sides with a 1×3. It’s a completely seamless-looking wraparound mantel that is a little narrower on the sides than the front.
Talk about a transformation!
Now, I realize there’s a lot of “it depends” in this tutorial. Every house is different. Every fireplace unit is different. Your local building codes are different. And with a project of this scope, those are all important details. However, I hope it at least gives you a good idea of where to start. I had NO IDEA what I was doing when I jumped into this project. I’ve never put in a gas fireplace before … I just started by asking questions and finding people with experience.
Research your local codes. Find a fireplace shop that can guide you and answer questions. Don’t forget to pull permits as necessary. Follow regulations.

As always, please let me know if you have any questions and I’ll get back to you as soon as possible.
Thanks for stopping by!
For more project ideas, you can find me on Pinterest. And to stay up to date with the latest shenanigans, follow me on Instagram and subscribe to my YouTube.
Shop the Post: