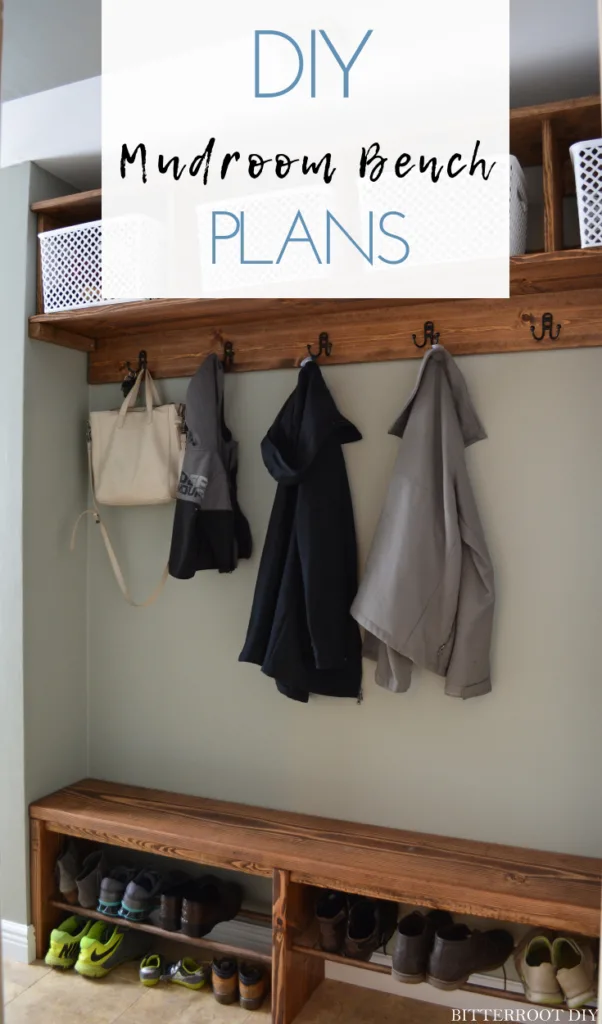
Build an easy DIY mudroom bench with shoe storage.
This post may contain affiliate links. If you make a purchase from one of the links, I may make a small commission at NO EXTRA COST to you. This helps keep the tutorials and plans free here at Bitterroot DIY. Thank you for your support! See my full disclosure here.
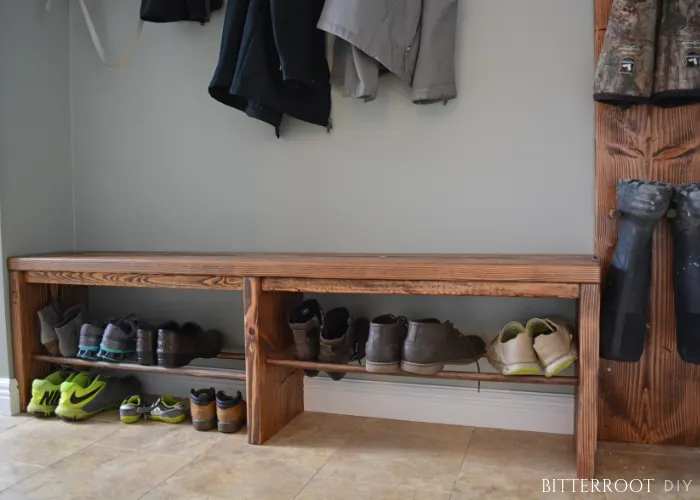
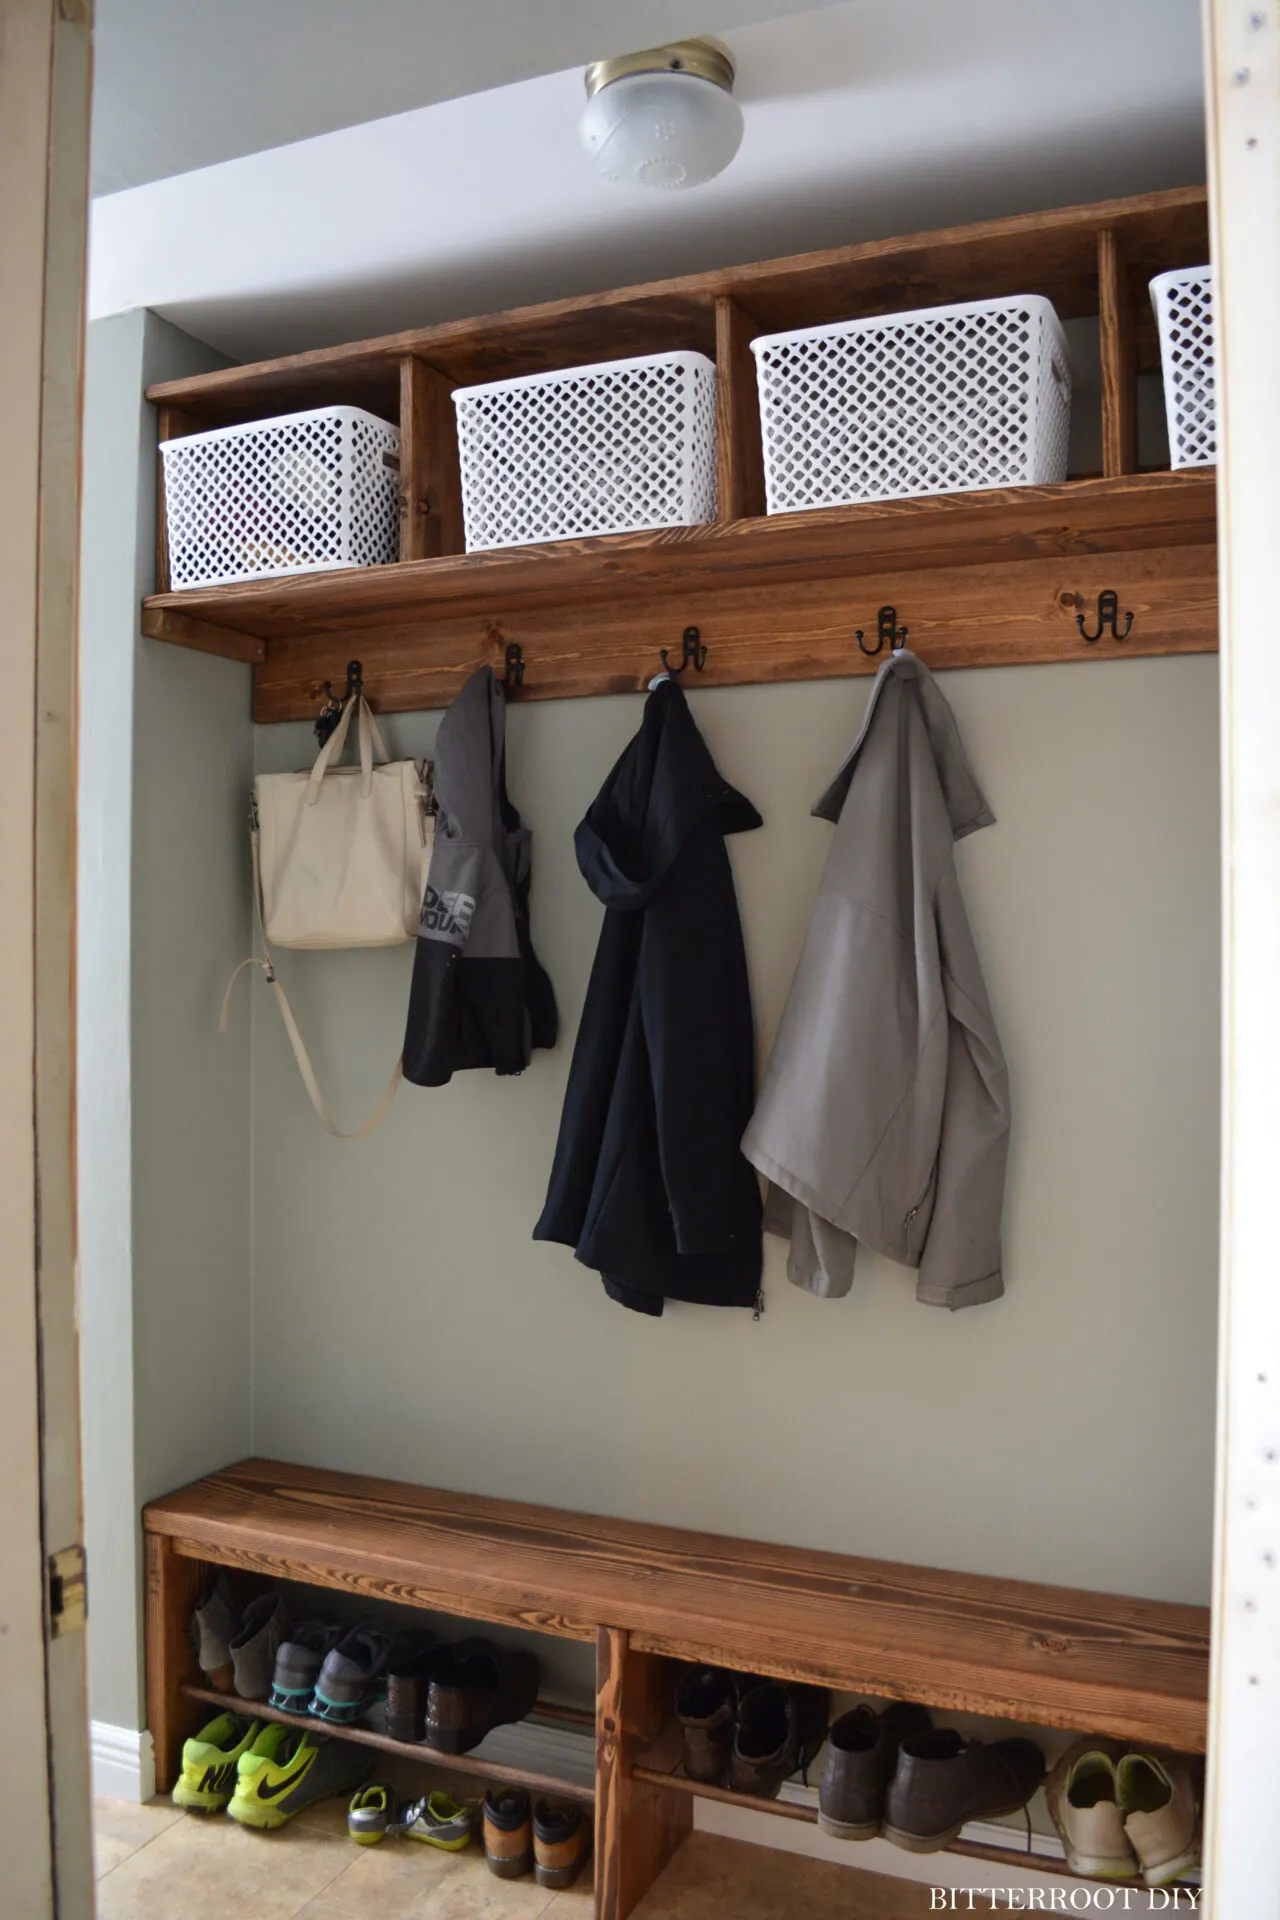
Are you ready for the easiest DIY Mudroom Bench ever!?!
This bad boy is a quick build, can be customized to fit any space, and finishes off any mudroom perfectly. Just in time for winter!
If you haven’t already, make sure to grab plans for the storage cubbies and boot hanger to complete your space!
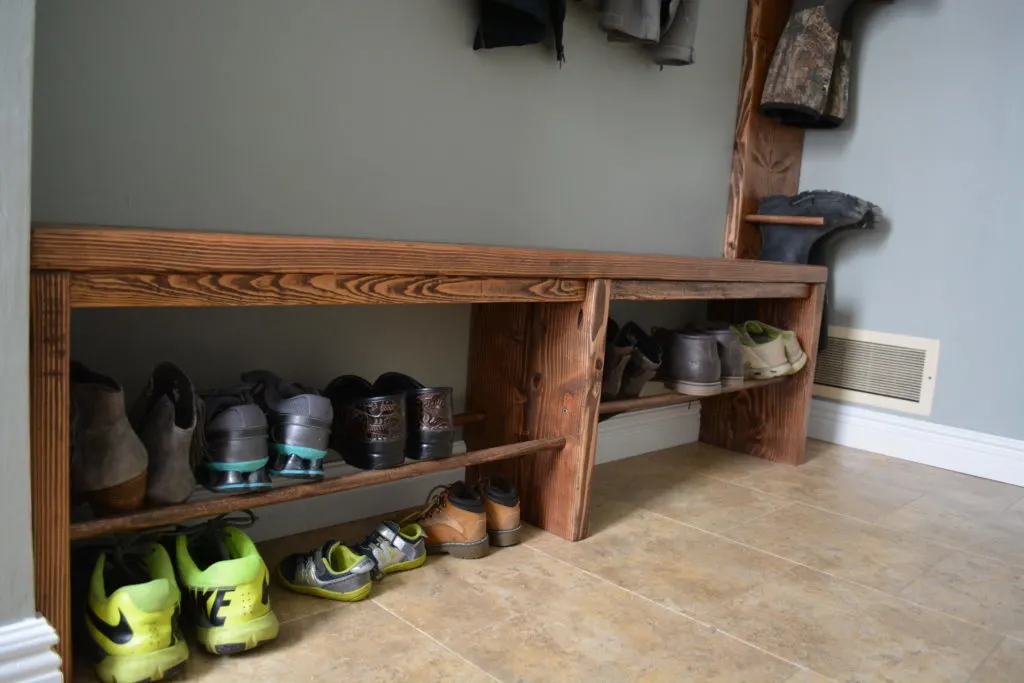
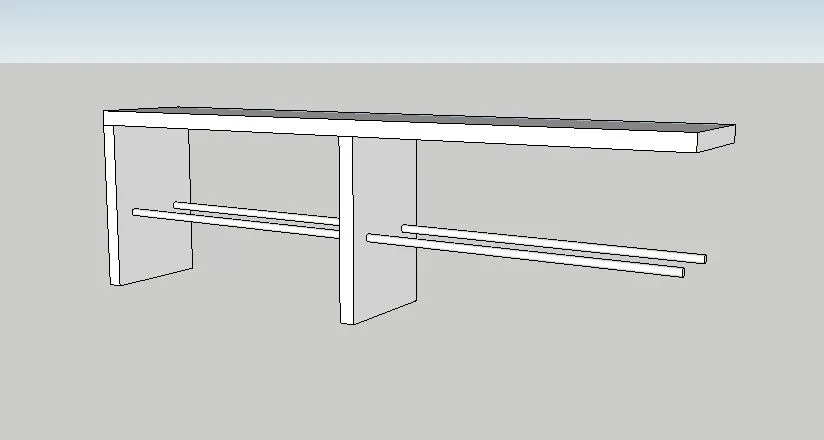
You may notice in the plans that I recommend using two long dowels for the shoe rack (full bench length). However, as you can see in the photos, I did not use two full length dowels. I ended up with four dowels and offset them on each side. Honestly, that was due to poor planning on my part. If I built it again, I’d use two full length dowels for a stronger joint and cleaner look.
If you so choose, you can use four dowels like I did and make the following adjustments:
- Cut dowels to appropriate length for four sections instead of two.
- Offset the dowels on each side enough that you can fit the drill to put a screw in the end of each dowel. Drill the 3/4″ dowel holes 1/2″ deep in the middle leg on both sides.
- Assemble the bench top, end legs, and then add the middle leg.
- Attach the top leg braces.
- THEN put the dowels in place. Attach them to each leg with wood glue. Once the glue sets, put a 1 1/2″ screw into the end of each dowel for a secure joint.
Just a heads up – the dimensions for each section of this mudroom are based on our hallway. Adjust dimensions as necessary to fit your space.
Enjoy the free plans!
Tools & Supplies:
- Saw
- Drill
- 3/4″ Forstner Bit
- 1 1/2″ Screws
- Kreg Pocket Hole Jig
- 2 1/2″ Pocket Hole Screws
- Tape Measure
- Pencil
- Wood Glue
- Orbital Sander
- Woven Storage Bins
Lumber:
- 2 | 2 x 12 @ 6′
- 2 | 2 x 2 @ 6′
- 4 | 3/4″ Dowels @ 6′
Cuts:
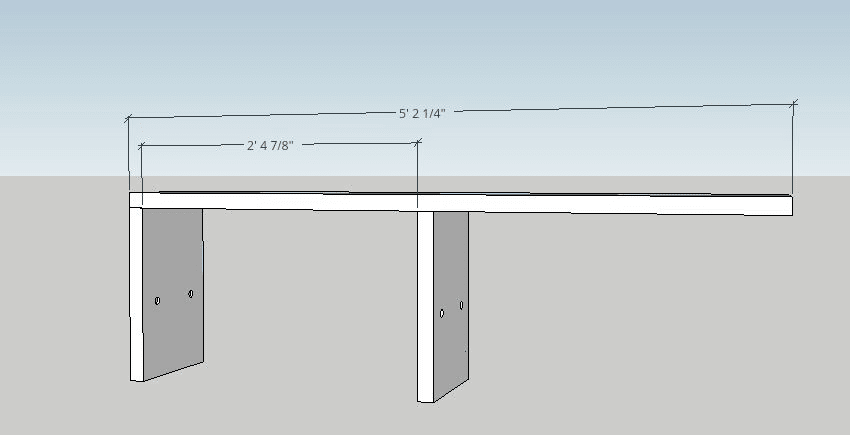
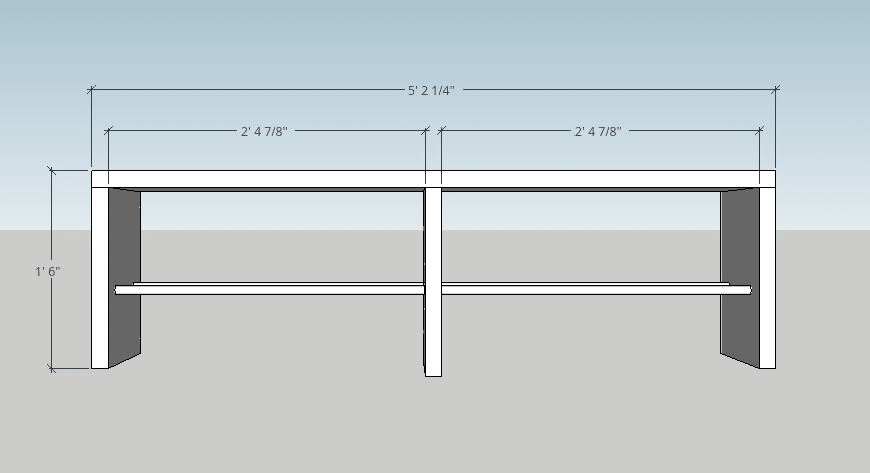
- 1 | 2 x 12 @ 62 1/4″ (seat)
- 3 | 2 x 12 @ 16 1/2″ (legs)
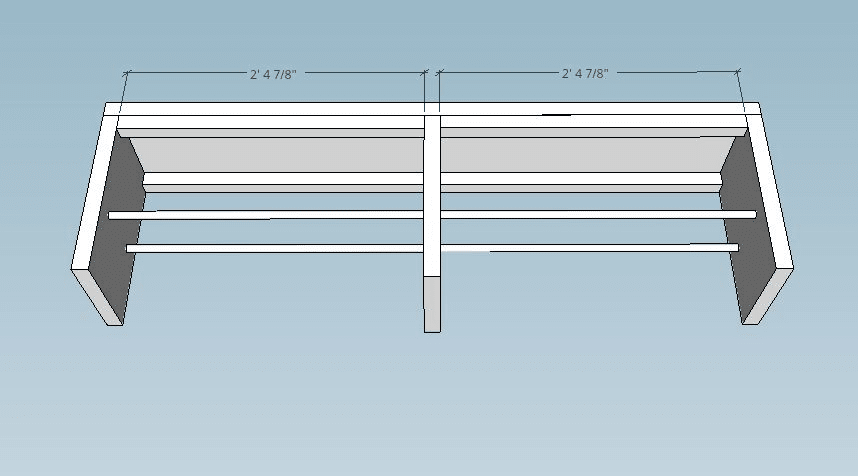
- 4 | 2 x 2 @ 28 7/8″ (top braces)
- 4 | 3/4″ Dowels @ 61 1/4″ (shoe rack)
Step 1.
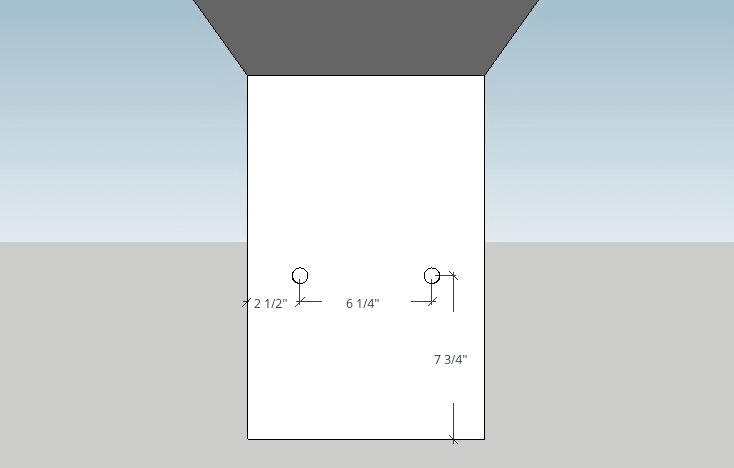
Prior to assembly, drill two 3/4″ dowel holes 1″ deep on the inside of both of the bench end legs as shown below:
Drill two 3/4″ dowel holes all the way through the center bench leg in the same locations.
Once you’ve drilled the dowel holes in the legs, attach the bench top to one of the end legs with wood glue and 2 1/2″ pocket hole screws.
Step 2.
Attach the middle leg to the bench top with wood glue and 2 1/2″ pocket hole screws.
Step 3.
Thread the 3/4″ dowels through the middle leg into place in the end leg and attach with wood glue.
Position the other end leg in place and attach to the 3/4″ dowels with wood glue. Use 2 1/2″ pocket hole screws to attach the leg to the bench top. Place pocket holes on the inside of the bench to best hide them.
**If your bench runs wall to wall, place pocket holes on the outside edge of the legs to hide them against the wall.
Step 4.
Position the top braces between the bench legs and flush with the bottom of the bench top. Attach to the legs with 2 1/2″ pocket holes and wood glue. Place pocket holes on the back of the 2 x 2s to best hide them.
Step 5.
Sand and finish as desired. I used Varathane Weathered Wood Accelerator in brown, followed by Varathane Triple Thick spray-on polyurethane (available at Home Depot and Menards).
After it dries, move the bench into your mudroom and anchor how you see fit.
I screwed the bench directly into the studs in the wall since there are kiddos running around who like to climb EVERYTHINGGG. I finished the whole room off with a few plastic woven baskets for the storage cubbies. They’re great for gloves, scarves, etc.
Please let me know if you have any questions and I’ll get back to you as soon as possible!
Don’t forget to grab plans for the storage cubbies and boot hanger to complete your mudroom!
Thanks for stopping by!
For more project ideas, you can find me on Pinterest. And to stay up to date with the latest shenanigans, follow me on Instagram.


Mel
Wednesday 13th of May 2020
What type of wood did you use? Is it pine or oak? I like the looks of this, but the stain will look different depending on the wood chosen.
tylynn_sattler
Thursday 28th of May 2020
I used pine.
Stephie
Wednesday 18th of March 2020
What color is the wall?
tylynn_sattler
Thursday 19th of March 2020
Behr silverstone. It's a beautiful gray color that has pretty strong green undertones in our basement. I think it's one of those paint colors that can look very different depending on the room!
Mike Boyer
Sunday 9th of December 2018
Where did you get the white baskets for the overhead cubbies?
tylynn_sattler
Sunday 9th of December 2018
I found them at Walmart but Menards also has some!