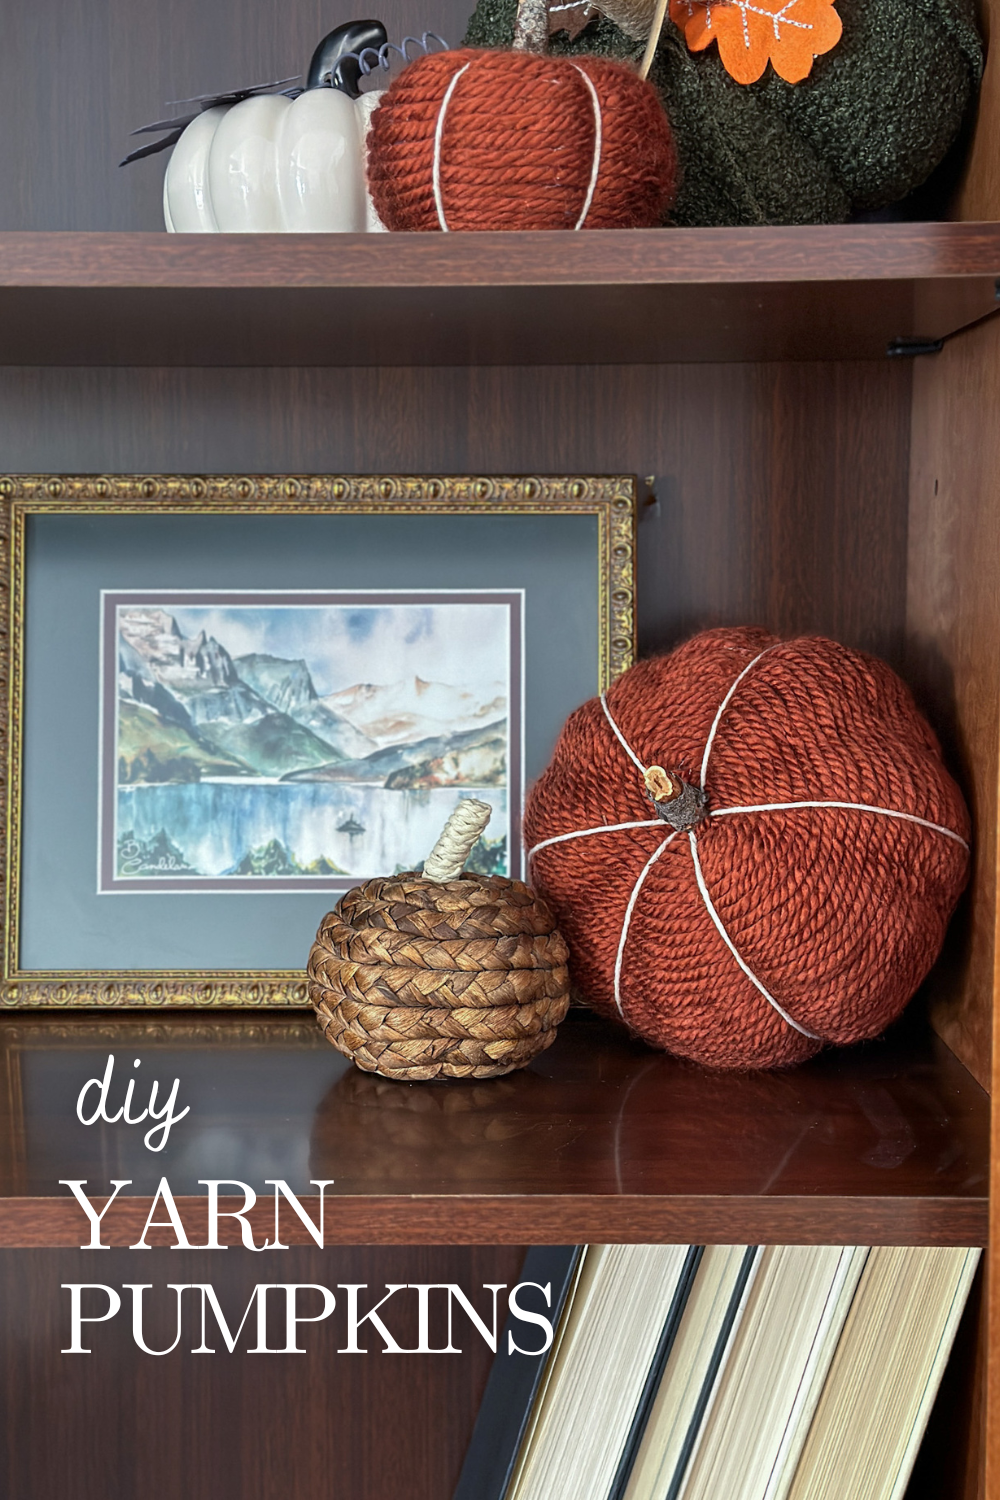
Make your own charming DIY yarn-wrapped pumpkins!

I was on the search for a rust/maroon pumpkin for our bookcase and, when I couldn’t find quite what I was looking for, decided to make it! Of course, as per usual, it then turned into a whole pile of pumpkins – large, small, medium, tall, short, squat – all the pumpkin shapes. They were so fun (and therapeutic 😉 ) to make, so I just kept going with it! I wish I had grabbed a pack of foam gourds as well for a cute Thanksgiving decoration. Next year I’ll have to add some!
All you need is a few cheap foam pumpkins, hot glue, yarn, and a little patience.
- Small Foam Pumpkins, Large Foam Pumpkins (or a pack of Pumpkins + Gourds)
- Hot Glue Gun + Glue
- Yarn – I used Yarn Bee pumpkin, rustic rouge, emerald, and barn owl
- Cotton Twine (optional)
- Branches (from the yard)


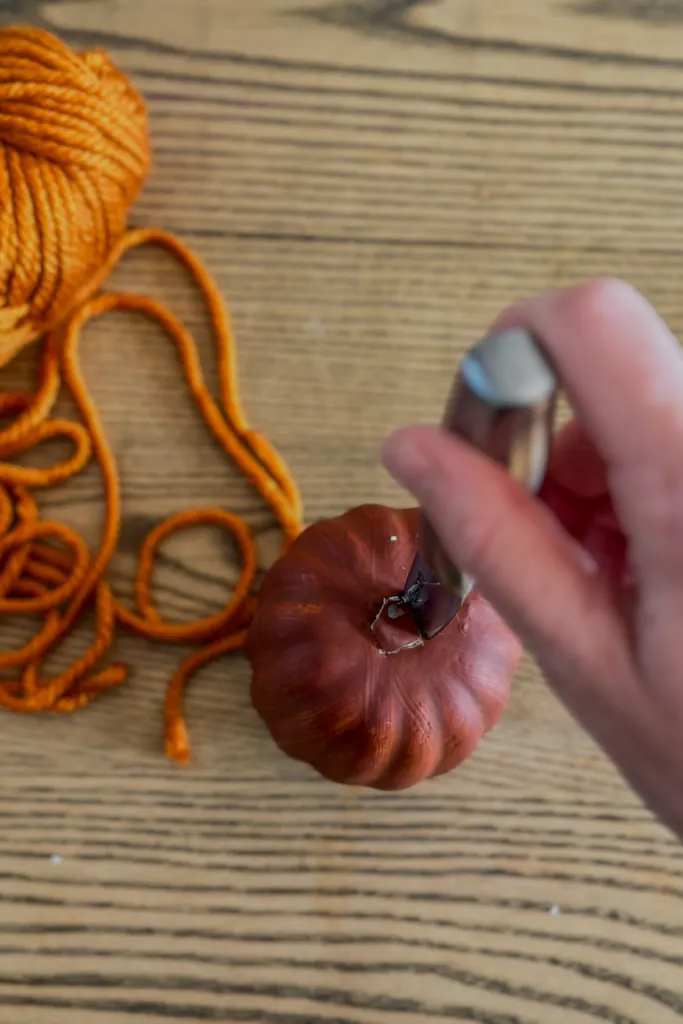
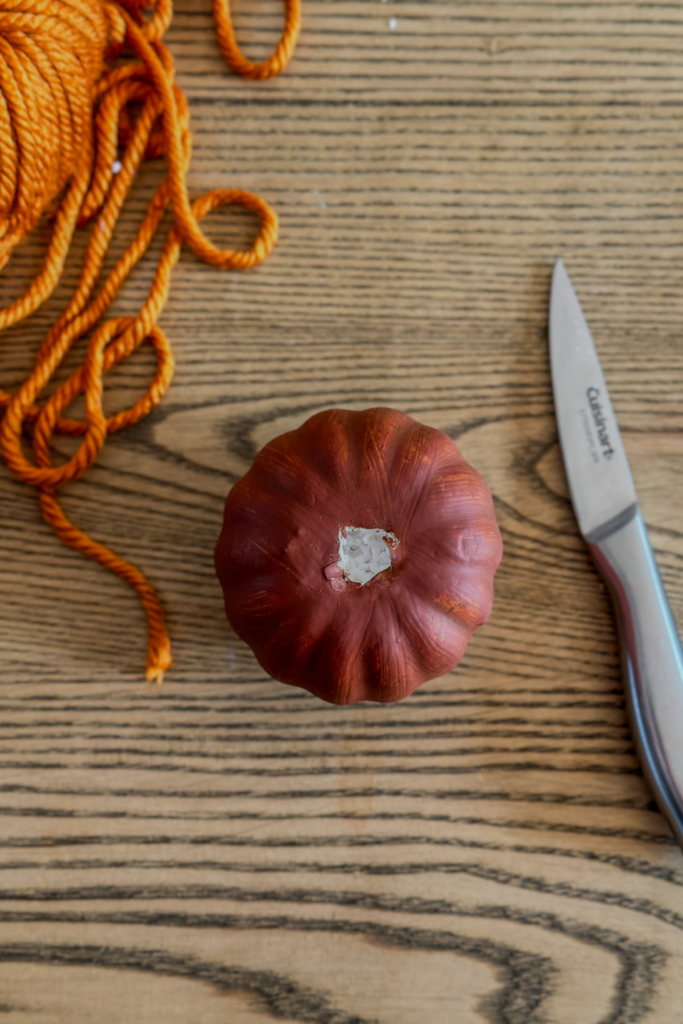
First, remove the stem and paint the pumpkins in a color that’s close to the color of yarn you’re using. This will help so you won’t see the original color through any small gaps in the yarn.
I used small caramel apple wood sticks through the stem hole to hold the pumpkins upright while I painted them and then popped them into the top of a small box (or egg carton in this case) to dry.
These are the colors I used, though I wish I had had one that was a little more orange for the orange yarn. But it still worked!


Once the paint is dry, cut a small hole out of the top of the pumpkin to make a spot for the new branch stem. It doesn’t have to be too big, just a bit larger than the original stem to fit the branches you collected.


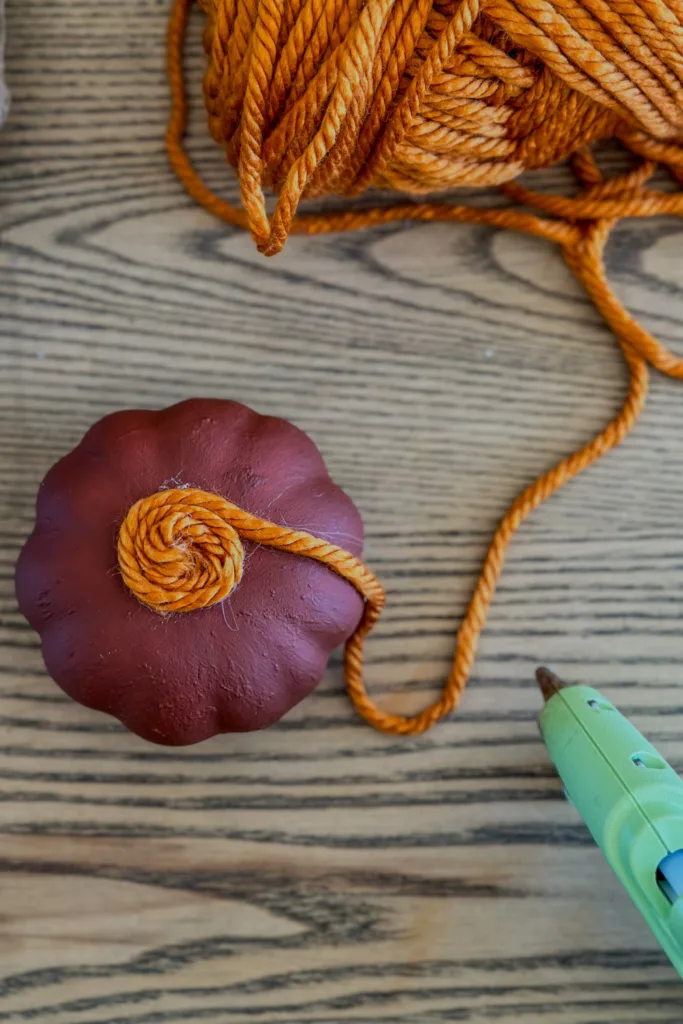
Flip the pumpkin over. Add a small bead of hot glue in the middle of the bottom of the pumpkin and begin wrapping the yarn around itself.
Carefully add another bead of hot glue and continue wrapping. It helps to gently press the yarn into the previous row to make sure you don’t end up with gaps. Add hot glue as you go.
Continue to work your way up around the pumpkin until the whole thing is wrapped in yarn.


You can leave it at that, or add some cotton twine to define the shape a bit more.
To add the twine, wrap it like you would do ribbon on a gift. Center it over the top of the pumpkin, wrap down around, twist the twine around itself at the bottom, then back to the top. Repeat until you have even sections.


Loosen the twine just a bit and insert the branch for a stem. The branch should push the excess twine down into the center of the pumpkin so it all looks even from the top.
Then turn the pumpkin over and tie the twine along the bottom.
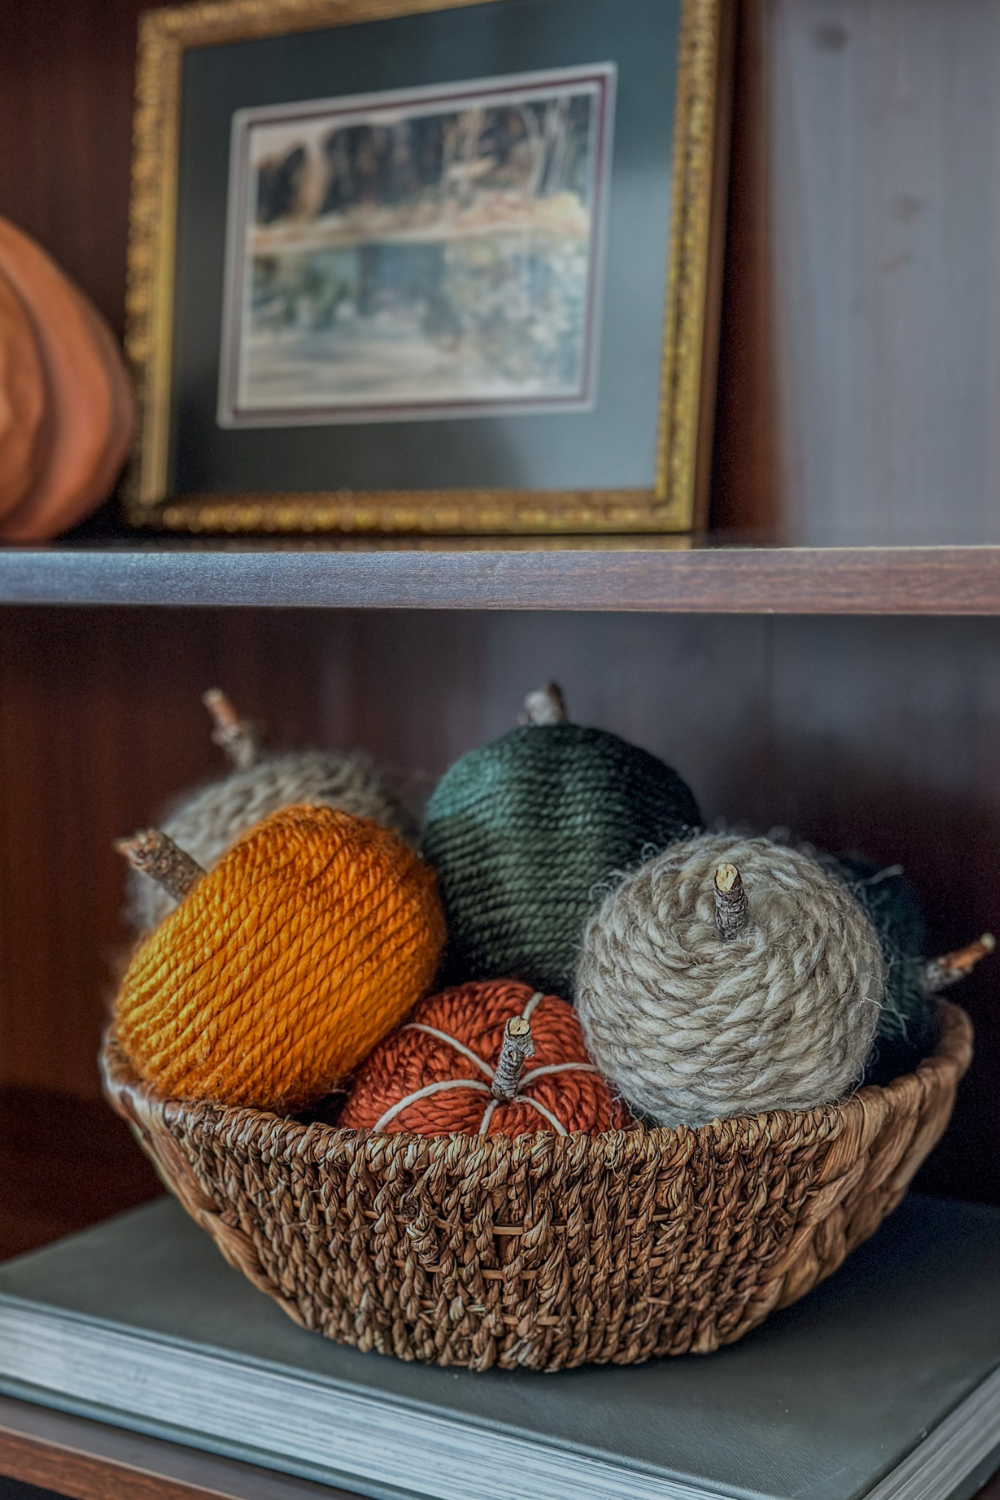
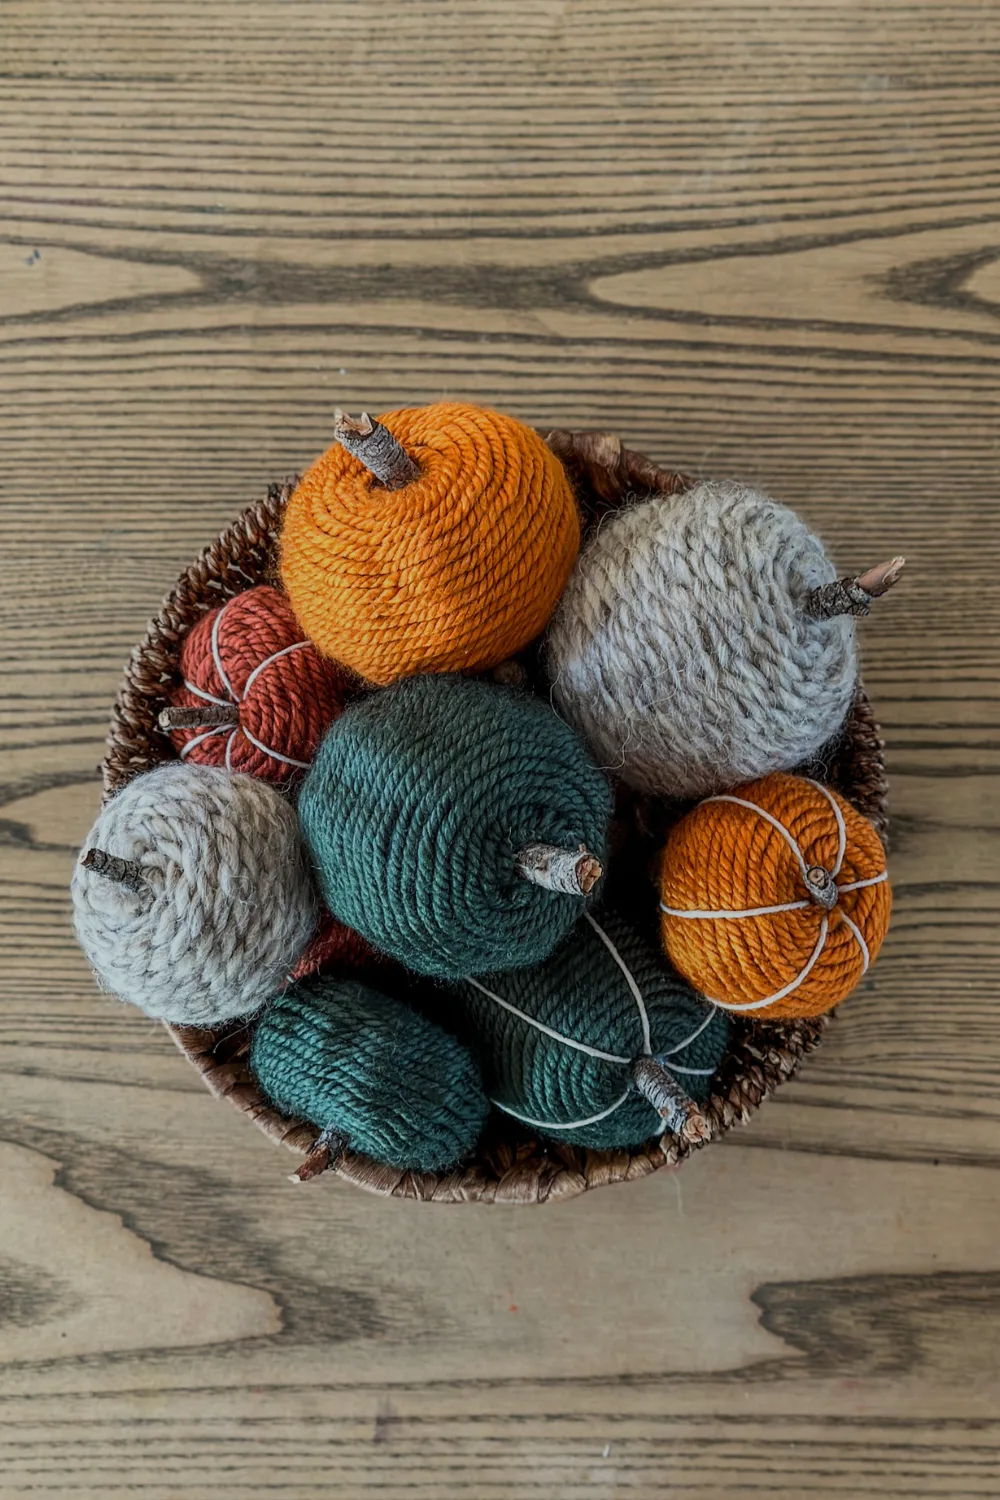
And voila – yarn pumpkins!


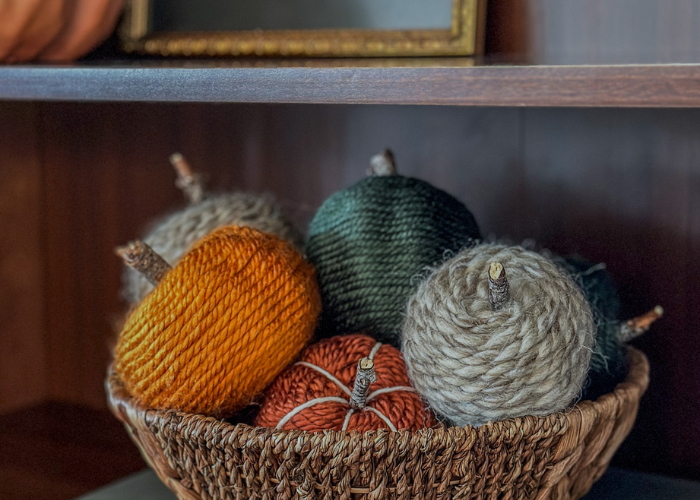
I added twine to a few and left the rest just yarn-wrapped.
How cute are they with all the colors stacked together! I just love it.
So much fall decor is all neutral nowadays – bring back the color!

I used pretty small yarn, but these would be so cute with some thick chunky yarns! The barn owl gray ones are a little fluffier and so cute! Thicker yarn would also go a bit faster, which I might recommend … 😅
But it was worth it! And I do love how the small yarn looks too.


Don’t forget to tag me on Instagram @tylynnm_ if you make some of these. I’d love to see it! And follow along over there to see these projects come to life in real time! If you’re a video learner, I also posted a reel on how to make these DIY yarn pumpkins.
And, of course, let me know if you have any questions and I’ll get back to you as soon as possible.
| Tylynn |
This post contains affiliate links. If you make a purchase from one of the links, I may make a small commission at NO EXTRA COST to you. Thank you for your support so I can continue to share content and ideas with you. See my full disclosure here