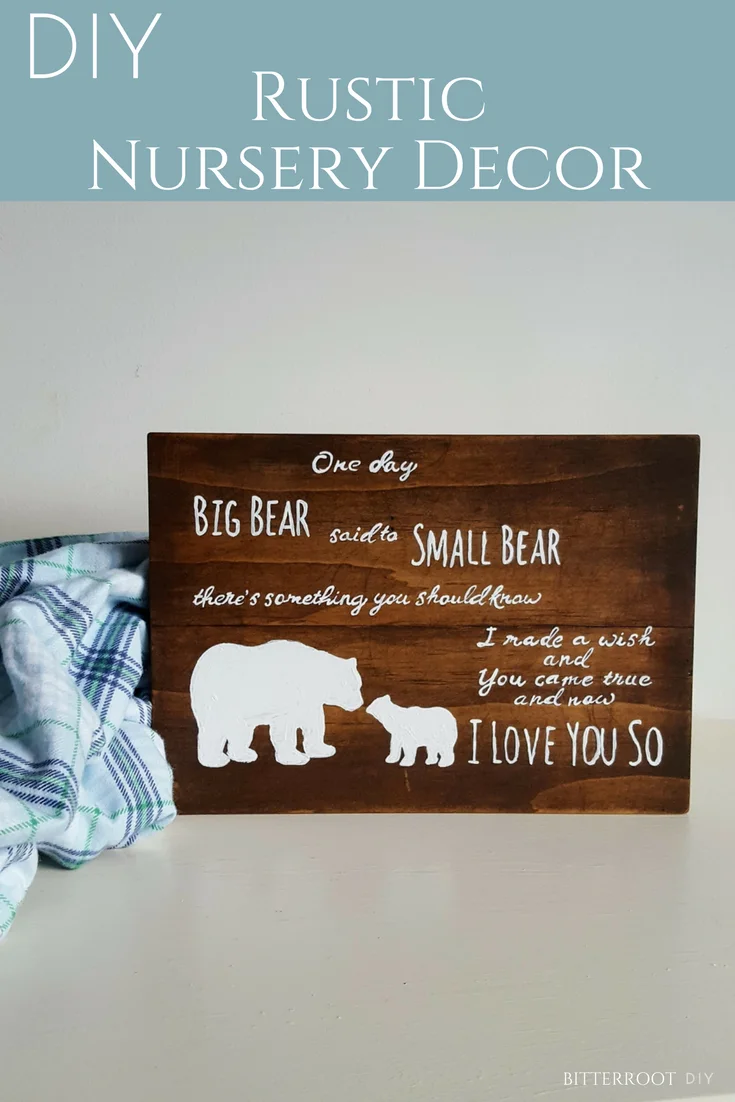
When I started looking for decor for the new baby nursery, I did what anyone would do – headed to Pinterest for inspiration! There are so many adorable ideas out there, but one of my favorites was a wooden plaque with a simple quote and image. I thought about just purchasing it, but then decided I wanted to make a special one for my new little boy 🙂
And I knew exactly what to write … that never happens for me.
There is a small book that my mom used to read to me and my siblings when we were little – Wonderful You by Kate Gleeson. When I graduated college, she gifted me the original copy – the very book she read to us – falling apart, bite marks all around the edges, and clearly very well-loved.
So I used my favorite quote. The same line my mom repeated to us every day. The same quote I want my little boy to know by heart:
“One day Big Bear said to Small Bear, there’s something you should know: I made a wish and you came true and now I love you so.”
It’s simple and beautiful and honest. Perfect for the nursery.
If you have a special quote or are looking to DIY some nursery decor, this project is easily customizable. If you’d like to use the same quote and image, download the free printable here.
Without further ado, here’s the step-by-step.
Materials:
- Scrap Wood
- Wood Glue
- Stain
- White Acrylic Paint
- Paintbrushes
- Krylon Acrylic Spray
Step 1.
To start, I cut a scrap piece of 1×4 into two 8″ (approx) pieces and collected two scrap wood shims.

Next, I lined up my two scrap boards and attached them at the back using wood glue and the wood shims.

Just glue the wood shim to one of your boards, position the second board, and glue the shim to the second board to hold the two boards together.
PS – ignore the stain on the back of these boards. They were test pieces from a different project 😉
Step 2.
Once the wood glue dried, I sanded and stained the boards with Varathane Dark Walnut.

I like smoother boards most of the time. However when I sanded these boards, I did it by hand and the sandpaper left some scratches on the wood. I loved the scratchy look, so there ya go!

Accident turned blessing-in-disguise!
Step 3.
Once the stain has had plenty of time to dry, it’s on to the image transfer.

Honestly, this did not go exactly according to plan. But things worked out in the end, so everything’s ok!
Let me explain:
I tried to do a chalk transfer since that usually works fairly well on dark backgrounds. However, I didn’t have any normal chalk. All I had was sidewalk chalk … let’s just say, I ran out of time running errands and the hardware store didn’t carry normal chalk … So there I was, with my large sticks of sidewalk chalk covering the back of my image so carefully and then tracing it onto the boards.
But when I removed the printed image from the boards … no chalk 🙁
I think the sidewalk chalk stuck to the back of my paper a little better than normal chalk, so it didn’t transfer to the wood.
Nonetheless, I was afraid that might happen, so I made sure to really press hard into the wood when I traced the image. It was worth the time and pain.
When I removed the printed image there was no chalk, but there was an imprint! Yay 🙂
If you’re trying to repeat this process: either use normal plain white chalk or just go for the imprint!
Chalk Method: Create your image, resize it to fit the boards (mine is about 8 x 10), and print out on plain printer paper. Cover the back of the paper with chalk. Make sure to get a good cover of chalk wherever your image is! Position and tape the image onto the finished boards. Trace your image. When you remove the printed image, there should be a chalk outline. Fill in with paint! A paint pen would work wonderfully here, or you could just paint it with acrylic paint.
There’s a great tutorial for this method over at Salvaged Inspirations.
Imprint Method: Create your image, resize it to fit the boards (mine is about 8 x 10), and print out on plain printer paper. Position and tape the image onto the finished boards.

Trace your image, pressing firmly to ensure you dent the wood.

Remove the printed image and fill in with paint!

Step 4.
Let it dry and then coat the board with a sealant. I used Krylon Acrylic Spray to make sure the image doesn’t smear.
And that’s that!
I love how it looks in the new baby room 🙂
As always, please leave any questions or comments you may have!
And, for the first time ever, I’ve uploaded this post to link parties over at Between Naps on the Porch, Dwellings, Thrifty&Chic, Remodelaholic, and Our Crafty Mom.
Follow the links to see all the other great bloggers at the parties!


Nancy
Tuesday 27th of June 2017
What a creative way to add a personal touch to your nursery!
tylynn_sattler
Wednesday 5th of July 2017
Thanks Nancy!