
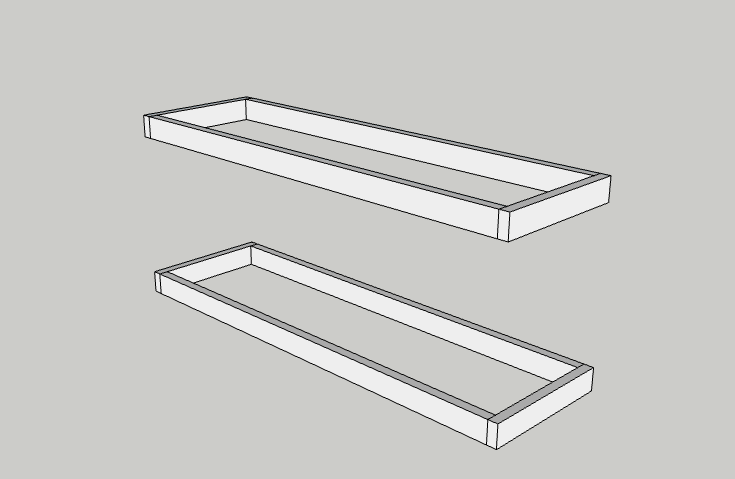
The easiest way to build a basic workbench for your garage or shop.


This post contains affiliate links. If you make a purchase from one of the links, I may make a small commission at NO EXTRA COST to you. Thank you for your support so I can continue to share projects and ideas! See my full disclosure here.
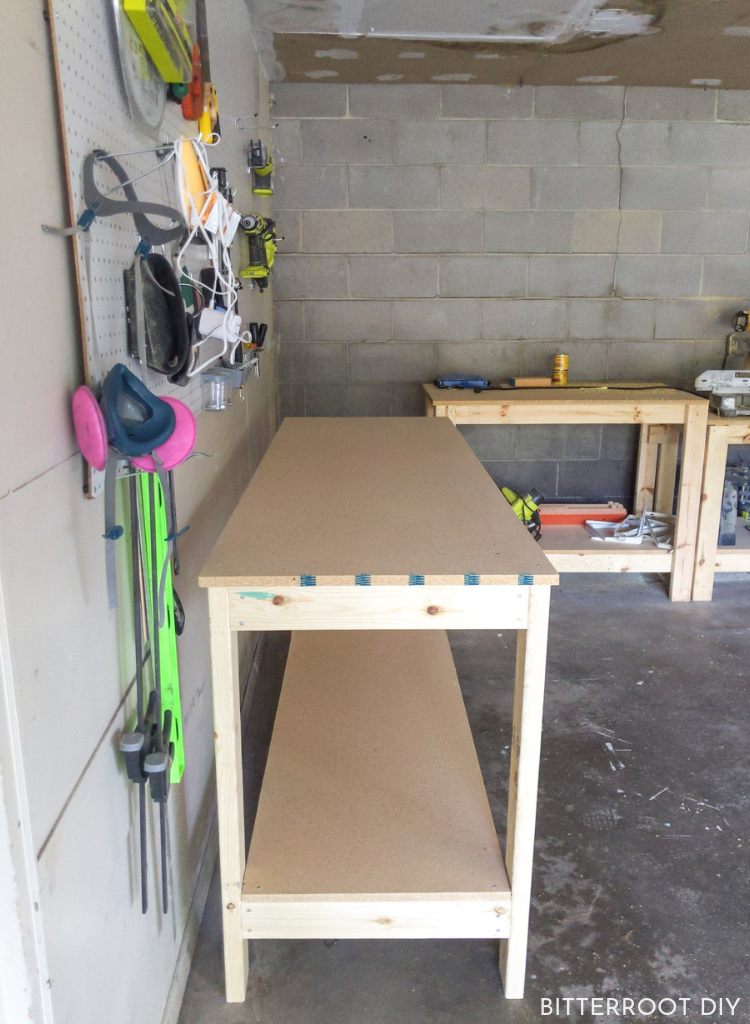
A few weeks ago I gave my garage/shop area a much-needed makeover. I cleared everything out, gave it a good cleaning, added pegboard storage to one of the walls, and built myself a mobile workbench and a miter saw stand. When I cleared everything out, I moved one of the old “workbenches” (aka: an old door on some table legs) over to my husband’s shop area.
Guess what happened the minute he saw my new workbenches …
He requested a new one for himself, of course!
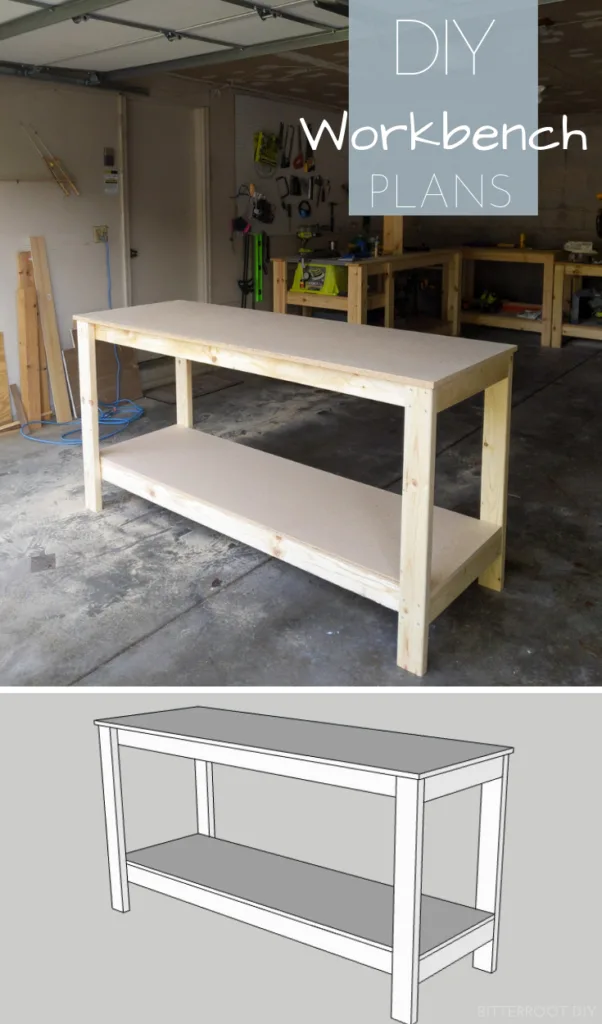
So today I have plans for his new workbench! It’s very simple and quick to build and you can adjust the dimensions to fit any space.
Enjoy the plans!

Tools & Supplies:
- Miter Saw
- Circular Saw
- Drill
- Tape Measure
- Clamps
- Level
- Speed Square
- Pencil
- Safety Glasses
- Ear Protection
- 2 ½” Screws
- 1 ¼” Screws
Lumber:
- 7 | 2 x 4 @ 8′
- 1 | 3/4″ Full Sheet of Particleboard (or plywood of your choice)
Cuts:
- 4 | 2 x 4 @ 36″ (legs)
- 4 | 2 x 4 @ 21″ (frame sides)
- 4 | 2 x 4 @ 68″ (frame front & back)
- 1 | Particleboard @ 25″ x 72″ (tabletop)
- 1 | Particleboard @ 21″ x 71″ (bottom shelf)
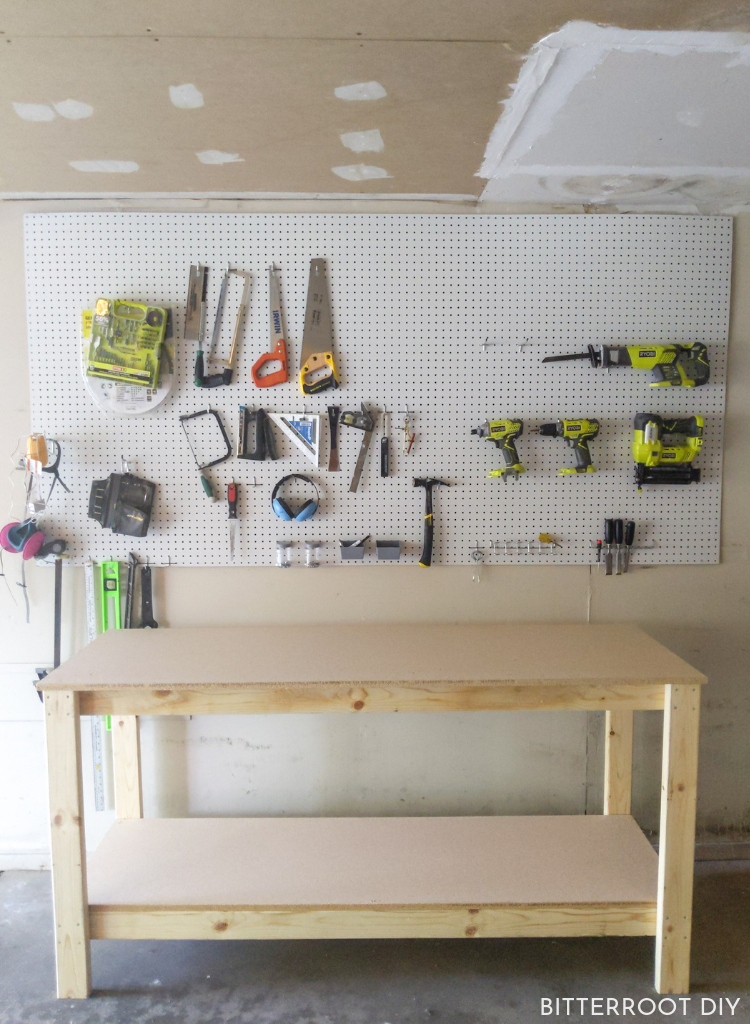
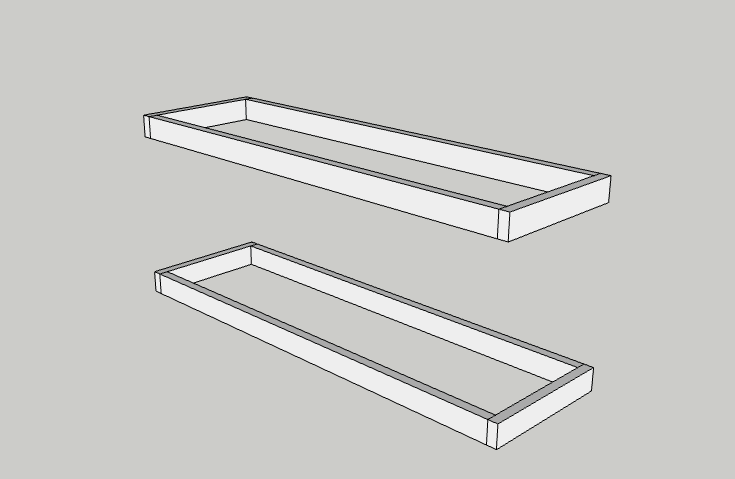
Step 1.
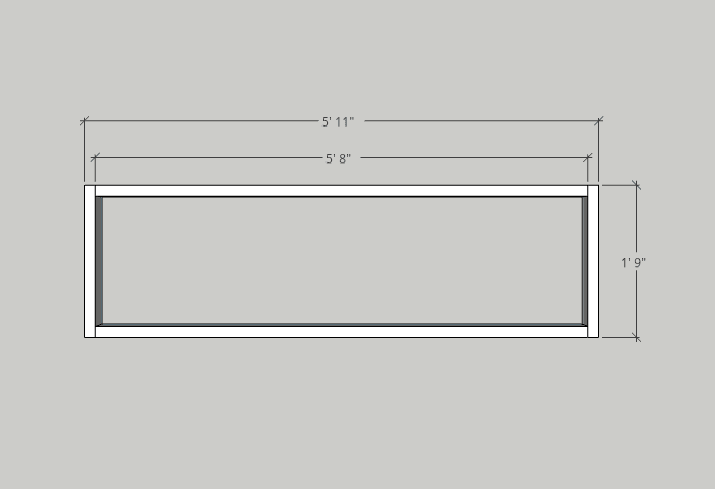
Build the top and bottom frames as shown in the diagram below.
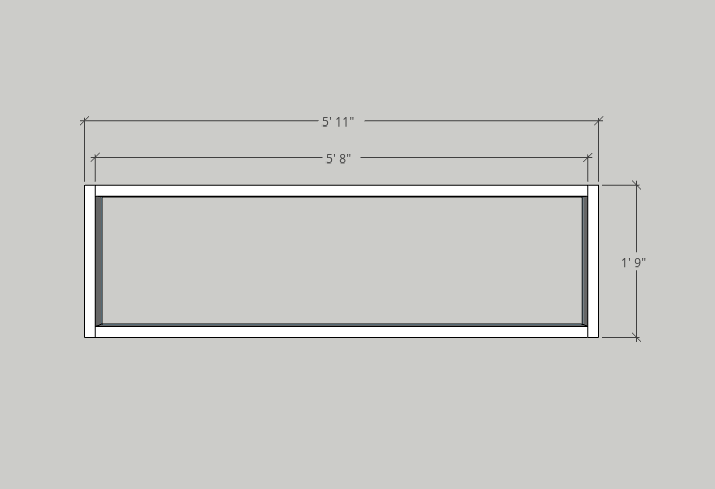
Attach the 21″ sides of the frame to the 68″ front & back of the frame with 2 1/2″ self-tapping wood screws. I used four screws through each side (two on both ends of each of the 21″ pieces – one on the top, one on the bottom).
See the video if you need clarification … I’m not sure if that explanation made any sense.
Build two frames (top & bottom).
Step 2.
Attach the top frame to the legs.
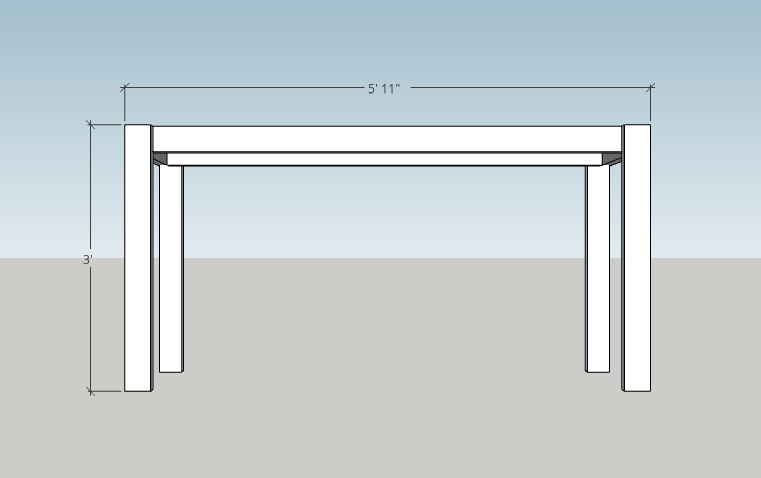
It’s easiest to build this part upside down. Simply lay the frame on the ground and match the legs up on the outside ends of the frame. Attach with 2 1/2″ self-tapping screws.
I drove four screws through each leg (two into the front & back frames, two into the side frames).
Step 3.
Mark 6″ up from the bottom of the legs and attach the bottom frame with 2 1/2″ self-tapping screws.
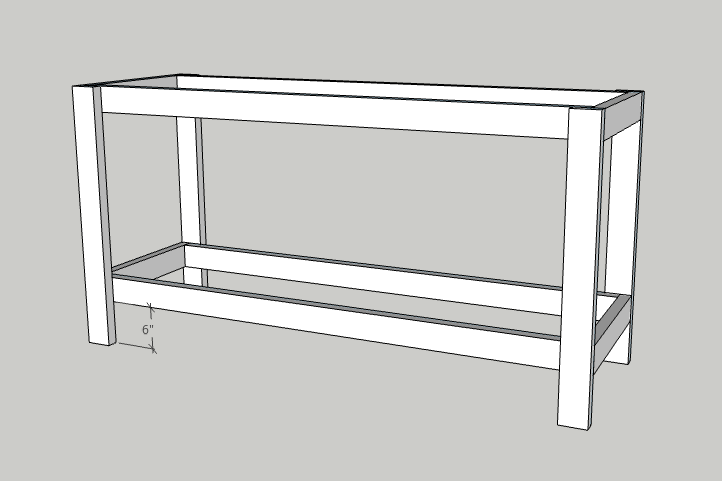
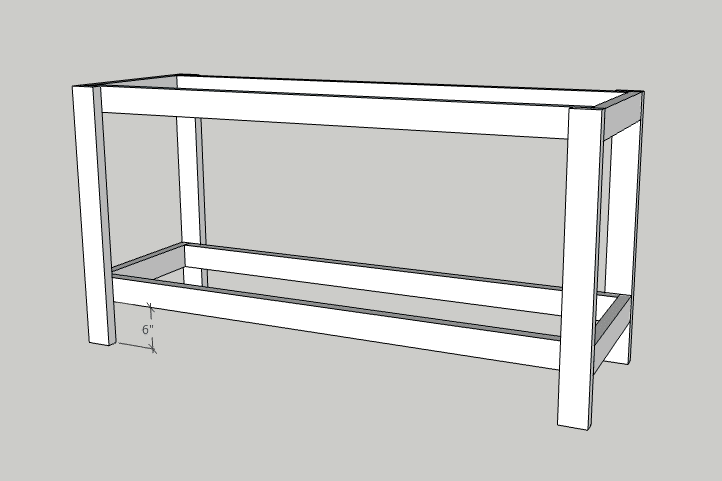
I set the bench on its side, marked 6″ up on each leg, moved the bottom frame into position, clamped it, and then attached it. Again, I used four screws through each leg ( two into the front & back frames, two into the side frames).
Step 4.
Place the bottom shelf on the bottom frame and attach to the frame with 1 1/4″ self-tapping screws.


I just drilled directly down through the particleboard into the frame and countersunk the screws so they’re out of the way.
Step 5.
Center the tabletop on the top frame – there should be a 1/2″ overhang on all sides of the legs.
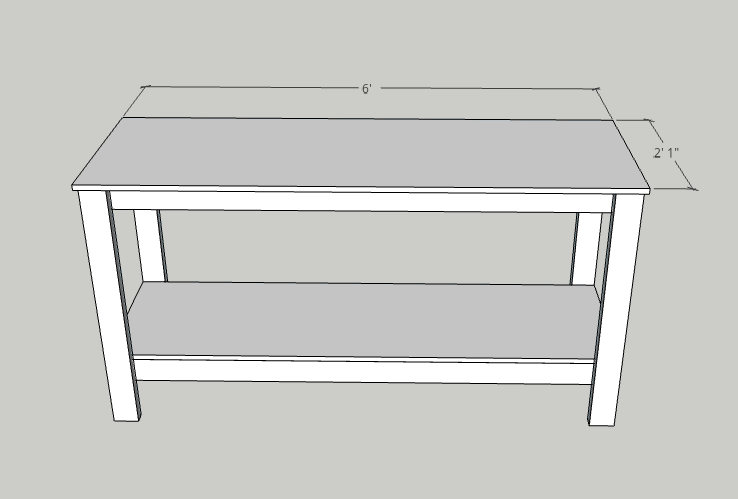
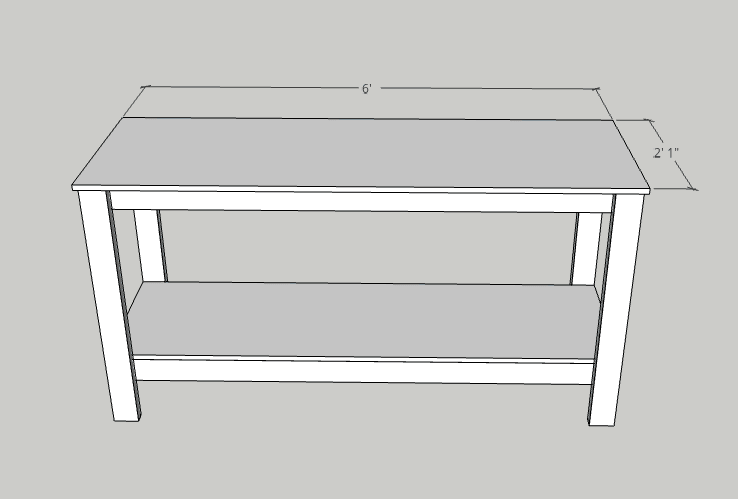
Attach with 1 1/4″ self-tapping screws. Again, I drilled directly through the particleboard into the frame and countersunk the screws.
I placed a screw in each corner and two in the middle (make sure you hit the frame in the middle since it’s back further than the legs).
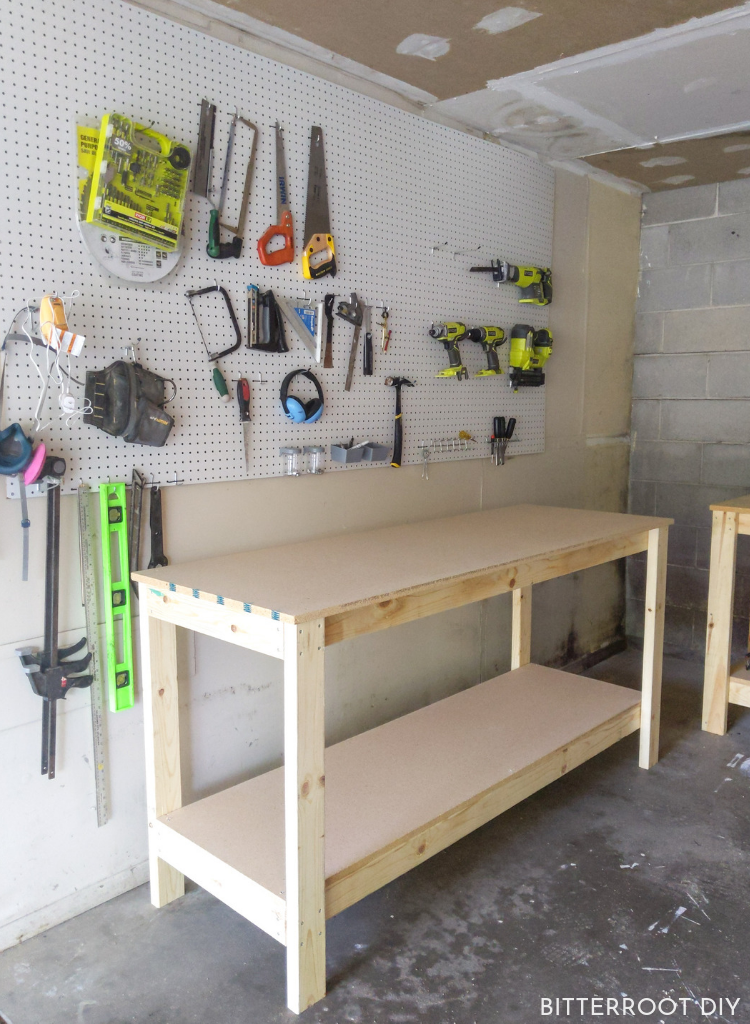

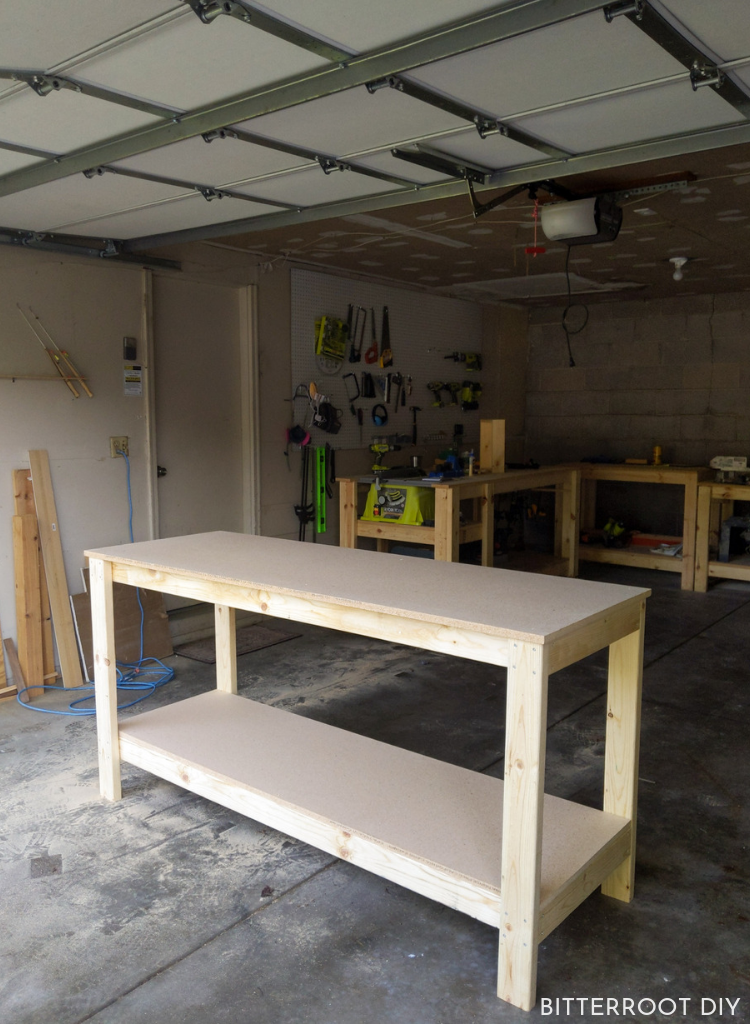
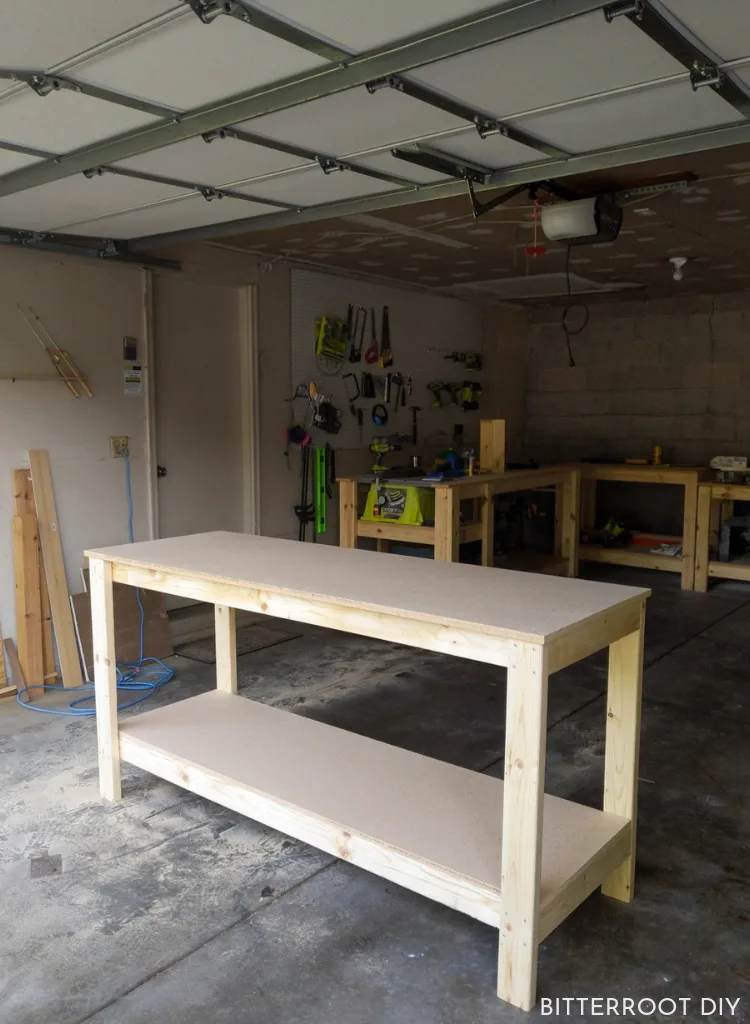
And there you have it – an easy, sturdy DIY workbench.
Please let me know if you have any questions and I’ll get back to you as soon as possible.
| Tylynn |
Thanks for stopping by!
For more project ideas, you can find me on Pinterest. And to stay up to date with the latest shenanigans, follow me on Instagram.


Rich Brown
Monday 2nd of November 2020
This is a rock solid simple no frills workbench! Thank you for sharing. I was able do all the cuts with six 2x4x8's and had enough scrap to add an 18" cross member for the top shelf. This thing will have no problem holding a napping baby elephant after a long day in the Savannah desert. Perfect!
tylynn_sattler
Tuesday 3rd of November 2020
Haha glad you like it! I use mine all the time.
Gatewood
Friday 2nd of October 2020
I completed my table today. The directions were easy to follow. Thank you for sharing your skill and knowledge.
tylynn_sattler
Monday 5th of October 2020
Wonderful! Thanks for using my plans!
Sergio Cortez
Wednesday 5th of August 2020
Just built this today and it came out awesome!! I literally used this guide the entire way through and it came out exactly like in the picture! Perfect size for a 2 car garage and very solid! Great job! Thank you!
tylynn_sattler
Friday 7th of August 2020
Perfect! I'm glad it worked out well for you. Thanks for using my plans!
Augie
Tuesday 16th of June 2020
I might sound really dumb but I am new to woodworking and was looking into making this workbench. I wanted to add casters as well to make it mobile but when looking it up everyone is saying I need another piece of wood on the end of the 2x4 to secure it. Is there any video you have of how to easily add casters for a beginner
tylynn_sattler
Tuesday 16th of June 2020
I do not have a video of that, but I've added casters on a lot of my other workbenches. All I usually do is put an extra piece of wood on the bottom of the legs and screw the casters to that. Here's a link to the casters I like: https://amzn.to/2YH5zaR
Karen
Monday 27th of April 2020
Could an 8’ top sit on this?
tylynn_sattler
Monday 27th of April 2020
Yeah you could do an overhang on the sides. I'd probably extend the whole base so you only have like a 3" overhang on each side if you're just using the 3/4" particleboard for the top so it doesn't sag.