
Grab these woodworking plans to build a rustic DIY end table.

This post may contain affiliate links. If you make a purchase from one of the links, I may make a small commission at NO EXTRA COST to you. This helps keep the tutorials and plans free here at Bitterroot DIY. Thank you for your support! See my full disclosure here.
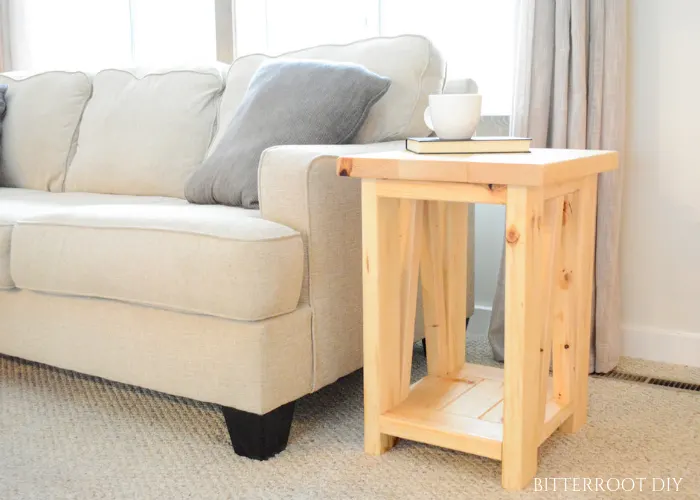
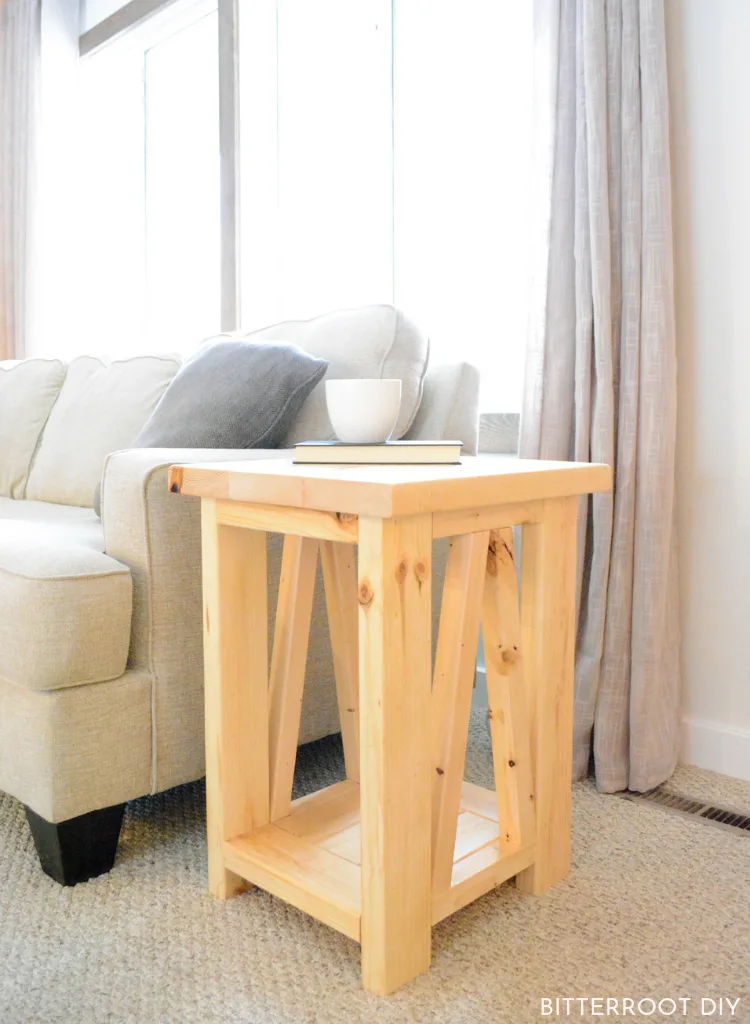
Looking for a unique, super sturdy DIY end table? I’ve got just the thing! I built this truss-style end table for my dad last Christmas. He’s been using a small fold-up tray up as his end table at the cabin for a few years now, so it was time for a little upgrade! This end table is all 2x lumber, so it’s very sturdy, cost efficient, and quick to build.
Enjoy the plans!
TOOLS & SUPPLIES:
- Miter Saw
- Drill
- Kreg Pocket Hole Jig
- Brad Nailer
- Tape Measure
- Clamps
- Wood Glue
- 2 1/2″ Screws
- 2″ Finish Nails
- Stain of your choice
- Semi-Gloss Polyurethane
- Speed Square
- Pencil
- Safety Glasses
- Ear Protection
LUMBER:
- 2 | 2 x 4 @ 8′
- 1 | 2 x 6 @ 6′
- 2 | 2 x 2 @ 8′
CUTS:
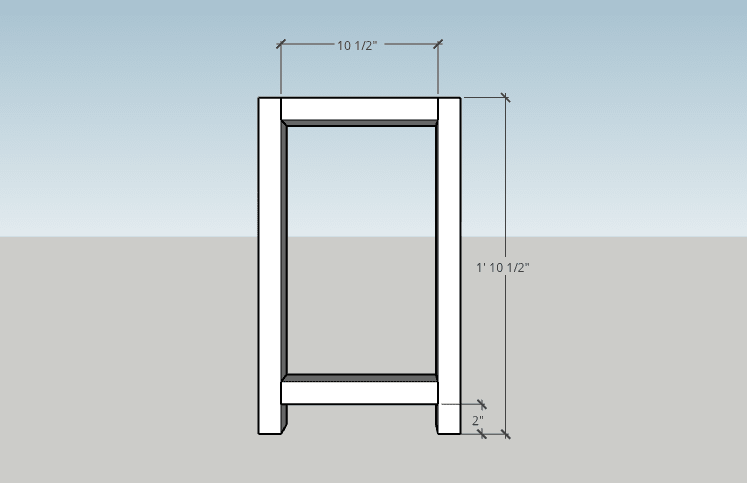
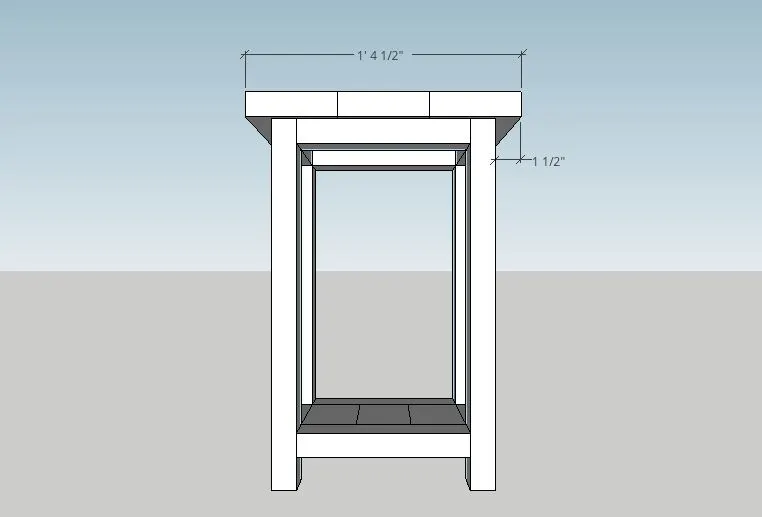
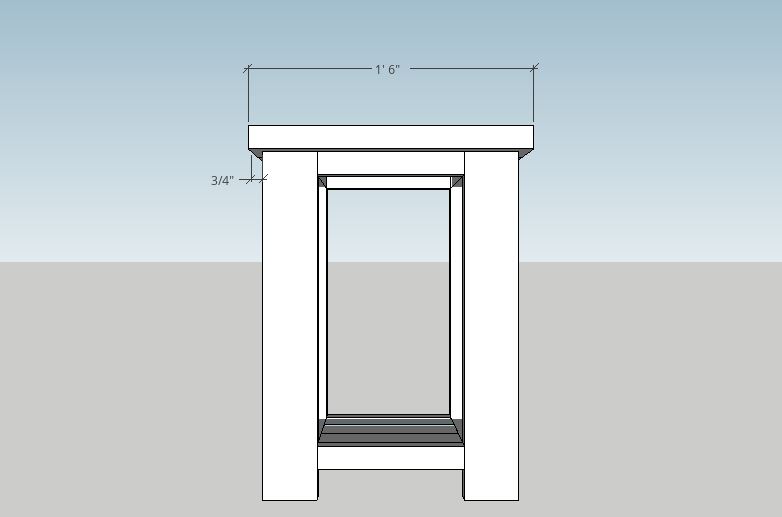
- 4 | 2 x 4 @ 22 1/2″ (legs)
- 4 | 2 x 4 @ 10 1/2″ (frame supports)
- 3 | 2 x 4 @ 9 1/2″ (bottom shelf)
- 3 | 2 x 6 @ 18″ (top shelf)
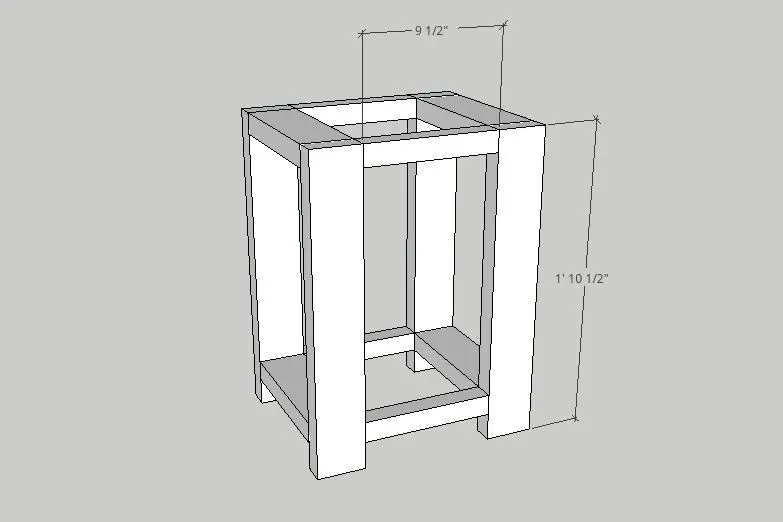
- 4 | 2 x 2 @ 9 1/2″ (frame supports)
- 4 | 2 x 2 @ 17 3/4″ with a 10 degree parallel miter
Step 1.
Build the front and back frames with 2x4s as shown. Use wood glue and 2 1/2″ pocket hole screws to attach the frame supports to the legs. Drill the pocket holes on the bottom of the lower 2x4s to hide them. Drill the pocket holes on the top of the upper 2x4s. You won’t be able to see them once you attach the top shelf.

Step 2.
Join the front and back frames together with the 2×2 frame supports. Use wood glue and 2 1/2″ pocket holes. Drill the pocket holes in the same places as the 2×4 frame supports to best hide them (bottom of the lower 2x2s and top of the upper 2x2s).

Step 3.
Assemble the bottom shelf with 2 1/2″ pocket hole screws and wood glue as you would a tabletop. Attach the shelf to the frame with pocket holes and wood glue. Drill all pocket holes on the bottom of the shelf to best hide them.


Step 4.
Work the side truss pieces into place and adjust them until they’re symmetrical. There will be a small gap between them at the top since I rounded the cut to 10 degrees.


You can definitely cut them to fit after you’ve built the rest of the frame if you want them to meet perfectly. For this truss style, it won’t make much of a difference. However, it’s completely up to you!
Attach the truss 2x2s with wood glue and 2″ finish nails. Drive the finish nails through from the top of the upper frame and bottom of the lower frame into the truss 2x2s to hide them.
You can use 2″ screws if you don’t have a finish nailer, but make sure to pre-drill or use self-tapping screws to avoid splitting the wood. Drill screws in through the top of the upper frame (hidden under the tabletop) and bottom of the lower frame to hide them (same as you would do the nails).
Step 5.
Assemble the top shelf with pocket holes and wood glue (same as the bottom shelf). I wrote a separate post about assembling tabletops that walks through how to build a tabletop with pocket holes. Use 2 1/2″ screws.
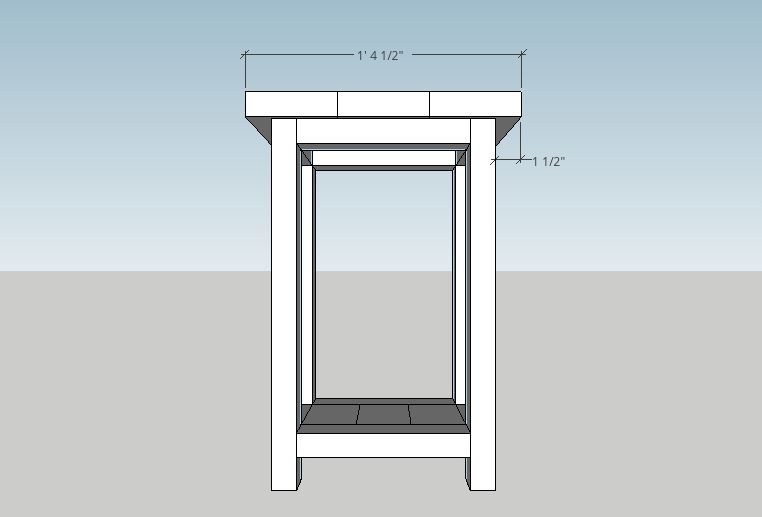
Once you’ve built the top shelf, attach it to the frame with small “L” brackets. I like to attach tabletops with brackets in order to let the wood move and shift with temperature and humidity. You can attach the top with pocket holes also, but sometimes it will pull the table off square if the wood moves too much (especially with 2x lumber on the top).
Lastly, sand and finish as desired. I left this end table the natural pine color and simply sealed it with semi-gloss polyurethane.

Please let me know if you have any questions and I’ll get back to you as soon as possible.


Thanks for stopping by!
For more project ideas, you can find me on Pinterest. And to stay up to date with the latest shenanigans, follow me on Instagram.


xander
Friday 8th of January 2021
can i get the sketchup file please
tylynn_sattler
Monday 25th of January 2021
I cannot provide the sketchup file at this time.