Hey all, thanks for stopping by Bitterroot DIY!
For more project ideas, you can find me on Pinterest. And to stay up to date with the latest shenanigans, follow me on Instagram.
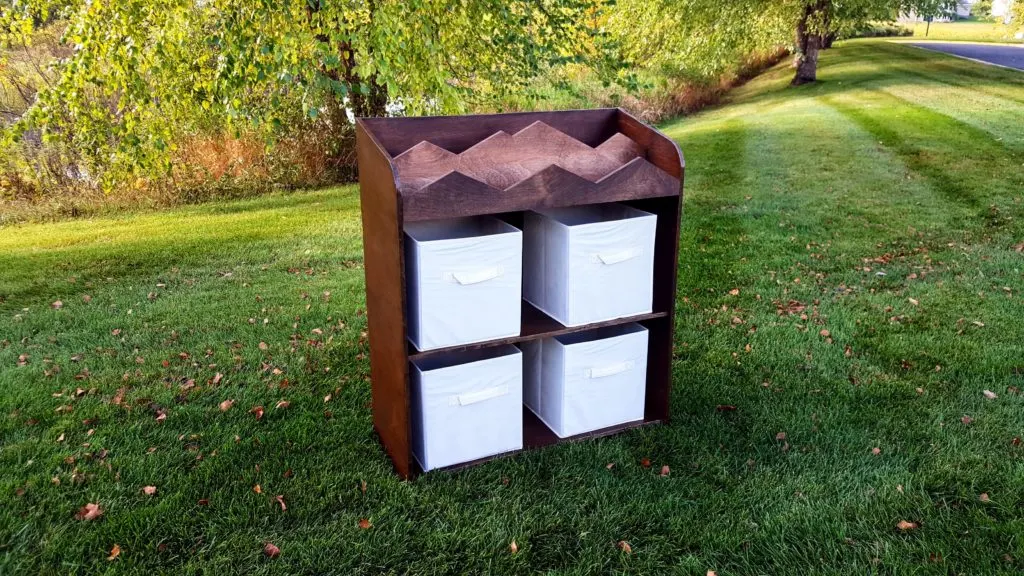
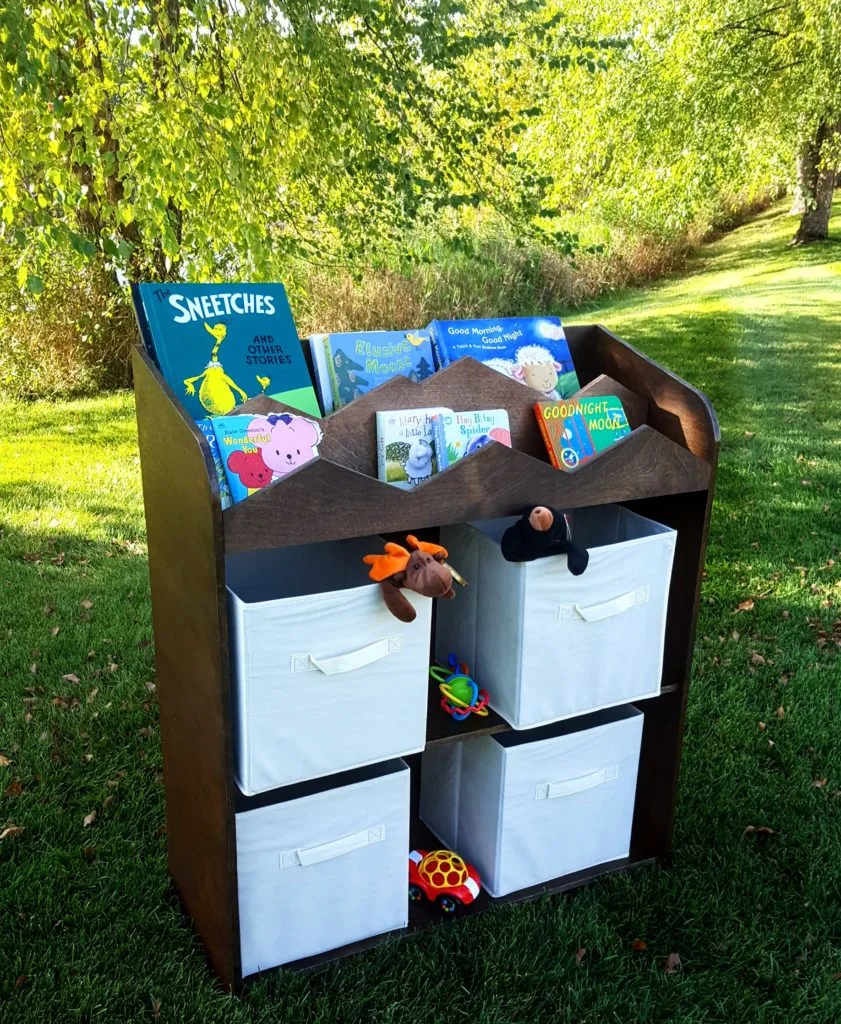
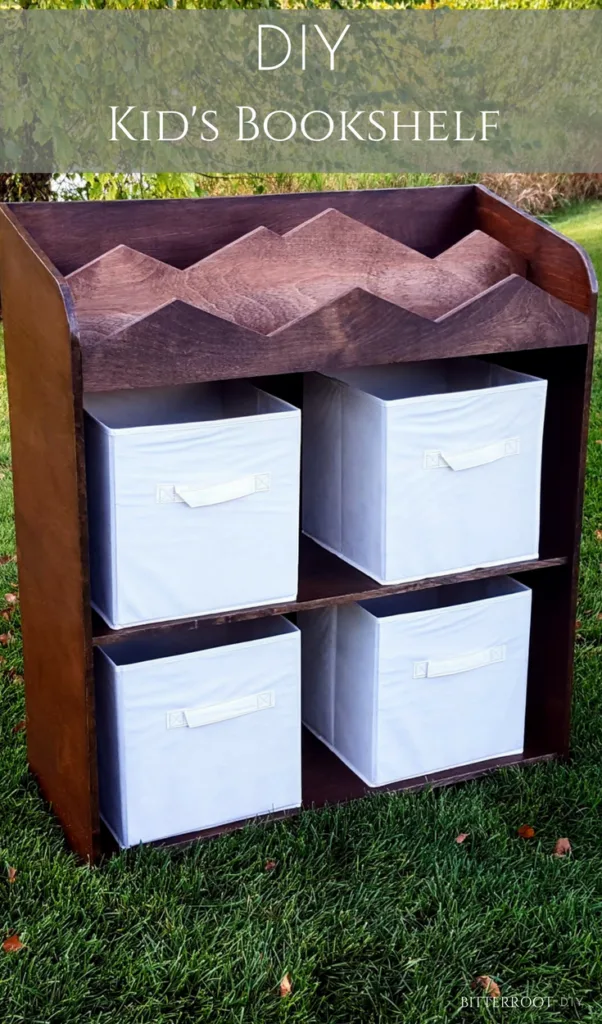
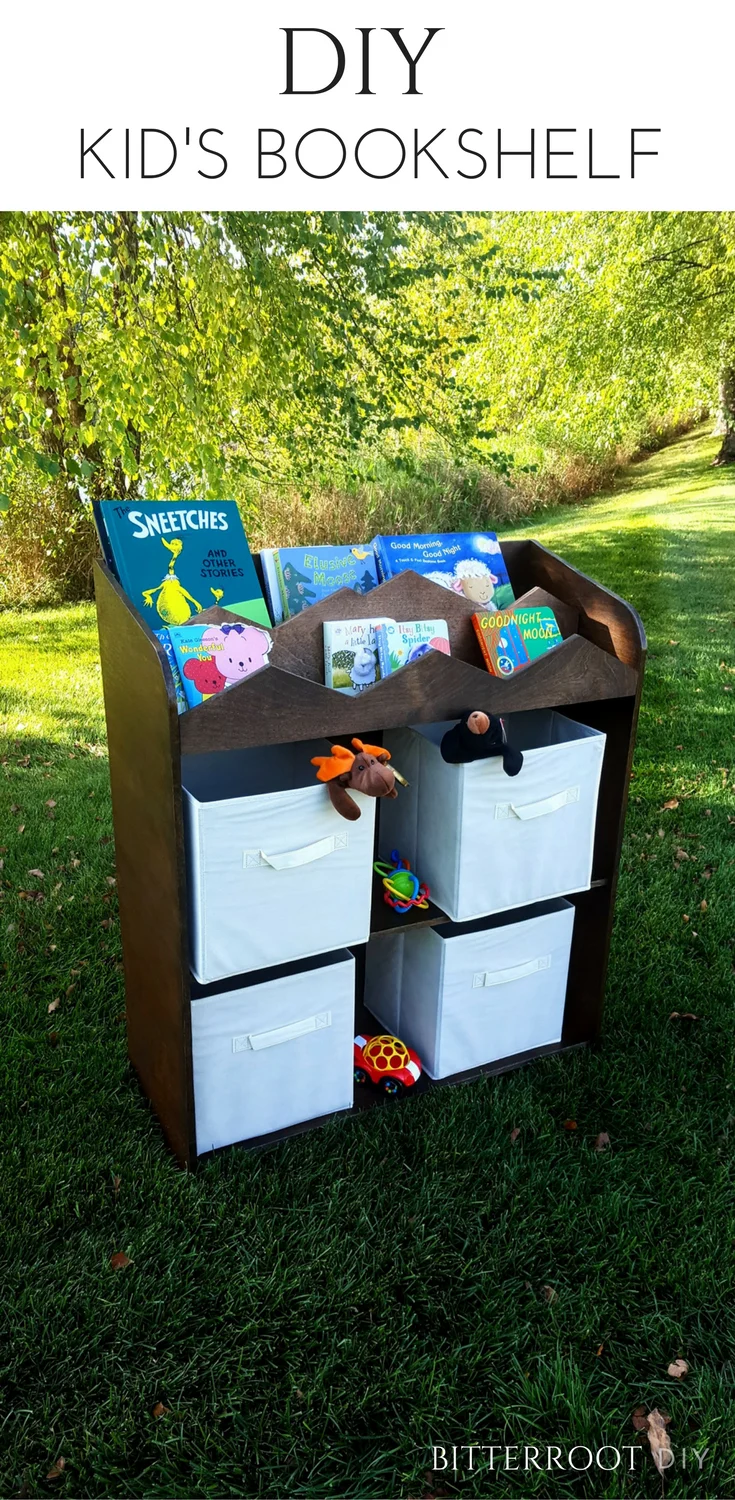
This past month I decided to participate in the Kreg One Sheet Contest. The challenge was to build something using just one sheet of plywood. We’ve been in need of a place to put all Weston’s toys and books, which have been in stacks in his room since he was born, so I took this opportunity to make a custom bookshelf/toy storage unit! Books on top, toys on the bottom … business in the front, party in the back if ya know what I mean 😉
Hope you enjoy the free plans below!
This post contains affiliate links. See my full disclosure here.
Tools & Supplies:
- Circular Saw
- Jigsaw
- Drill
- Kreg Pocket Hole Jig
- 1″ Pocket Hole Screws
- Tape Measure
- Square
- Clamps
- Pencil
- Safety Glasses
- Ear Protection
Lumber:
- 1 | 4’x8′ Sheet of 1/2″ Plywood (I used 1/2″ Purebond plywood from Home Depot)
Cuts:
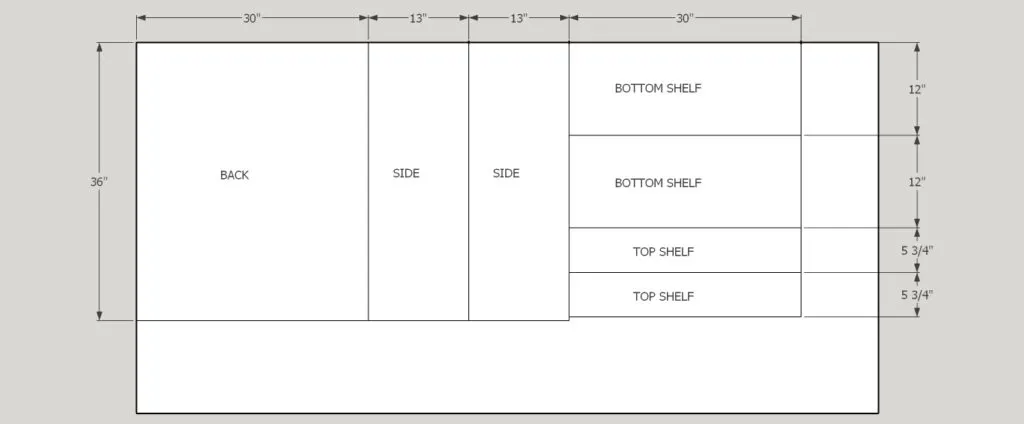
- 1 | 30″ x 36″ (back)
- 2 | 13″ x 36″ (sides) continue reading for how to do the rounded edges
- 2 | 12″ x 30″ (bottom shelves)
- 2 | 5 3/4″ x 30″ (top shelves)
In order to fit all cuts onto one sheet of plywood, cut the plywood sheet according to the following diagram:
I had the guys at Home Depot rip the plywood along the vertical 30″ and 13″ sections so I could maneuver the sheets more easily. Once I got it home, I used the circular saw to rip it all down to the final lengths and widths.
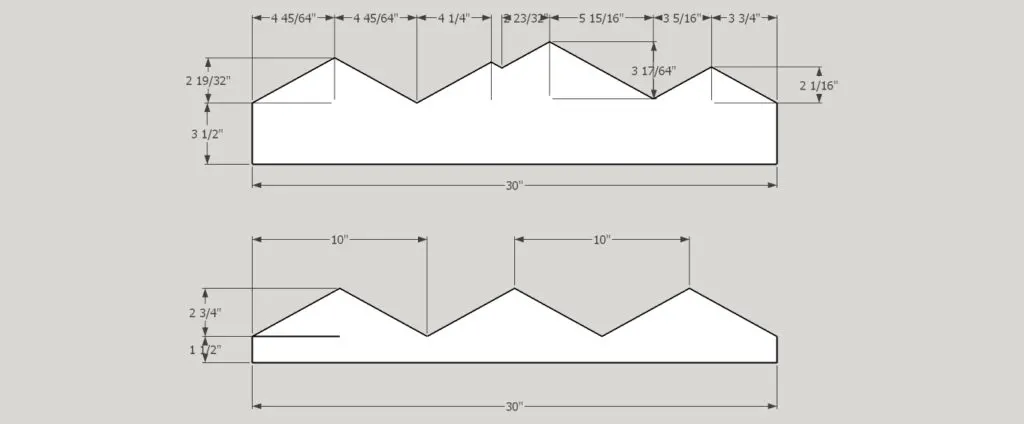
I then used two spare sections from the 30″ wide sheet to create the mountains for the fronts of the top shelves. I cut the mountains with a jigsaw according to the following dimensions:
Don’t get too caught up in the exact dimensions for the big mountain range. When I made these, I drew and cut out the smaller mountain range according to the shown dimensions and then placed it on top of the board for the larger range. With everything lined up, I marked the outermost edges at 3-1/2″ (as shown on the diagram) and drew lines at the same angle as the small range. I kept drawing lines at the given angles and different offsets until I liked how the bigger range looked … it was very scientific 😉
If you like this exact range design, please do use the dimensions from the diagram. However, it’s no big deal if your lines aren’t quite accurate to a 64th … it won’t make a big difference.
Lastly, to get the rounded edges on the side pieces:
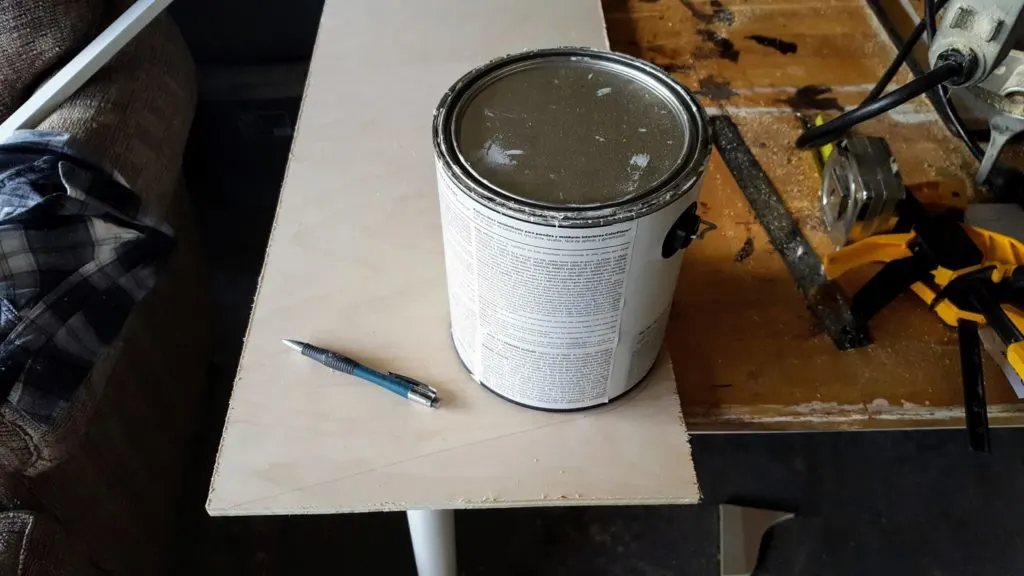
Mark a point 1/2″ from the top outside corner of the side piece (to account for the 1/2″ thickness of the plywood back). Next, mark a point 3″ down from the opposite side. Draw a diagonal line between those two points. Place a paint can (or anything with a decent circumference) with its sides tangent to the diagonal line and long edge of the side piece. Trace the curve and cut it out with a jigsaw.
Vwallahhh! Beautiful curves.
After you’ve completed all the cuts, it’s on to the build!
Step 1.
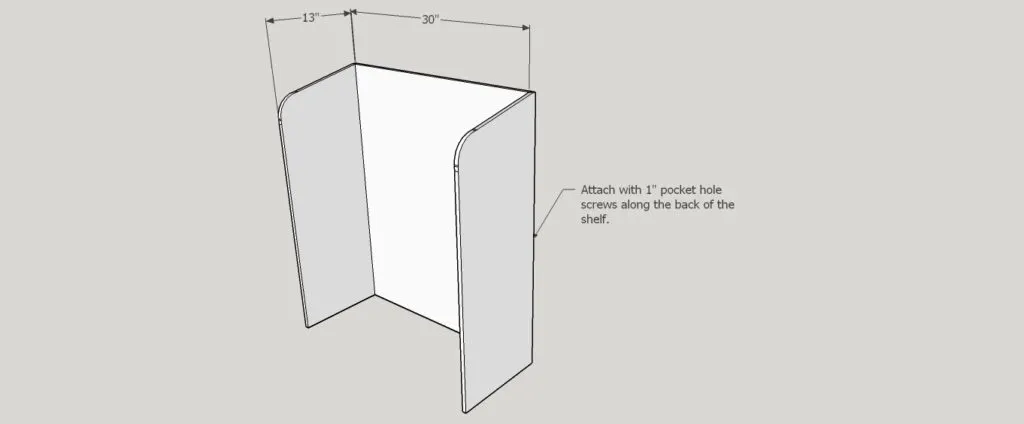
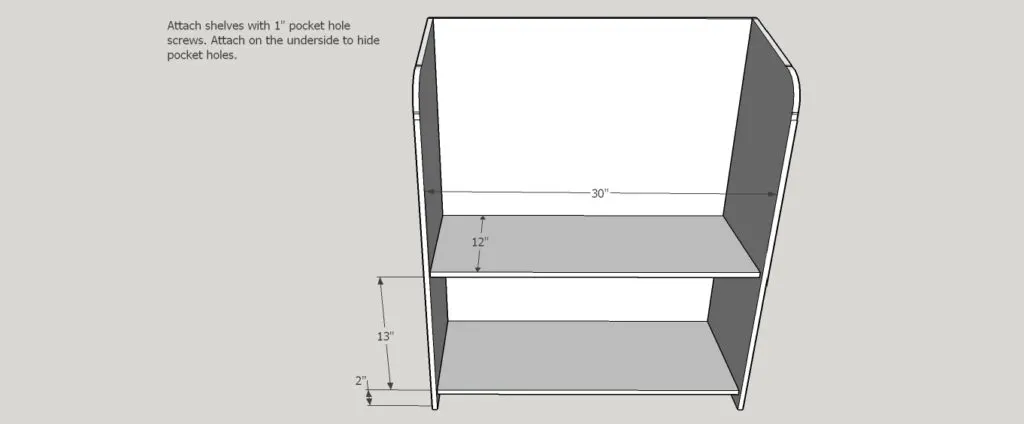
Start by attaching the sides to the back of the bookshelf. Line up the back so it is flush with the back edge of the side pieces.
Step 2.
Insert the bottom two shelves and attach with pocket holes and screws. Place the shelves so they are flush against the back of the bookshelf. They should sit 1/2″ inset from the front edge.
Step 3.
I decided to build the whole top shelf unit before inserting it into the main bookshelf in order to help with placement.
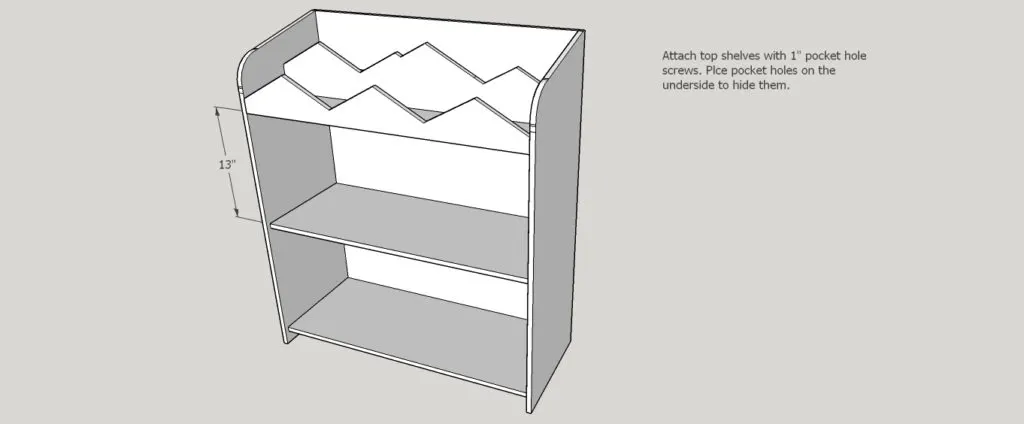
Begin by attaching the small mountain range to the lower shelf. Next, attach the large mountain range to the back of the lower shelf. Finally, attach the upper shelf to the back of the large mountain range.
It’s not necessary to build the upper unit first, but I found it helpful. Do whatever works best in your situation!
Step 4.
Position the upper shelf unit and attach with pocket holes and screws. When the upper shelf unit is flush against the back of the bookshelf, the small mountain range should be flush with the front edge.
Step 5.
Finish as desired!
I stained the bookshelf with one coat of Minwax Special Walnut followed by one coat of Minwax Jacobean. To give the mountains some depth, I stained the small range with both Special Walnut and Jacobean but left the large range with just Special Walnut. I finished it off with a coat of Minwax Clear Gloss Wipe-On Polyurethane.
Please leave any questions or comments and I’ll get back to you as soon as possible. And if you build from these plans, do share! I would love to hear from you!


