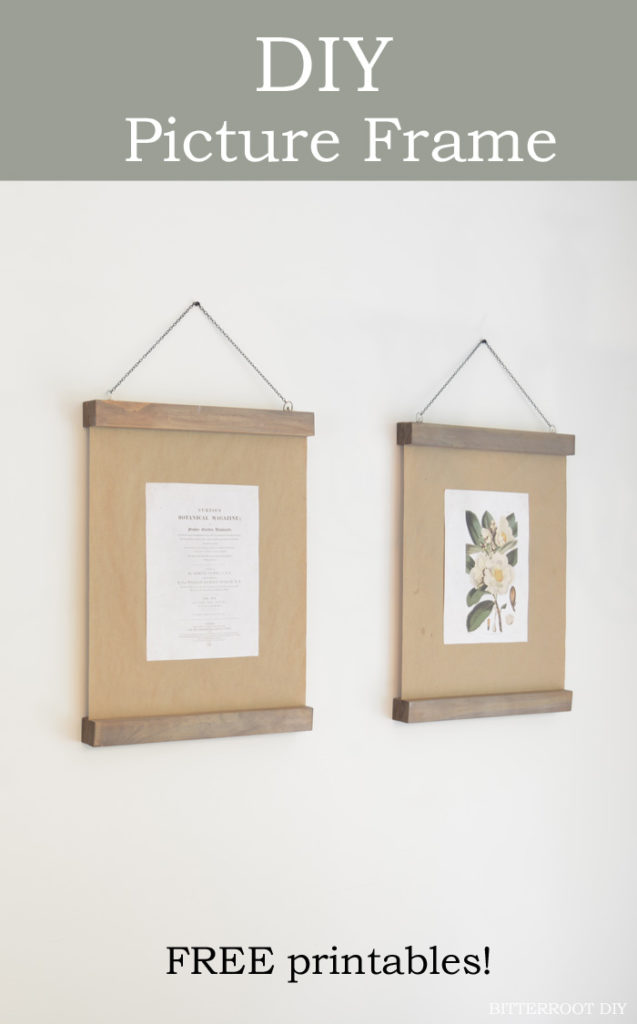
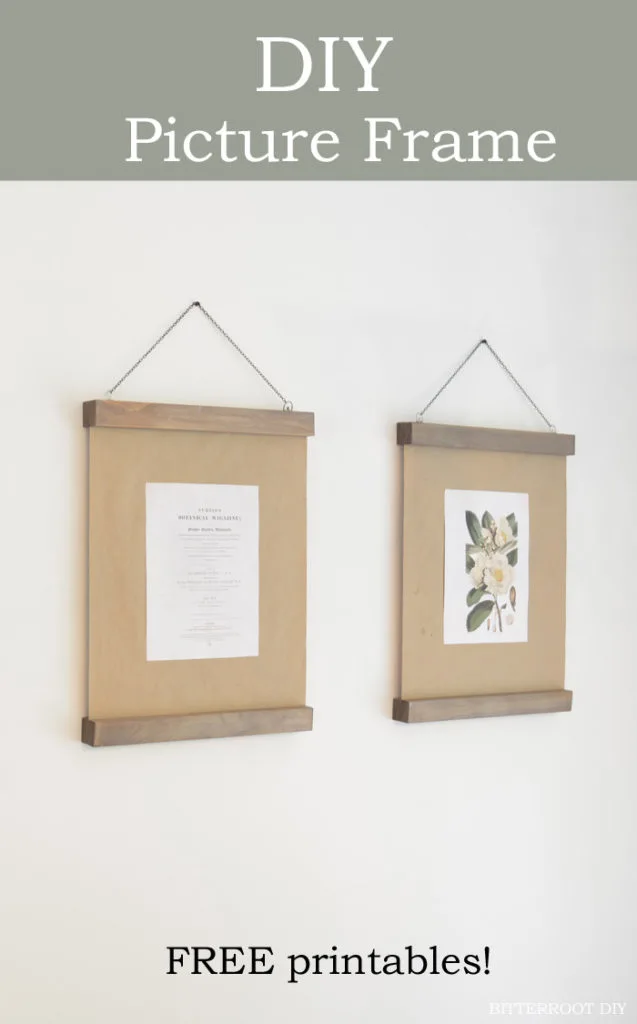
I have been searching and searching for some large pictures and frames for the new dining room lately and finally came up with the solution this week! The latest trend in poster frames – with just a strip of wood at the top and bottom – caught my eye recently. Typically, those frames are either glued or nailed into the posters on the top and bottom, but I wanted to be able to change photos out with the seasons. So I made some and added a little twist … magnets are the name of the game here!
Enjoy the free plans! The plans are written for ONE 16″ x 20″ frame … adjust accordingly.

Tools & Supplies
- Small Black Chain (I found mine at Walmart in the bead section)
- 6 D Ring Hangers (Walmart)
- E6000 Adhesive
- 3/4″ Strong Magnets (Walmart)
- 3/4″ Forstner Bit
- Drill
- Saw
Cuts:
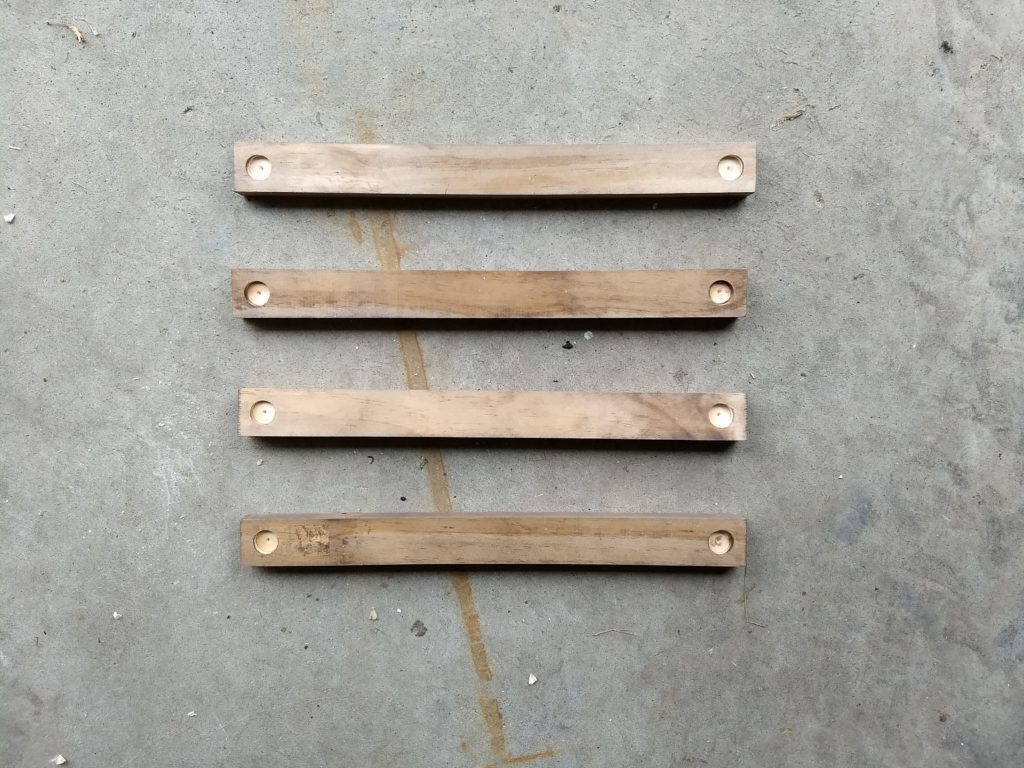
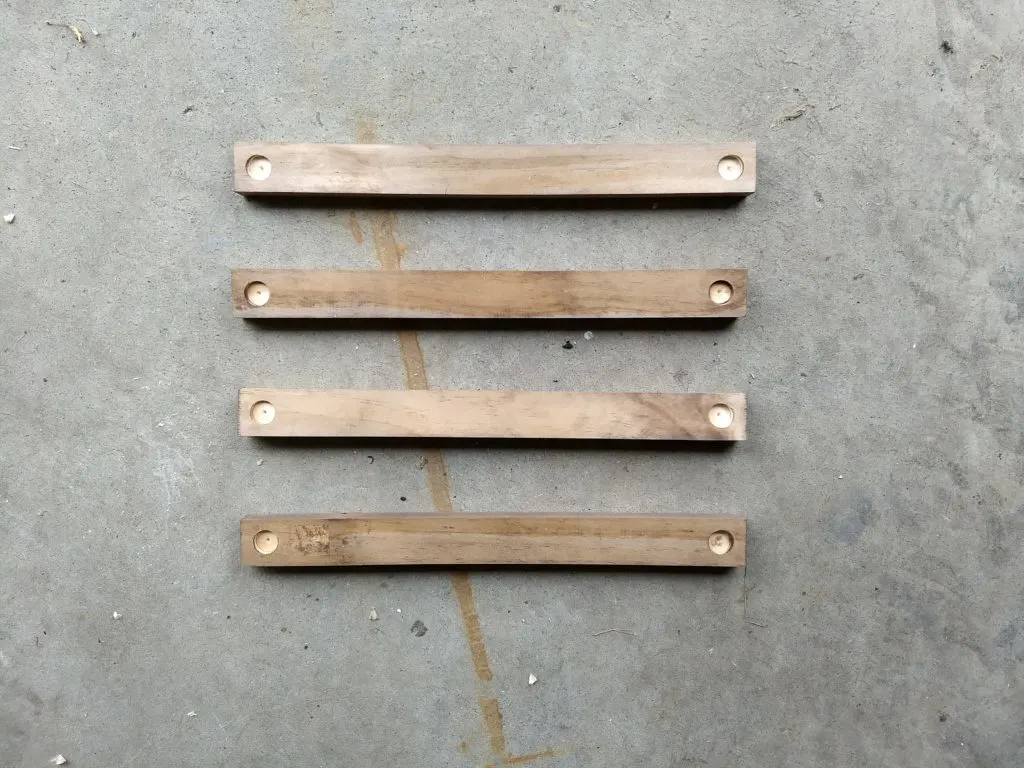
- 4 | 1 x 2 @ 16″
Step 1.
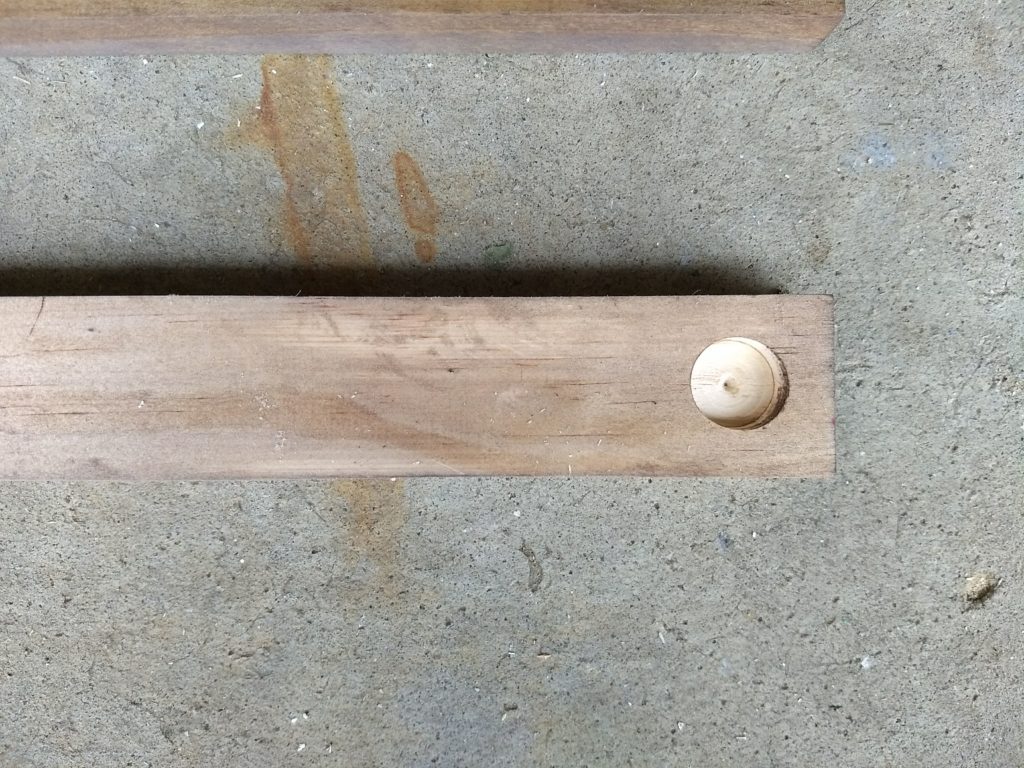
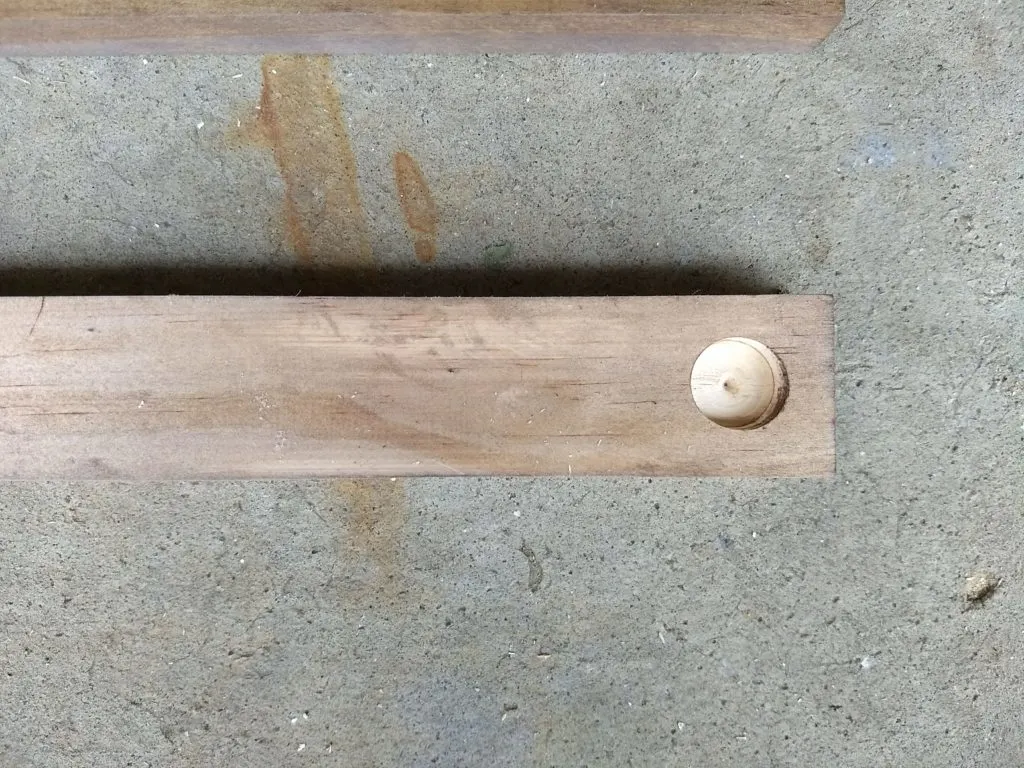
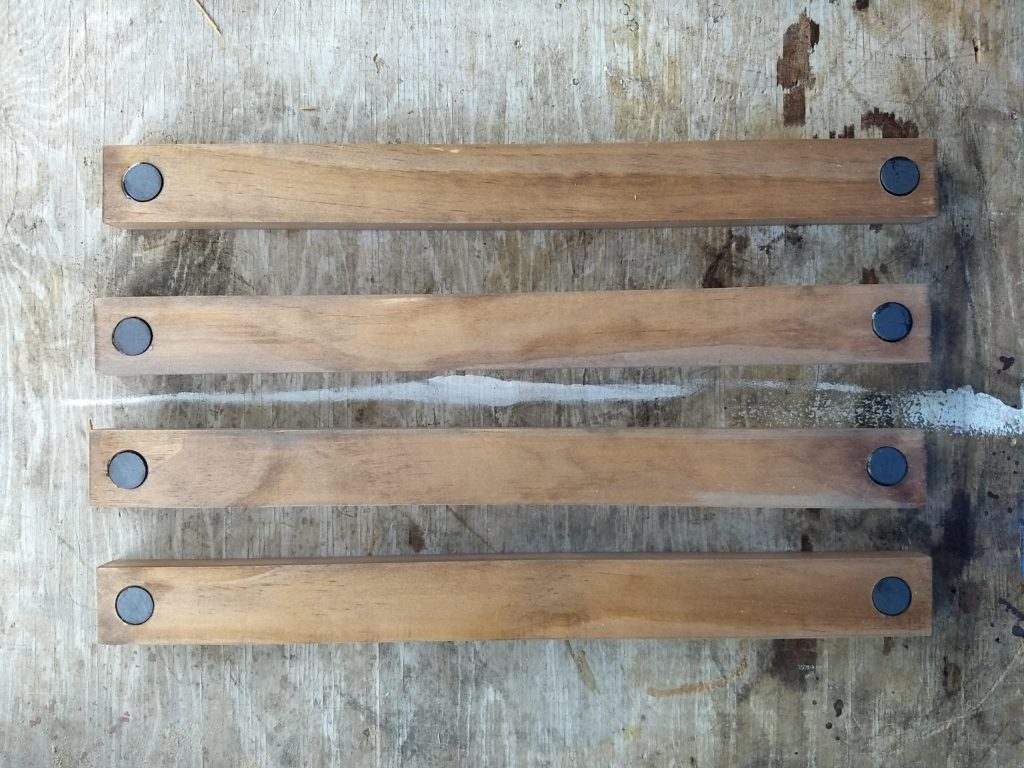
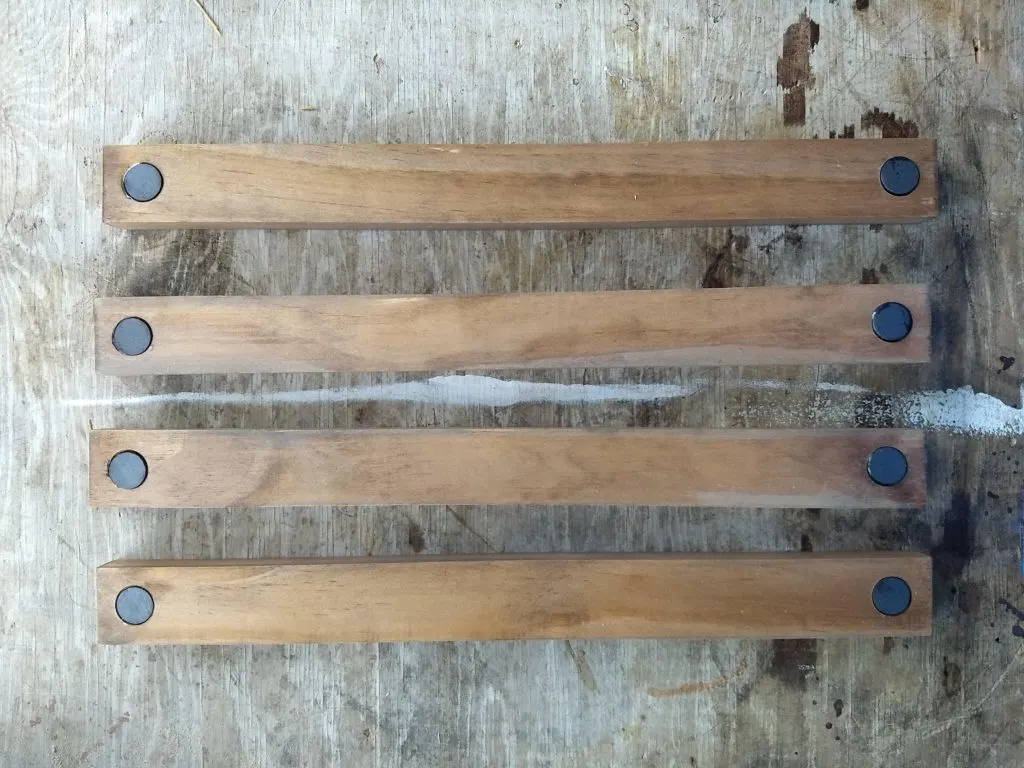
Drill a hole approximately 1/4″ deep (as deep as your magnets) on each end of all four boards with a 3/4″ forstner bit. Place the center of the holes 5/8″ in from the end and centered on the board.
Step 2.
Sand, stain, and finish the boards before moving onto the next step. I used Minwax Special Walnut, followed by one coat of Minwax Classic Gray which I wiped on and off as quickly as possible. I sealed the boards with Minwax Spray-on Polyurethane in semi-gloss.
Step 3.
Glue the magnets in place with E6000 adhesive. The magnets should sit just above the surface of the boards to ensure a solid connection. Take care to line up the magnetic fields when you place the magnets so that the boards will stick together when you’re done. (don’t ask how I figured that one out …)
Step 4.
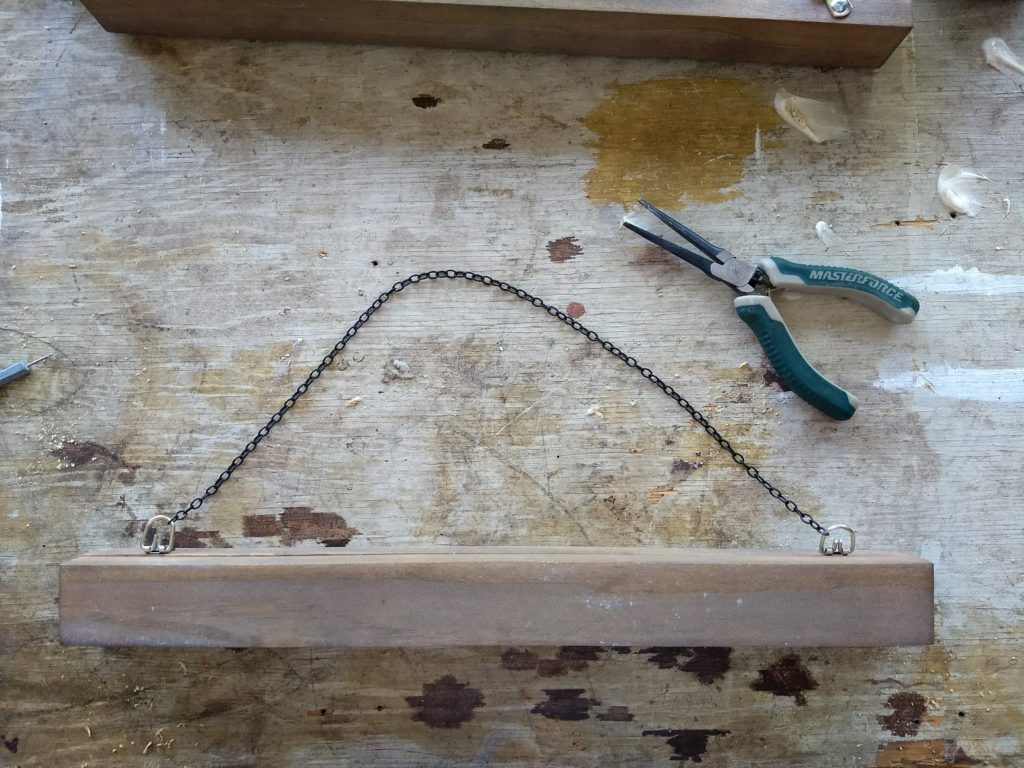
Once the glue is dry, attach D-ring hangers to the top of the frame and loop the black chain through the hangers on each side.

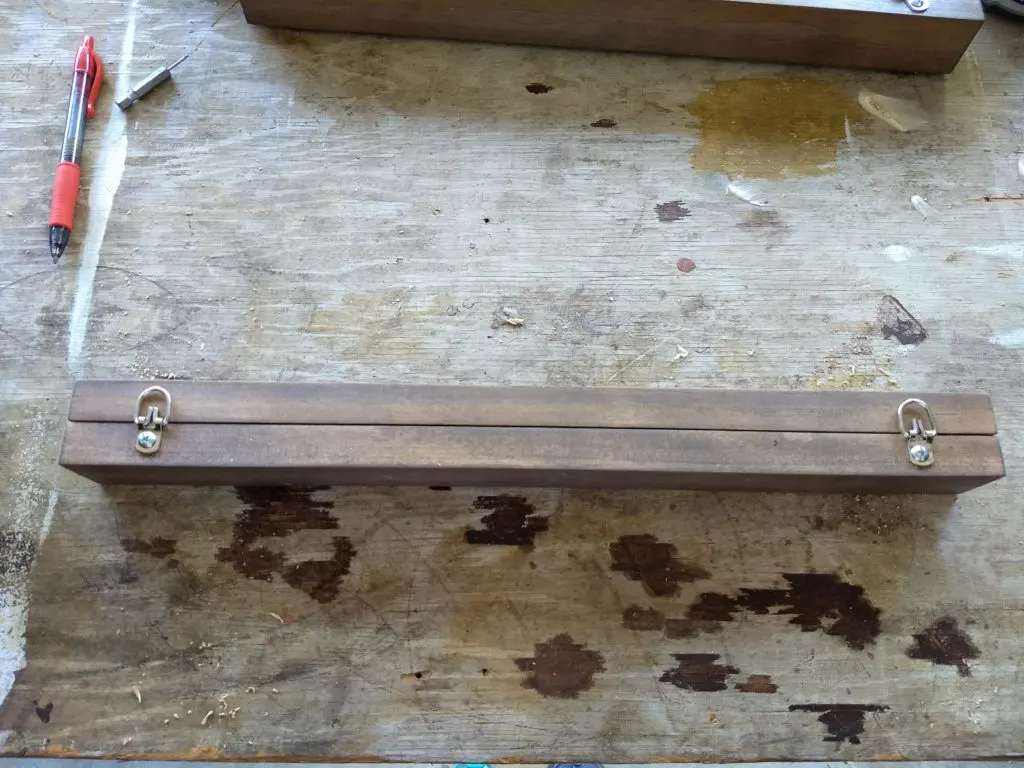
Adjust the chain according to the length you want. You only need to attach the hanging hardware to one set of 1x2s (the top). The bottom 1x2s will just clamp onto the bottom of the photo

Step 5.
Align and clamp your photo between the top magnets. Repeat for the bottom.
And there you have it!
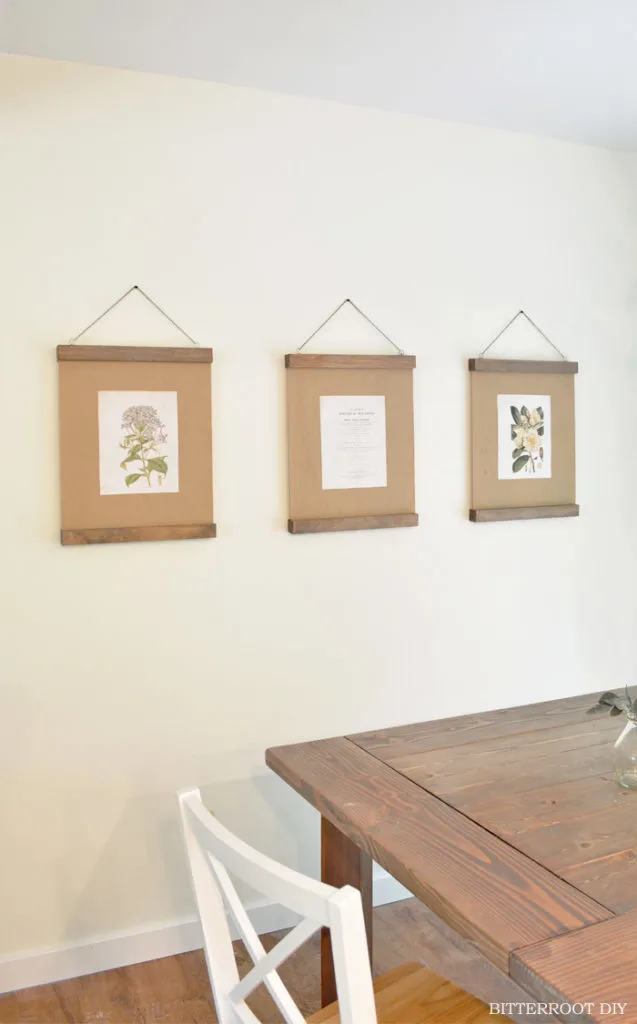
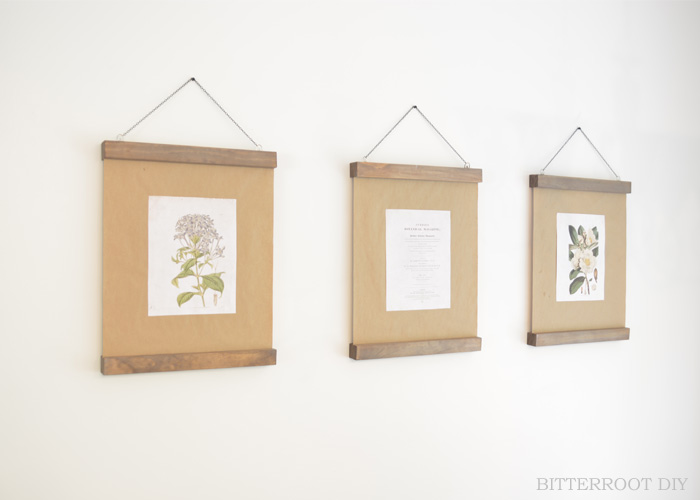
Now, let’s just take a moment to admire these beautiful botanical prints.
Cynthia from Home Beautifully whipped them up just for these frames! They look amazing in our new kitchen/dining room – just the right touch of rustic and elegant.
I printed the photos out as 8x10s and glued them to kraft paper to make the full 16×20. You can definitely order 16×20 prints if that’s more your style. I think I’ll try that out for some fall prints!
You can find the free botanical prints here. They’re sized to be printed at either 8 x 10 or 16 x 20.
Let me know if you have any questions and I’ll get back to you as soon as possible!
And don’t forget to head over to show Cynthia some love and snag all sorts of amazing projects and printables. She has the best tutorials to DIY a beautiful and organized home!