Install your own DIY board and batten on a half wall with this full tutorial.
This post contains affiliate links. If you make a purchase from one of the links, I may make a small commission at NO EXTRA COST to you. This helps keep the tutorials and plans free here at Bitterroot DIY. Thank you for your support! See my full disclosure here.
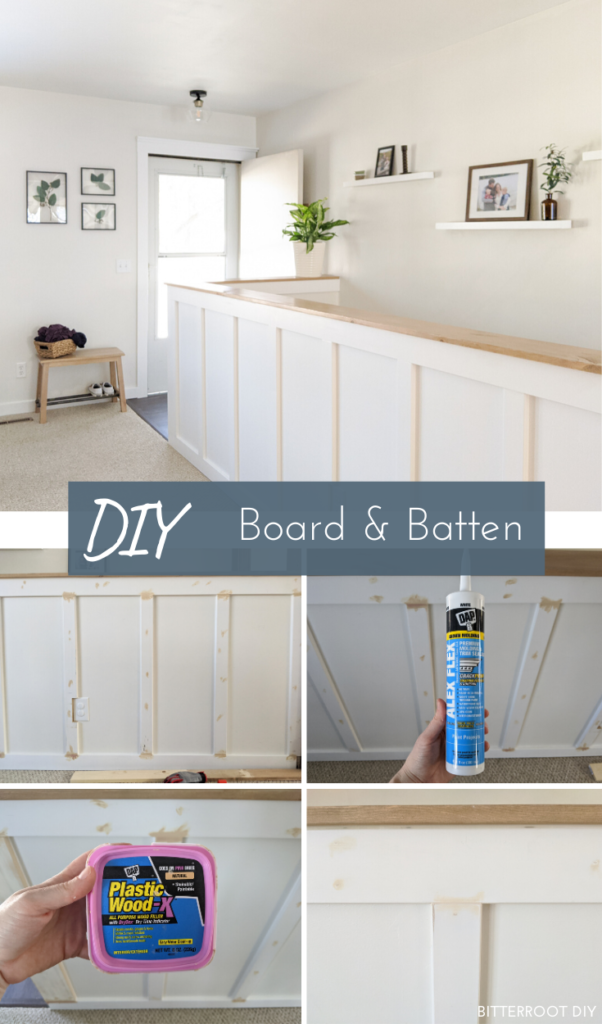
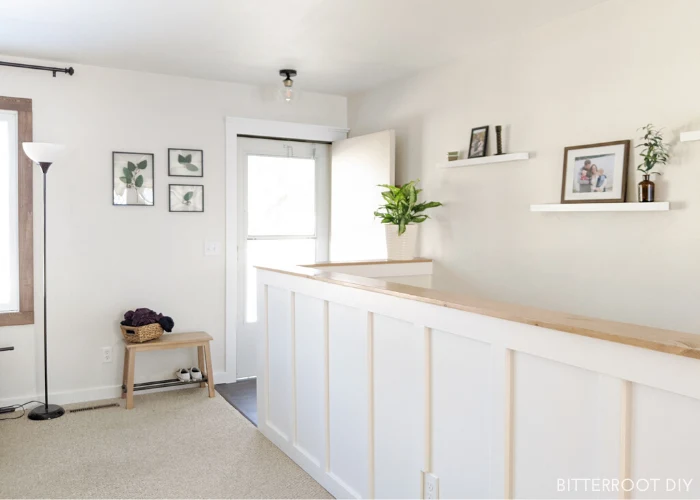
One of my favorite parts of the latest entryway makeover was installing DIY board and batten along the entryway half wall. It’s been such a blahhh awkward space for the last few years, but I’m so happy with how it all looks now – definitely worth the wait.
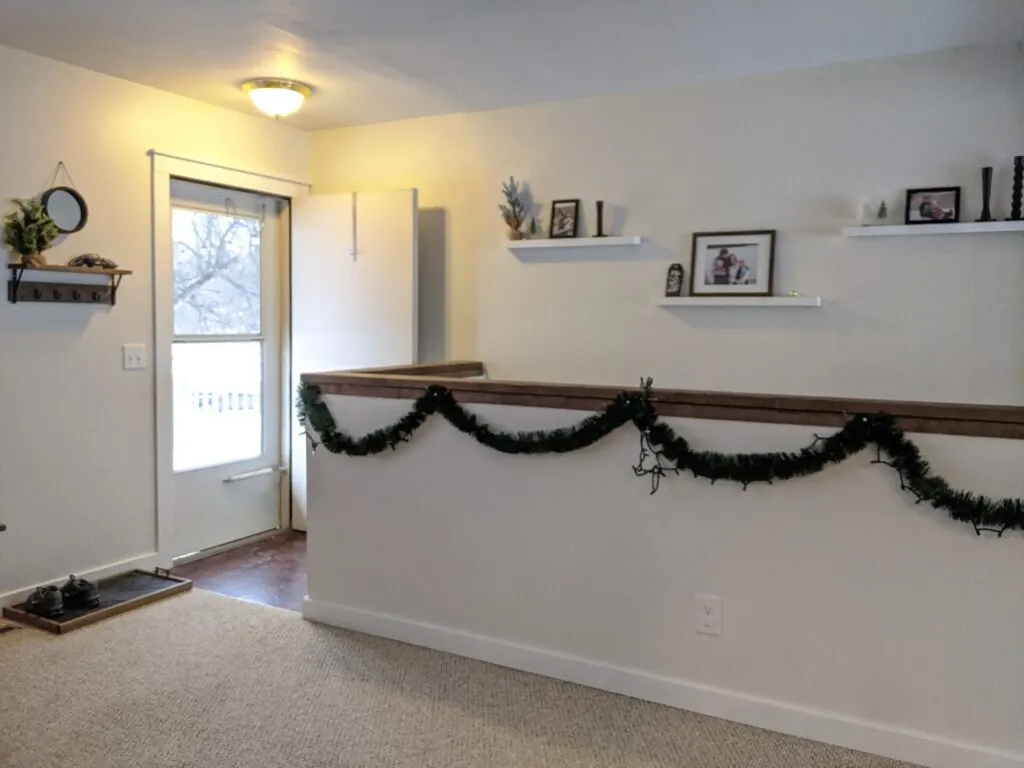
Here’s a before (just ignore the Christmas decorations):

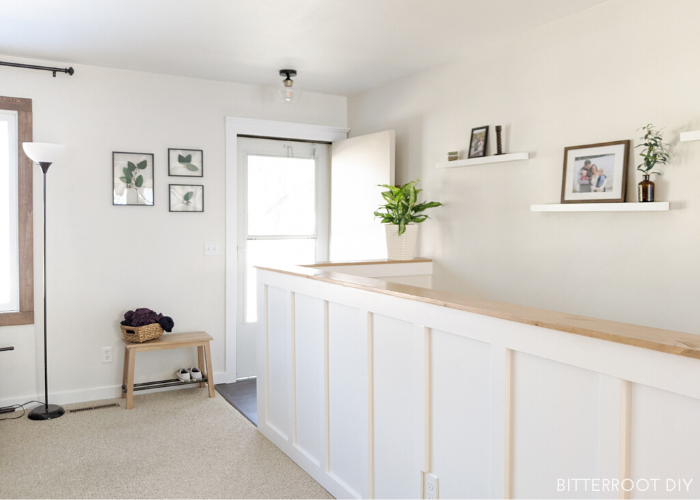
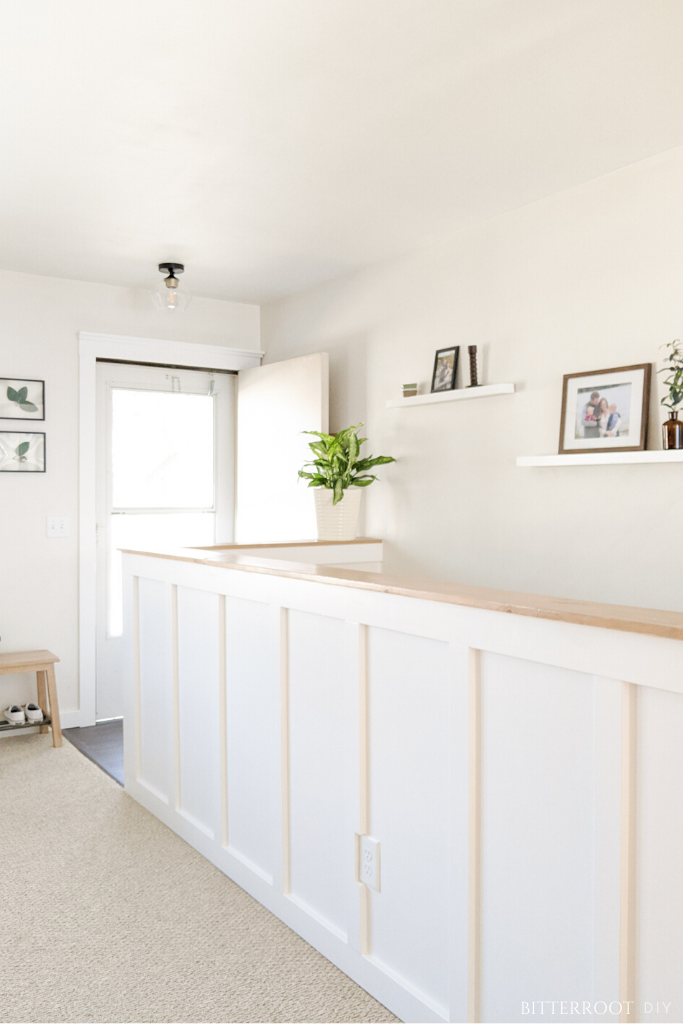
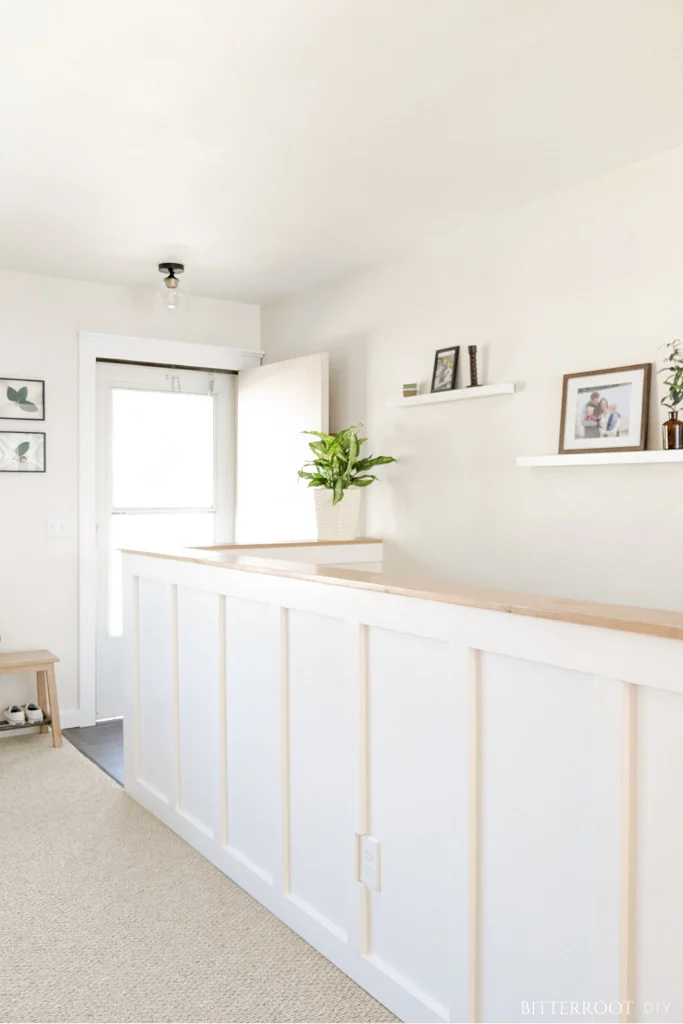
And the after:
I’m pretty sure there are a bazillion tutorials already out there for DIY board and batten, but everyone’s house is a little different. So here’s my take on it if you have a similar half wall/pony wall situation.
Don’t forget to check out my Instagram highlights to see this whole space come to life and watch the full tutorial!
Tools & Supplies:
- Miter Saw
- Jigsaw (to cut around outlets and switches)
- Finish Nailer
- 2″ Finish Nails
- Paintable Caulk
- Wood Filler
- Sanding Sponge
- Small Trim Paint Brush
- Fine Finish Trim Roller
- Stud Finder
- Level
- Tape Measure
- Pencil
- Safety Glasses
- Respirator
- Respirator Filters
- Ear Protection
**If you’re doing the half wall top, you’ll also need:
- Orbital Sander
- Corner Braces
- Stain of your choice
- Wipe-on Polyurethane
- Stain Pads
Lumber:
- 1 x 3 Primed MDF for all vertical stiles
- 1 x 4 Primed MDF for all horizontal rails (top & bottom)
- 1 x 8 Pine for top of half wall
** I did not provide specific lumber quantities since it depends on the project, but those are the board sizes I used.
A few things to note before you get started:
- Our walls are smooth (no texture), so I just installed the boards directly onto the existing drywall. If you have textured walls, I recommend skim coating or installing flat panels to get rid of the texture before attaching the trim boards.
- If you plan to use 1×3 MDF boards, make sure your baseboards are thicker than the 1x3s (or the same thickness). Traditional baseboard trim is a little thinner than a 1x board, so you may need to install new baseboards. I installed 1×4 MDF baseboard trim a couple years ago along this wall, so it’s all the same thickness as the 1x3s. If you need to install new baseboards, measure and cut your baseboard to length and attach it to the wall by driving 2″ brad nails through the trim into the studs along the length of the wall. For more detailed information, see this post on how to install baseboard trim.
- If you prefer not to redo your baseboards, consider using a different type of lumber or trim for the board and batten.
- I kept things simple and spaced the vertical stiles along the wall studs (16″ on-center on this wall), so all I had to do was nail them to the studs. You can change the spacing if you prefer something different in your space. HOWEVER, you may want to use a construction adhesive to ensure the boards are really stuck to the wall. You can also drive the brad nails in at an angle to “hook” the drywall better (so the nails can’t just slide straight in or out). OR consider building the whole board & batten unit before attaching it to the wall (I know, so many options) .
- There’s no “perfect” way to install DIY board and batten – a lot of it is just figuring out what will look the best in your space. Feel free to play with spacing, height, top trim, etc. until you like it. Just be consistent along the whole wall.
Ok, all that said, let’s get started!
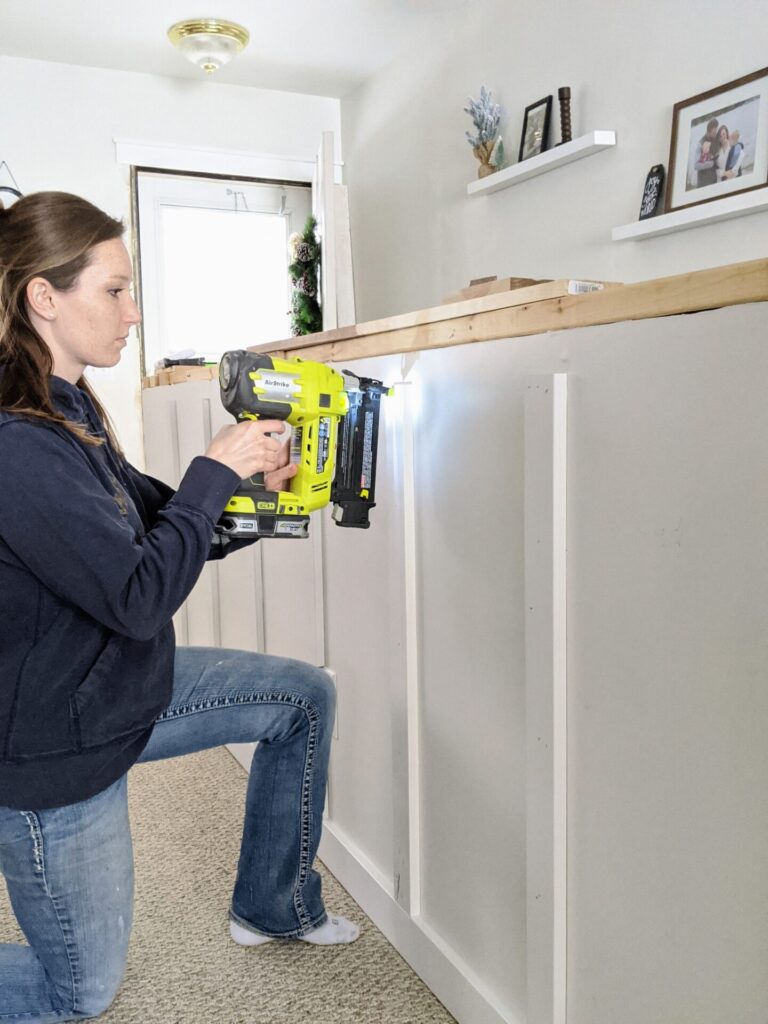
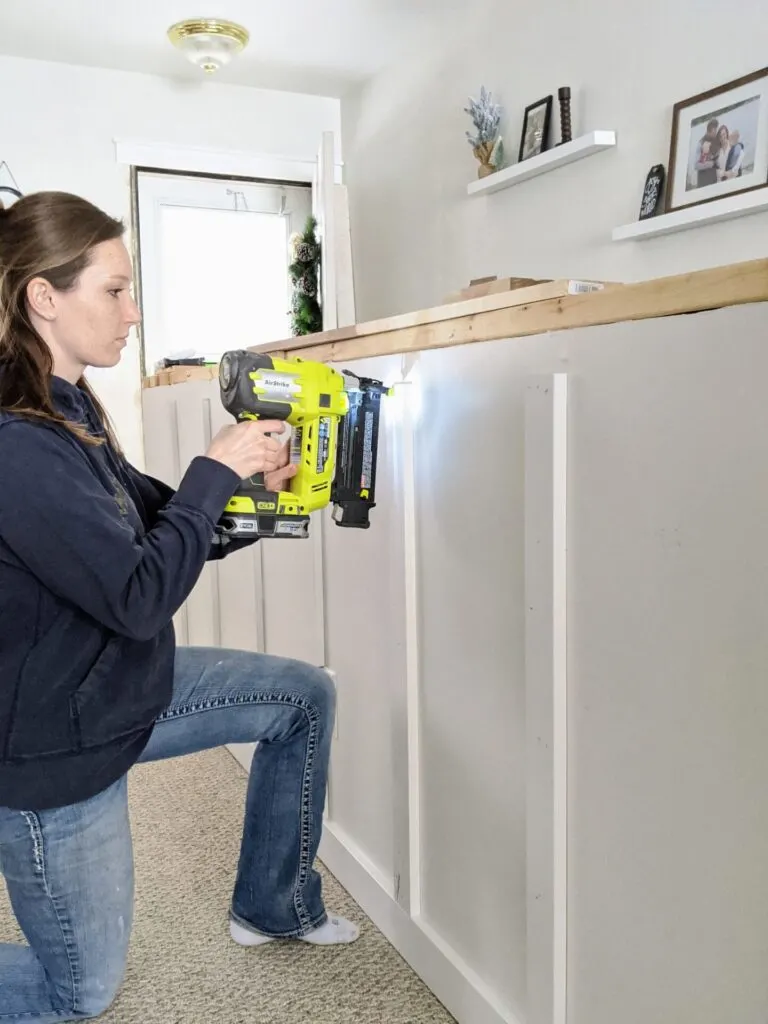
Step 1.
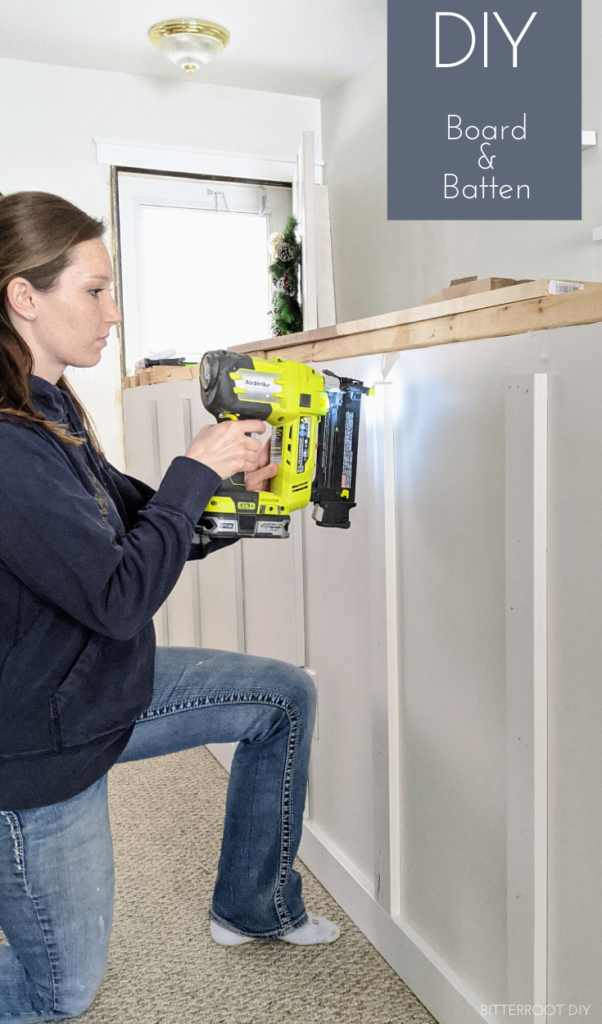
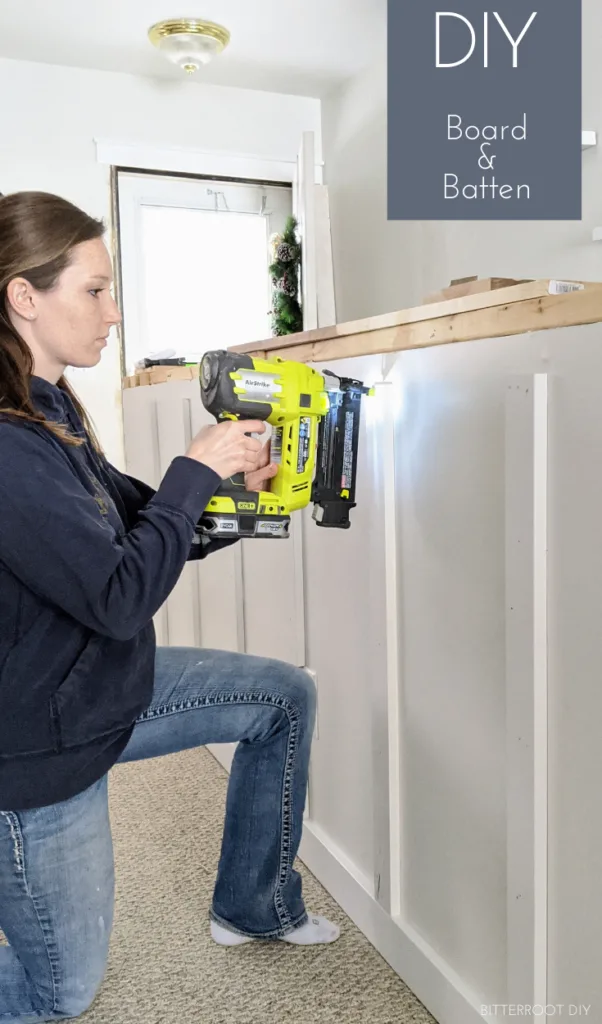
As I said above, I kept it simple and spaced the vertical stiles along the wall studs, which are 16″ on-center along this wall. Once you’ve determined the spacing, work from ones side of the wall to the other. Position the first board, make sure it’s level, and attach it to the wall with 2″ brad nails. Drive the nails through the trim board and into the studs for a secure connection.
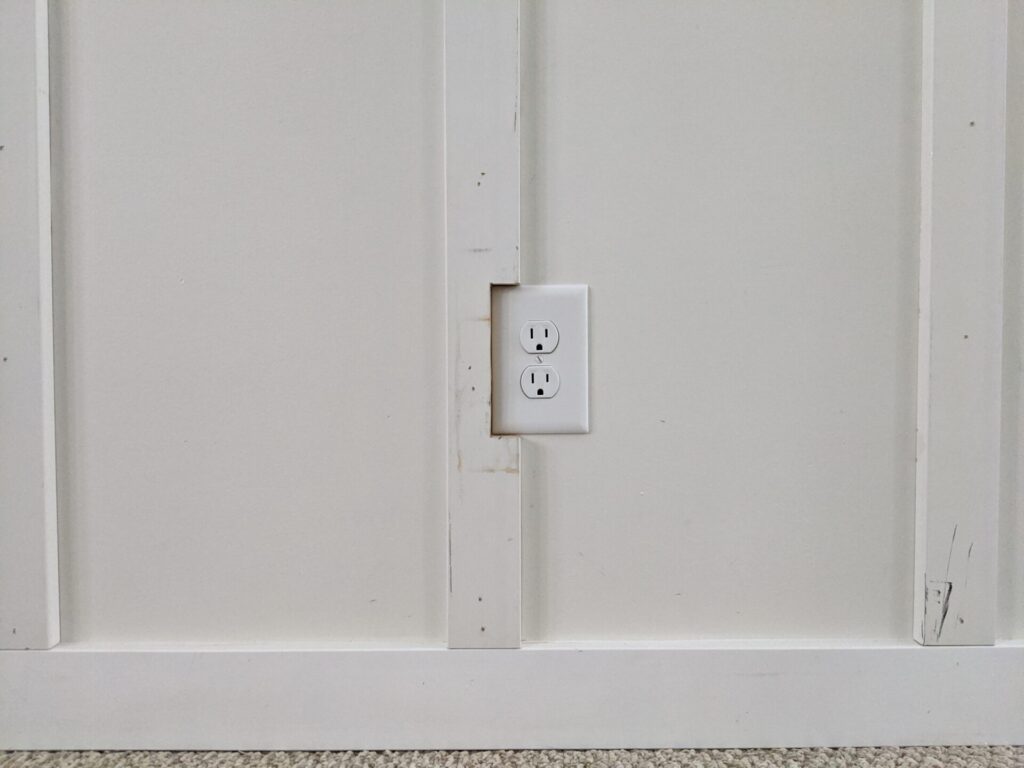
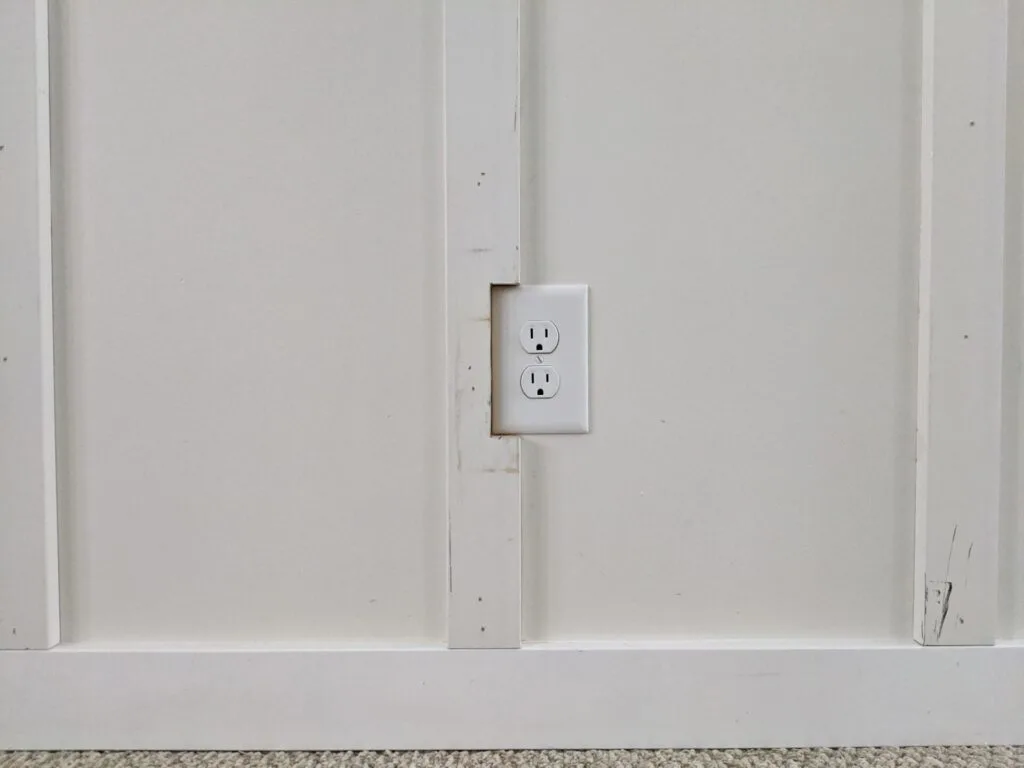
There are a few options to work around outlets and switches. You can move the outlet or switch, build up the whole area around the outlet with trim and reattach the cover on top, or simply cut around the cover.
I went with the latter option and cut the notch out with a jigsaw:
Here’s what it looked like once I had installed all the vertical boards:

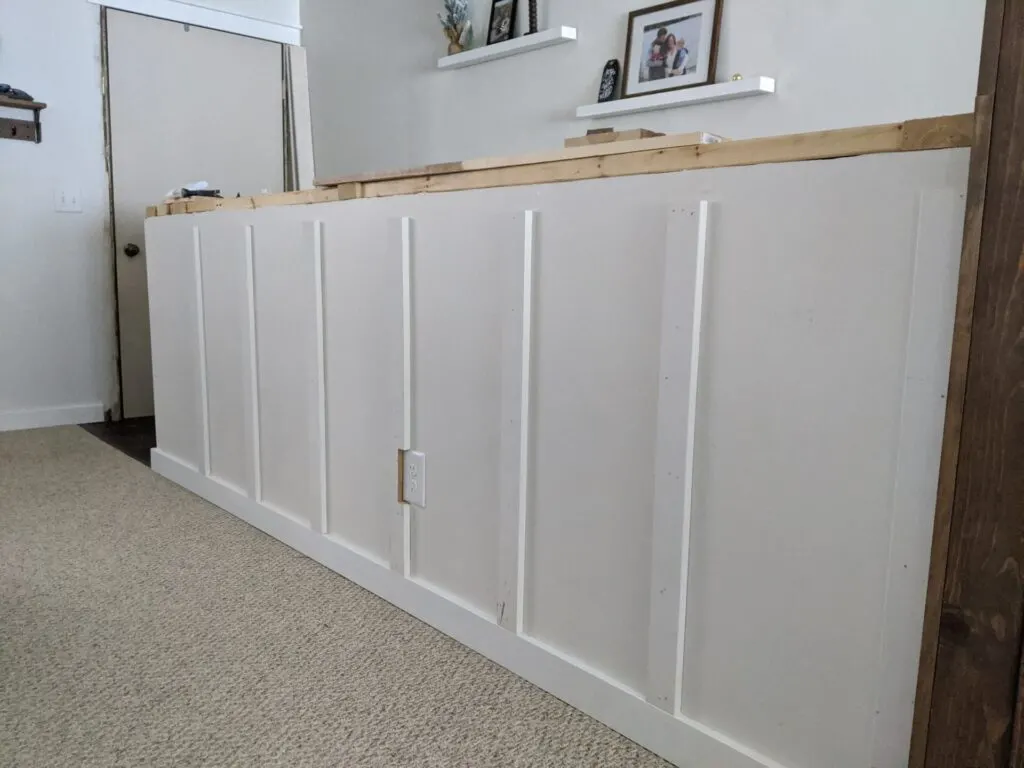
Step 2.
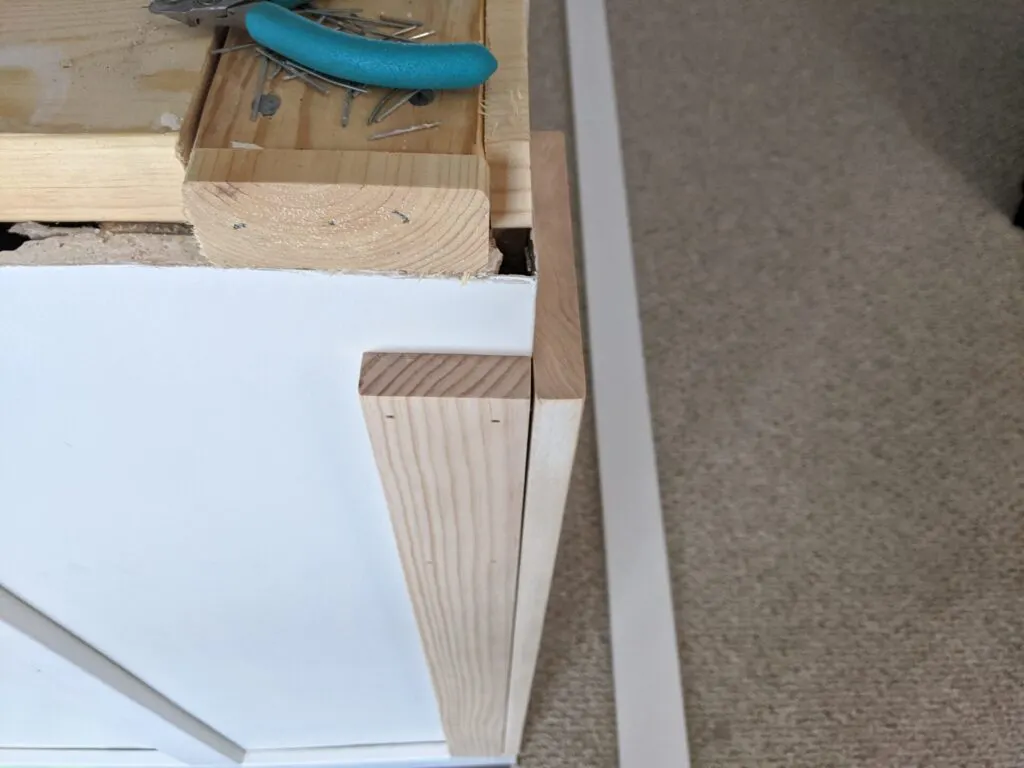
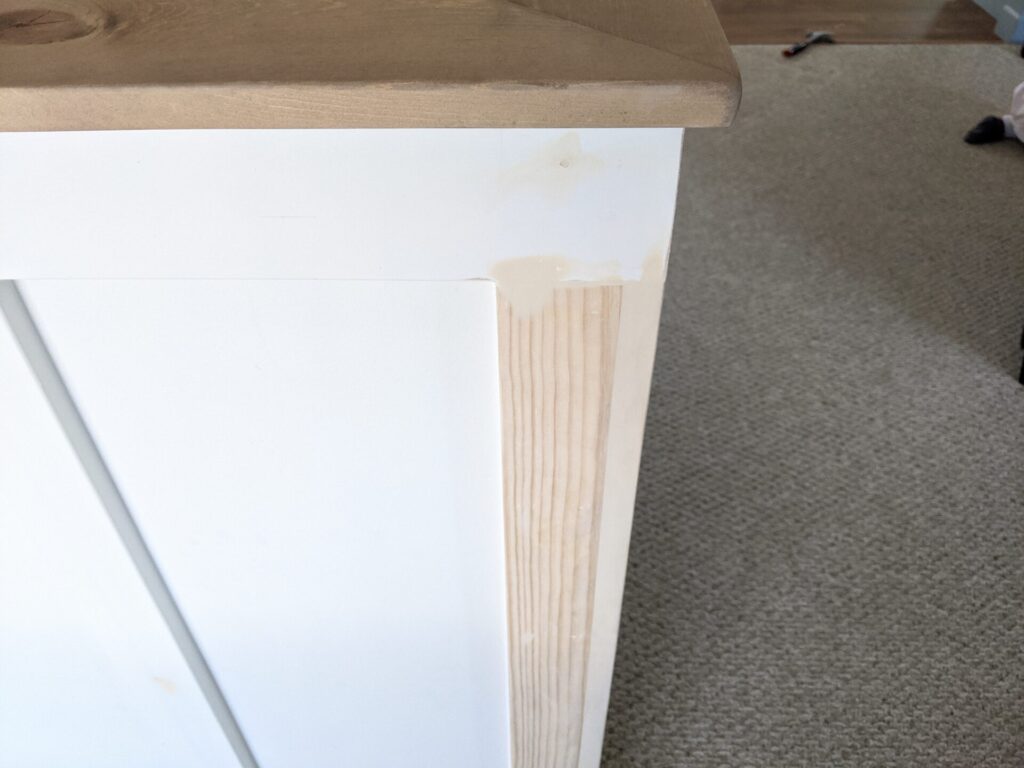
You can see at the far end that there’s an outside corner along this wall. Depending on the room, you may or may not have inside or outside corners to work with. Like I said before, there’s no “perfect” way to install board and batten. So I used a few extra boards to see what it would look like with the whole corner built up versus attaching vertical boards just before the corner and leaving the existing drywall corner (I hope that makes sense?). I think it looks more professional and “finished” to build the whole corner up. Due to the spacing along the wall, I used a wider board at the end of the long wall to maintain the correct spacing between vertical 1x3s and still cover the whole outside corner:
I used a “select pine” 1×3 for the opposite side.
Why did I change materials?
Well, this whole corner of the wall was kinda an interesting hodge-podge …
I used a 1×3 since they have perfectly square sides and I planned to butt it up to the other board. The primed MDF boards have slightly rounded front edges and I wanted a perfectly square joint:

HOWEVER …
I discussed it quite a bit over on Instagram, but I would do this whole outside corner differently next time. I recommend ripping the long side of the boards at a 45 degree cut so they meet at a miter along the corner. It would make for a stronger, tighter joint and would match the top and bottom 1×4 trim joints (which meet at a 45).
I’m not exactly sure why I did it the way I did … but, hey, live and learn!
I used a lot of wood filler to seal that butt joint and make it look smooth:

Overall, I think it turned out fine. But I’ll definitely do it at an angle next time I install DIY board and batten.
I didn’t have any inside corners along this half wall. But, if you have an insider corner, I’d install one board all the way in the corner of the wall and then butt the next board up to it to start the next wall (similar to how you overlap coped baseboards on an inside corner).
Step 3.
These next few steps have to do with installing the top 1×8 on the half wall. If you’re installing DIY board and batten along a regular wall, skip to Step 5.
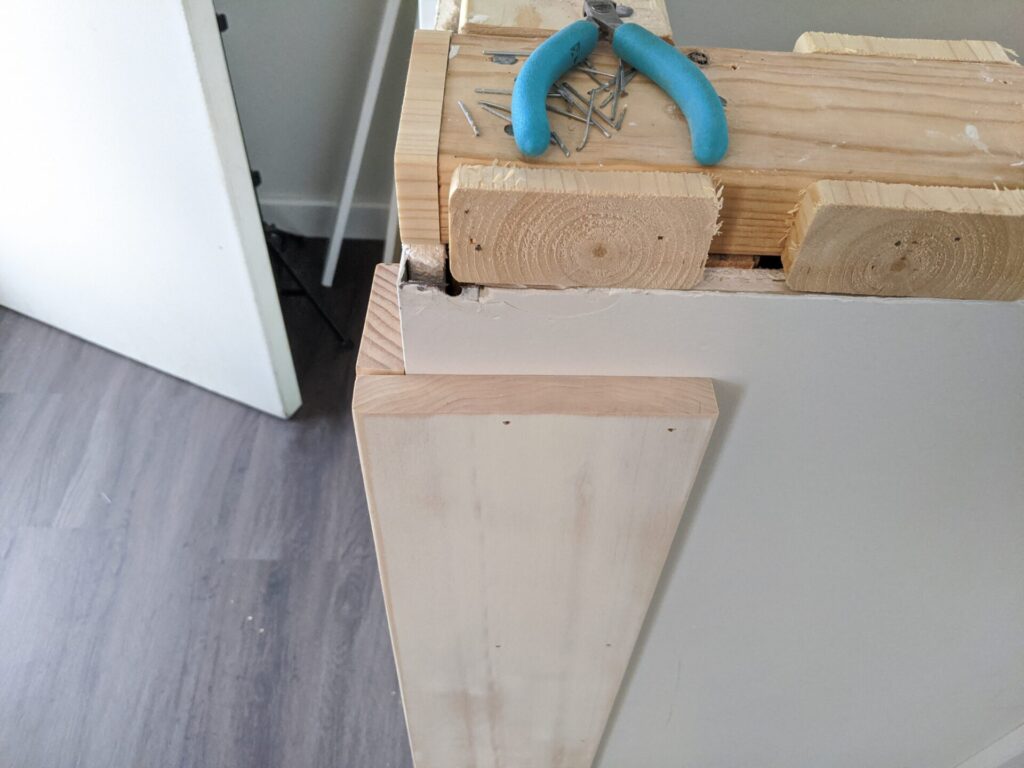
This wall used to be a full floor-to-ceiling wall, but we removed half of it when we did the first big remodel in this house (a couple years ago). After we removed half the wall, I put a new 2×4 on top of the existing (now shorter) wall studs to solidify the half wall/pony wall. Because the wall was fully finished and drywalled, cutting it off half way left the studs buried below the drywall and the top 2×4 sitting outside the drywall – there’s no way to cut the studs off below the drywall since the drywall was already there. So it looked something like this:

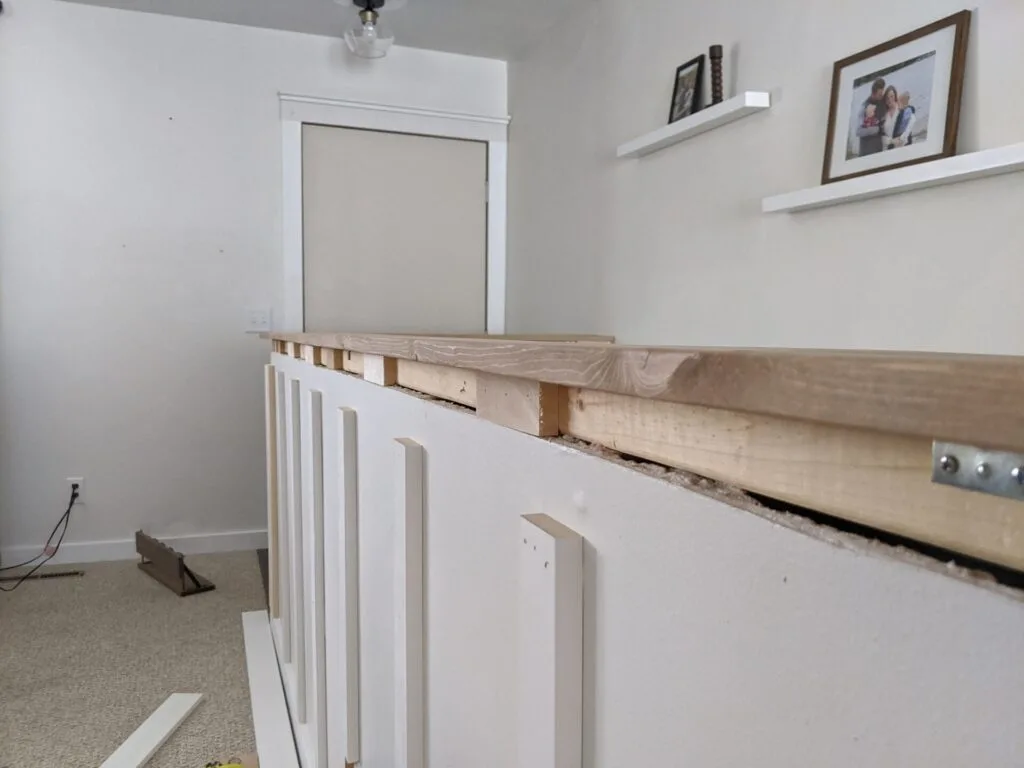
The new top 1×8 is already attached in that photo, but you can see the 2×4 cap underneath it.
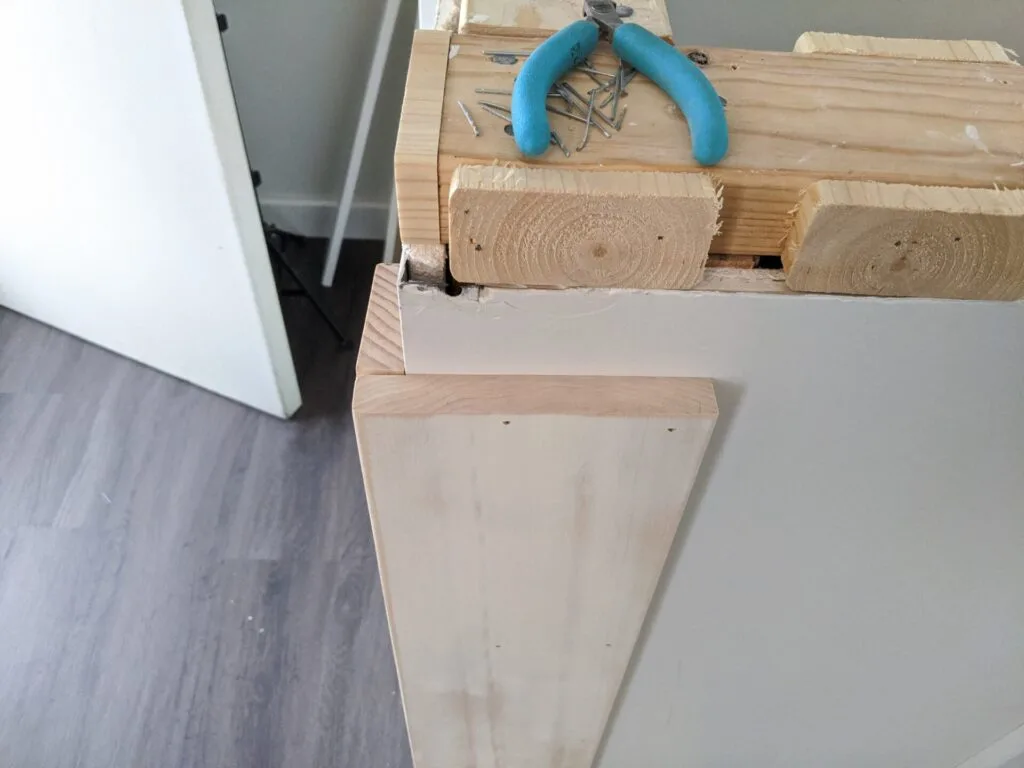
Standard wall drywall is 1/2″ thick (ours is), so I cut a bunch of 1/2″ shims and attached them to the side of the top 2×4 to shim the trim to the correct position. I did the same thing on the other side of the half wall (towards the the staircase).
Step 4.
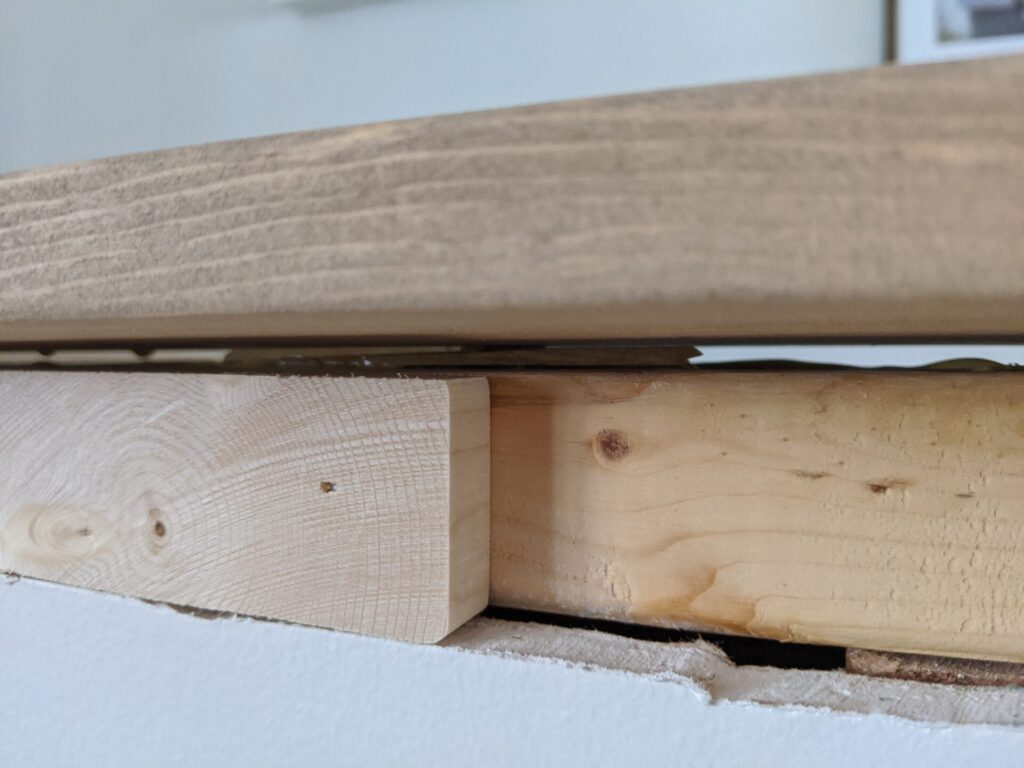
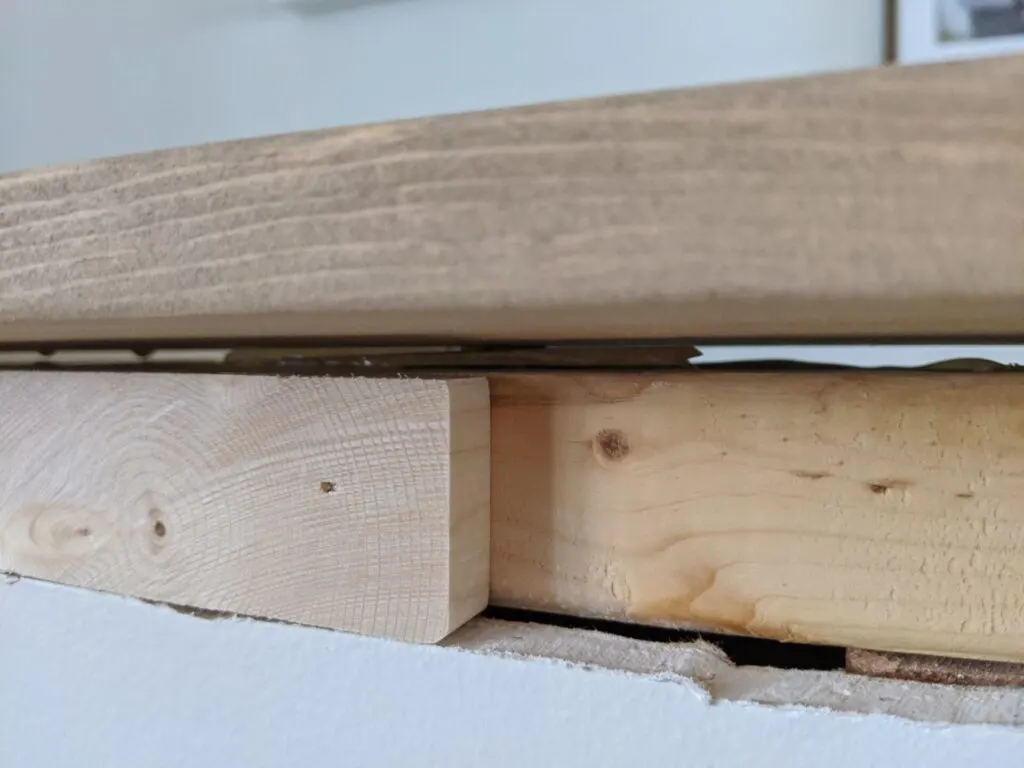
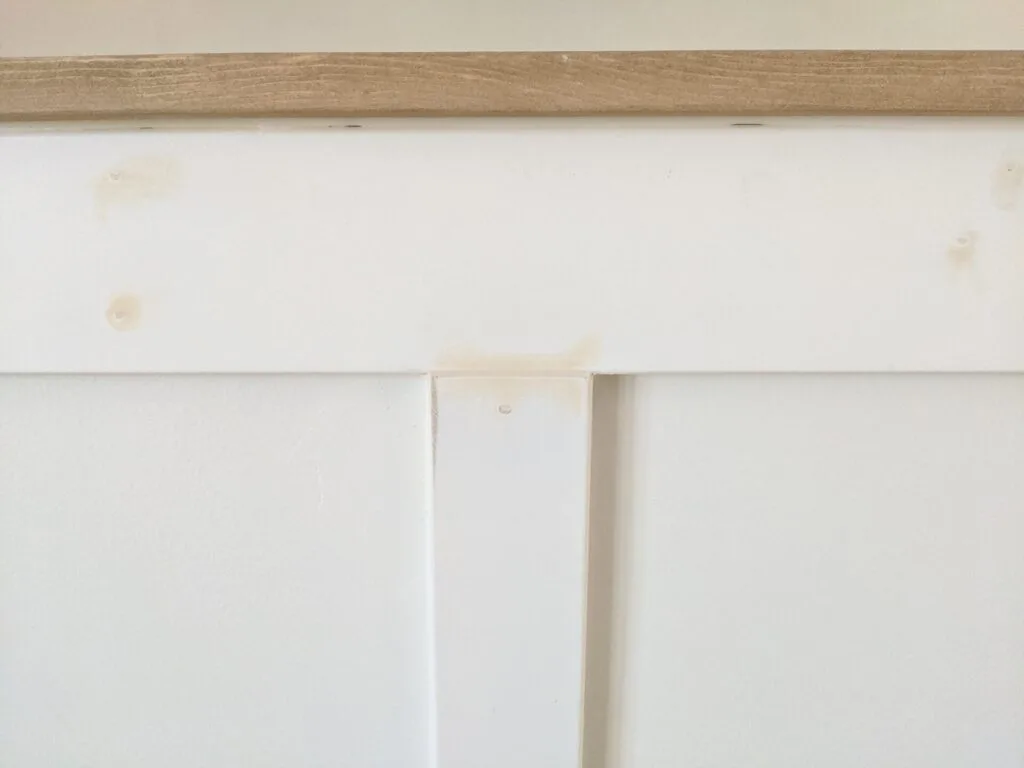
Once all the shims were in place, I applied some wood glue to the top of the 2×4, positioned the 1×8 along the top, and shimmed it where necessary to make sure it was level. You can see a couple shims in there between the 2×4 and 1×8 top:
I sanded and stained the 1×8 top before installing it so the whole house didn’t smell like stain, but I waited to seal it until after it was installed. I used my new FAVORITE stain combo – pre stain, white wash pickling, and early american. More info on the stain combination coming soon!
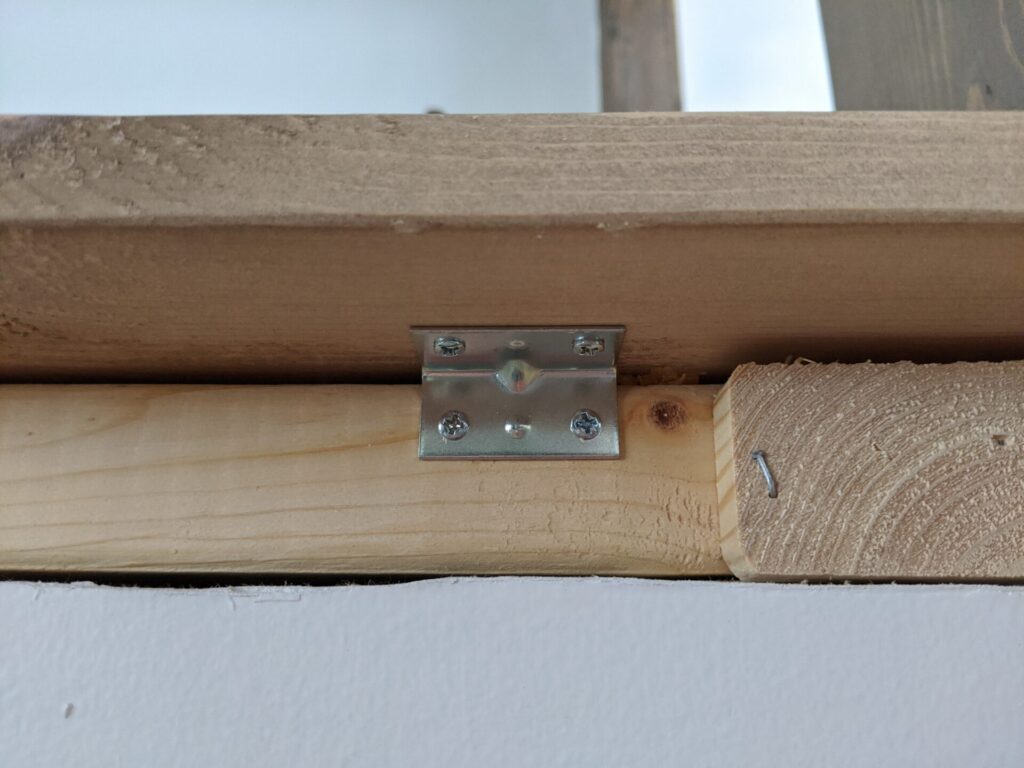
Since I had already sanded and stained the board, I didn’t want to screw or nail through the top of new 1×8. So I used corner braces along the bottom to attach it.


It worked perfectly since the trim doesn’t sit against the 2×4 (it’s against the shims). If you’re working with an existing half wall and the drywall runs the full height of the wall, you could just cut out small sections of drywall to place the corner braces and then run the trim over that – there are a lot of ways to make it work!
Make sure to use plenty of braces to make the top really solid. I think I used about 16 – half on the outside edge and half on the inside edge.

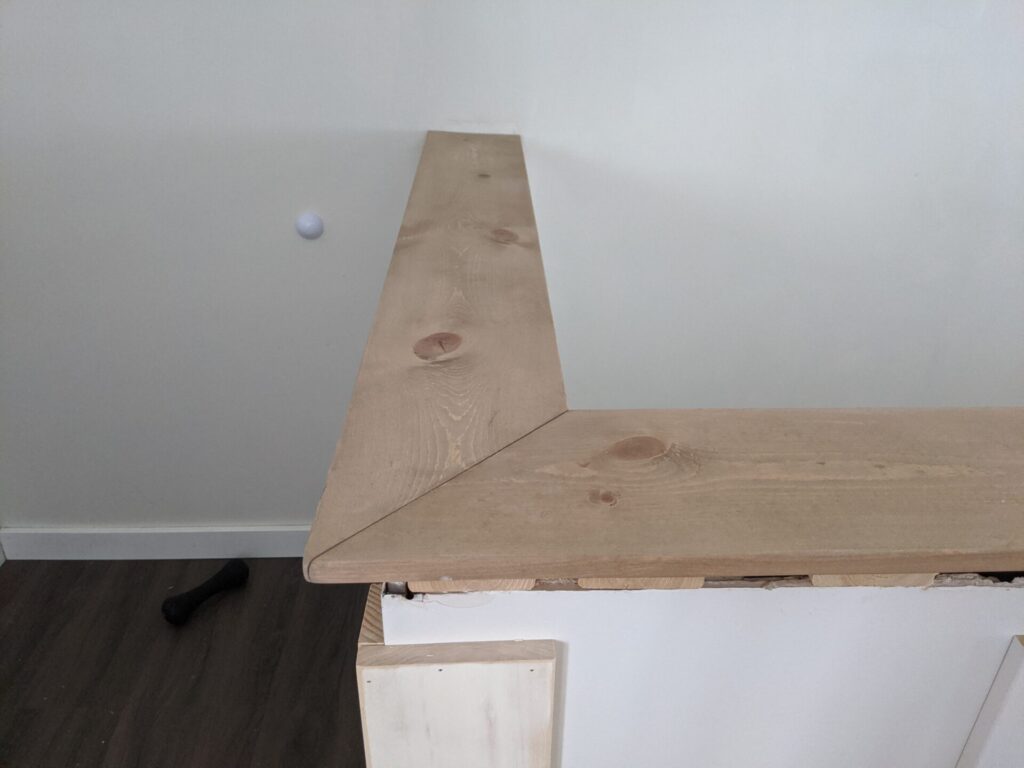
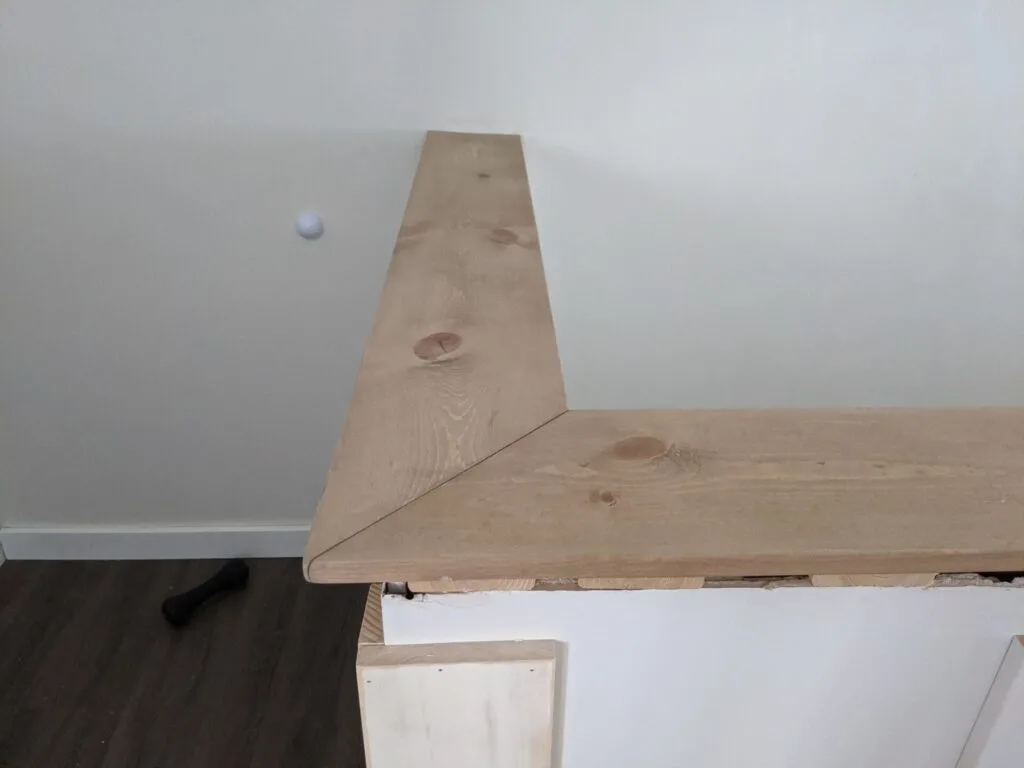
Here’s a view of the corner if you have a corner to work around. The biggest challenge here was making sure both boards lined up on the same plane. It took some leveling and finagling, but I’m happy with how it worked out. You can barely feel the joint when you run your hand along it:
Step 5.
Next, I installed the top 1×4 trim board. I used 2″ brad nails, same as the vertical stiles, and drove them through the trim into the shims and studs along the top of the wall.
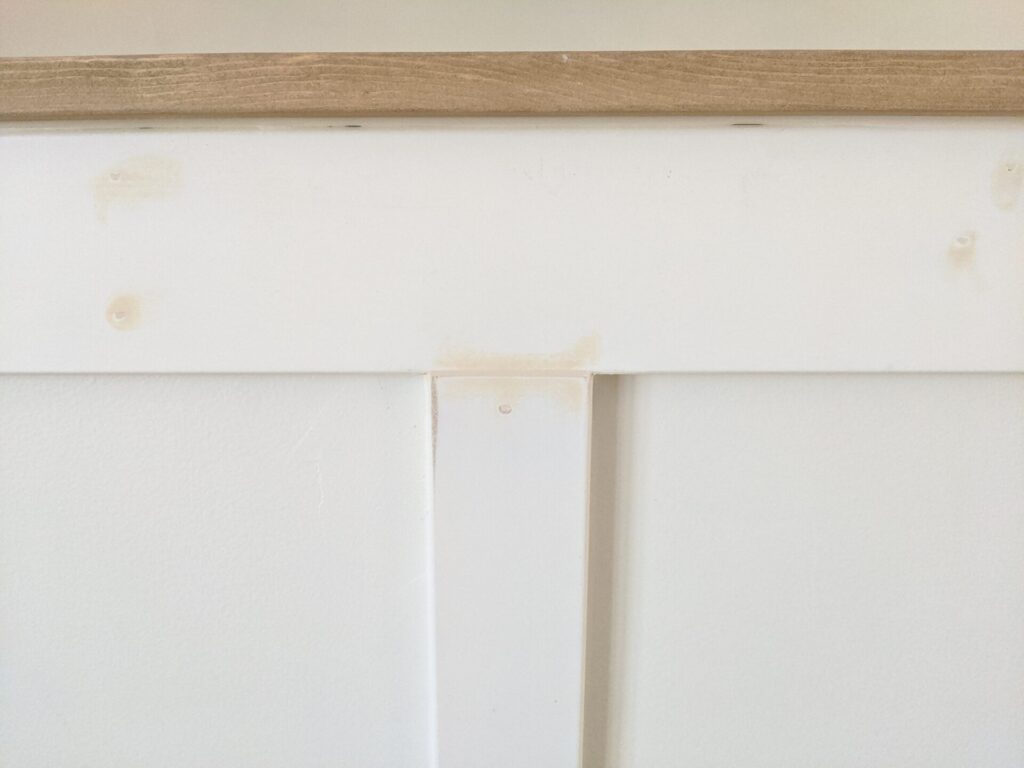
Then it was time to seal all the holes and joints.
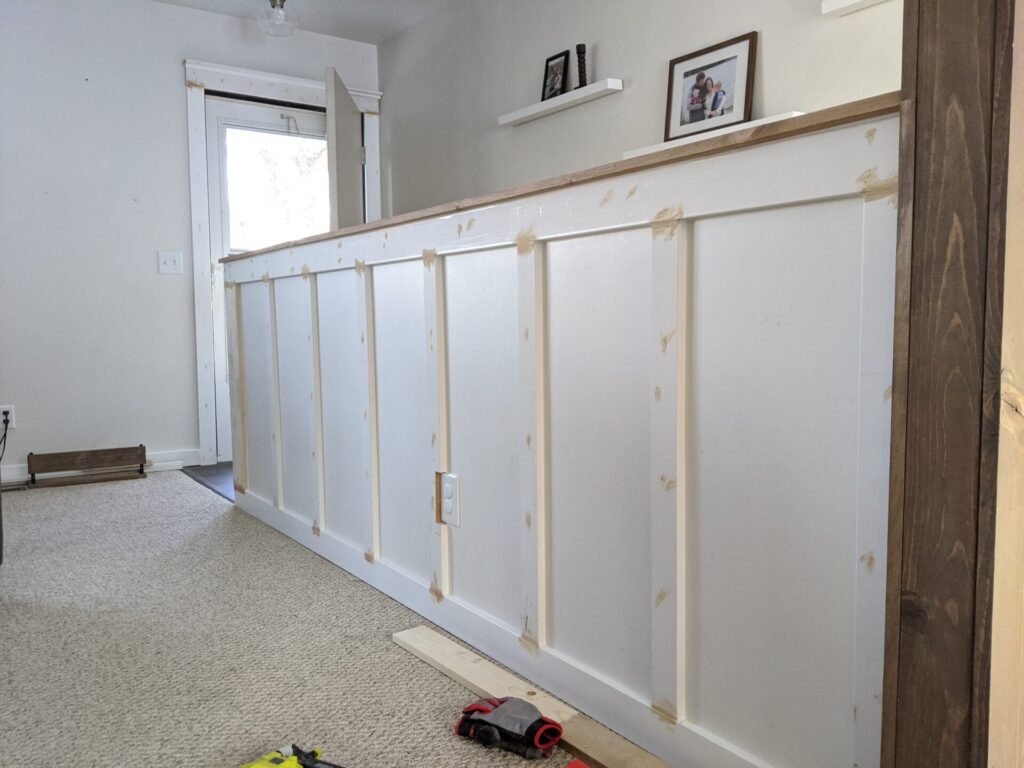

I used wood filler on all the joints between trim boards, as well as nail holes.


I caulked all the joints between trim and drywall.
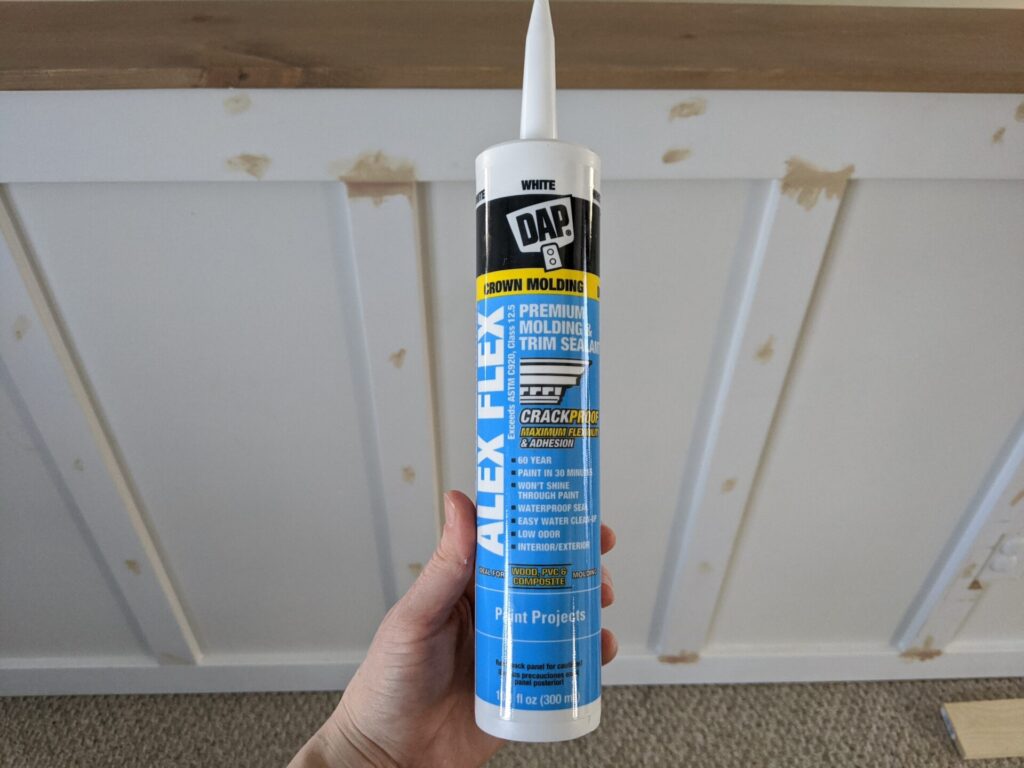
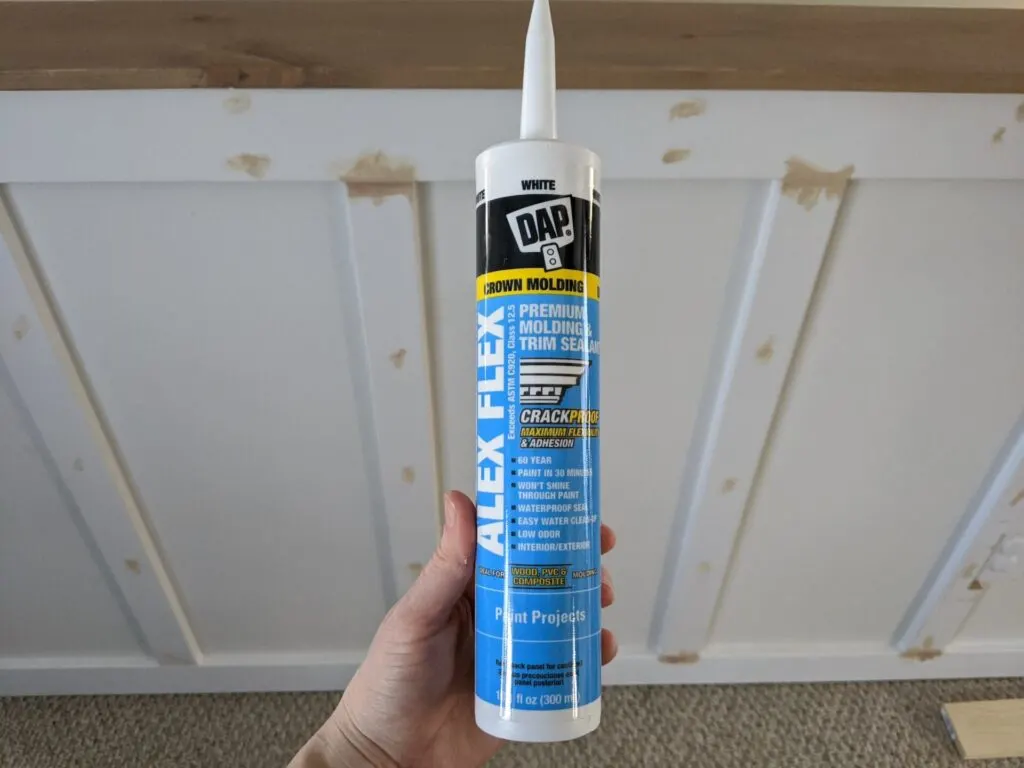
MAKE SURE TO USE PAINTABLE CAULK!
I’ve had really good luck with this stuff all over our house:
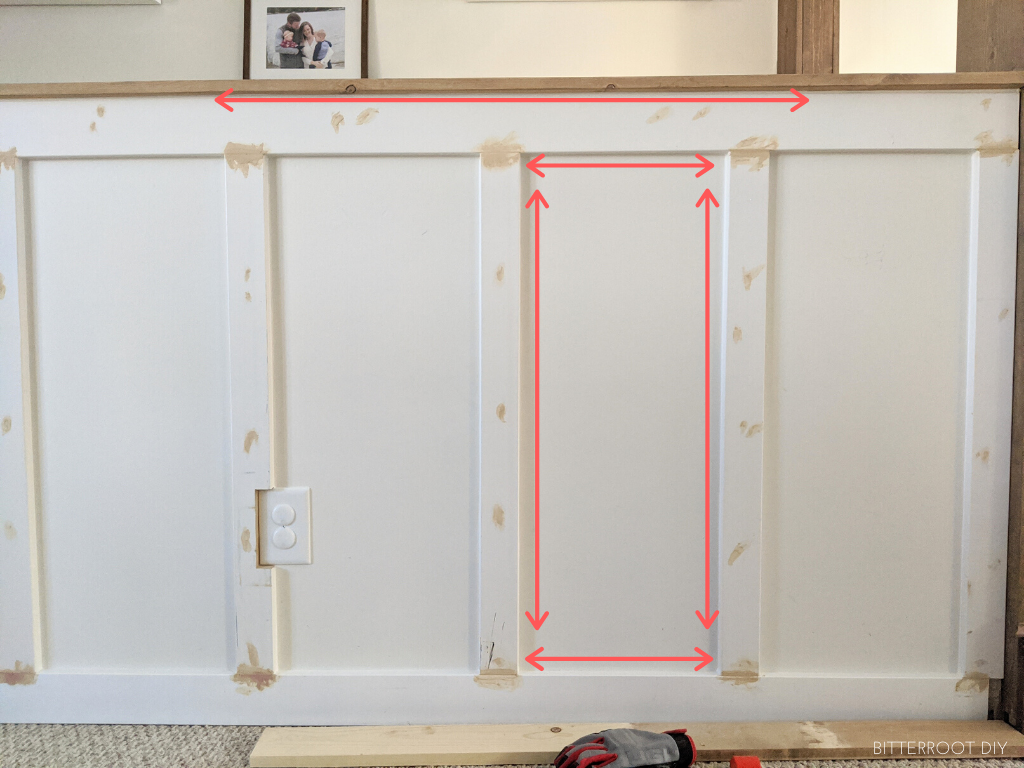
For a little better visual on what to caulk vs wood fill, here’s a little diagram. The red lines are seams to caulk. The rest of joints are wood filler:

After the wood filler dries, sand smooth. I like to use a sanding sponge for wood filler along trim. It works faster than just holding a piece of sandpaper and gives you a really smooth finish.
Step 6.
Once you’ve sanded all the wood filler and sealed all the seams with caulk, you’re ready to paint!
I used a small angle brush to cut in along all the edges that the roller couldn’t reach and a fine finish foam roller to roll the rest of it. The high density foam rollers are GREAT for painting trim. I use them every time I paint trim and have been happy with how smooth the finish is. You can find them at any home improvement store if you prefer that to Amazon (linked above).
I used the same paint for this wall that I’ve used for all the trim in our house – Sherwin-Williams Emeral Urethane trim enamel in “Extra White”. It’s the perfect white trim color and dries super hard so it’s easy to clean. It’s also self-leveling … which is basically magical when you’re using a brush and roller.
Step 7.
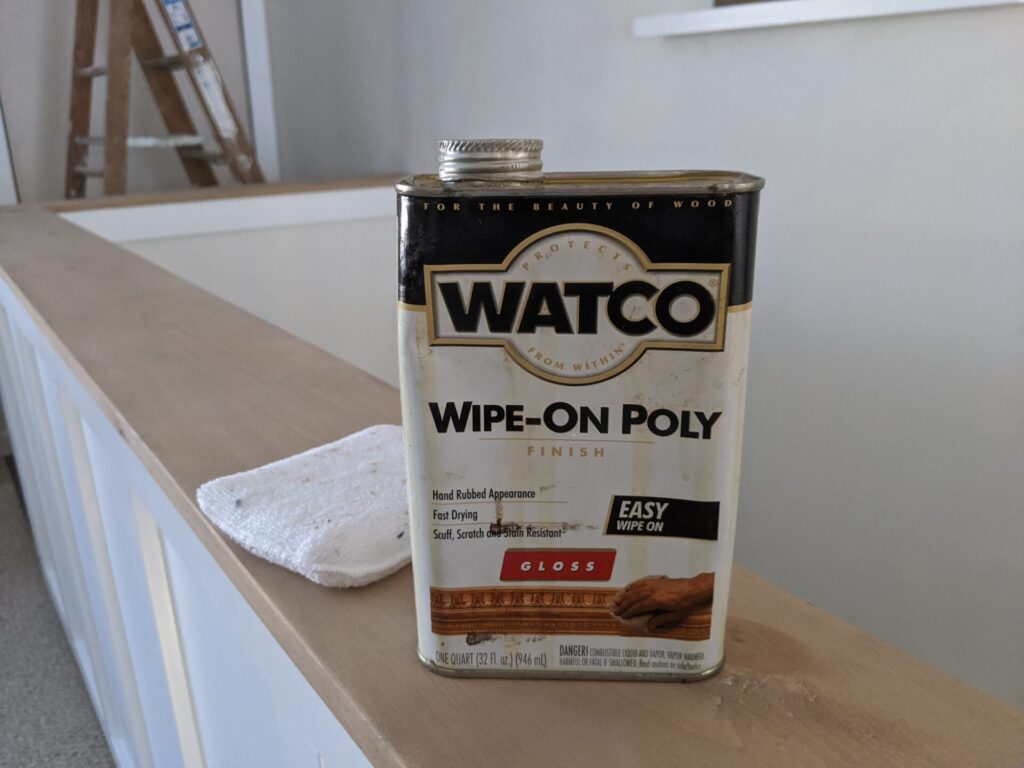
I sealed the top 1×8 with glossy wipe-on poly. I applied 3 coats and used 220 grit sandpaper between each coat for a super smooth finish (available at most home improvement stores).

Step 8.
Lastly, I ran one more bead of caulk between the top 1×4 trim and the 1×8 cap to really make the joint disappear.
And there you have it!

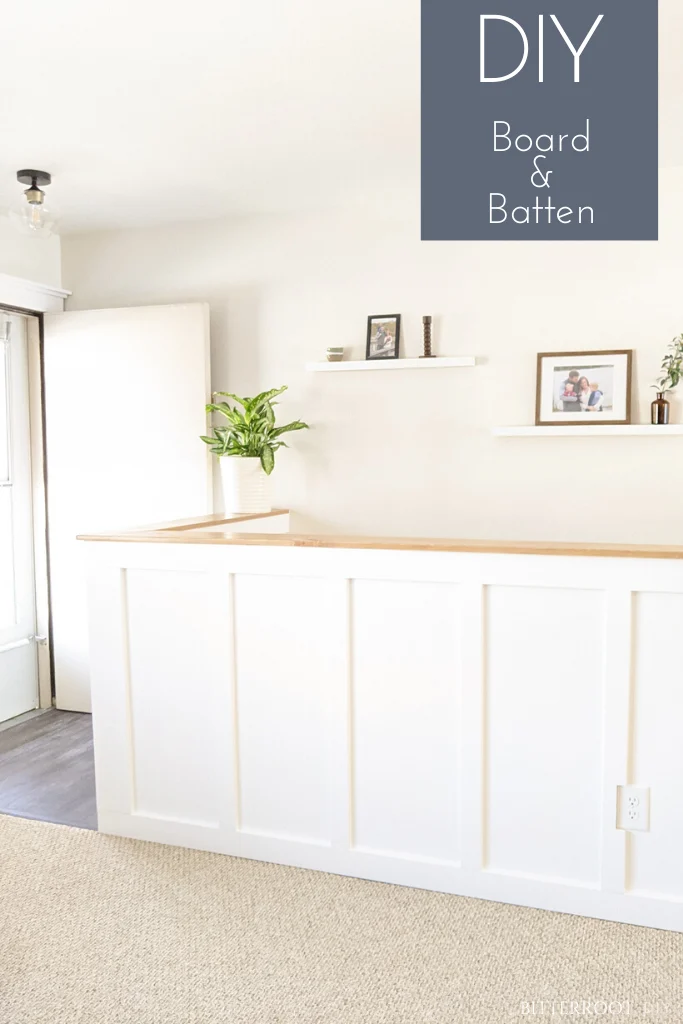
I can’t believe the difference – what a transformation.
**Update: head over to see the full DIY entryway final reveal!
Please let me know if you have any questions and I’ll get back to you as soon as possible!


Thanks for stopping by!
For more project ideas, you can find me on Pinterest. And to stay up to date with the latest shenanigans, follow me on Instagram.