
Plans and a tutorial to build your own DIY end table.
This post contains affiliate links. If you make a purchase from one of the links, I may make a small commission at NO EXTRA COST to you. This helps keep the tutorials and plans free here at Bitterroot DIY. Thank you for your support! See my full disclosure here.
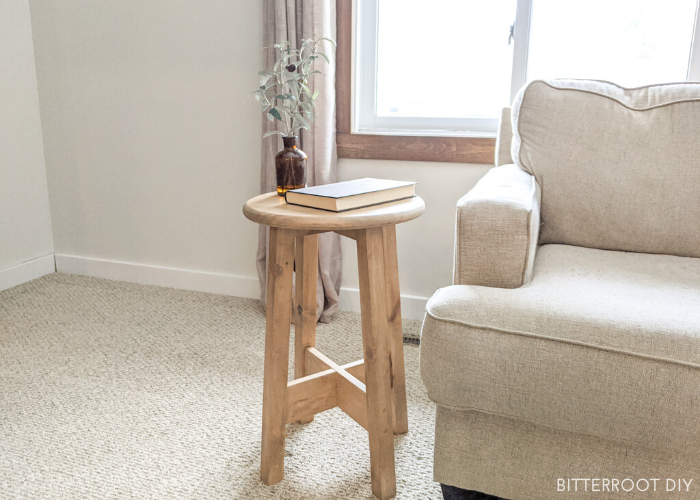
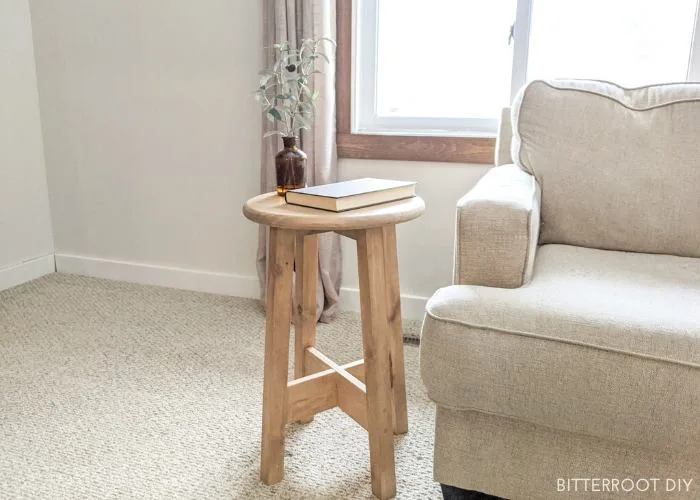
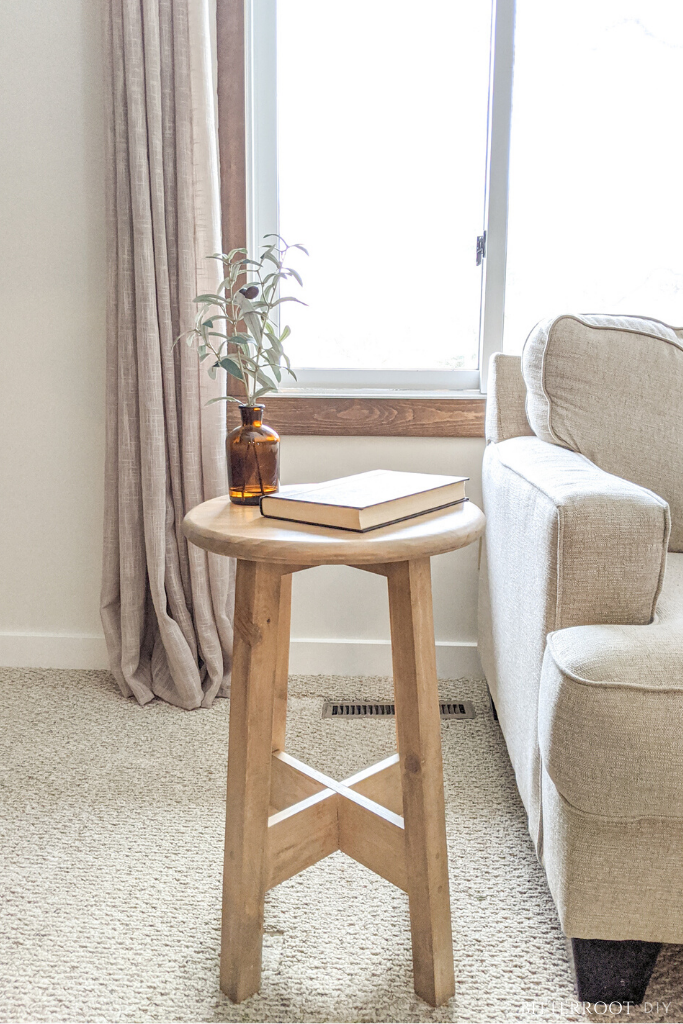
Table #2 of the four-table DIY end table extravaganaza! In case you missed it over on Instagram, we’ve been considering new end tables for our living room but couldn’t decide on a style, so I just went ahead and built a few! Here’s the second design – a criss cross DIY end table.
Enjoy the plans!
TOOLS & SUPPLIES
- Miter Saw
- Drill
- Countersink Bit (or I have this bit set from Home Depot and it has one in it!)
- Kreg Pocket Hole Jig
- 2 1/2″ Pocket Hole Screws
- 2″ Wood Screws
- 3/4″ Corner Braces (optional)
- Tape Measure
- Clamps
- Wood Glue
- Pre-Stain
- White Wash Stain
- Early American Stain
- Water Based Polyurethane in Glossy
- Stain Pads
- Polyurethane Brush
- Speed Square
- Pencil
- Safety Glasses
- Ear Protection
Lumber:
- 2 | 2 x 2 @ 8′ (you’ll have quite a bit of extra)
- 1 | 1 x 4 @ 6′
- 1 | 1″ x 15″ Edge Glued Pine Round (available at Home Depot or Menards)
Cuts:
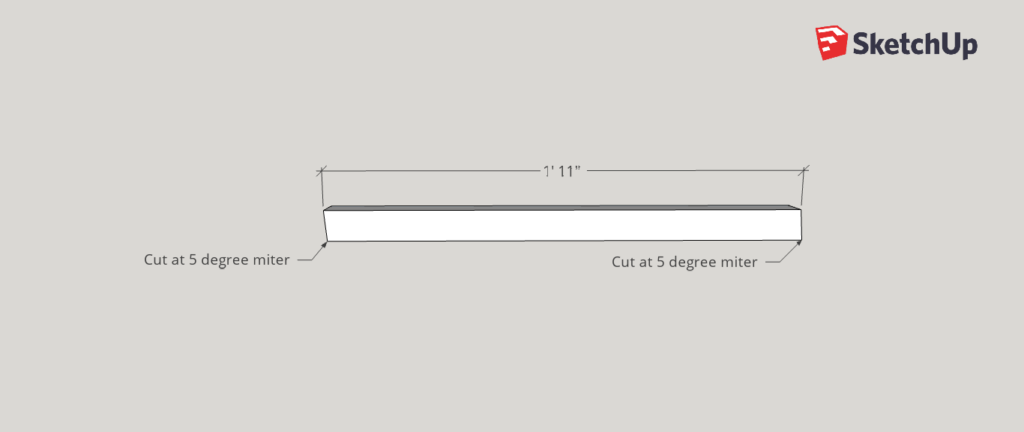
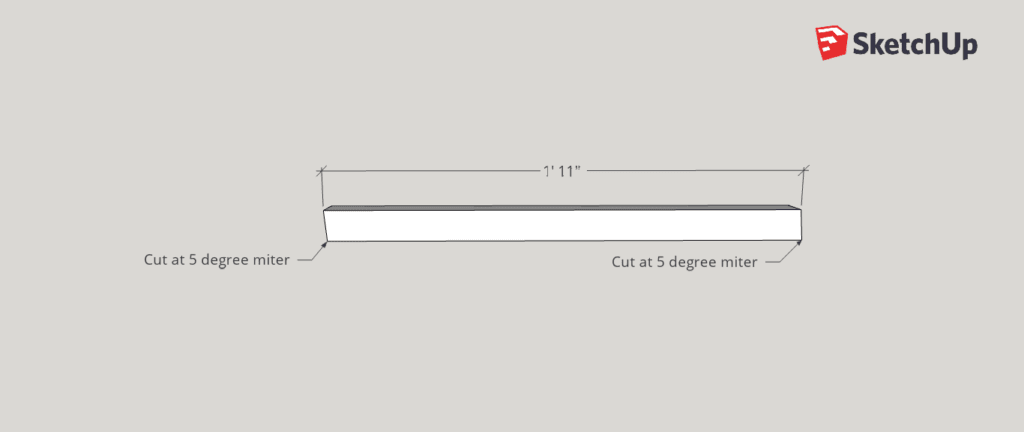
- 4 | 2 x 2 @ 23″ with 5 degree miter (legs)
- 2 | 2 x 2 @ 6″ with 5 degree perpendicular miter (top frame)
- 2 | 1 x 4 @ 8 7/8″ with 5 degree perpendicular miter (criss cross)
DIY End table Leg Cuts:
diy end table Top frame cuts:
Once you cut the top frame 2x2s to length, cut a 1 1/2″ half lap in the center of each. I used my miter saw to cut them, but you can also use a circular saw or router.
**In case you missed it, I shared a tutorial to cut half laps with a miter saw over on my Instagram page – make sure to head over there for more tips and tricks like this!
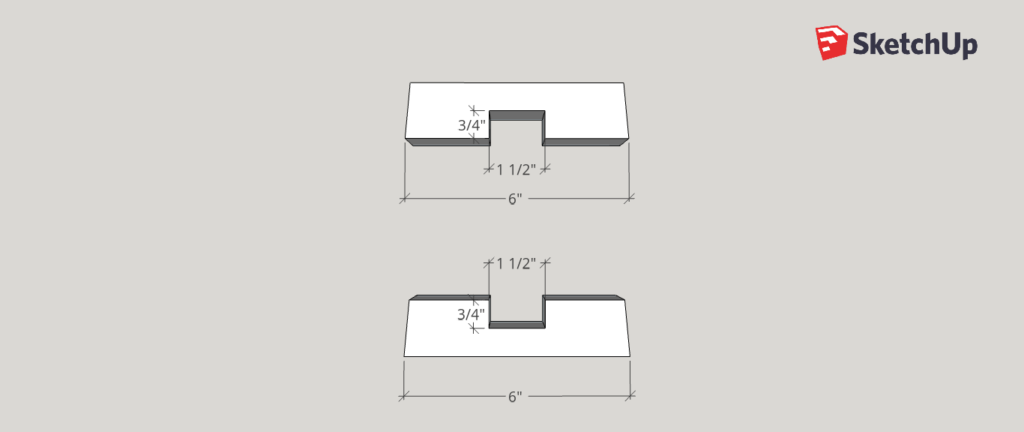
To help visualize, the half laps fit together like this:


If you do not feel comfortable cutting half laps, you can cut each board into two separate pieces and use pocket holes to put them together. I cut half laps since the boards are so short and it gets difficult to drill all the pocket holes.
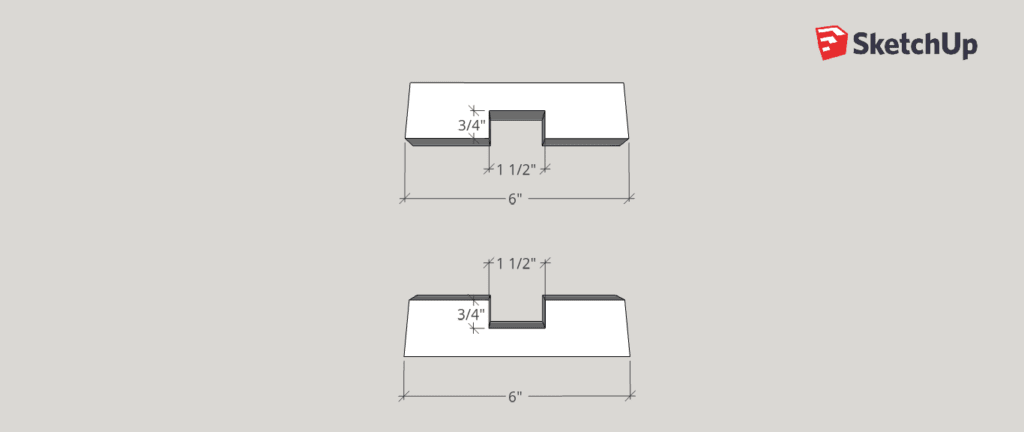
diy end table Criss Cross Cuts:
Once you cut the 1x4s to length for the criss cross, cut 3/4″ half laps in the center of each as shown below.
Again, I used my miter saw to cut them, but you can also use a circular saw, table saw, jigsaw, or router (lots of options!). I just held the 1×4 vertically against the fence, set the blade depth stop, and cut little by little.


The criss cross goes together like so:


Step 1.
After you’ve finished all the cuts, assemble the first frame as shown. Attach the top 2×2 to the legs with wood glue and 2 1/2″ pocket hole screws. Drill two pocket holes on each end of the 2×2 for a strong joint to the legs. Place pocket holes on the top side of the 2×2 to hide them – you’ wont be able to see them once you attach the tabletop.


Repeat to build the second frame:


Again, drill two pocket holes on each side of the top of the 2×2 and attach to the legs with wood glue and 2 1/2″ pocket hole screws.
Step 3.
Apply wood glue to the half laps and put the frames together as shown below.


Step 4.
Apply wood glue to the 1×4 half laps and put the boards together to form the criss cross.
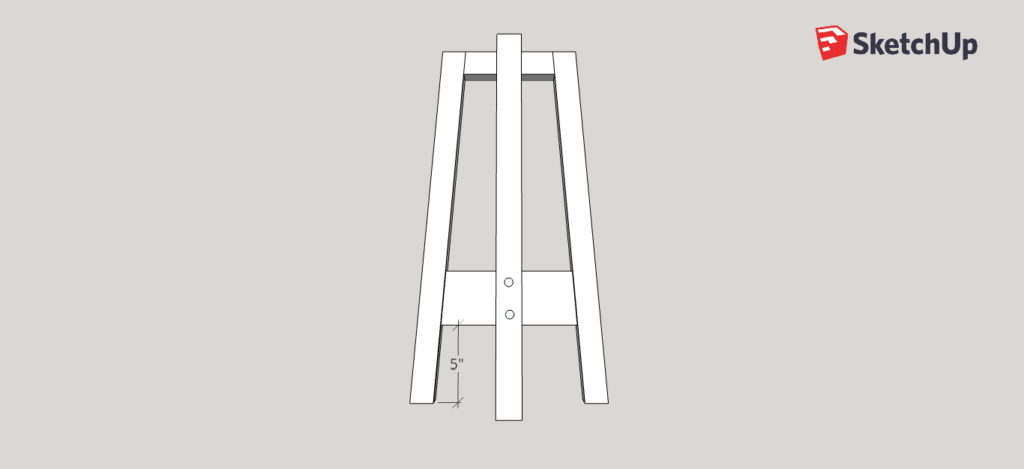
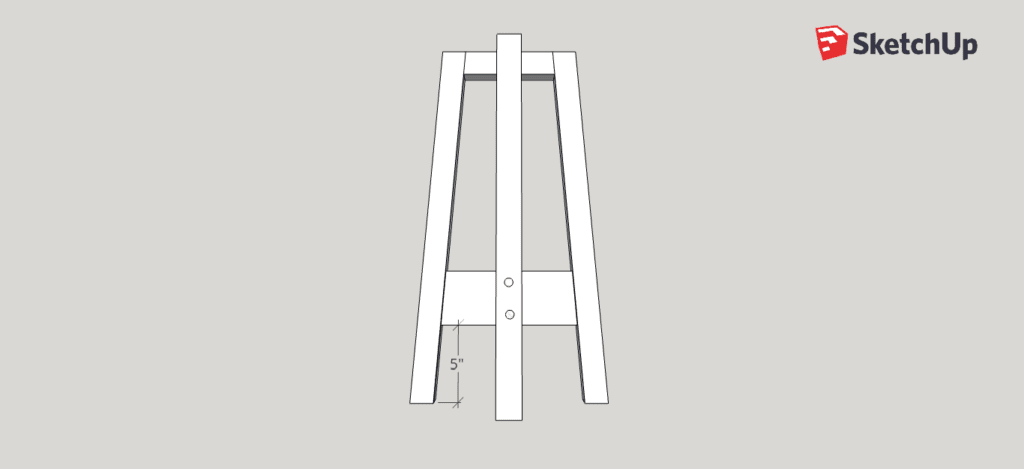
Mark a line 5″ up in the center of each leg. Apply wood glue to the ends of the criss cross 1x4s, center it on each leg on the 5″ mark, and clamp in place.


Pre-drill through each leg into the top and bottom on the ends of the 1x4s. After you pre-drill the holes, follow up with a countersink bit on each. Drive 2″ screws directly through the legs into the ends of the criss cross on all four sides. Sink the screws into the countersink you drilled and fill it with wood filler (or you could do wood or brass plugs for a cool accent).
I did not use pocket holes here because the drill and bit are too long to fit inside the criss cross. However, if you have a right angle drill attachment, you can probably get away with it.
I just filled the holes with wood filler and you’d never even know they’re there!
Step 5.
I used a 15″ edge glued pine round from Home Depot for the top, but feel free to make your own if you prefer.


Sand and stain before attaching the top to avoid having to work around so many corners.
I stained this table with my latest favorite stain combination – prestain, white wash pickling, and early american.

Last, but not least – attach the top!
There are a lot of different ways to attach tabletops, but I go back and forth between small 3/4″ corner braces, figure 8 fasteners , or just screwing it directly in from the bottom. I used 3/4″ corner braces for this one.
Please let me know if you have any questions and I’ll get back to you as soon as possible!


Thanks for stopping by!
For more project ideas, you can find me on Pinterest. And to stay up to date with the latest shenanigans, follow me on Instagram.


Holly Hold
Tuesday 1st of September 2020
Your plans/designs are so beautiful--Zen. Thank you!!!