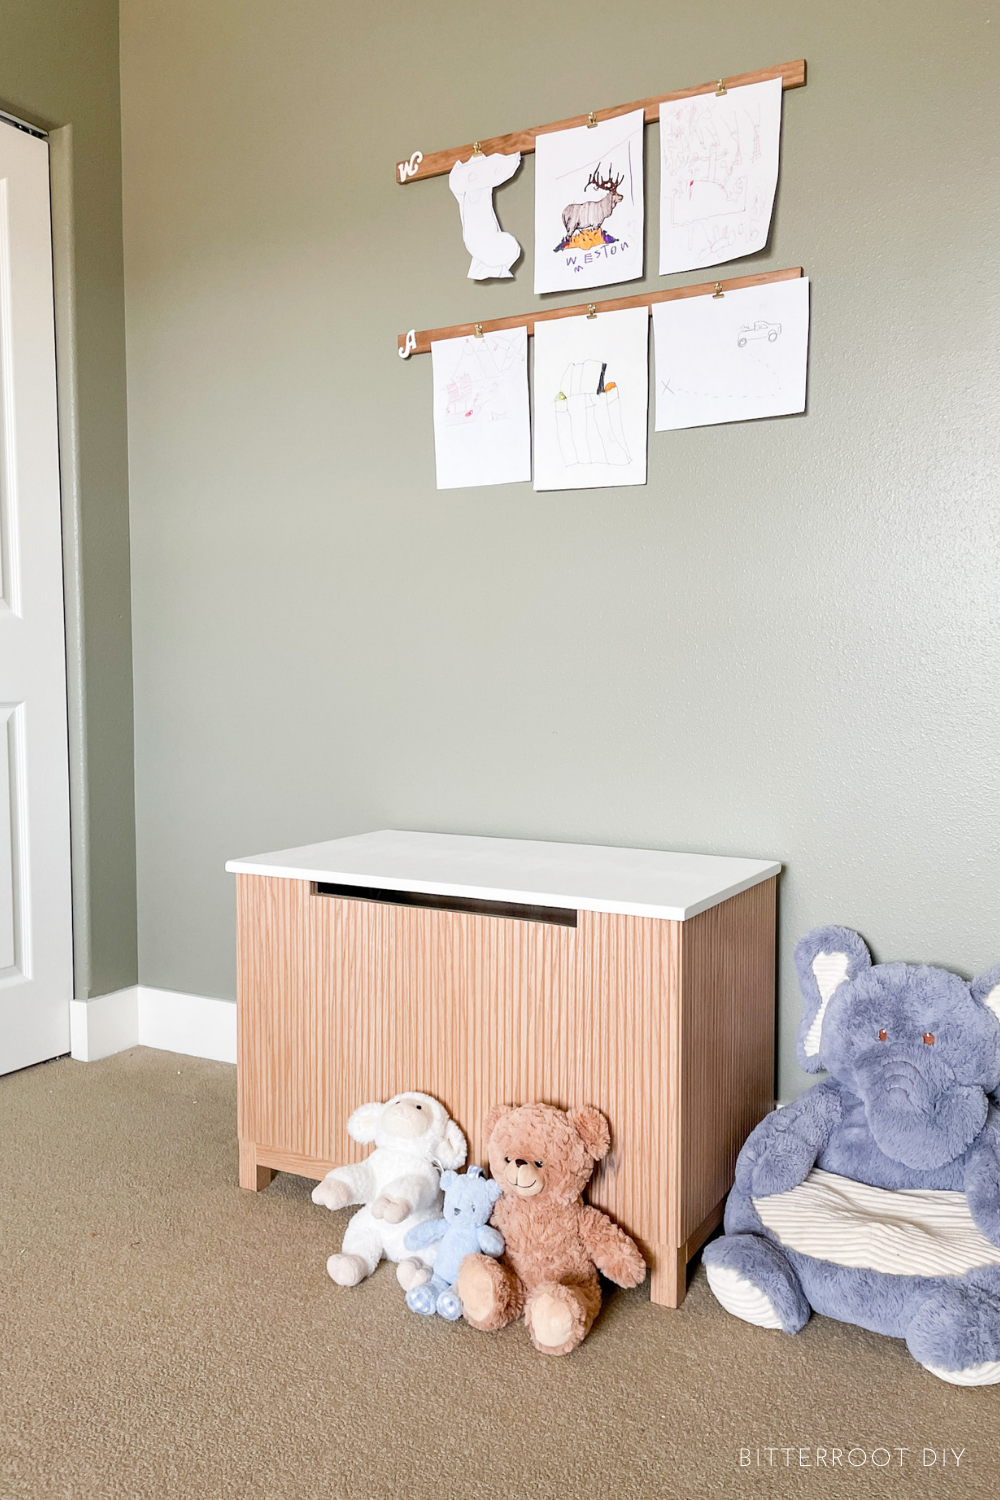
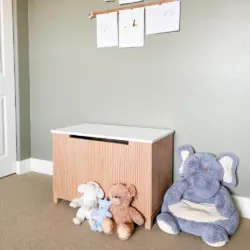
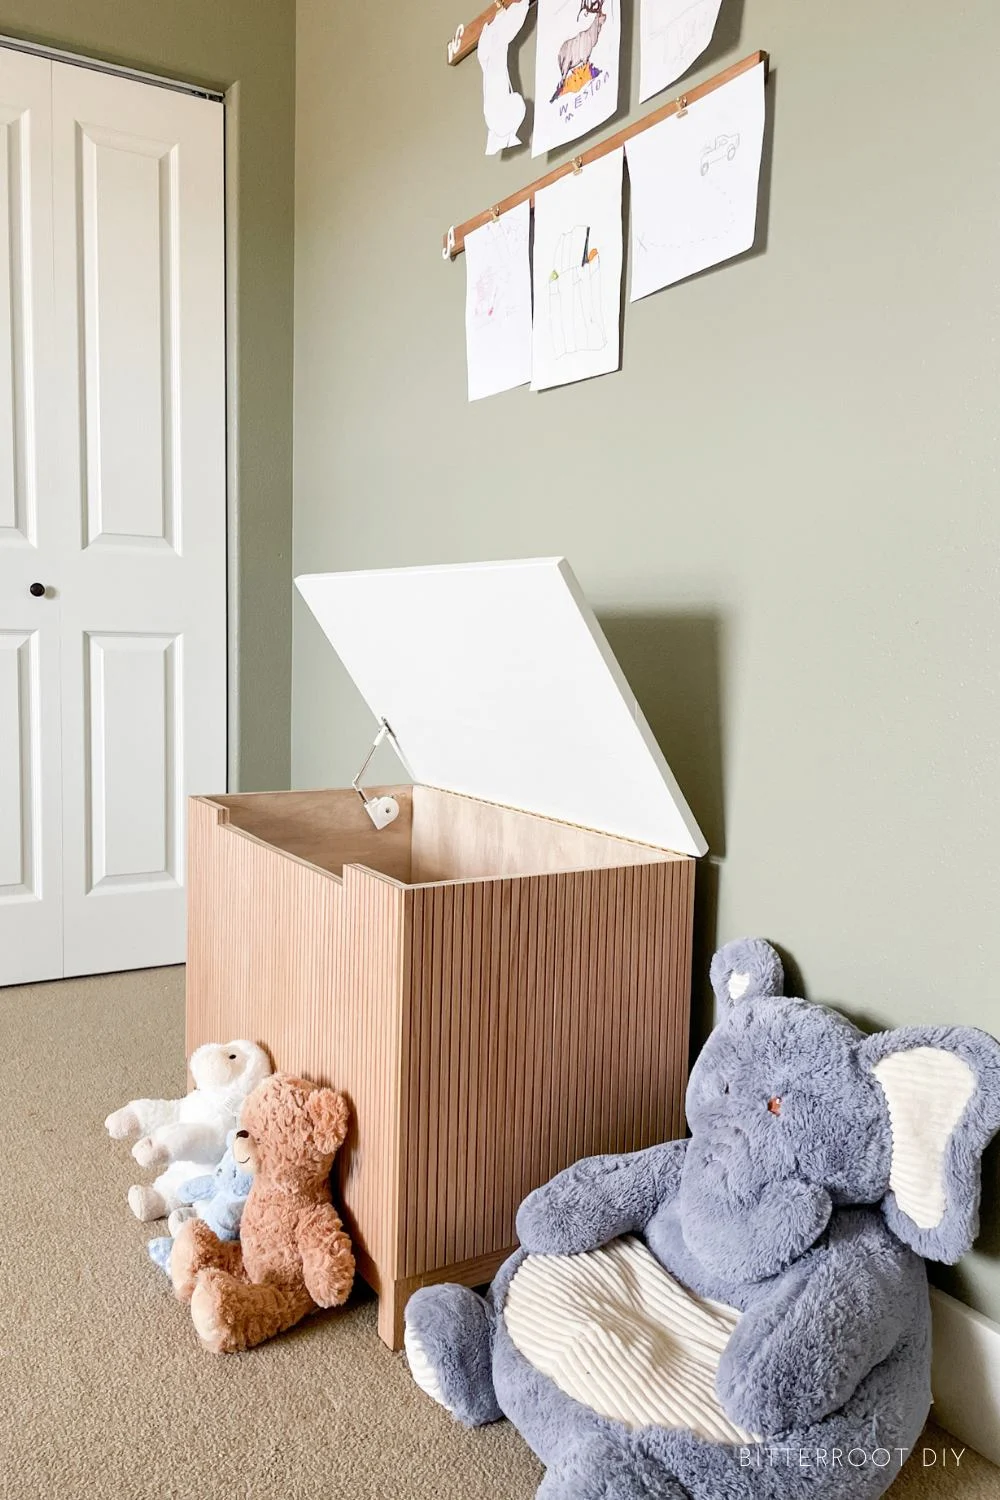
Store toys in style with this fluted kids toy box.


This post contains affiliate links. If you make a purchase from one of the links, I may make a small commission at NO EXTRA COST to you. Thank you for your support! See my full disclosure here.
- Soft Close Lid Stay
- Piano Hinge
- Paste Wax (if you use hardwood 2x2s)
- Construction Adhesive
- Red Oak Pole Wrap
- Edge Glued Panel (optional for the lid)
- Kreg Pocket Hole Jig (there are a lot of models, depending on your budget)
- Miter Saw
- Orbital Sander
- Drill
- Tape Measure
- Wood Glue
- 2 1/2″ Pocket Hole Screws
- 1 1/4″ Pocket Hole Screws
- Pipe Clamps (optional)
- Level
- Speed Square
- Pencil
- Safety Glasses
- Ear Protection
The lumber and cut lists for this fluted DIY kids toy box are available for purchase. Your purchase also includes a downloadable PDF of the plans. If you prefer, the plans are available for free in the post below – you simply have to calculate the lumber and cut lists yourself.
-

 Fluted Kids Toy Box$1.99
It’s the endless quest – how/what/where to store all those toys without throwing off the room aesthetics. Shelves with baskets look nice, but I’ve never had much luck with them in action. No matter what, the toys get mixed up and the kids get overwhelmed having to sort them while picking up. I do try to keep toys to a reasonable number and declutter regularly, but you know how it goes. A toy box has always worked best for us so the kids can just pile everything in, but they can sure be an eyesore in an otherwise cute room. What to do, what to do.
My goal was to come up with toy storage that is both efficient (for the kids cleaning up by themselves) and looks nice in their new woodland forest room. Fluted furniture – fluted E’RRYTHING – is making a big comeback. It’s classic, modern, and very woodland forest-y.
So here you have it – a fluted toy box for both form AND function.
Enjoy the plans!
You can also check out the video tutorial over on my YouTube channel.
Step 1.
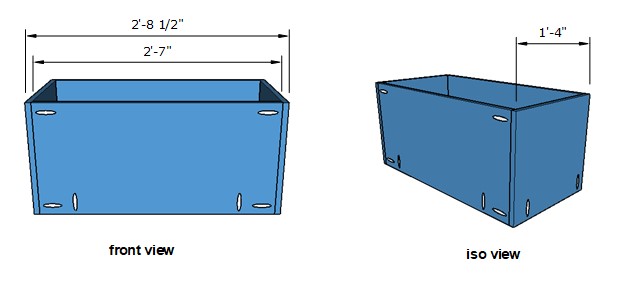

Pre-drill all pocket holes before beginning assembly.
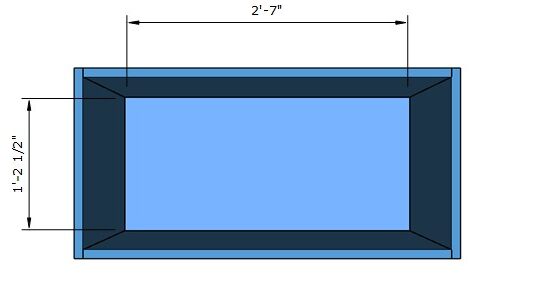
Use wood glue and 1 1/4″ pocket hole screws to assemble the box as shown. Use a speed square to make sure the box is perfectly square.
Don’t worry about the pocket holes on the bottom of the panels – you’ll use them in Step 4 to attach the box to the legs.
Step 2.


Build the two sides of the leg frame. Use wood glue and 2 1/2″ pocket hole screws. Place pocket holes along the top of the 2x2s so they’re hidden once you attach the box on top.
I used red oak 2x2s for the legs to match the fluting, but any type of 2x2s will work. If you use a hardwood, I recommend coating the screws with paste wax before driving them to avoid breaking the screws and/or boards.
Step 3.


Complete the legs by attaching the front and back 2x2s with wood glue and 2 1/2″ pocket hole screws.
Step 4.

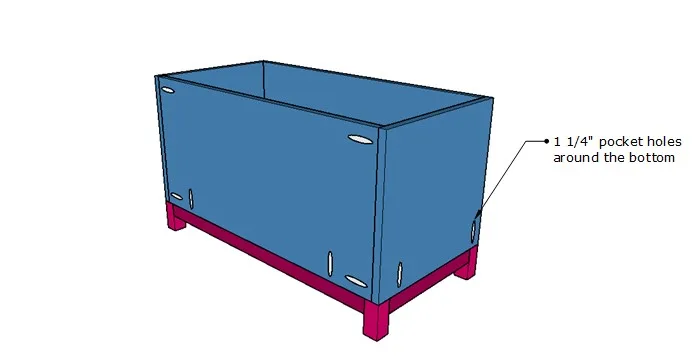
Attach the toy box frame to the legs with wood glue and 1 1/4″ pocket hole screws.
Step 5.

Apply a bead of wood glue along the exposed portion of the leg frame in the inside of the toy box (should be 3/4″ since it’s flush with the outside edge of the plywood) and drop the bottom panel into place.
Step 6.


Cut the pole wrap to fit, and adhere it to the outside of the toy box with construction adhesive.
Use a utility knife to cut the pole wrap vertically (between fluting). To cut horizontally (across fluting), roll it up tightly and cut to length with a miter saw.
Tape, clamp, and/or use weights to hold the fluting in place until the adhesive dries. Mine took about 24 hours.
Step 7.

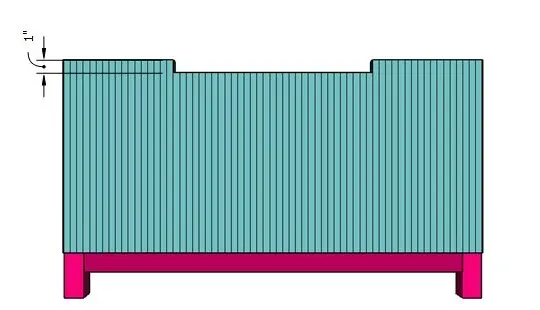
Cut a notch out of the front of the toy box to prevent any finger smashing. Cut it 1″ deep and approximately 15″ wide. Adjust the dimensions and center it based on how your pole wrap lines up. It doesn’t have to be perfect – just start and end it between flutes and make it as wide as you like. I used a jigsaw, but cut however you see fit.
Sand any rough edges along the fluting.
I just used a small piece of 200 grit and hand-sanded along the ends of the fluting where they splintered a bit from cutting. Then I sealed the toy box with clear satin polycrylic.
Sand and paint (or stain) the lid before attaching in the next step. If you paint it, make sure to use a shellac based primer first to block the knots and any sap spots from seeping through the paint.
I sealed mine with Zinsser shellac based primer and painted it with Benjamin Moore White Dove interior trim paint.
Step 8.
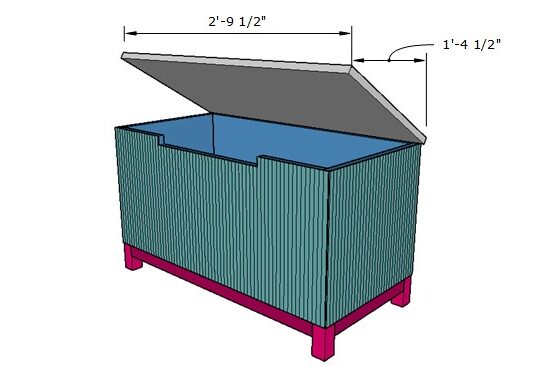
Position the lid so it is centered from side to side and flush with the back of the toy box and secure it with a long piano hinge along the back. I used a premade edge glued panel from Lowes, but you can make your own if you prefer.
Attach the soft close lid stay to the inside.
The instructions were not super clear on the lid stay, so here is the placement that worked for me:
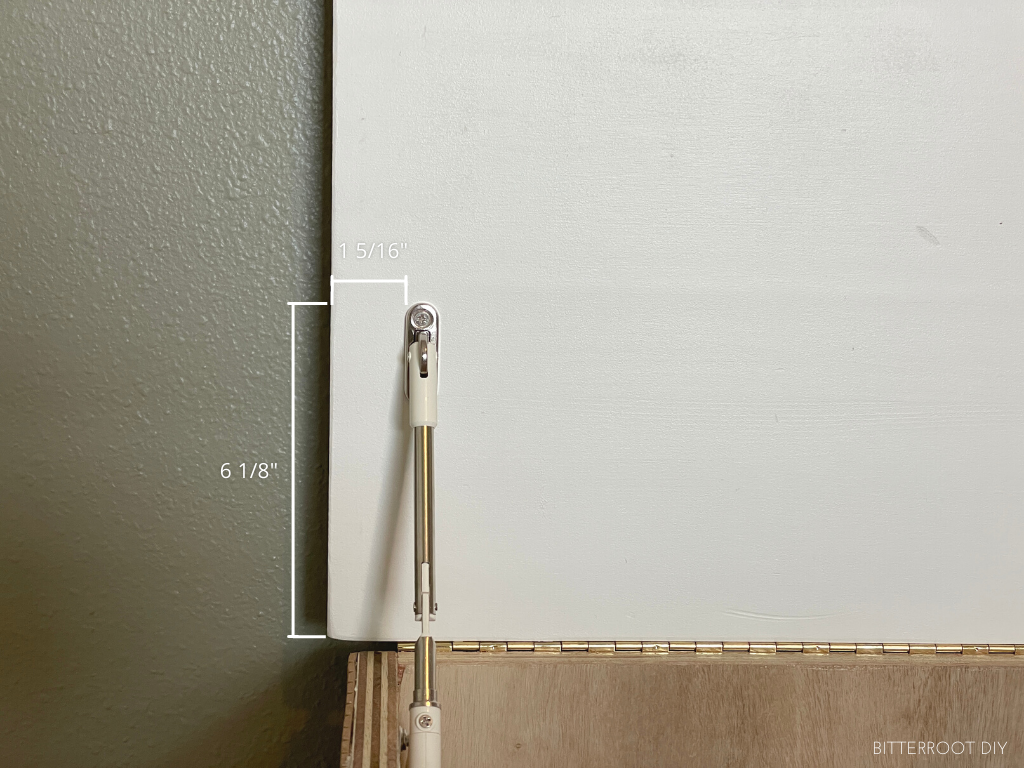

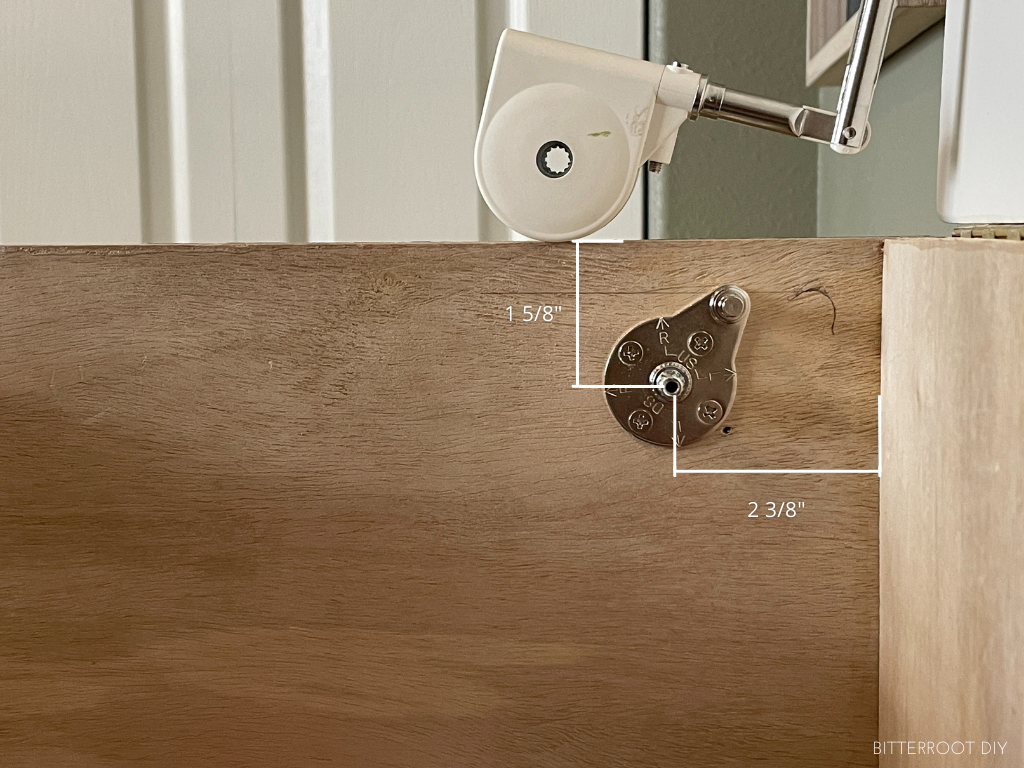
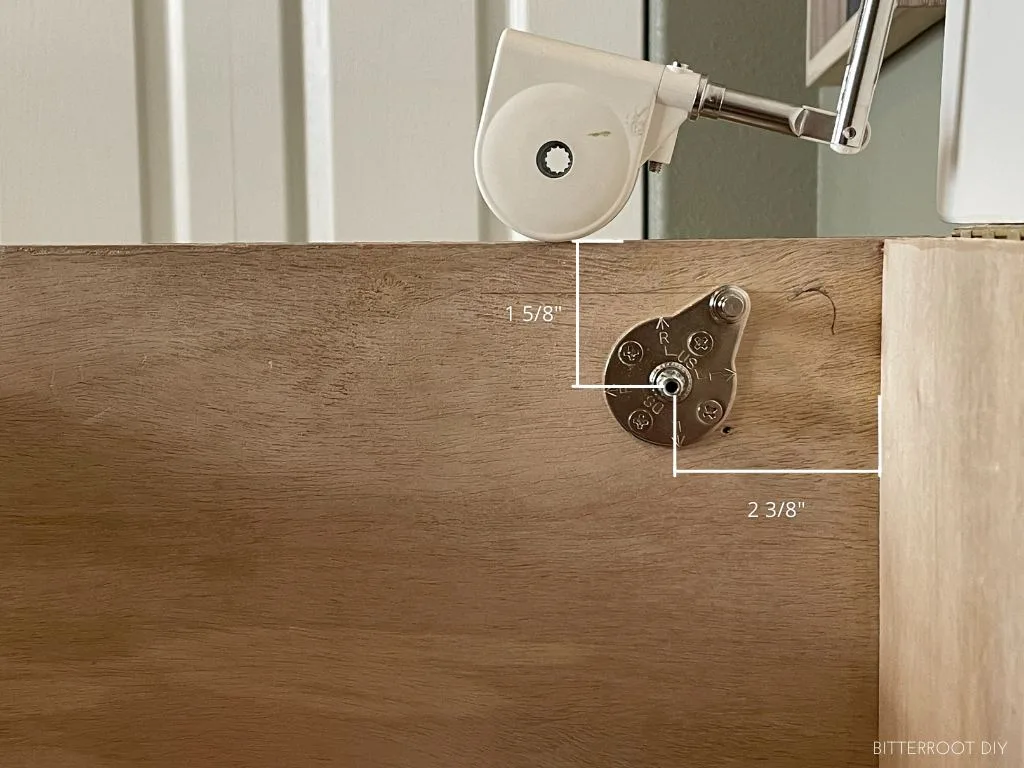
See my YouTube video for more information.

I’d love to see your take on this fluted kids toy box! Tag me over on Instagram @bitterrootdiy or shoot me an email at bitterroot.diy {at} gmail.com if you build it!
As always, please let me know if you have any questions and I’ll get back to you as soon as possible.
– Tylynn S