
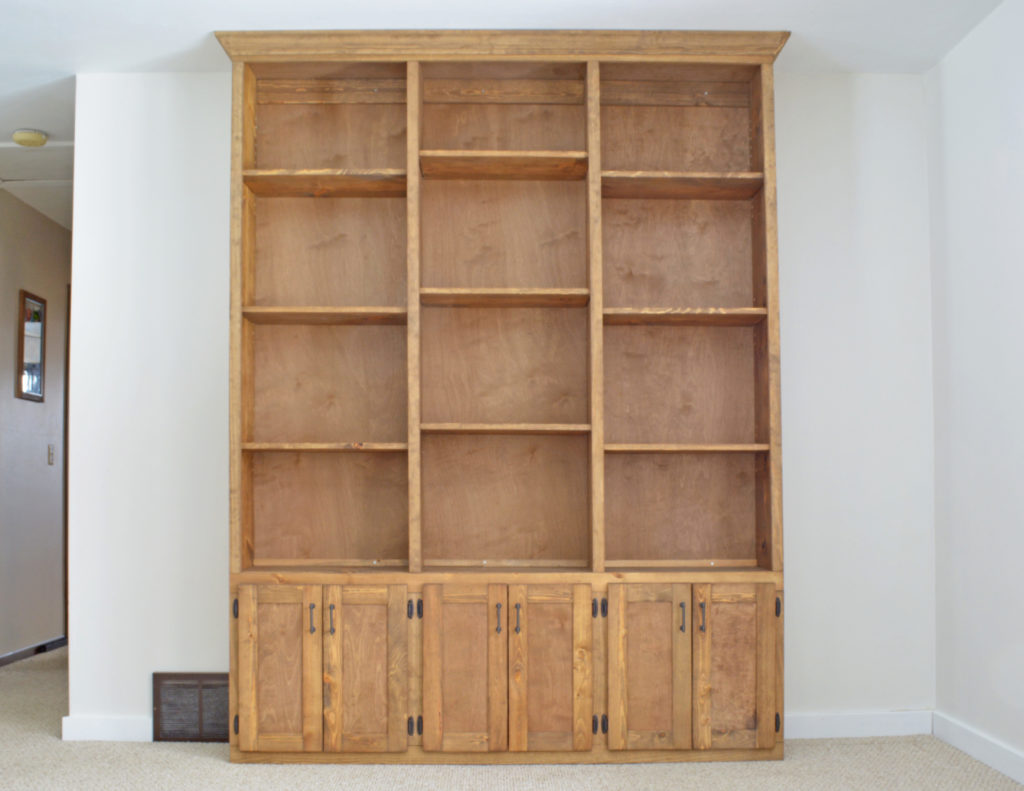
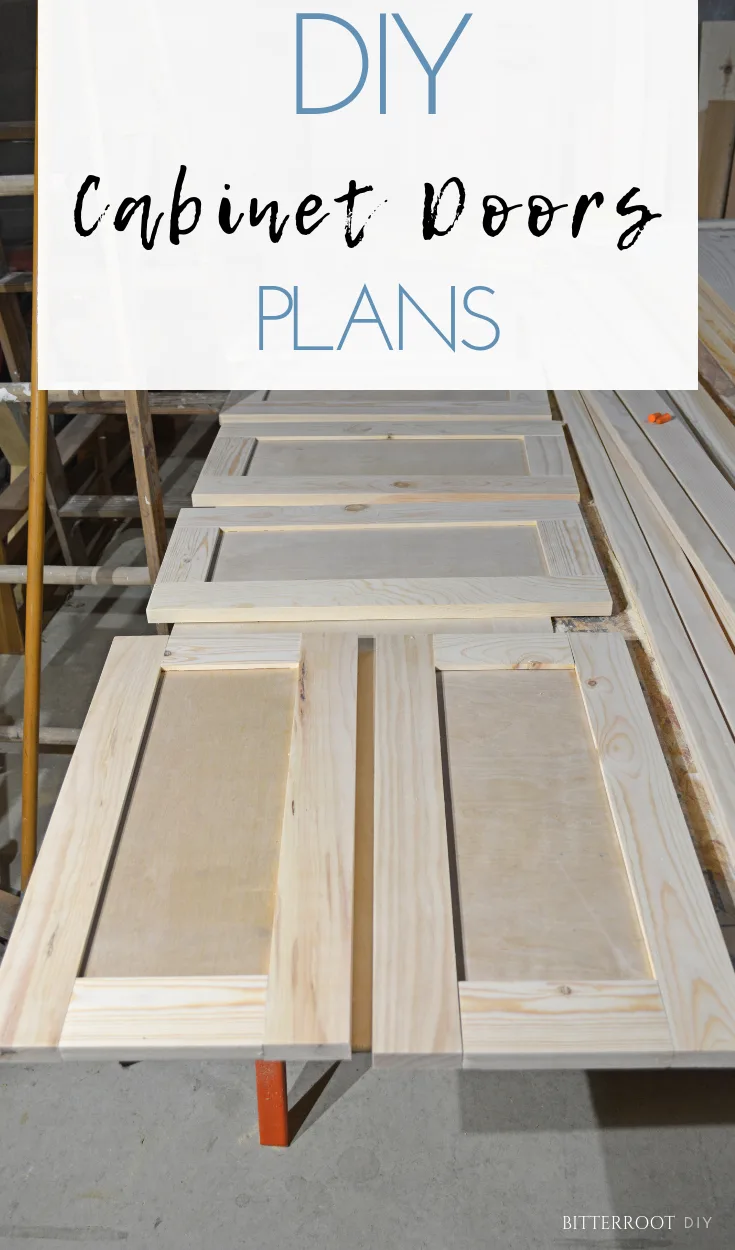
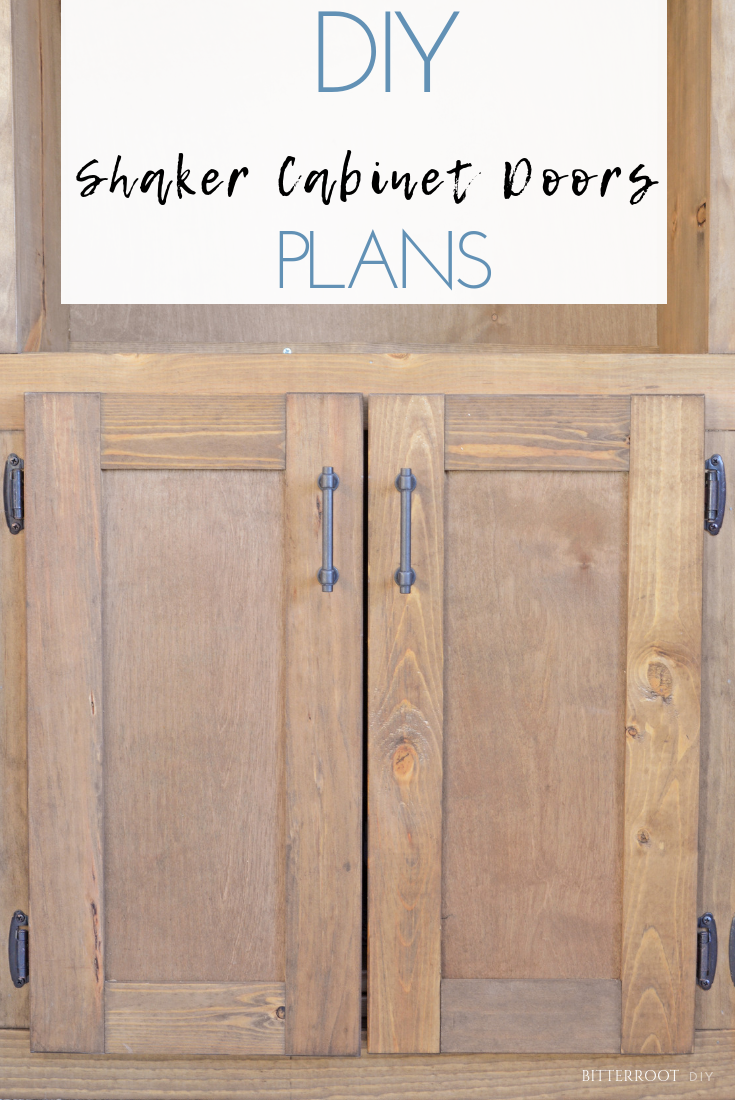
In my latest project, a built-in bookcase for the living room, I made my first attempt at building shaker cabinet doors. I went back and forth on how to do it, but finally decided on a combination of groove joints and pocket holes. The more traditional method is full tongue and groove joints, but I figured I could come up with something in the middle ground. This method with grooves and pocket holes was super simple and effective AND the doors turned out great! What more could you ask for!?
This tutorial is written for ONE 11″ x 21 1/2″ door.
Enjoy the free plans!


This post contains affiliate links. If you make a purchase from one of the links, I may make a small commission at NO EXTRA COST to you. This helps keep the tutorials and plans free here at Bitterroot DIY. Thank you for your support! See my full disclosure here.
Tools & Supplies
- Router
- Router Table
- 1/4″ Straight Router Bit (that’s what I used) or 1/4″ Groove Bit
- Miter Saw
- Drill
- Kreg Pocket Hole Jig
- 1 1/4″ Pocket Hole Screws
- Tape Measure
- Pencil
- Wood Glue
- Orbital Sander
Lumber:
- 1 | 1 x 3 @ 6′
- 1 | 1/4″ Plywood project panel
Cuts:
- 2 | 1 x 3 @ 21 1/2″ (stiles)
- 2 | 1 x 3 @ 6″ (rails)
- 1 | 1/4″ Plywood @ 6 3/8″ x 16 7/8″ (Center panel. I cut it 1/8″ narrower than the width of the grooves to allow the panel to move as the wood expands or contracts)
Step 1.
Route a 1/4″ groove along the center of the rails and stiles. Cut a stopped groove about 2″ from the top of the stile to 2″ from the bottom of the stile. This prevents any unsightly gaps in the top or bottom of the cabinet door once it’s assembled. For more information on how to cut a stopped groove safely, see this great video from Rockler.
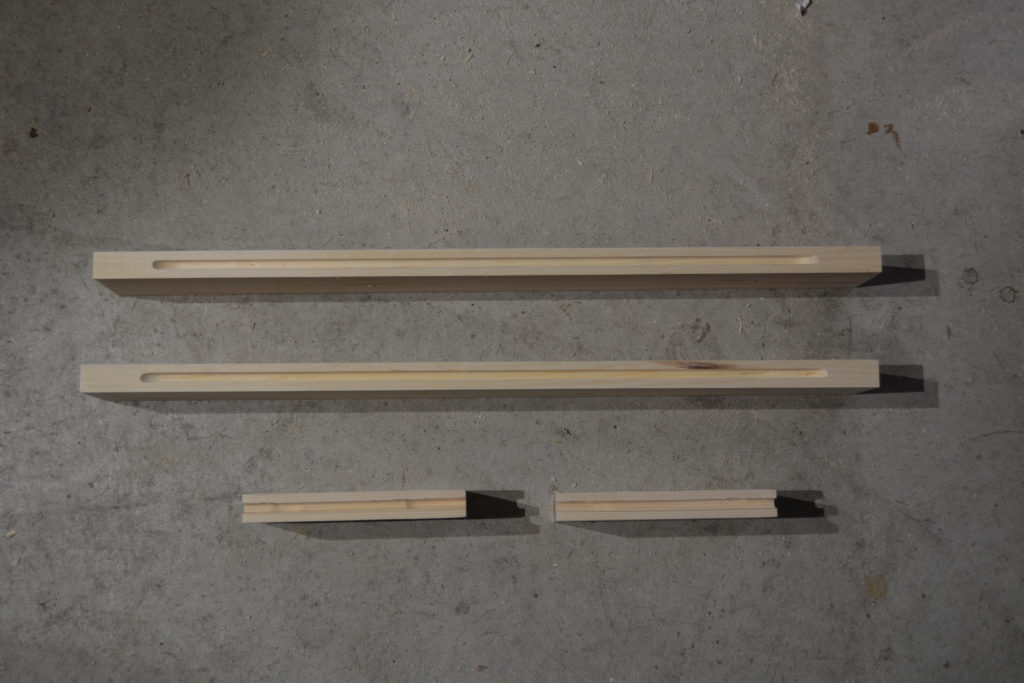

Cut a 1/4″ groove along the full length of the rails.


Step 2.
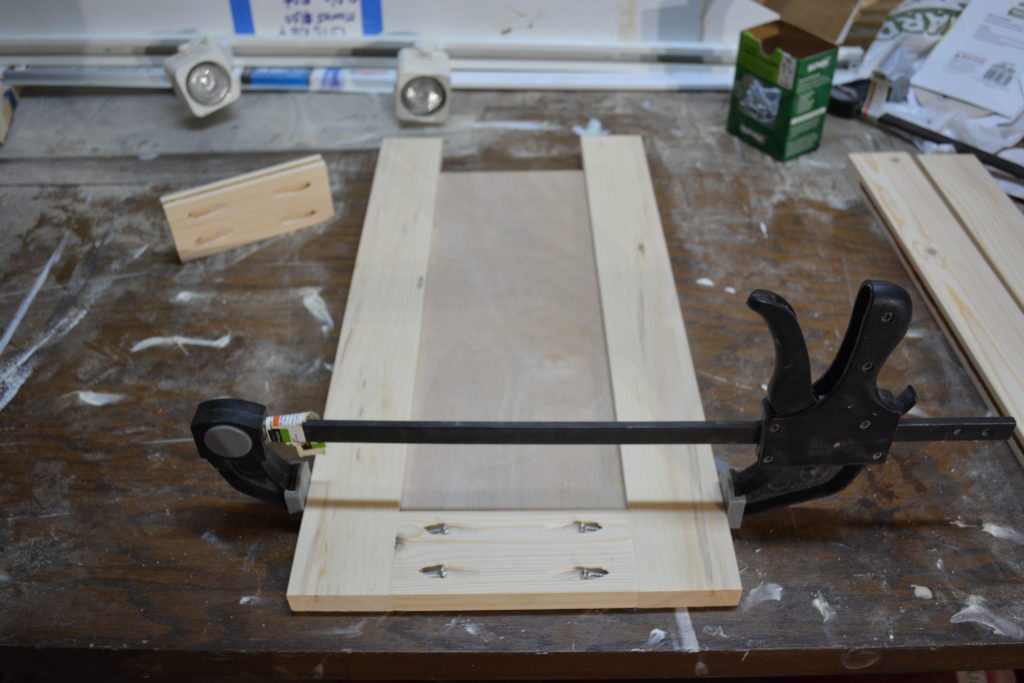
Insert panel into the stiles and bottom rail. Adjust until the stiles and rail are flush. Clamp in place and attach with wood glue and 1 1/4″ pocket hole screws.

Step 3.
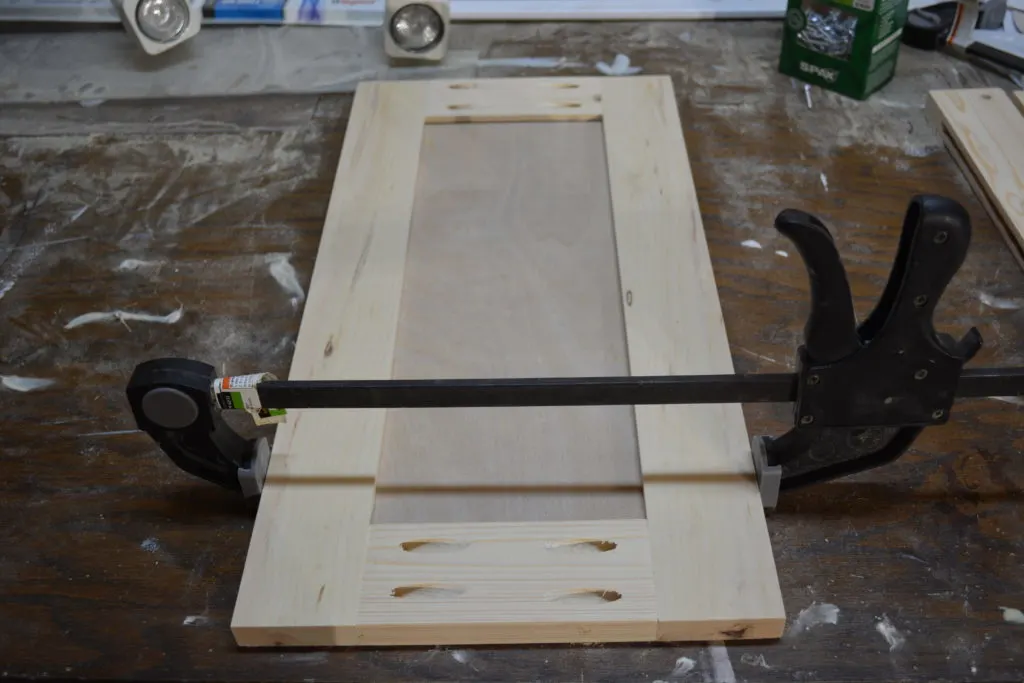
Repeat for the other side of the door. Clamp the rail in place and attach with wood glue 1 1/4″ pocket hole screws.
This is the back of your door:

Wood glue does not take stain, so make sure to remove any wood glue from the surface of the wood.
Flip it over and admire your masterpiece!
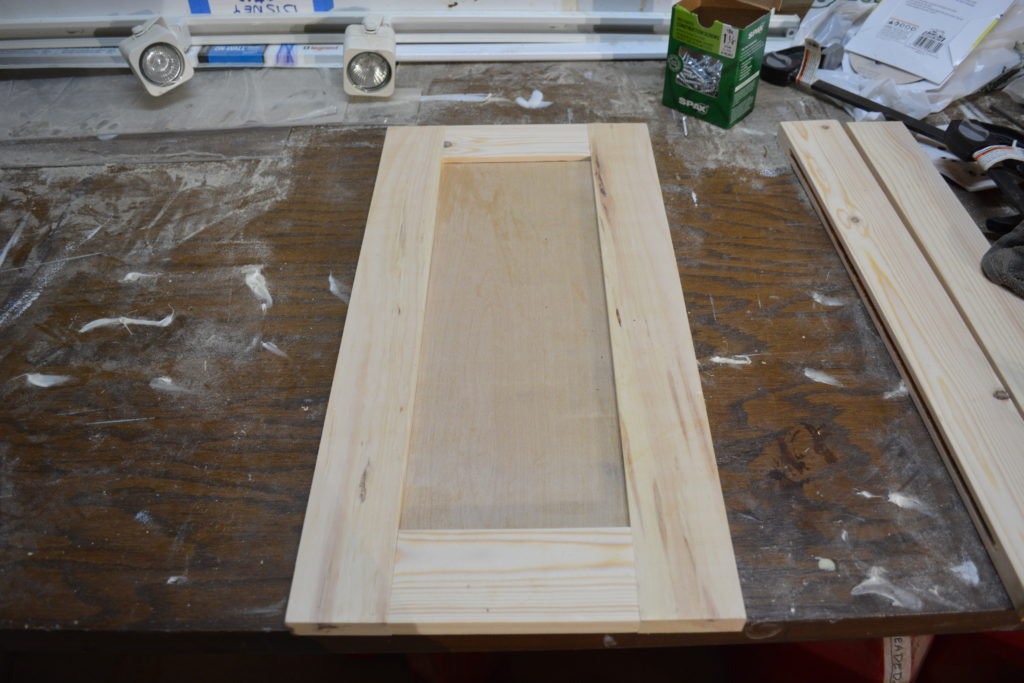

Once the wood glue dries, sand and finish your door as desired.
I stained the doors with Varathane Weathered Wood Accelerator in brown (available at Home Depot) and attached them to my brand new built-in bookshelf!

Please let me know if you have any questions and I’ll get back to you as soon as possible!


Thanks for stopping by!
For more project ideas, you can find me on Pinterest. And to stay up to date with the latest shenanigans, follow me on Instagram.


Sarah
Tuesday 29th of June 2021
I had all my kitchen cabinets redone by a cabinet painter a few weeks ago, and ever since I've been itching to do a DIY and build new cabinet doors for my mudroom. I'm a home improvement newbie, but your process seems totally doable. I think I'm going to tackle it one of these weekends, and hopefully, it turns out as good as yours! Wish me luck!!
Shiree
Sunday 28th of June 2020
How did you remove your wood glue to ensure your stain wouldn't have issues?
Michael Green
Monday 28th of December 2020
I often cut a straw at an angle to get glue out of the creases while it's still wet.
tylynn_sattler
Monday 29th of June 2020
I didn't have any glue run off with these doors, but if you do - use a damp rag to wipe away any excess glue while it's still wet. If you let it dry, you can scrape it off with a chisel or sand it off.
Katie White
Monday 25th of May 2020
where did you get the hardware?
tylynn_sattler
Thursday 28th of May 2020
Amazon - https://amzn.to/2M6y8bZ (affiliate link). I've used them in all the house and love them!
Holly Sims
Tuesday 28th of April 2020
What kind of plywood did you buy? I will be painting mine.
tylynn_sattler
Thursday 30th of April 2020
I used birch since it's the cheapest of the nice plywood. If you're painting, you could also use MDF since you won't see the wood grain at all.
Marissa
Monday 27th of April 2020
May I ask what kind of wood you bought for the 1x3?
tylynn_sattler
Tuesday 28th of April 2020
Just pine 1x3 from Menards